Boot Configuration Error Code 0xc000000f [Explained & Solved]
The error code 0xc000000f typically appears when users attempt to install the latest Windows updates. The upgrade becomes stuck and directs users to the recovery startup screen. This screen displays an error message, stating that users will need to utilize recovery tools to proceed.
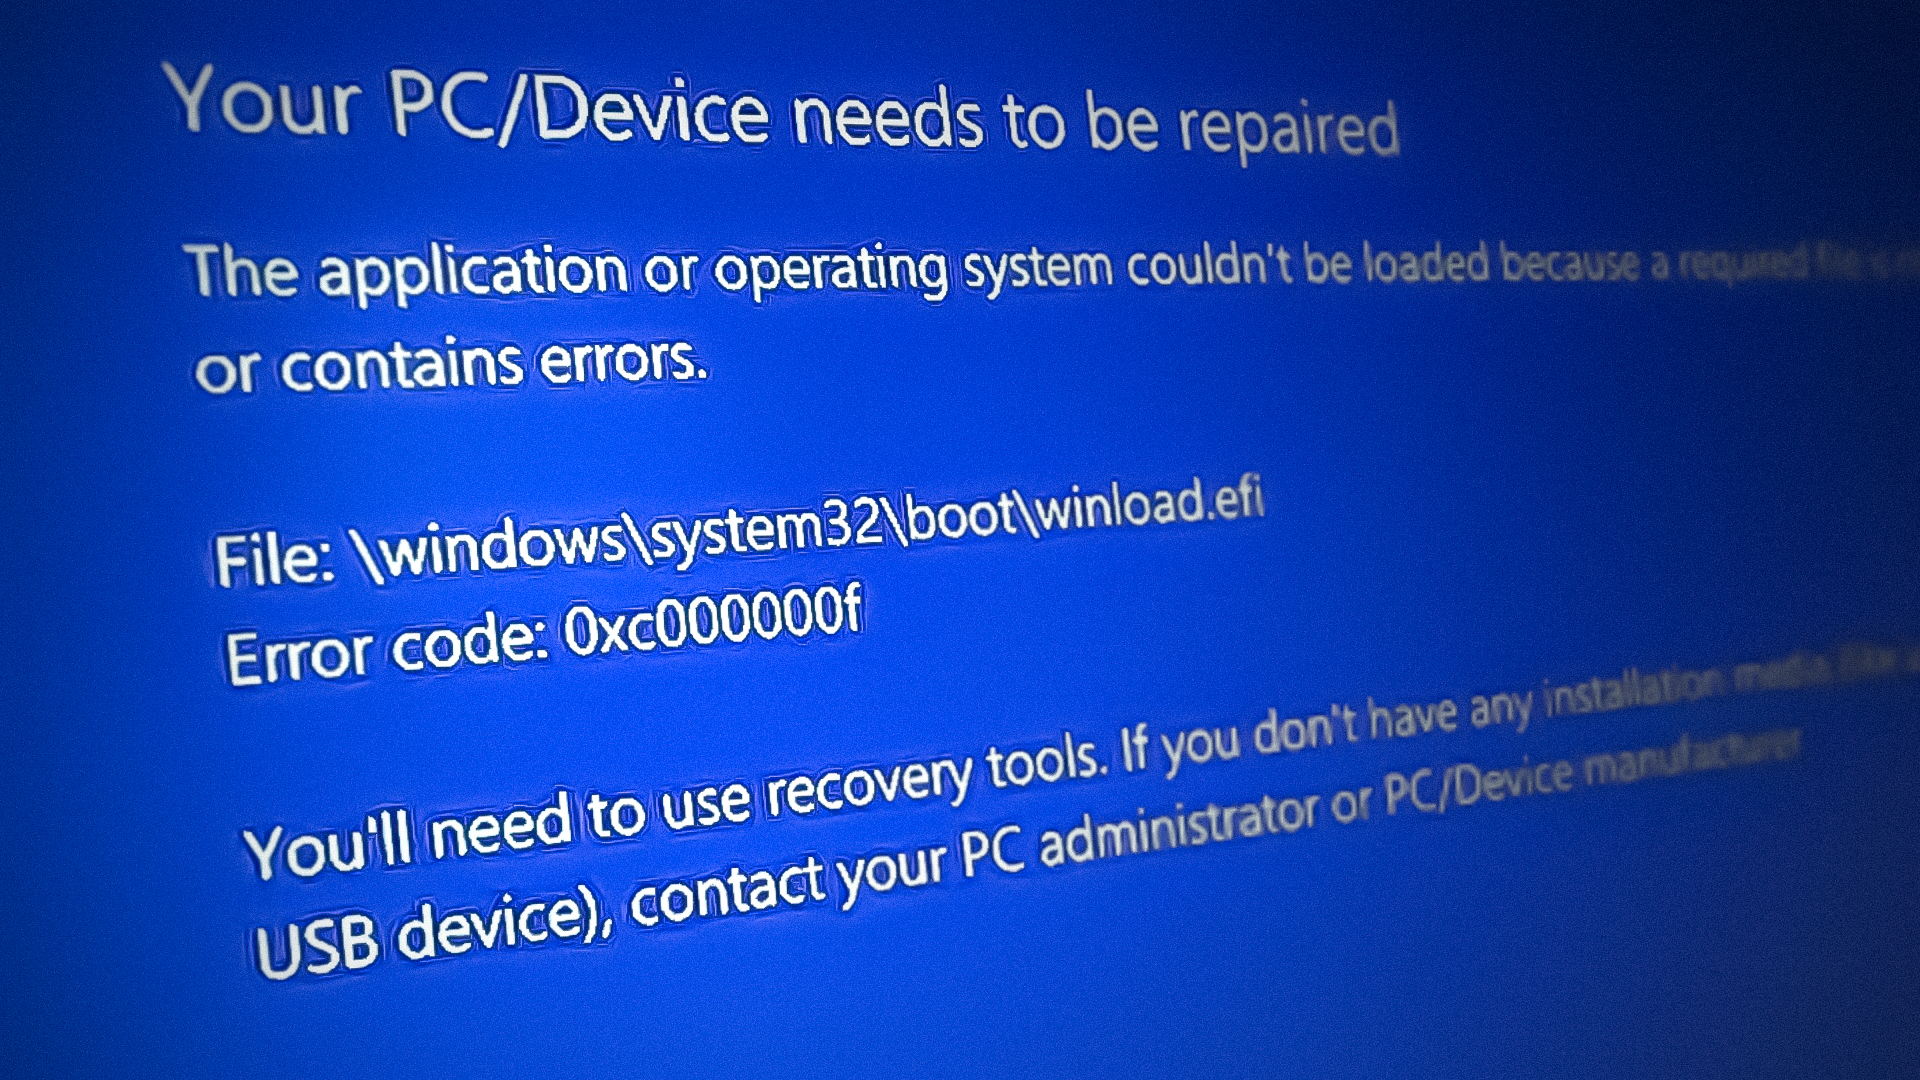
Since the error code prevents users from accessing the system, finding and implementing a solution becomes a bit tricky. In this guide, we will walk you through the troubleshooting methods that have worked for other affected users and demonstrate the correct way to perform the steps. Proceed with the methods that best fit your situation.
Before you troubleshoot.
If you look closely at the error message, you will notice that it mentions you need to access the recovery tools via installation media. This is why, before you proceed with the troubleshooting methods, you must create installation media for your device.
To get started, plug in the USB drive with the installation media and boot into the Windows 11 recovery environment.
1. Use System Restore.
To begin with, try restoring the system to a previous point in time before the issue occurred. This can be done through the System Restore utility, which takes snapshots of the system at different times, especially before performing critical operations. You can choose any restore point to revert the system to a specific given state.
Here is how you can use the system restore utility to fix the problem at hand.
- Once you have booted into the Windows Recovery Environment, navigate to Troubleshoot > Advanced options.
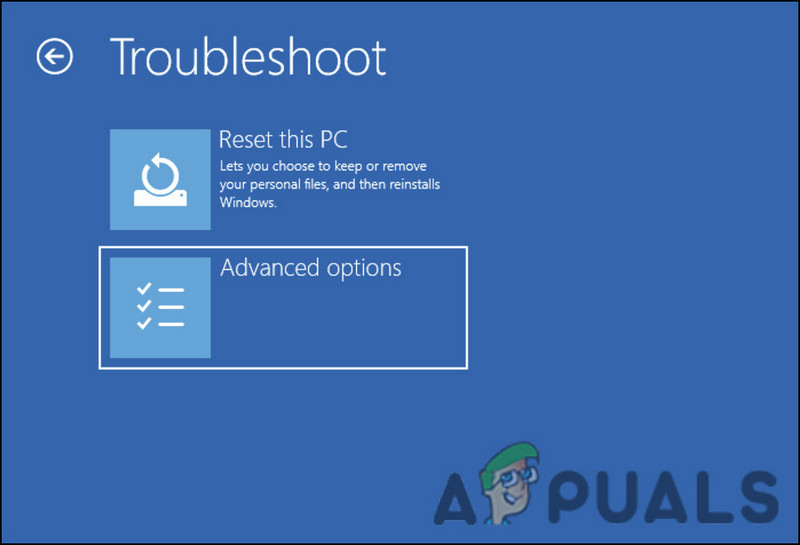
Click on the Advanced options button - Click on System Restore.
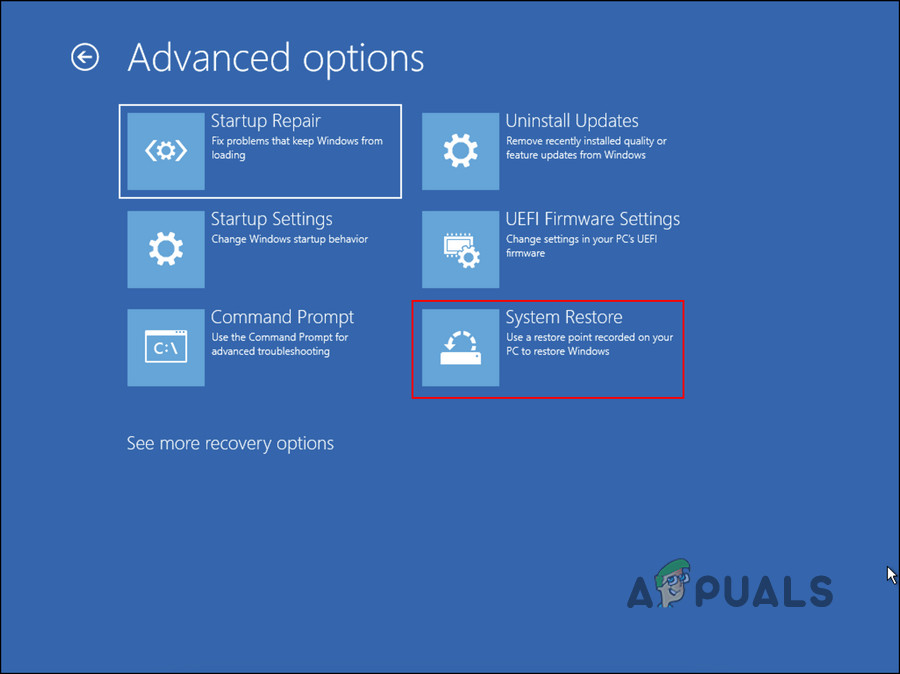
Click on the System Restore option - In the following dialogue, click on the “Next” button.
- Now, you should be able to see the restore points created on the system. Pick a restore point (preferably the latest one), and then follow the on-screen instructions to complete the procedure.
2. Rebuild the BCD.
You might also be facing the issue due to a problem with the boot configuration data. The Boot Configuration Data file contains information about your computer’s boot options. In the event that this file becomes corrupted, your computer will have trouble booting.
Fortunately, if any of these problems occur, you can fix them easily by using the Command Prompt.
Here is how you can proceed:
- In WinRE mode, navigate to Troubleshoot > Advanced options.
- Choose Command Prompt from the list of options,” is already correct grammatically.
- In the subsequent window, type the command below and press Enter to execute it:
BCDEdit
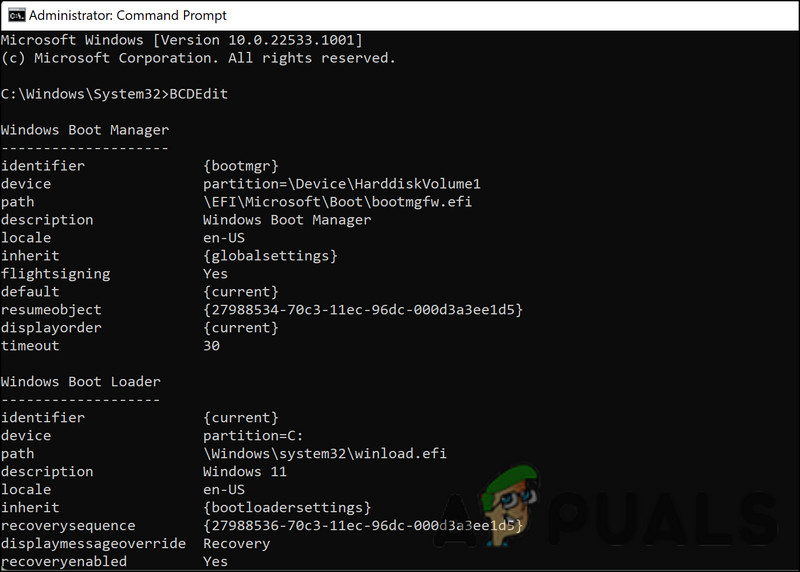
Run the BCDEdit command - Make a note of the drive letter adjacent to “OSdevice” in the Windows Boot Loader section of the Command Prompt. In the subsequent commands, replace “X” with that letter.
- Execute the following commands one by one:
CHKDSK /f X:
DISM /image:X:\ /cleanup-image /restorehealth
SFC /scannow /offbootdir=X:\ /offwindir=X:\windows
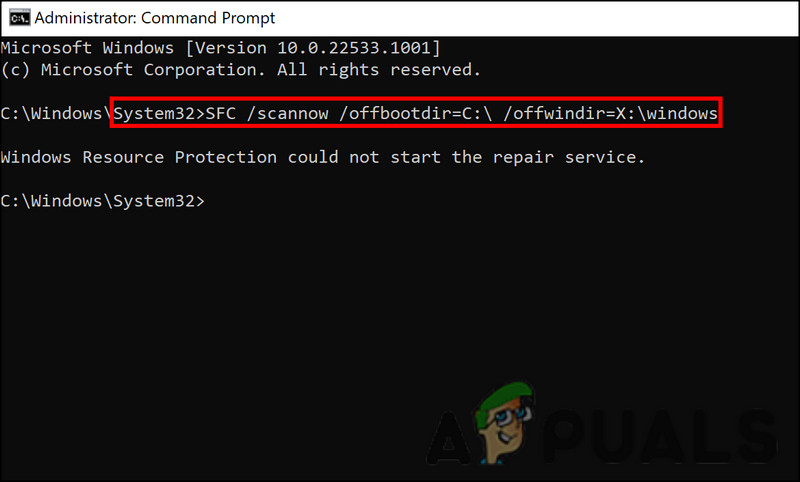
Run the SFC command - Next, execute the following commands one at a time:
C:
bootrec /fixmbr
bootrec /fixboot
bootrec /scanos
bootrec /rebuildbcd
- Once done, type “exit” and press Enter. This will close the Command Prompt.
- Now, head back to the Advanced Options screen and choose Startup Repair.
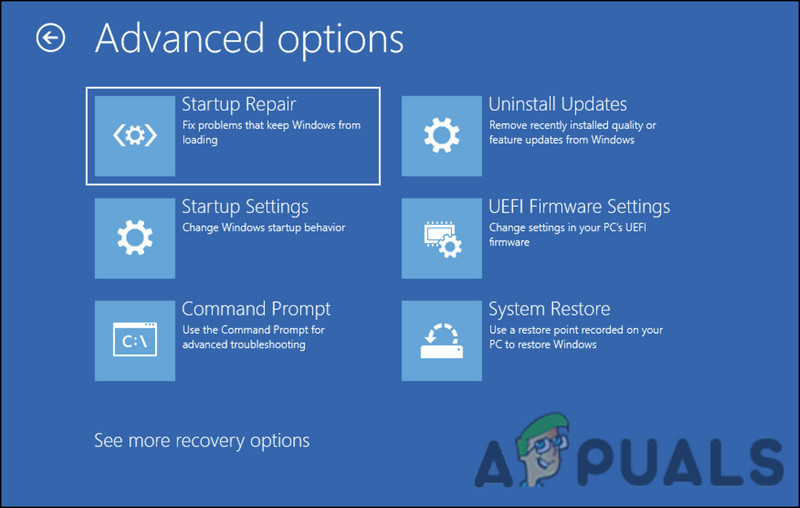
Click on the Startup Repair option - After the process completes, restart the computer.
3. Perform a clean installation of Windows 11.
If you are unable to resolve the problem with these troubleshooting methods, you may also need to install Windows 11 from scratch.
To clean install Windows 11, you can use the ISO file available on Microsoft’s official website. However, please note that this process takes up a lot of time, so we only recommend proceeding with it if you have some to spare. It is also worth mentioning that you should remove all external peripherals that are not important before you begin.
Here is how you can proceed:
- In Recovery mode for Windows, select Troubleshoot.
- Select Advanced Options, and then click Startup Settings in the next window.
- Next, click on the “Restart” button and wait for your PC to reboot.
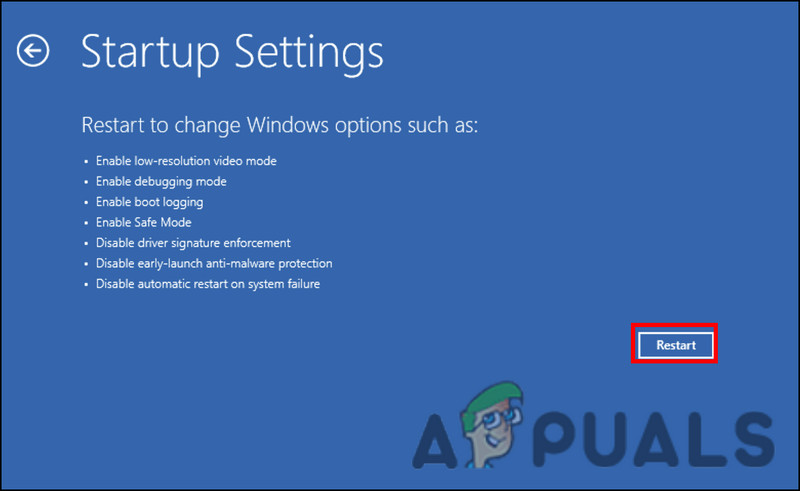
Click on the Restart button - Lastly, press one of the following keys on the Startup screen to make the desired changes.
4 - Enable Safe Mode

5 - Enable Safe Mode with Networking

6 - Enable Safe Mode with Command Prompt
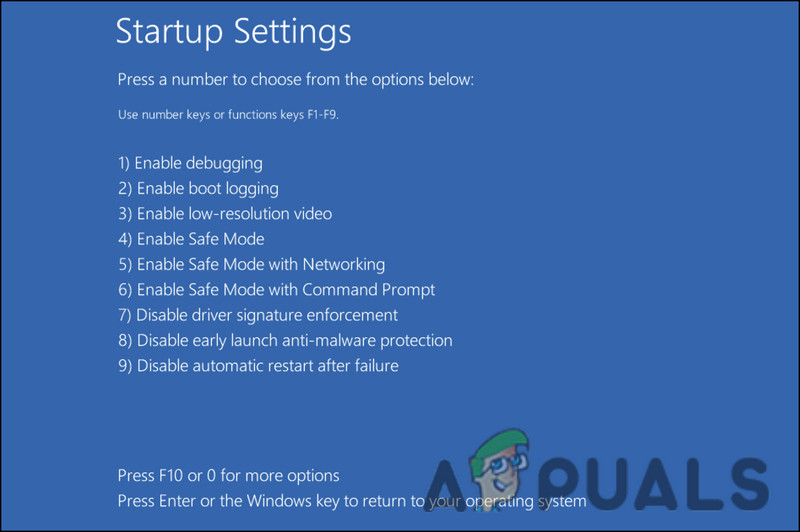
Choose a Safe Mode option
Once you are in safe mode, proceed with the steps in this guide to finish the clean installation.
I have a Dell XPS 15z L511 laptop and Windows 10 has problems on this device. I have gotten this error twice and the first time it cost me $50 to have repaired. Each time this error has occurred the computer was attempting to restart after an update. I have a disc for the original Windows 7 drivers. Is it possible to recover the system using this disc instead of creating a Windows 10 bootable media? My end goal is to replace Windows 10 with 7 at this point.