How to Create Windows 11 Bootable USB Installation Media
Whether you want to install Windows 11 on a new computer or you just want to keep a backup install of Windows 11, learning how to create a bootable USB Installation Media for Windows 11 is a very useful skill.

With bootable Windows 11 installation media, you can clean install, upgrade, repair or reset Windows 11 on any PC that meets the minimum requirements.
Additionally, the Windows 11 installation USB disk can also be used as a recovery drive when you are forced to boot from WinRE (Advanced Startup).
If you’re looking for specific instructions on how to create a Bootable USB flash drive for Windows 11, we’re going to guide you through the entire process. Just follow the instructions below:
Note: In order to be able to replicate the instructions below, you will need to be signed in with an administrator account. Also, the USB flash drive that you’ll mount Windows 11 on needs to be at least 8 GB in size.
There are actually two different methods that you can use to create a Windows 11 installation media:
- Method 1: Using Rufus to Create the Bootable USB Installation Media
- Method 2: Creating the Bootable USB Installation media using Command Prompt
But before you’ll be able to follow any of those options, you’ll need to start by ensuring that you have a viable Windows 11 ISO to work with.
Download the Windows 11 ISO FILE
Important: If you already have a viable Windows 11 ISO file, skip this step altogether and start directly with STEP 2 below.
- Open your browser on the PC that you’re going to use to create the Windows 11 installation media and visit the home page of UUP Dump – This is the service that we’re going to use to download the Windows 11 ISO file.
- Once you’re inside the main screen of UUP Dump, access the x64 architecture button associated with the Dev Channel.
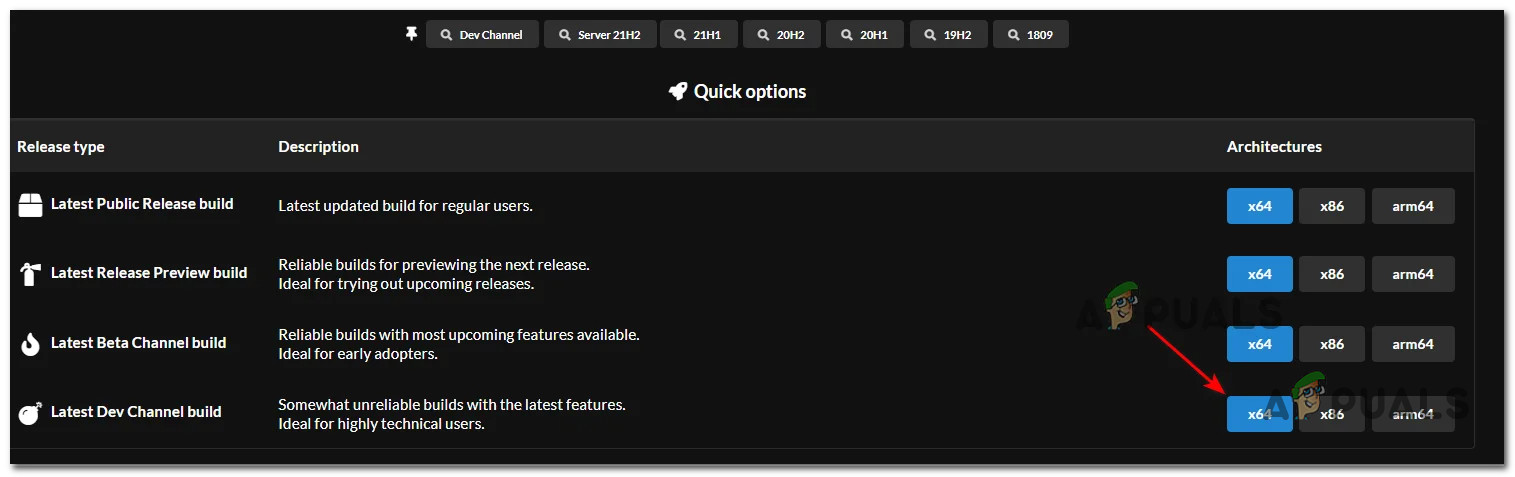
Download the Windows 11 ISO Note: As of now, Windows 11 is only available through the Dev Channel. This will change as a Beta and Public version of Windows 11 are eventually released.
- Once you get to the next page, select the latest available build from the list of options, then choose your language and click the Next button.
- After you get to the next screen, select the Windows 11 editions that you want to include on the Windows 11 ISO. You can choose multiple versions or you can choose only the version that interests you in order to keep things light.
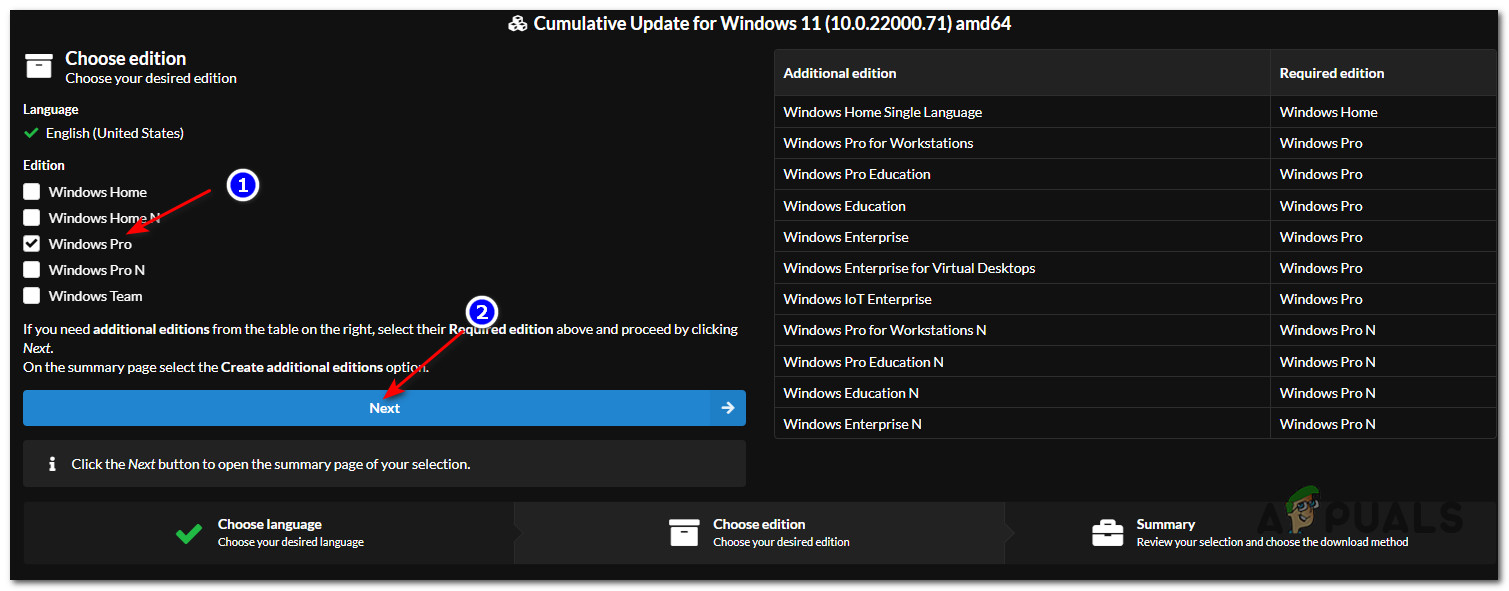
Choosing which Windows versions to include Note: Our recommendation is to stay away from the N versions as they are exactly like the normal versions but without the Windows Media Player components. But keep in mind that the product keys for the standard versions of Windows 11 will not work for the N versions.
- Once you’ve selected the Windows version that you want to include on your Windows 11 ISO, hit Next one final time to arrive at the final confirmation menu.
- When you get this far, select the Download and convert to ISO toggle from the menu on the left, then check the Include Updates box.
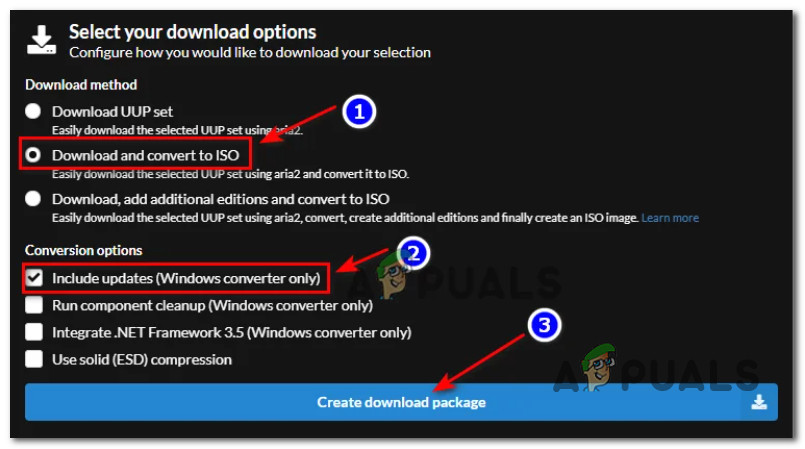
Downloading the correct Windows 11 ISO package from UUP Dump - Finally, hit the Create download package button and wait until the download is finished.
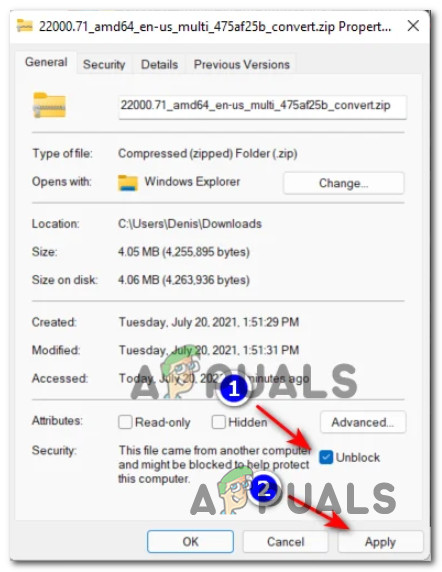
- Once the download is complete, go ahead and use File Explorer to navigate to the location where the ISO package was downloaded. When you get there, right-click on the archive and choose Properties from the context menu that just appeared.
- When you’re inside the Properties screen, access the General tab from the ribbon menu at the top and ensure that the file is unlocked – If it’s not, check the Unblock box and hit the Apply button.
Unblocking the zip file - Once the archive that you previously downloaded from UUP Dump has been unblocked, right-click on it again and click on Extract All from the context menu that just appeared. You can either use the built-in extraction utility that comes with Windows or you can use a 3rd party alternative like WinZip or WinRar to get the job done.
- When you’re asked to select the location where you want the files to be unpacked, choose a drive with plenty of free space (at least 20 GB).
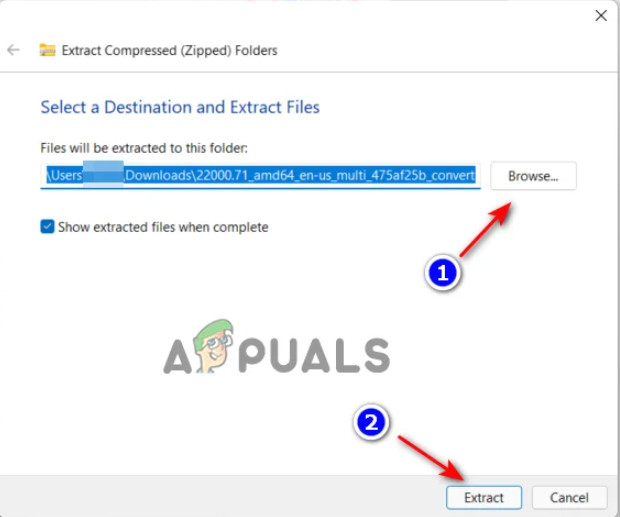
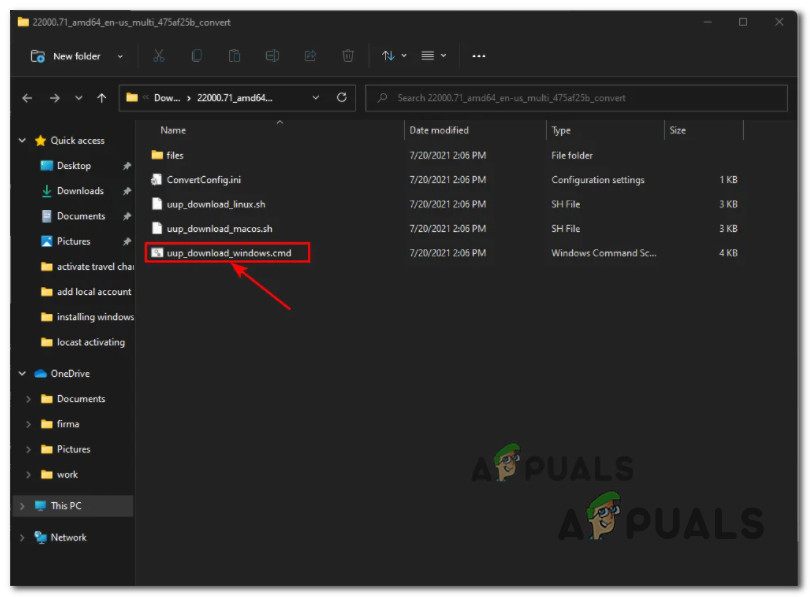
Extracting the files - After the extraction process is finished, go to the extraction path and double-click on the uup_download_windows.cmd file to download all the Windows 11 ISO files.
Download the Windows 11 files - When you’re prompted by the Smart Screen interface, click on Show More (bottom-left corner of the screen) and then click on Run Anyway to bypass the security warning.
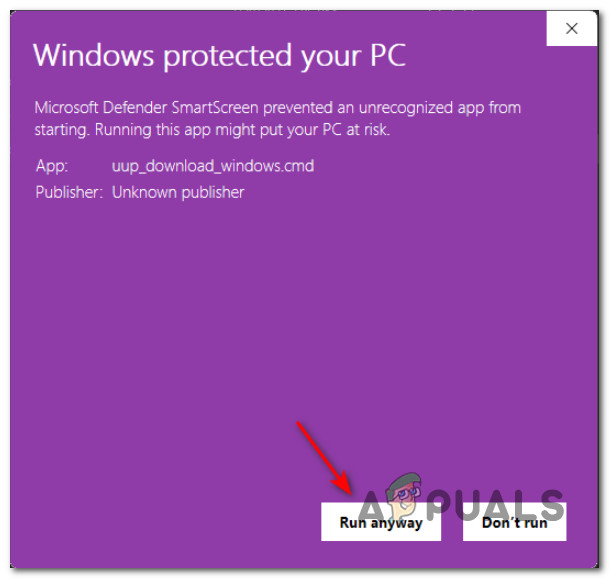
Getting past the Smart Screen interface Note: Depending on your security settings, you might not get this prompt at all.
- At the User Account Control prompt, click Yes to grant administrative privileges.
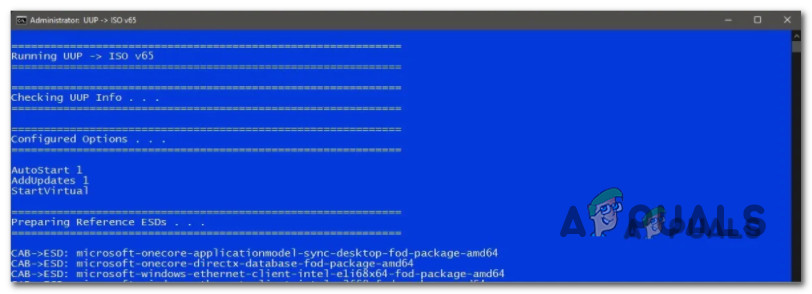
- Once you see the CMD window opening, wait patiently until the Windows 11 ISO is successfully downloaded. Even if the utility looks like it’s frozen indefinitely, don’t close this window for now.
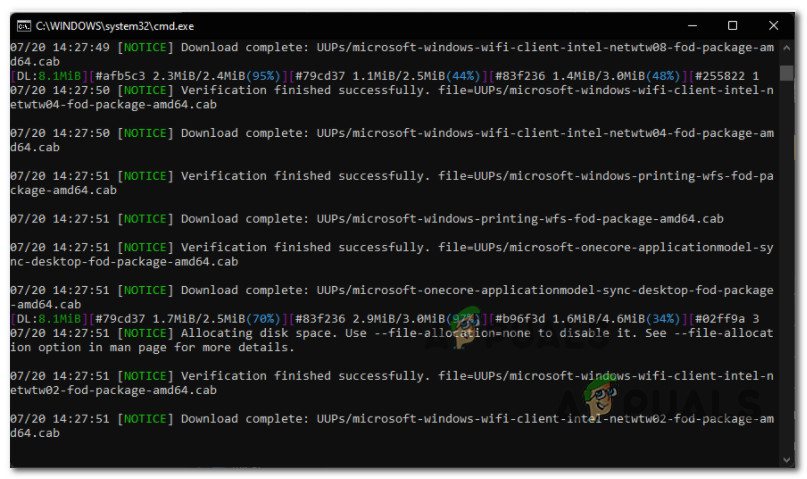
Downloading the Windows 11 ISO dependencies - At some point during this process, you will see the background color of the CMD interface changing from black to blue. This is the signal that the download stage is finished and the process has now moved to the ISO building stage.
Building the Windows 11 ISO - Once the operation is complete, you will get a success message. At this point, you can navigate to the location where you initially opened the uup_download_windows.cmd file from and you should find the Windows 11 ISO there.
Create the Windows 11 Bootable USB
Now that you’ve made sure that you have a working Windows 11 ISO, it’s time to turn it into a bootable installation media for Windows 11. You can do this natively from an elevated Command Prompt or by using a 3rd party tool (RUFUS).
If you’re not that technical, our advice is to use Rufus since the entire method is done from an easy interface.
Option 1: Make the Windows 11 ISO Bootable on a USB Flash Drive via Rufus
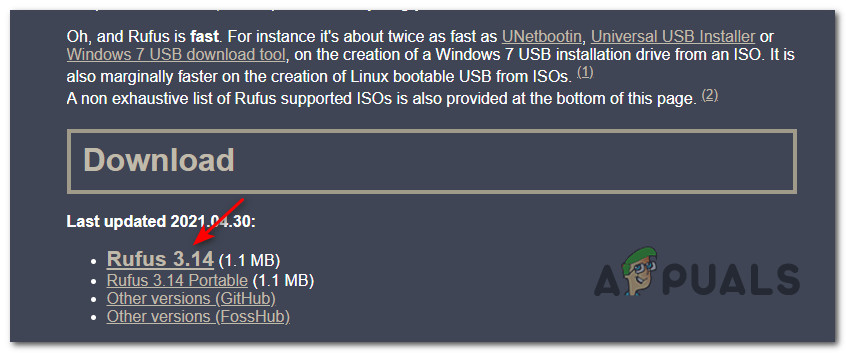
- Open your browser and navigate to the official download page of Rufus.
- Once you’re inside the correct page, scroll down to the Download page and click on the latest stable build of Rufus to download it locally.
Downloading the latest version of RUFUS - Once the RUFUS installer has been downloaded locally, double-click on it and follow the on-screen prompts to install it on your computer.
- Once RUFUS is successfully installed on your computer, go ahead and connect the USB Flash Drive.
 NOTE: It’s important to use a USB flash drive with a capacity of at least 8 GB.
 - Doube-click on the RUFUS icon and click Yes to grant administrative privileges when prompted by the User Account Control. Also, keep in mind that this process will also format all the data that’s currently stored on the flash drive. So before proceeding any further, take the time to back up any important data before moving any further.
- Inside the main interface of Rufus, start by selecting USB flash drive under Device.
- Next, click the Select button associated with Boot Selection, navigate to the location where the Windows 11 ISO is located and select it.
- Use the Image Option drop-down menu to select Standard Windows 11 installation.
- Next, select GPT as the default Partition disk, then set the Target system to UEFI (non-CSM).
- Under Volume label, you can either insert a custom name for your USB flash drive or you can leave the default option.
- As the File system used by the future installation media, select NTFS.
- Finally, keep the Cluster size to Default (4096 bytes).
- Now that RUFUS is fully configured and ready to go, go ahead and click on Start to begin the process of creating the Windows 11 installation media.
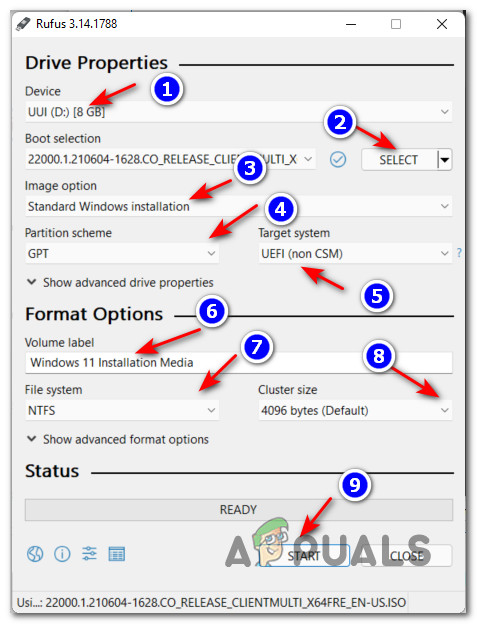
Configuring RUFUS to create a Windows 11 installation media - At the confirmation prompt, click Ok to effectively start the process.
- Once the process is complete, the Windows 11 installation media is successfully created. All you have to do at this point is to boot from it (you might need to change the boot order) on the PC where you want to install, upgrade or repair Windows 11.
Option 2: Make the Windows 11 ISO Bootable on a USB Flash Drive via Command Prompt
Important: Keep in mind that the install.wim file for Windows 11 exceeds 4 GB. This is not a problem if your default file system is NTFS, but if you’re still using FAT32, this will produce an error while attempting to create the installation media. One solution should be to format your drive to exFAT, but that’s not a safe bet as not all motherboards support booting from an exFAT USB.
- Make sure you have the Windows 11 ISO at the ready.
- Connect the USB flash drive you are going to use to create the installation media. Make sure you don’t have any important data currently stored on the flash drive as this operation will format it.
- Next, press Windows key + R to open up a Run dialog box. Inside the dedicated prompt, type ‘cmd’ then press Ctrl + Shift + Enter to open up an elevated Command Prompt.
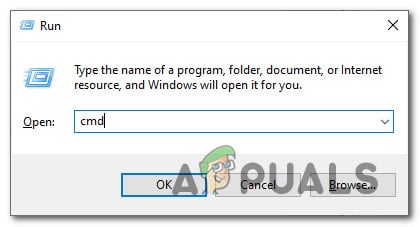
Open the Elevated Command Prompt window - When you’re prompted by the User Account Control (UAC), click Yes to grant admin access to Command Prompt.
- Once you’re inside the elevated CMD prompt, type diskpart and hit the Enter key to open up the Diskpart utility.
- Next, type the following command and press Enter to get a list of all the connected storage disks:
list disk
- Next, type the following command and press Enter to select the USB disk that you’re going to use a Windows 11 installation media:
select disk X
Note: Keep in mind that X is simply a placeholder. Replace it with the actual number of the USB drive from the list that’s currently displayed inside the CMD prompt. For example, “select disk 2“
- Next, type the following command and press Enter to clean the current drive:
clean
- Once the cleaning process is complete, type the following command and hit Enter to convert the selected partition to MBR:
convert mbr
- Next, type the following command and hit Enter once again to create the primary partition on the selected drive:
create partition primary
- Now, we’ll need to format the drive to exFAT in order to ensure that the drive will actually be bootable. Do this by typing the following command and pressing Enter:
format fs=exfat quick
- Once the operation is complete, type active and hit Enter to mark the current partition as active.
- Next, type ‘assign’ and press Enter to assign the drive letter.
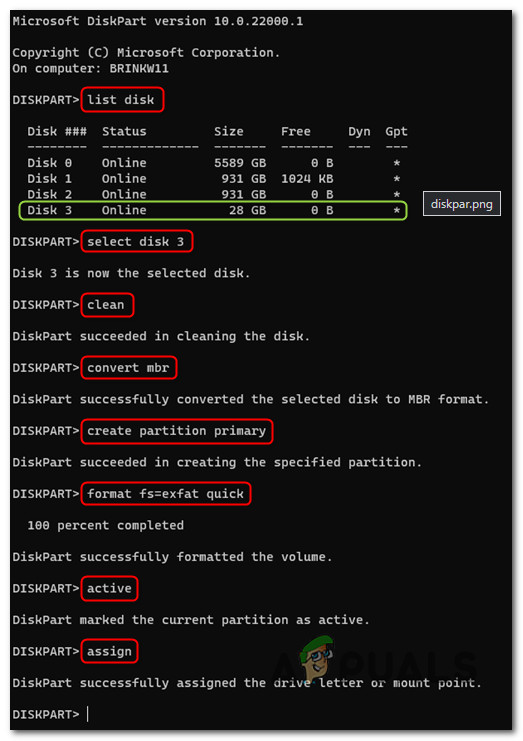
Using the Diskpart utility - At this point, you can safely close the elevated CMD prompt.
- Open up File Explorer (by double-clicking or by pressing Windows key + E). Once you’re at the root location (This PC), memorize the USB’s drive letter.
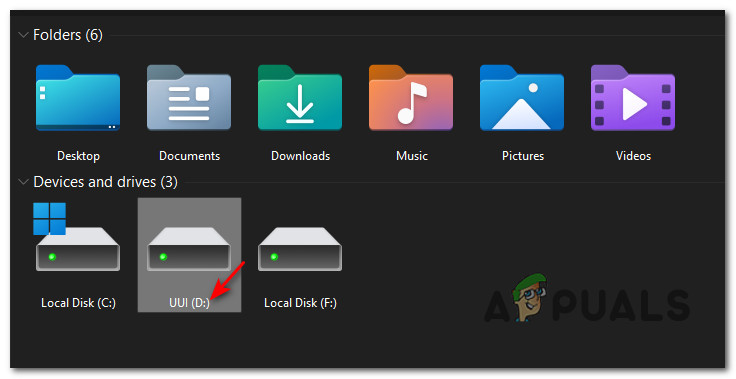
memorize letter - Next, you need to mount the Windows 11 ISO file that you created at STEP 1 by double-clicking on it.
- Next, inside the ISO, press Ctrl + A to select everything inside, then right-click on a selected item and choose to Show more Options.
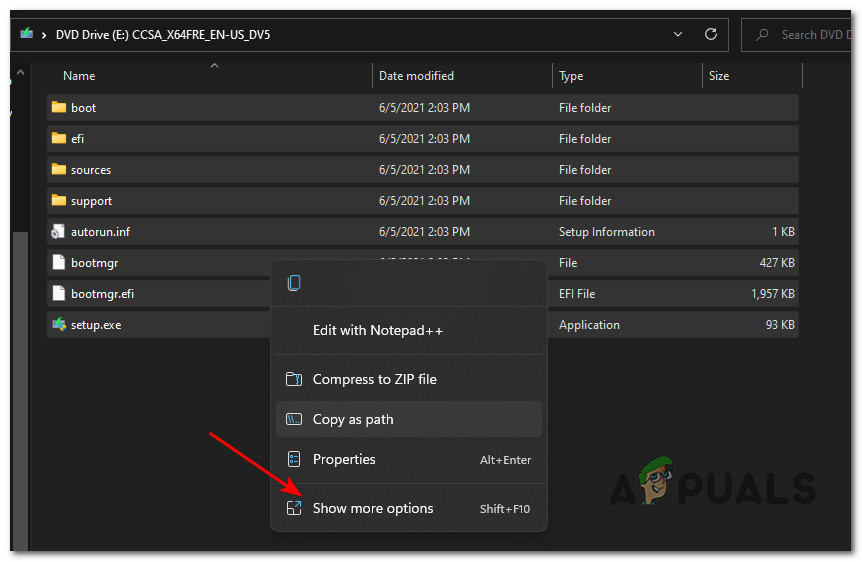
Show More Options - From the menu that just appeared, click on Send to > USB Drive (X:) from the context menu that just appeared.
Note: X is simply a placeholder for the actual letter of your USB flash device. - Wait until the operation is finished as it might take a couple of minutes depending on your storage device reading and writing speeds.
- As soon as the operation is finished, you can unmount the ISO file and begin using your Windows 11 USB Installation media.


