How to Delete Steam Cloud Saves
The Steam Cloud provides an easy and transparent way to save your game data on a remote storage system. The files specified in the Auto-Cloud configuration or if they are written to the disk will automatically be replicated to the Steam cloud servers (using the Cloud API) after the game exists.
This is particularly useful if the user changes his computer. The game progress will be resumed by either the Cloud API or reading directly from the disk. The files will be automatically downloaded before the game is launched as you would have already entered your Steam credentials. The main job of the Steam Cloud is to ensure that all the files are synchronized across all the computers a user is using.
Users have the option to disable the whole Cloud synchronization present in the Steam Settings in the client. Users also have the flexibility to disable the Cloud synchronization per game. But before moving on with the solutions, update the Steam client to the latest build.
What Are the Different Methods of Utilizing the Steam Cloud?
Steam offers two different methods to utilize the Steam Cloud.
First up is the Steam Cloud API. The Cloud API provides a series of functions that allows you to directly integrate the Steam Cloud into your game. The Cloud API also does the task of isolating individual Steam user files from each other and also provides better control over the Steam Cloud as a whole.
The second is the Steam Auto-Cloud. This feature was primarily designed for legacy games where it was hard to use the Cloud API. It is a quick way to get started with the Steam Cloud but it lacks the flexibility and power that the Steam Cloud API provides.
It is recommended by the developers to use the Cloud API instead of Steam Auto-Cloud as it provides deeper and effective integration and customization. It enables you to get the most out of the Steam cloud.
How do I Resolve a Steam Cloud Conflict?
A Steam Cloud conflict occurs when the Steam Cloud content doesn’t match with your local game files stored on your hard drive. This can occur on the machine you were using at that time or it may have occurred in another machine previously. Because the file was modified in two different locations without the synchronization between them, Steam cannot determine which file to keep.
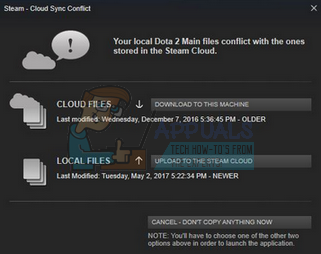
You will most likely pick the file which was modified most recently. Meaning the latest developments in your game will be saved. You should carefully inspect the data previewed in the window. Carefully review the date and time of the context and correspond this to the last time you played a game on Steam. This context can help you in determining which version to keep.
Note that playing games in offline mode will keep your games from syncing and this is the most probable cause of the Steam Cloud conflict.
What If Steam is Unable to Sync Files to the Cloud?
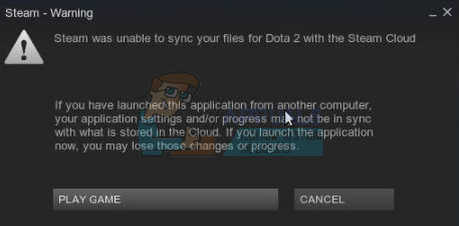
This error indicates that Steam could not sync your local files with the Steam Cloud. It can be a temporary issue that the Steam Cloud servers may be facing. You can check the Steam Cloud status from the Steam website to ensure that the problem is on their side.
If the Steam cloud service is up and running perfectly, it means the problem is at your end. You could check your Steam connection and troubleshoot problems. You can also check if only you are having problems syncing with the Steam Cloud.
If you ignore the message and click on “Play game”, it could cause a potential conflict between your local files and the Steam Cloud. It can also result in lost progress and game data.
What If I Lose a File or Progress After Moving to a Different Computer?
If you are missing your most recent progress and have double-checked that the game is using the Steam Cloud using the Settings, it means either Steam wasn’t able to sync your data successfully or the sync resulted in your previous data being uploaded to the Cloud.
It is possible that your original file or the progress is still on the older machine and was unable to sync. It is possible if you launch Steam on that computer, your progress will show. If it does, it will automatically be updated on all other machines connected with your Steam account.
Also, many games don’t use the facility of Steam Cloud. You can check the game’s official page if Steam Cloud support is available. If it isn’t and you don’t have access to the older machine, it means that your progress is lost and there is no way to recover it.
How to Delete Files Stored in Steam Cloud Servers?
Steam Cloud is used to back up each of your game’s progress so you don’t lose your progress if you access the game from any other computer. You can confirm that your progress is being saved by the Cloud using the following method.
Check if Your Game is Being Backed Up.
- Open your Steam client. Open its Settings by pressing the Steam button present at the top left corner of the window and selecting the option.
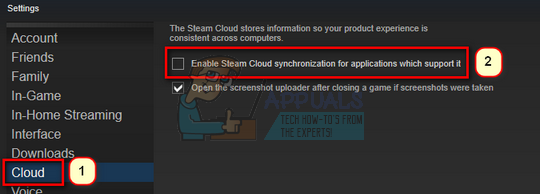
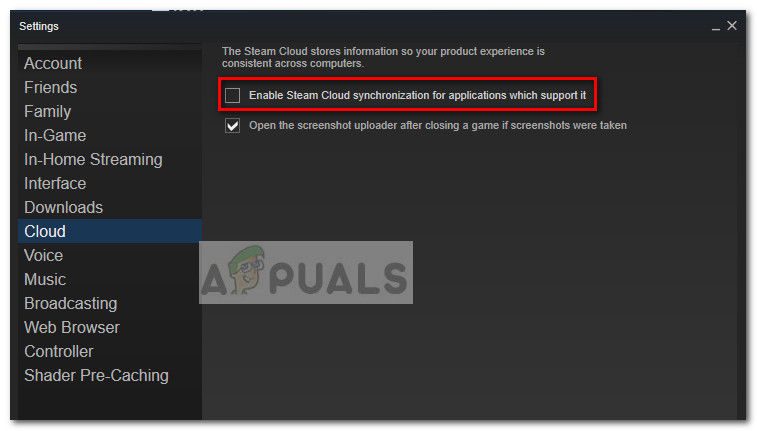
- Open the Cloud tab present on the left side of the screen. Check if the option “Enable Steam Cloud synchronization for the applications which support it” is checked.
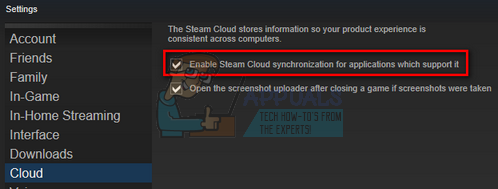
Enable Steam Cloud synchronization for the applications which support it - Next click on the Library tab present at the top side of the Steam client. Here all of your games will be listed.
- Right-click on the game and select Properties. Then navigate to the Updates tab present at the top of the window.
- Here at the bottom of the window, you will see an option “Enable Steam Cloud synchronization for [game’s name]”. Ensure that the option is checked.
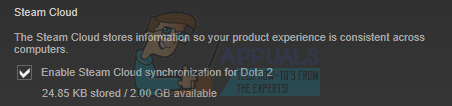
Enable Steam Cloud synchronization for the Game
If you have both the options enabled, it means that your game is being backed up by the Steam Cloud and we can also delete the data.
What is the Backup Mechanism?
The first thing you should know is that there are three versions of the saved game data
- The original version is stored in the folder of AppData (D1).
- The cloud version is stored in the location Steam/userdata/SteamID/AppID (D2).
- The cloud version stored in Steam’s cloud servers (D3).
Do note the annotations (D1, D2, D3) we used as we will be referring to them a lot in the future.
When you start the game for the first time, D1 is created automatically. After you are done playing the game, the game data is updated in D1 and automatically copied to D2. After this D2 is then synced to D3, thus uploading all of your game content.
If you start your game from another computer for the first time, if Steam has D3 on its servers but doesn’t detect D2 on the computer, it will automatically download the data and copy D3 to D2. Steam Cloud also automatically downloads the missing data whenever you start Steam.
In a nutshell, the most important data for us is D2. If we can manipulate it, we can successfully delete the data which you want to delete.
Note: Some games don’t have D1 and they directly save their data to D2. While some games don’t use D2 as a medium and upload the data to the Cloud directly from D1.
What Are the Userdata Contents?
In the directory Steam/userdata, you should have a folder corresponding to your SteamID (You check what your Steam ID is by reading our article on it). After you open it, there will folders made for each game that you play. They will be identified using their AppID (AppID can be easily checked by visiting the game in the Steam store and extracting it from the URL). In this game folder, you will find two entities.
- remotecache.vdf: This file describes all the properties of files that are contained in the remote folder.
- Remote folder. This contains all the files which are synced with your Steam Cloud server.
Deleting Data from Cloud
In this method, we will be following two important steps. We will first bring up the Steam Cloud conflict notification and then delete the Cloud files.
Do note that you would have to follow these steps game by game to delete all of the Steam cloud content.
First, we need to delete the AppID folder from your Steam directory. After you restart your computer and Steam, Steam will automatically re-create the folder. We need to perform this step to ensure that the Steam Cloud is working perfectly and we can go ahead with the part of deletion.
- Open your Steam directory. The default location for your Steam installation is
C:\Program Files (x86)\Steam
- Search for a folder of AppID and Delete it. Then restart your computer and Steam. Start a game for a few minutes. Make sure that you have a working internet connection.
- Navigate back to the Steam directory and check if the AppID folder is back. If it is, it is confirmed that your Steam Cloud is working perfectly and we can proceed with the method.
Bringing Up Steam Cloud Conflict Dialogue
The first part of the solution is probably the most difficult. To delete all your Steam Cloud data, it is necessary to bring the conflict dialogue. Without it is not possible to delete the data present in your Cloud. Steam Cloud conflict occurs when the Cloud files differ from the data present on your hard drive.
There are two methods to bring about this conflict:
Method 1:
- Make sure that your Steam Cloud is enabled by following the steps mentioned above. Exit Steam completely by ending all the processes starting with Steamclientbootstrapper using the task manager.
- Now will alter all the files in the location
Steam\userdata\SteamID\AppID\remote
The objective is to make sure that all the files are different from those uploaded to the Steam cloud. We can’t simply delete the files from this location as Steam will automatically notice that the files are missing and download the same ones from the Cloud servers. We can achieve our task by corrupting them and making them 0-byte files.
- Navigate to
Steam\userdata\SteamID\AppID\remote
- Now hold shift and right-click on your remote folder. Select the option “Open PowerShell window here”.
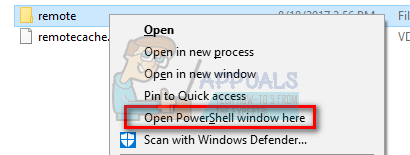
Open PowerShell Window Here - You can also open PowerShell when in the folder by clicking the File option present at the top left side of the screen and selecting “Open Windows PowerShell as administrator”.
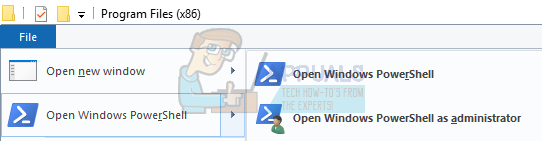
Open Windows PowerShell as administrator - Once PowerShell is opened, type the exact text written below
clc –path “C:\Program Files (x86)\Steam\userdata\SteamID\AppID\remote\*"
If you fail to write the correct code, you will get an error like this

If you correctly type in the line there will be no confirmatory message and you will get a window like this.

Start your Steam and there will be the conflict windows present on your Steam client.
Method 2:
This is an easier method as compared to the earlier one but it isn’t that efficient.
- Open your Steam client. Open its Settings by pressing the Steam button present at the top left corner of the window and selecting the option.
- Open the Cloud tab present on the left side of the screen. Uncheck the option “Enable Steam Cloud synchronization for the applications which support it”.
Uncheck the Option of Enable Steam Cloud synchronization for the applications which support it - Now navigate to your Stream directory as you did earlier and delete all files present in the folder of AppID. The file path for deletion is
Steam\userdata\SteamID\AppID.
- Now start the game to make new and different files in the file location.
- Exit the game and Steam completely by ending all Steam processes in the task manager (end steamclientbootstrapper first).
- Now delete the remotecache.vdf file present in the location
Steam\userdata\SteamID\AppID
- Start your Steam.
- Head over to the client’s Settings and enable the cloud.
Now a Steam conflict dialogue will come forth and we can proceed with the remaining method.
Deleting Cloud files
Once the Cloud conflict error is forth, don’t click any option and follow the instructions below.
- Navigate to the following file path
Steam\userdata\SteamID\AppID
and delete all the files in it. There will be two files (remote folder and remotecache.vdf). Delete both of them.
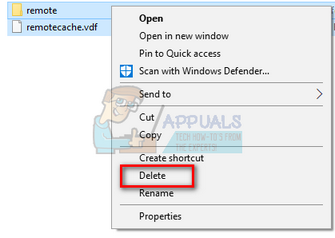
Delete Remote Folder and RemoteCache.vdf - Now go back to the conflict window and select the option of “Upload to the Steam Cloud”. Now Steam will sync your AppID folder while there will be nothing in it and the previous data on your Steam Cloud will be deleted.
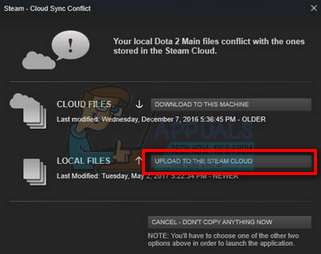
Upload to the Steam Cloud - Now the game will start automatically but it will create new files that will be synced to your Steam cloud when you close it. We can prevent it from happening by pressing alt + tab. This will open the open windows on your screen. Select the Steam client from the list of windows.
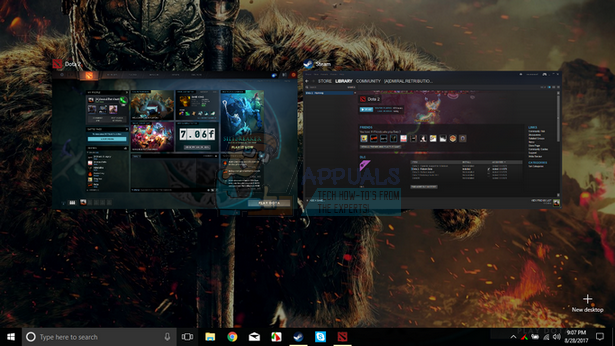
Steam will Open With the New Game - Once you are in the Steam client, open the client’s Settings. Navigate to the Cloud tab and uncheck the line which enables cloud.

Check the Option of Enable Steam Cloud synchronization for the applications which support it - Now return to the game and exit. No files will be synced to your Steam cloud.
- Exit Steam and delete the AppID folder as we did before.
How to Make Sure If it Worked?
Remember how we checked at the beginning of this method if the Steam Cloud was running as expected by deleting the AppID folder and checking if it was made again. If there is no file present in the Steam cloud, there will be no file downloaded to your computer.
- Enable the Steam cloud as we did in the guide.
- Exit Steam completely by using the task manager.
- Delete the AppID folder (if you didn’t in step 2).
- Now check D3 (these are the cloud files) and compare them with D2 (local files on your computer). If there is nothing in D3, there will be nothing in D2 too!
- Check the following directory Steam\userdata\SteamID
No new AppID folder would have been created.
You can also check by logging Steam in on another computer and checking if the files exist.
If you make it till here without any problems, you have successfully deleted all the files on your Steam Cloud.
How to Delete Steam Cloud Saves from OS X
The procedures above can also be replicated on OS X and older Macs to a slight extent. By following the steps below, you will be able to delete your local saves. You can then disable the Steam Cloud synchronization from the Steam application, start a new game and create a few new saves. Then, when you return to re-enable the Steam Cloud synchronization features, the client will ask you which saves do you want to use. You can then choose the new ones which will delete and replace your old saves from the cloud.
To make things even clearer, here’s a step-by-step guide through the whole thing:
- Open your Steam application and go to Steam > Settings via the ribbon at the top of the window.
- In the settings menu, click on the Cloud tab and uncheck the box associated with Enable Steam Cloud synchronization for applications that support it.
Uncheck the Option of Enable Steam Cloud synchronization for the applications which support it - Close Steam completely and open your Finder app.
- Go to Library > Application Support > Steam > SteamApps > Common and open the folder of whichever game you want to delete the save files.
- Next, open the SAVE folder to reveal the saves of the game.
Note: If the location specified above doesn’t land you to the save files, try the following locations but mind the placeholders:Users / *Your username* /Library / Application Support / *Game Folder* / Game Documents / *Game* / GameSaves Users/ *Your username* / Library / Application Support / Steam / userdata / *GameNumber* / remote Users/ *Your username* / Library / Containers / *Game Folder* / Data /Library / Application Support / *Game* / GameDocuments / *Game* / gamesaves
- Once you manage to identify and delete the local saves from the game you’re targeting, open the Game and create a few new saves.
- Exit the game, open steam and return to Steam > Settings > Cloud. From the cloud tab, re-enable the checkbox next to Enable Steam Cloud synchronization for applications which support it and click the OK button below.
- Steam will ask you whether you want to use the newly created local saves or the ones that you already have on the cloud. Choosing to use the new ones will delete the old saves that you currently have on Steam Cloud.
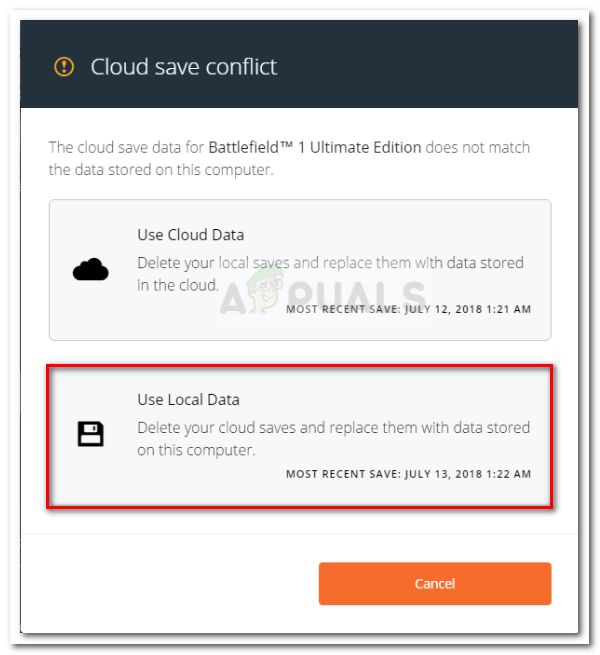
Delete Your Cloud Saves & Replace with Your Local PC Data
“How to make sure that this worked” section is next step?