How to Configure and Test 5.1 Surround Sound on Windows 10
Even with all the new advancements in sound technologies, some applications are still outputting stereo only. This can make it harder for you to determine if your 5.1 surround setup is working properly. While this technology delivers multichannel and mega-bit audio streams, the initial setup and some incompatibilities with Windows 10 can make 5.1 feel more trouble than it’s worth.
If set correctly, a 5.1 surround setup will enhance the range of effects, greatly contributing to the atmospheric soundtrack of a movie. If you use it while playing games, you’ll notice that it’s easier to pinpoint the enemy’s whereabouts and their actions based on the sound they make. Like previous Windows versions, Windows 10 has a built-in speaker test that allows you to test your 5.1 surround sound. However, the software is not always reliable and can provide you with false positives.
Before you get to the part where you test your 5.1 surround configuration, it’s important to be sure that you’ve set it up correctly. Once you configure your system to use all the available channels to output surround sound, you can use the tests below to ensure that you’re getting the best audio quality.
How to Configure 5.1 Sound on Windows 10
Unless you properly configure the 5.1 channels in Windows 10 after connecting the hardware, you’ll most likely get a stereo output from your PC or laptop. Keep in mind that in order to output 5.1 audio from your PC, the sound card must have 5.1 support. As of now, not all onboard soundcards are configured to output 5.1 surround signal. Desktops with newer motherboards usually have it even on low-end, but laptops aren’t that lucky.
Note: Even if you have an onboard soundcard with 5.1 support, chances are the quality will be sub-standard. The reality is, most onboard sound solutions will not output true 5.1 surround. If you’re looking for quality, always go for a dedicated sound board.
Before you attempt the steps below, make sure your system is actually able to output 5.1. Furthermore, check if all the cords and wires are properly attached and update the driver for your sound card to the latest version.
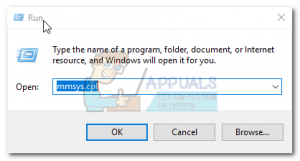
- Press Windows key + R to open a Run window and type “mmsys.cpl“. Hit Enter to open the Sound Properties.
- Go to the Playback and select your playback device that is capable of outputting 5.1 sound. Keep in mind that the name might vary according to your soundcard. With the speakers selected, click on Set Default and then hit the Configure button.

- In the Speaker Setup window, select 5.1 Surround and hit Next. If you see multiple 5.1 Surround entries, select the one that resembles more closely how have placed your speakers.
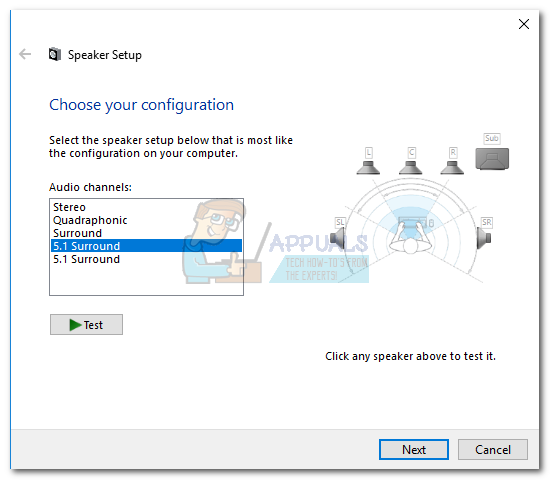 Note: Ignore the Test button for now. We’ll use it later after we’ve successfully configured the audio output.
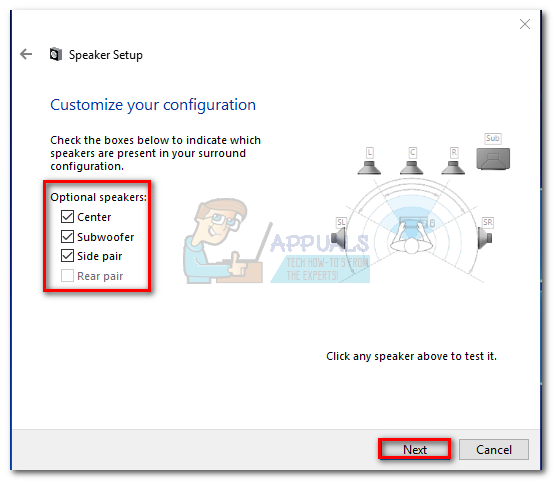
 - Then, make sure all the boxes under Optional speakers are set and hit Next. If your 5.1 setup is incomplete or you’re using it without the subwoofer, it’s best to disable the missing equipment now. Doing this will redirect the audio meant for the missing channel to an active one. This way, you will ensure that you’re not missing any important audio.
- This next dialog box is about selecting the full-range speakers. Most 5.1 systems do not have full-range speakers since the audio task is split across multiple channels. Check the boxes under Full-range speakers if applicable and hit Next.
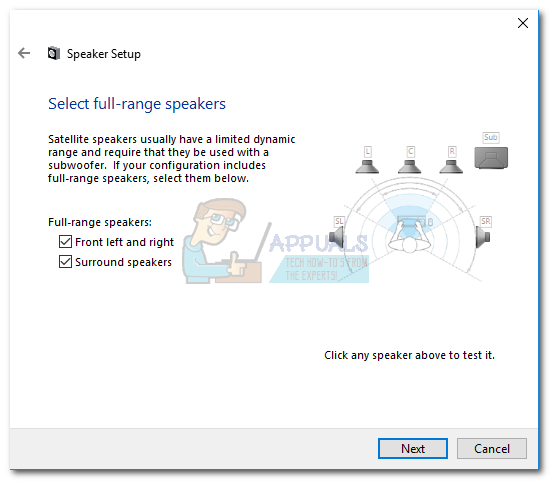 Note: If you’re not sure if your audio setup contains full-range speakers, you do an online search and look at your speakers’ configuration. If you can’t find any relevant information, check both Front left and right and Surround speakers. This way you won’t limit the audio quality if some of your speakers are capable of outputting full-range or if you’re not using a subwoofer.
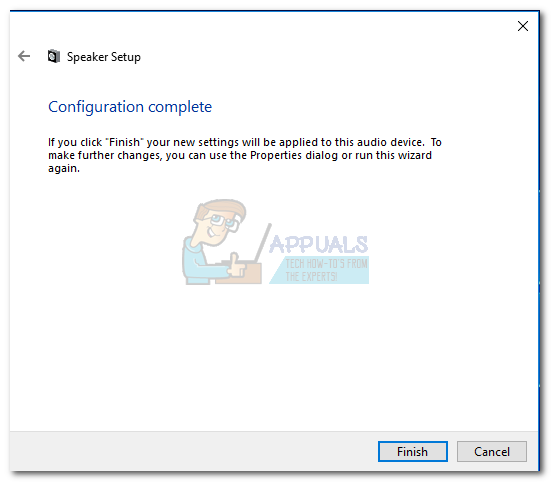
 - If the configuration completes successfully, hit the Finish button and move to the testing section below.
Note: If you have 5.1 speakers but you are unable to select 5.1 Surround after clicking the Configure button (option greyed out or not available), the issue is part bug part Microsoft trying to push Sonic Surround and Dolby Atmos by forcing users off old technology. The issue has been around ever since Windows 10 launched and Microsoft doesn’t seem keen on fixing it. Instead, the company seems to opt for a planned obsolescence when it comes to 5.1 Surround sound. Despite a lot of users complaining that their 5.1 setups have stopped working once they’ve upgraded to Windows 10 from Windows 7 or 8, there’s still no official fix on the horizon.
If you’ve only encountered 5.1 sound issues after the Creators Update, follow this article (dts sound windows 10) for some DTS troubleshooting guides. In the event that you’ve only begun to set up your 5.1 audio speakers when presented with the issue, follow this guide (windows 10 surround sound not working) to troubleshoot your surround problems.
If you were able to complete the configuring process successfully, follow the guide below in order to test your 5.1 surround sound.
How to Test 5.1 Surround Sound on Windows 10
Once you’ve successfully configured your 5.1 speakers, it’s time to put them to the test. We are going to start with the built-in way of testing your 5.1 surround configuration, but if you’re looking to test the true capabilities of your speakers, scroll below and use a test from the collection featured below.
Preferably, you should start your testing session by using the Windows built-in sound test wizard. The software will do a basic test to see if the audio channels are working properly. Here’s a quick guide on how to perform the sound test on Windows 10:
- Press Windows key + R to open a Run window and type “mmsys.cpl“. Hit Enter to open the Sound Properties.

- Go to the Playback and right-click on the 5.1 speakers that you previously configured and select Test.
 Note: Keep in mind that the name of your playback device might vary according to your soundcard.
 - You should now start hearing test sounds coming from each of your 5.1 surround speakers in turns. Use this test to make sure every speaker works.
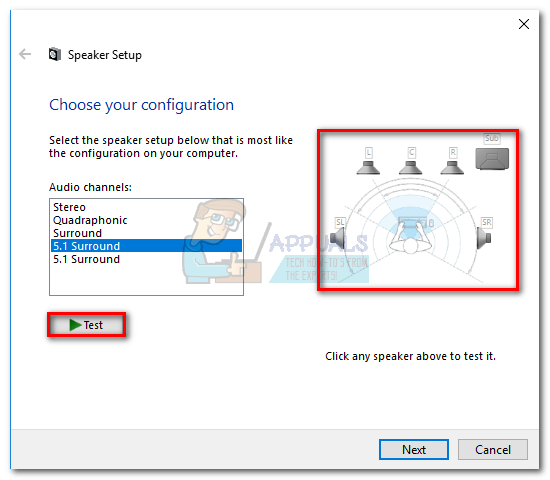
Note: Alternatively, you can hit the Configure button an then click the Test button to see a visual representation of which speaker is being tested. This will ensure that each speaker is connected to the right position.
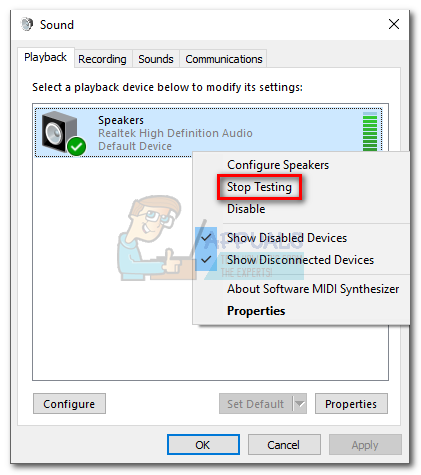
- When you’re done testing your speakers, right-click and select Stop Testing.
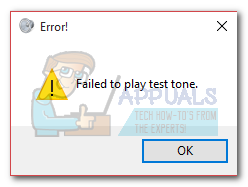
Note: If you’re seeing the error “Failed to play test tone” when clicking the test button, chances are there’s something wrong with your surround sound configuration. If that’s the case, follow these two guides (here & here) for some troubleshooting steps.
Additional 5.1 Surround Tests
If you’ve ensured that your speakers are wired correctly and the sound is coming from where it’s supposed to, let’s dive into some in-depth testing. Below you have a collection of sample tests that will allow you to hear if your speaker’s lows, mids, highs, and subwoofer are working properly. Let’s start you off with a list of test samples that don’t need to be downloaded and can be played immediately.
- Dolby 5.1 Sound Channel Check Demo
- Surround Sound Test LPCM 5.1
- 5.1 Surround Sound Test “The Helicopter”
- DTS 5.1 Surround Sound Test HD
- 5.1 THX Surround Sound Test
Note: The overall quality of the sounds you hear is always depended to the decoder. Furthermore, most video sharing services (YouTube included) do not support Dolby Digital or DTS. If your speakers are capable of outputting DTS or Dolby Digital, you should test them via DVD/Blu-ray, game console or another media that was encoded with these surround sound codecs.
If you’re serious about seeing what your surround speakers are capable of, you’ll need to download the sample files on your computer and open them with a program capable of decoding DTS or Dolby Digital. Here’s a list of places from where you can download 5.1 surround sample tests:
- DTS Trailers
- Dolby Laboratories
- Demo World
- Demolandia