Fix: DTS Sound Windows 10 Creators Update
Windows 10 users who have installed Creators update are unable to access Dolby settings on their systems. The DTS system stops working abruptly. Though you see Dolby Digital Live (DDL) or other Dolby Settings enabled in your Sound settings you only get stereo channels playback. When you play an HD sound, you get an error “This format is not supported”. Also, you hear no sound when you try to play Blu-ray disc which has multi-channel audio.
The problem with DTS access can be due to various reasons. Some experts say Microsoft did not include a media player and streaming technologies in its latest Windows 10 build and you are required to download a separate pack to use high definition sound and media streaming features. The reason for introducing a Windows OS without a media player and streaming features is linked to the hefty fines that EU levied on Microsoft a few years back for unfair business competition. Since Creators updates make several changes in the system, the older HDMI and High Definition audio drivers become incompatible with the upgraded Windows 10 system.
There are different ways to resolve the issue. In this article, we have listed few solutions that have worked for users who faced the same issue after installing Windows 10 Creators updates. Depending on the root cause of your Dolby Access issue, one of the solutions below might fix the issue and get your DTS working again.
Solution 1: Install Windows Media Feature pack
Many users who were facing the DTS issue were able to get the issue resolved by downloading Windows Media Feature Pack from this link. Install the Media Feature pack and enable DTS by following these steps
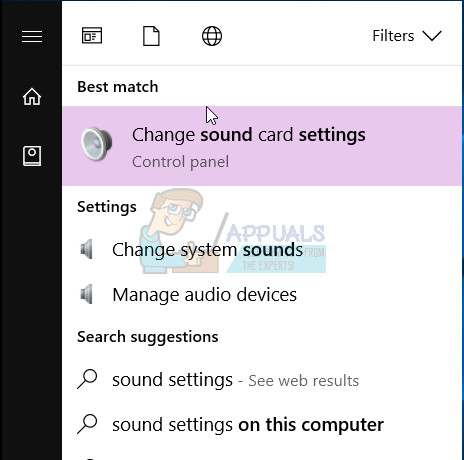
- Go to Start Menu
- Type Sound Settings in search bar
- Click on Change System Sounds in search results
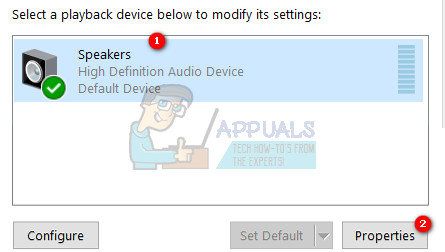
- Go to Playback tab, select Speakers ( High Definition Audio Device) which is selected as Default Device)
- Click Properties
- In Device Usage, select “Use this device(enable)”
- Click Apply
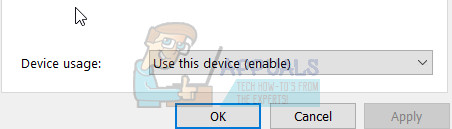
- Click OK
Solution 2: Make High Definition Audio Device your default output
You might have more than one High Definition Audio Device; for example, Speakers and Headphones. Follow the steps given below to make either the Speakers or Headphones the default audio device
- Open Start Menu
- Type Sound Settings in search bar
- Click on Change System Sounds in search results
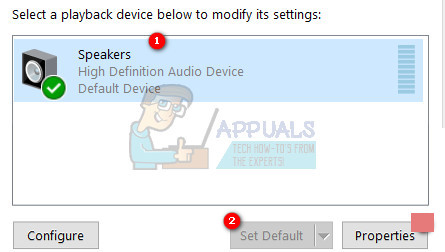
- Right-click on intended High Definition Audio Device in the list
- Click Set as Default Device
Solution 3: Update High Definition Audio drivers
- Go to Start Menu
- Type Device Manager in search box and select it from results
- In Device Manager window, go to Sound, video, and game controllers and expand it
- Select your Sound card and right-click on it
- Select Properties
- Select the Driver tab
- Select Update Driver or right click and choose Update
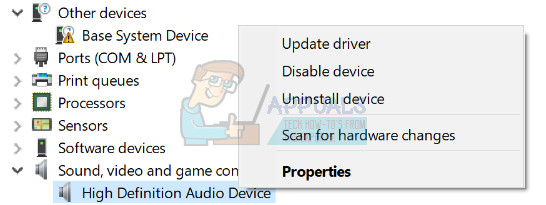
- Select Search automatically for updated driver software.
- If the Windows doesn’t find a new driver, try searching for latest driver on your sound card manufacturer website
Solution 4: Install Windows generic audio driver
In case your sound card manufacturer has not released a new driver that is compatible with Windows 1703 build, you can try installing the Windows generic audio driver. Many users were able to resolve the sound issue with this trick.
- Go to Start Menu
- Type Device Manager in search box and select it from results
- In Device Manager window, go to Sound, video, and game controllers and expand it
- Select your Sound card and right-click on it
- Select Update Driver
- Select Browse my computer for driver software
- Select Let me pick from a list of device drivers on my computer
- Select High Definition Audio Device and select Next and follow the instructions to install it
Solution 5: If nothings works, go back to the previous build
If you cannot do without DTS or Dolby Access, we suggest you go back to the previous build until Microsoft release a patch or fix to resolve this issue.
By going to the previous build, you will defer all updates that were installed after installing Creators updates. Bear in mind, if you revert to the previous build you will lose changes to any settings and might also lose apps that were installed after installing Creators update. To go back to the previous build, follow the steps below.
- Open Start Menu
- Go to Settings -> Update & Security -> Recovery
- Look for Go back to previous version of Windows 10
- Click Get Started button under “Go back to previous version of Windows 10” section
- If your Windows device is not plugged to Power, you will get instruction to Plug in your PC
- Click Close and plug the Windows device to Power
- You will be asked the reason for going back to the previous build, select any reason from the list and click Next
- In the Check for Updates window, click No Thanks
- In What you need to know window, click Next
- In Don’t get Locked Out window, click Next
- In Thanks for trying this build window, click Go back to earlier build
- The revert process starts. Once the process is completed, the computer will reboot and you will be taken back to the previous build that is before you installed Creators update.
Make sure your HDMI Output settings in YOUR AMPLIFIER is set to AMP only and not AMP/TV, as your TV is unlikely to handle DTS HD