Fix: Channel Surround Sound Not Working in Windows 11/10
When channel surround sound doesn’t work properly in Windows 11 or 10, users might only get stereo sound, with no audio coming from the rear or center speakers during media playback. This problem means that the system isn’t sending multi-channel audio to your surround sound setup.
The main reason for this is often incorrect speaker settings in the operating system or audio driver software. Other factors might include outdated or incompatible audio drivers, disabled audio enhancements, or hardware connection issues.
In this article, we will discuss several ways to solve this error.
1. Verify Surround Sound Configurations
Checking your surround sound settings is important because incorrect settings can limit your audio to stereo. Make sure each speaker is correctly identified in Windows sound settings so the system can send audio to all speakers, restoring surround sound.
- Press Windows + R to open the Run dialog box and type mmsys.cpl.
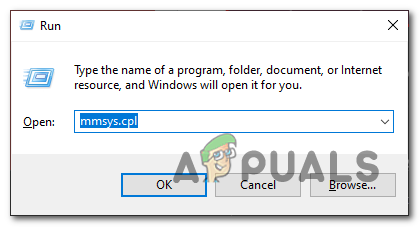
Verifying surround sound configuration - In the Playback menu, select your speakers and click Configure.
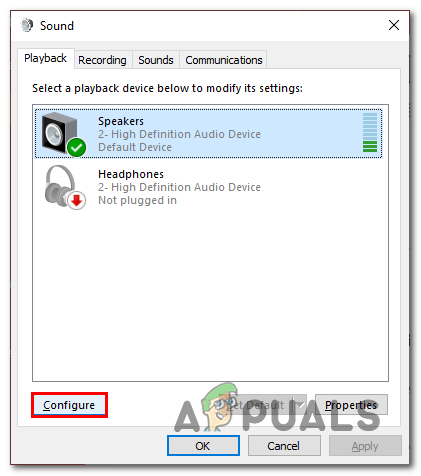
Verifying surround sound configurations - In the speaker configuration window, choose 5.1 or 7.1 based on your speaker’s capability.

Verifying surround sound configurations - Click Next, then Finish.
2. Use Windows Audio Troubleshooter
Running the Windows Audio Troubleshooter automatically checks for common audio problems, like wrong sound settings, disabled enhancements, or driver issues. This tool tries to find and fix any settings or errors that affect surround sound, providing a quick fix without needing manual changes.
- Press the Windows key to open the Start menu.
- Type Troubleshoot Settings in the search box and open it.
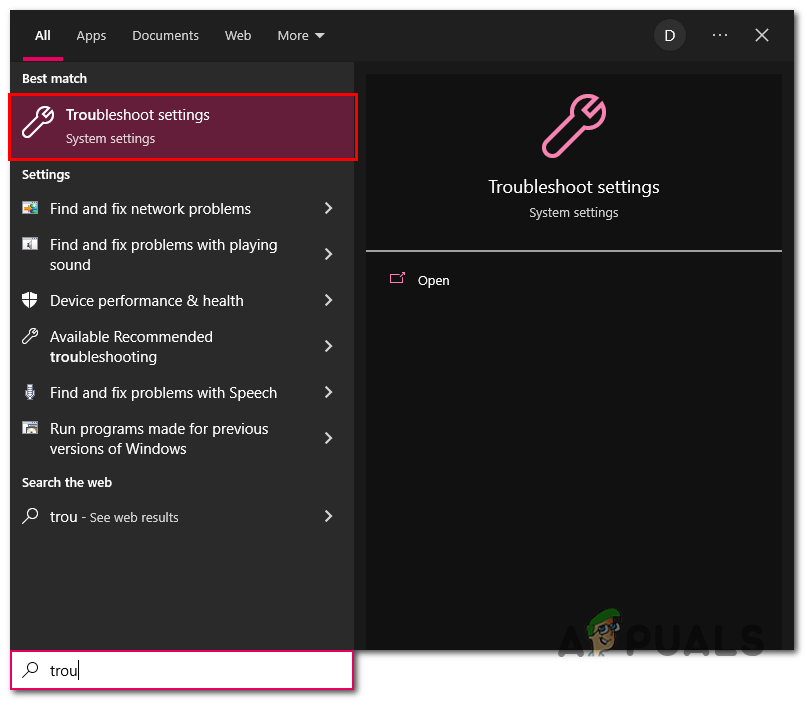
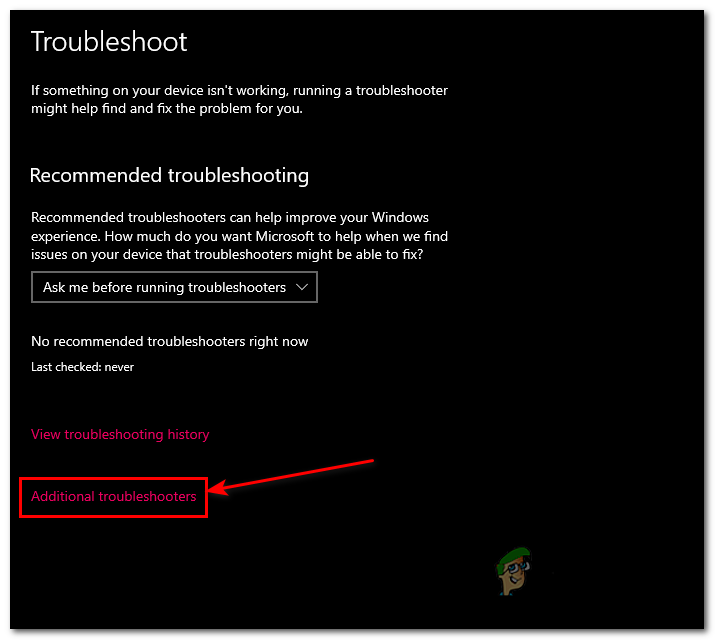
Run Windows audio troubleshooter - Click on Additional Troubleshooters.
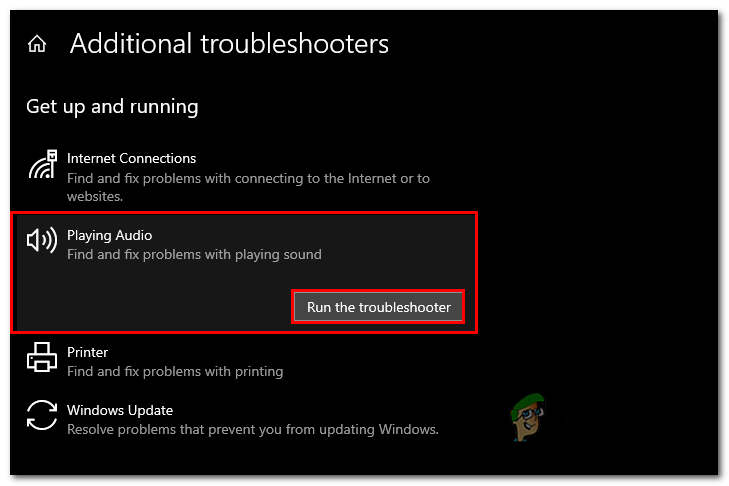
Run Windows audio troubleshooter - Select the Playing Audio option and click on Run Troubleshooter.
Run Windows audio troubleshooter - Wait for the troubleshooting process to complete, then click Close.
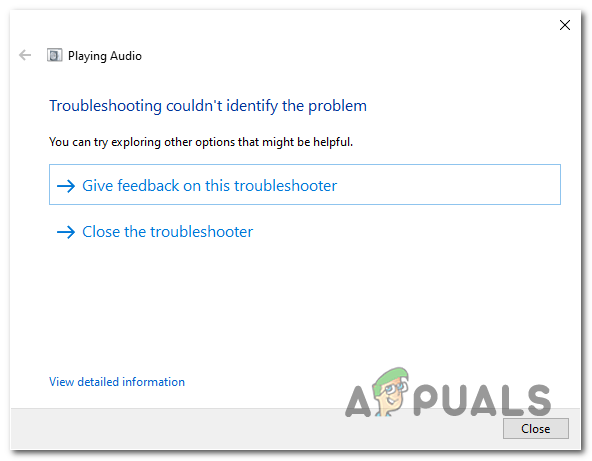
Run Windows audio troubleshooter
3. Download HD Audio Codecs
Downloading HD audio codecs adds important drivers to your system, letting Windows correctly handle multi-channel audio. This step ensures your PC can process surround sound, providing clear and immersive playback on all your speakers.
- Visit your sound card manufacturer’s website to download codecs. Here are links to some popular manufacturers:
Realtek users, click here.
Asus users, click here. - Click on the highlighted download icon as shown in the image.

Downloading HD audio codecs for Realtek - Once downloaded, follow the installation instructions.
4. Enable Speaker Fill
Turning on Speaker Fill lets stereo audio play through all speakers, simulating surround sound. This setting duplicates audio to make sure sound reaches all speakers, even if the source doesn’t support true surround sound.
- Press Windows + R to open the Run dialog box. Type mmsys.cpl and press Enter.
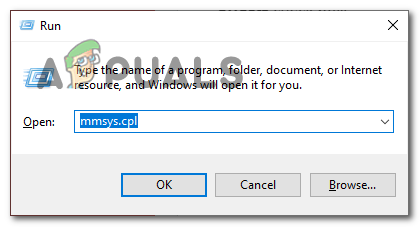
Enable speaker fill in speaker properties - In the Playback tab, click on Speakers and select Properties.

Enable speaker fill in speaker properties - In the speaker properties window, go to the Enhancements tab and uncheck Disable all sound effects.

Enable speaker fill in speaker properties - Click OK to apply the settings.
- Reboot your computer to apply the changes.
5. Change Audio Format
Sometimes, the audio format doesn’t match your speakers, affecting surround sound. Switching to a format like “24-bit, 48000 Hz” can fix this by matching the audio to your device’s capabilities.
- Press Windows + R to open the Run dialog box.
- Type mmsys.cpl and press Enter.
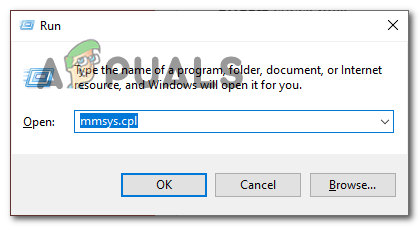
Changing audio format - Click on Properties to open the sound properties dialog.

Changing audio format - Go to the Advanced tab.

Changing audio format - In the Default format section, click the drop-down menu.
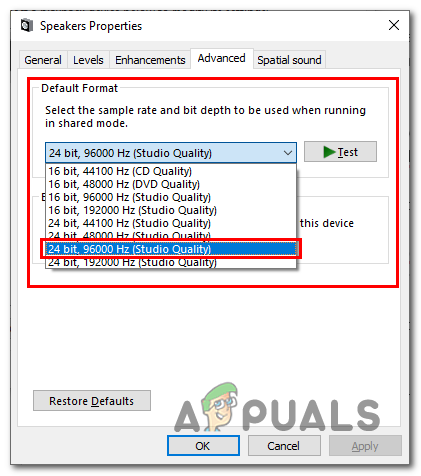
Changing audio format - Select 24 Bit, 96000 Hz (Studio Quality).
- Click OK to apply the settings.
6. Restart Audio Services
Resetting the audio services can resolve surround sound problems. Restarting them clears glitches, letting Windows set up the audio channels correctly.
- Press Windows + X and select Windows Terminal (Admin) or Command Prompt (Admin) from the menu.

Restart audio services - Enter the following commands to restart audio services:
net stop Audiosrv
net start Audiosrv
net stop AudioEndpointBuilder
net start AudioEndpointBuilder
net stop RpcSs
net start RpcSs
- After restarting the services, Reboot your computer.
7. Enable the Mono Audio Feature
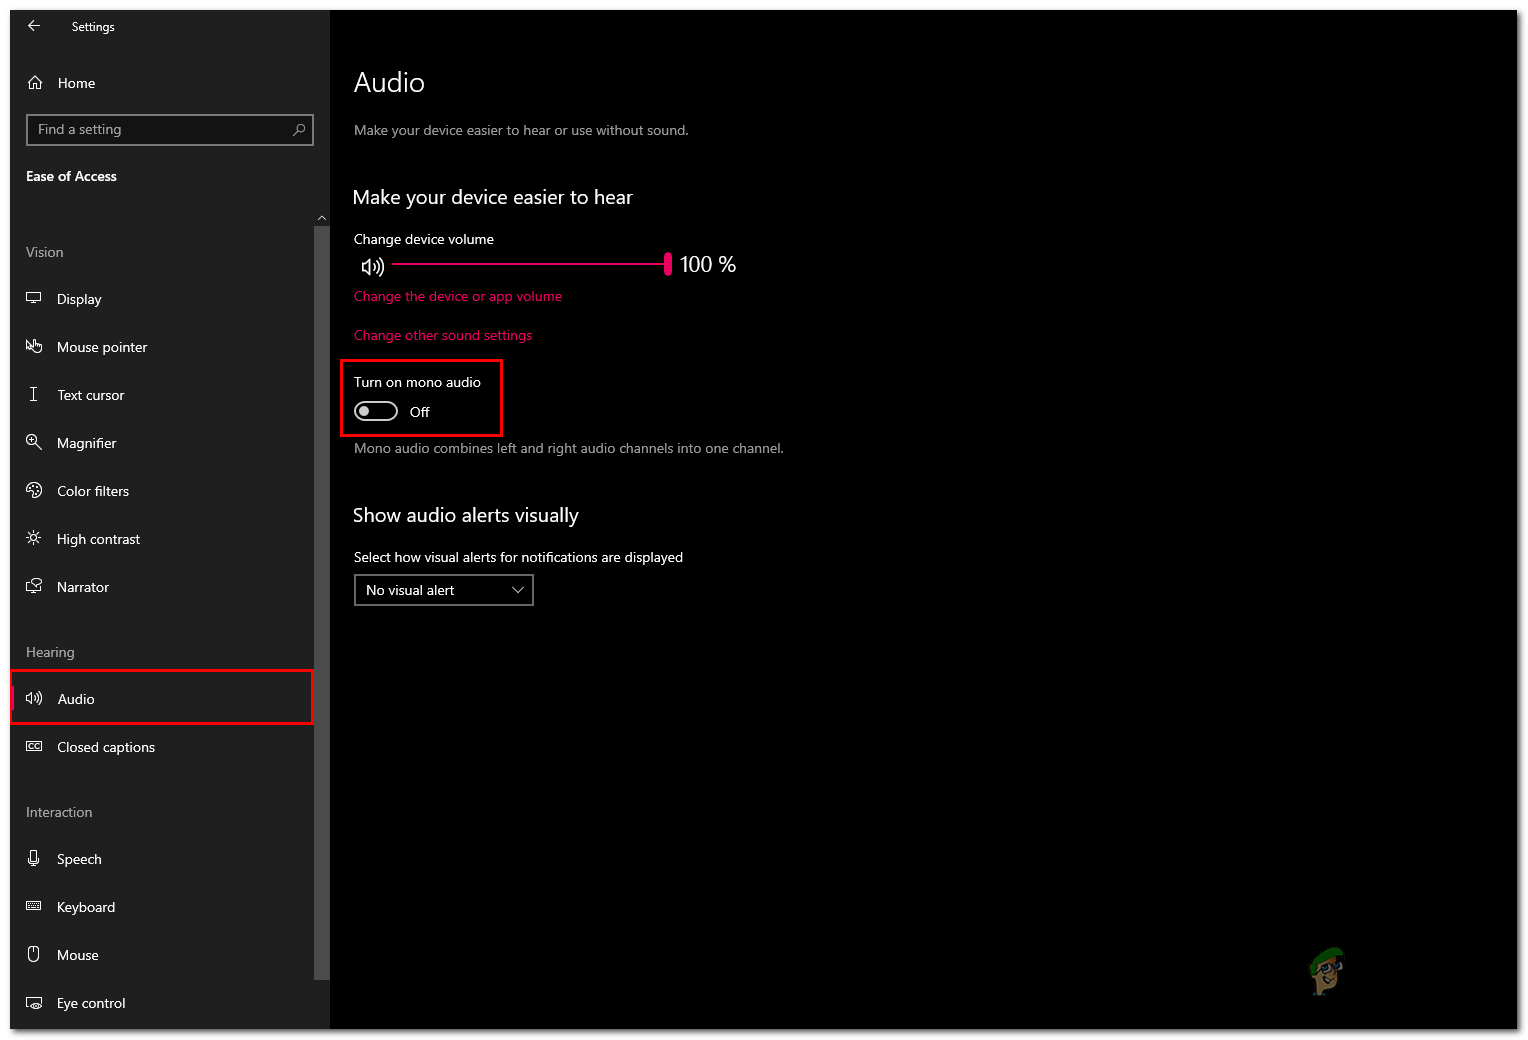
Switching to Mono Audio combines all sound into one channel, ensuring all speakers play the same audio. This helps identify issues in your setup.
- Press Windows + I to quickly open Settings.
- Select Ease of Access, then choose Audio on the left sidebar.

Enabling the mono audio feature on Windows - Switch the Mono Audio toggle to on.
Enabling the mono audio feature on Windows
8. Update Windows
An outdated Windows can cause audio problems, including with surround sound. Updating Windows adds fixes that often solve these issues.
- Press Windows + I to open Settings quickly.
- Go to Update & Security.
- Click Check for Updates.
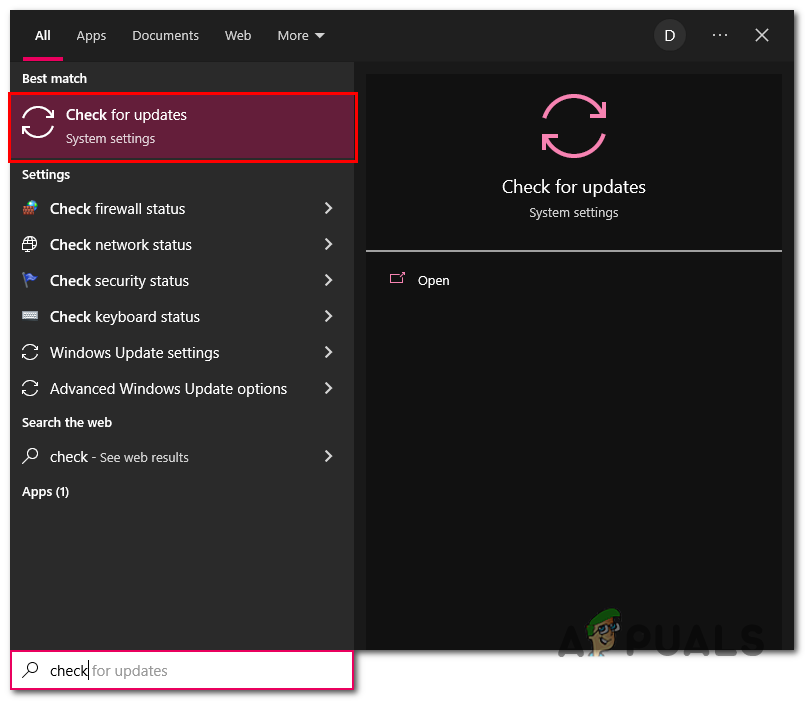
Updating Windows - Install any available updates.