How to Add Songs to Your Spotify Library
Spotify is one of the leading music streaming services currently used by music enthusiasts across the globe. The Spotify client for desktop computers is capable of not only streaming music available on the streaming service but also adding any music the user has stored locally on their computer to a library for the user to access and enjoy at any time. When you install the Spotify client for computers on your computer and sign into your Spotify account, the application automatically scours your computer’s hard drive and locally stored files for any music you might have. Unfortunately, Spotify falls a bit short of this task – the application, by default, only scans specific directories and folders (namely the user’s My Music folder, their iTunes Music library and their Windows Media Player library) instead of the entirety of the user’s hard drive.
When Spotify finds any locally stored music on your computer, it tallies the songs it finds with its own servers to see if they are also available on Spotify’s music cloud. Songs Spotify locates as local files on your computer are synced to your Spotify account, and you can then share them via social networks from there. Very few people who have copies of songs stored locally on their computers have every single song stored in one folder, much less all of them in one of the three directories Spotify usually checks for downloaded songs. When Spotify scans your computer for music files, it will not find out about any songs that you might own spread over a bunch of different directories on your computer or stored on external storage mediums such as external hard drives or USB drives. Spotify won’t know about the treasure trove of music you have hidden away in different places – not unless you tell it where to look.
It is for this specific purpose that there’s a feature built into the Spotify client that can be used to direct it towards specific folders on a Windows or Mac computer that have music stored inside them. Once you direct Spotify to a folder, it will constantly scan the folder for music files, so any new songs you add to these folders will also be synced to your Spotify account almost immediately. Once every single directory on your computer that has a song stored inside it has been added to the Spotify client, you will have your entire music library synced to the client, which you can then use to access and listen to any song at any time.
The Catch
Adding the directories the entirety of your offline music library is stored in on your computer to Spotify is all well and good, but there’s a caveat you definitely need to know about – Spotify does not support all music file formats. The following are the audio file formats supported by the Spotify client for desktop computers:
- MP3
- MP4 (provided that the files only contain audio – Spotify does not work with MP4 files that contain video)
Spotify uses the Ogg Vorbis format to interact with audio files, so the streaming service also does not support the M4A file format – the iTunes lossless file format for music files. The streaming service does, however, look for any songs that are in unsupported file formats on its music cloud and, if available, adds them to the user’s music library.
Down to Business
Now that we’ve gotten any and all theory you need to be familiar with out of the way, we can actually get on with actually adding songs and directories that contain songs to your Spotify music library. Here’s how you can go about adding locations on your computer that Spotify scans for music files on a regular basis:
- Launch the Spotify desktop client.
- Sign into your Spotify account once the client starts up.
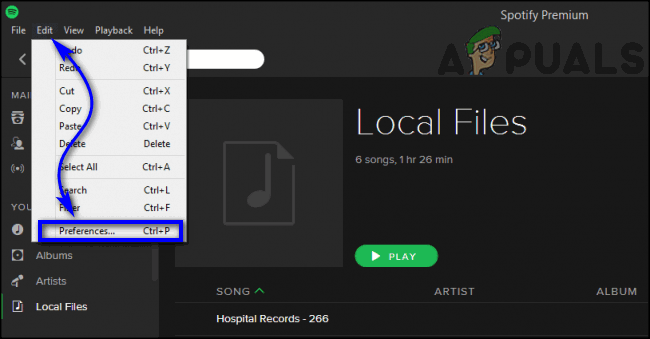
- If you’re using a Windows computer, click on Edit > Preferences in the menu bar. If you’re using a device running on MacOS, you are going to have to click on iTunes > Preferences > Advanced, select Spotify and enable the Share iTunes Library XML with other applications option.
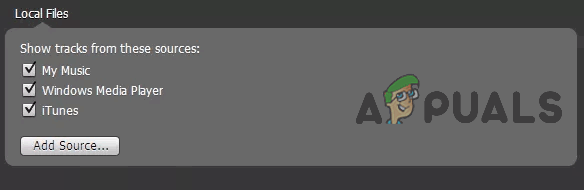
- Scroll down to and locate the Local Files section.
- Click on the Add Source… button.

- In the dialog that pops up, navigate to the directory on your computer that houses the folder you want to have the Spotify client start searching for music files on a regular basis. Once you see the folder you want to add to the list of folders Spotify scans for music files, click on it to select it and click on OK.
As soon as you do so, you will see that the folder you selected has been added to the Spotify client’s list of folders – the client will now also scan this folder when searching for existing and newly added music files on your computer. If you want to add yet another folder to this list, simply repeat steps 5 and 6 from the instructions listed and described above, and keep repeating these steps until you have added all of the folders you want to add to this list.
Removing Folders You No Longer Want Spotify to Scan
If there comes a time when you no longer want Spotify to scan one or more folders on this list for music files on your computer, have no fear – removing folders from this list is a simple matter of performing the following steps:
- Launch the Spotify desktop client.
- Sign into your Spotify account once the client starts up.
- If you’re using a Windows computer, click on Edit > Preferences in the menu bar. If you’re using a device running on MacOS, you are going to have to click on iTunes > Preferences > Advanced, select Spotify and enable the Share iTunes Library XML with other applications option.
- Scroll down to and locate the Local Files section.
- In the list of folders that you see under the Local Files section, simply uncheck the checkboxes beside any and all folders you no longer want the program to scan for music files.
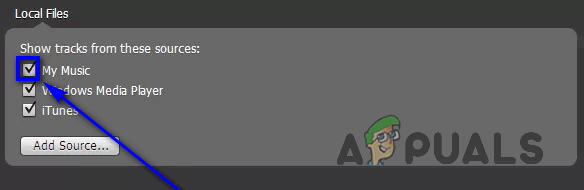
When you uncheck the checkboxes beside the offending folders in the list, you will see that they disappear from the list.