How to Reduce High Ping Issues on Windows 11
Many Windows users have encountered issues while attempting to play games on Windows 11, notably an excessively high ping. This issue considerably slows down the network data exchange, disrupting their in-game performance by causing frequent disconnects and matchmaking problems.
Through a thorough investigation of the problem, we’ve identified several culprits that could be responsible for this issue.
- Registry Editor uses hardcoded network values – This problem often arises in Windows 11 due to conflicting network-related values such as Network Throttling, TCPack Frequency, and TCP No Delay. Adjusting these values should alleviate the issue.
- Incompatible Power Automate – Some players have found that the Power Automate application was the root cause of the issue. Removal of this application from their PC resolved it.
- Problematic Windows update – Certain Windows updates have been known to induce high ping. Rolling back these updates may potentially rectify the problem.
- Incompatible energy-saving option – An active default energy-saving setting might be the cause. Disabling this setting from your network connection’s properties can address the issue.
- Disabled IPv6 – High ping might also result from forcibly disabling IPv6 protocol. Enabling IPv6 in your network connection settings may fix this. You can learn how to enable IPv6 on a Windows computer [here].
- Hindered network connection – A bug could be meddling with your internet connection, causing high ping. Correct this by removing the network connection from your PC and then reconnecting after a system reboot.
1. Fix using Registry Editor
One potential solution is to adjust certain values within the Registry Editor. Many users have successfully resolved high ping in this manner.
This method requires modifying the value of NetworkThrottlingIndex to FFFFFFFF, which directs the PC to use the recommended network throttling threshold. Additional adjustments to the values for TCPackFrequency and TCPNoDelay should be made, and a new key called MSMQ should be created.
Note: It is recommended to back up your Registry values before making any changes [learn how to back up here]. This precaution can save your system from potential harm should an error occur during the modification process.
- Press the Windows key + R, type ‘regedit’ in the Run dialog box, and press Enter to open the Registry Editor.

Open the Registry Editor - If prompted by the User Account Control, click Yes to grant administrative access.
- Inside the Registry Editor, first create a backup. Click on File in the top left corner, then select Export. In case of necessity, you can click on Importand select your backup file.

Export the Registry - Navigate to the following registry path either manually or by copying and pasting it into the search bar:
Computer\HKEY_LOCAL_MACHINE\SOFTWARE\Microsoft\Windows NT\CurrentVersion\Multimedia\SystemProfile
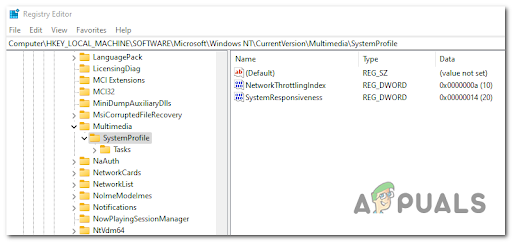
Navigating to the correct location - Double-click on the NetworkThrottlingIndex value and set its data to ‘FFFFFFFF’, then click OK.
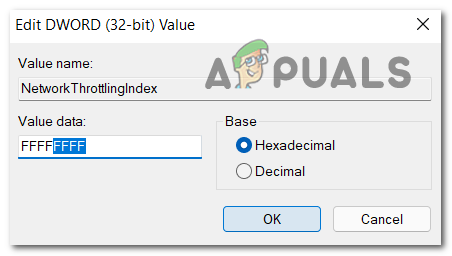
Modifying the NetworkThrottlingIndex value - Navigate to the following address:
Computer\HKEY_LOCAL_MACHINE\SYSTEM\CurrentControlSet\Services\Tcpip\Parameters\Interfaces
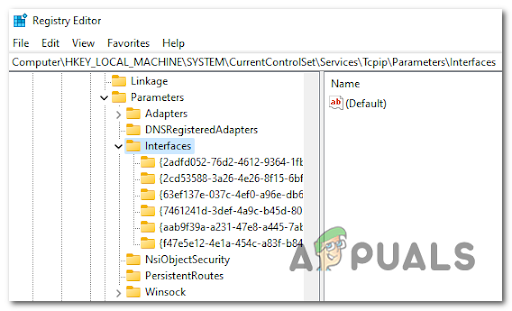
Navigating to the Interfaces key - Search through the folders within Interfaces and select the one that displays the most values when clicked.
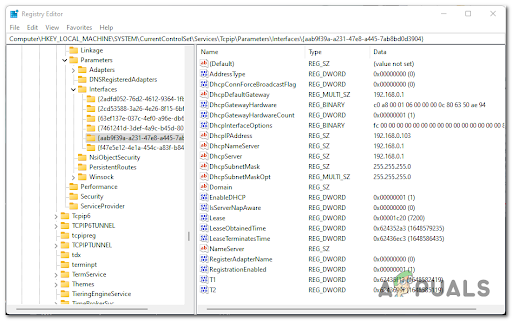
Choose the key with the most entries - Right-click on the right side and select New, then create a DWORD (32-bit) Value named ‘TCPackFrequency’. Double-click on this value and set its data to 1.
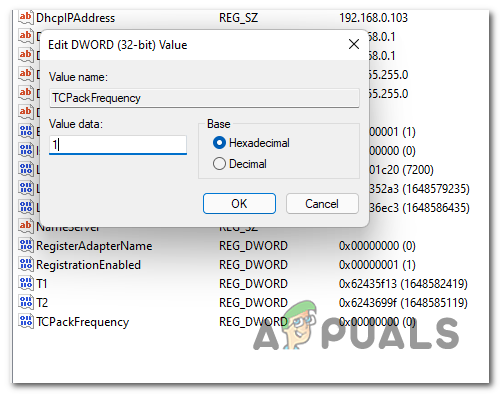
Editing the TCPackFrequency value - Repeat this process to create another DWORD (32-bit) Value called ‘TCPNoDelay’ and set its data to 1 as well.
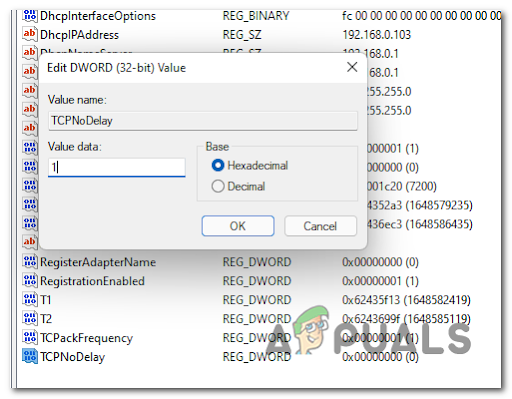
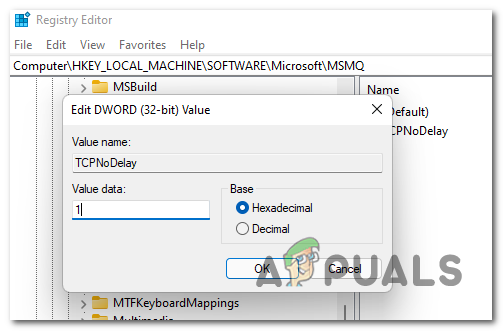
Editing the TCPNoDelay value - Navigate back to the HKEY_LOCAL_MACHINE key, then to SOFTWARE followed by Microsoft. Right-click on Microsoft, select New, then Key, and name it ‘MSMQ’/
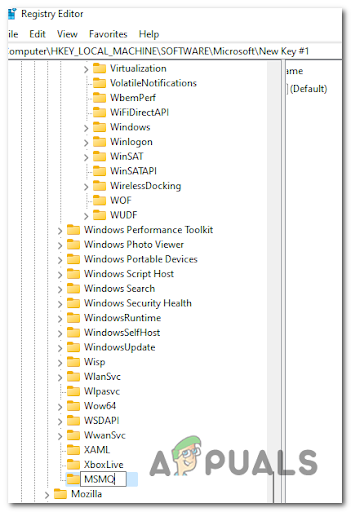
Creating the MSMQ key Note: If the ‘MSMQ’ folder already exists, ignore the newly created one and use the existing one.
- Within the MSMQ folder, create a DWORD (32-bit) Value and name it ‘TCPNoDelay’. Then, double-click it and change the data value to 1.
Editing the TCPNoDelay value - After completing these steps, close the Registry Editor and restart your PC. Once your computer has rebooted, the high ping issue should be resolved while playing games.
2. Delete Power Automate (if applicable)
If you’re using Power Automate on Windows 11, it is advisable to discontinue its use. As of the time of this writing, Power Automate has yet to be updated for Windows 11 and is known to cause consistently high ping during multiplayer gaming if left enabled.
To resolve ping-related issues, users have reported success after uninstalling the Power Automate application. According to accounts, this app could be contributing to the excessive ping.
Note: Alternatively, you may try force stopping the app before starting the game with high ping issues, although this is only a temporary solution.
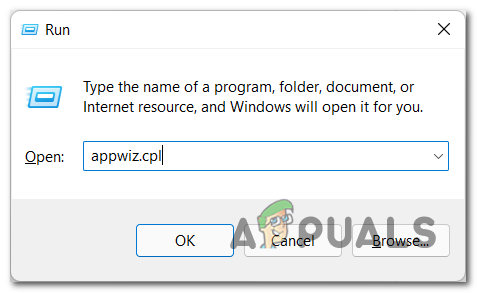
- Press the Windows key + R to launch a Run dialog box. Type ‘appwiz.cpl’ and press Enter to open the Programs and Features menu.
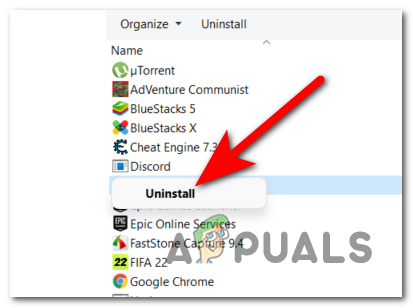
Programs and Features menu - In the Programs and Features menu, locate the Power Automate app, right-click on it, and select Uninstall.
Uninstall the Power Automate app - Follow the on-screen instructions to complete the uninstallation. Restart your PC afterward. Once your PC reboots, check if games still exhibit a high ping.
3. Uninstall the latest Windows update
Another possible fix for the high ping issue is to remove the most recent Windows update that has been applied to your system. Some players have successfully reduced their ping by doing so.
Note: For Windows 11, an update released in early March 2022 is known to cause high ping, particularly when playing games through the Game Pass service. Despite Microsoft releasing a fix for the issue, no universally accepted solution has been identified within the community as of this writing.
The problematic update was found to impede online gaming functionality, leading to matchmaking difficulties and frequent disconnections.
If you want to try this fix, uninstall the most recent Windows update installed before the issue began. Afterwards, test your games to determine if the high ping persists.
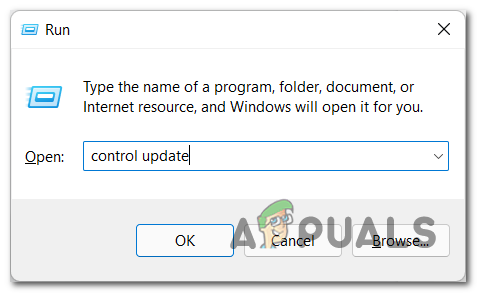
- Press the Windows key + R, type ‘control update’ into the Run dialog box, and hit Enter to access the Windows Update menu.
Windows Update menu - In the Windows Update menu, click on Update history.

Update History menu - Scroll down and select Uninstall updates. This will bring up the list of Installed Updates.

Installed Updates menu - Find the latest update, right-click on it, and choose Uninstall.
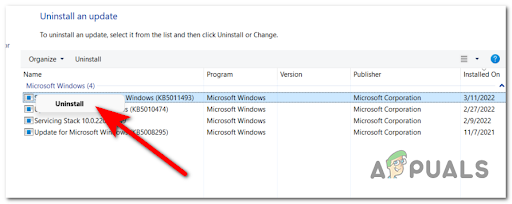
Uninstalling the problematic update - After uninstalling, launch the game with ping issues and check if the problem has been resolved.
Should you continue to experience high ping, review the subsequent method.
4. Disable any energy-saving option
High ping could also be a consequence of the energy-saving mode on some PCs. These modes are designed to limit a computer’s functions to conserve energy, which can include a reduction in network packet processing speed.
- Open a Run dialog box using the Windows key + R. Type ‘devmgmt.msc’ into the search bar and press Enter to access the Device Manager.

Device Manager - Inside the Device Manager, locate the Network adapters category, expand it, and double-click on the network adapter you are using.
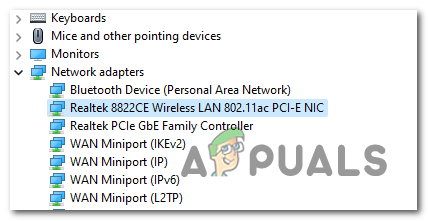
Network adapter - In the network adapter properties, navigate to the Power Management tab and uncheck the option allowing the computer to turn off the device to save power.
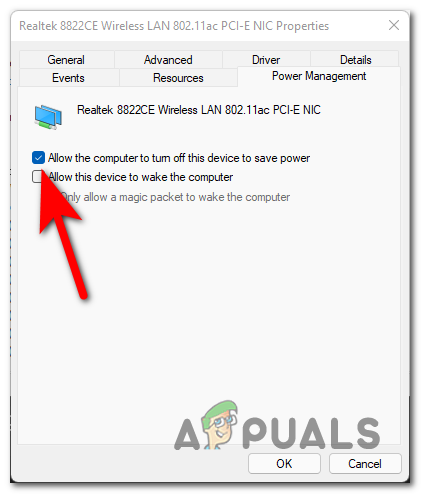
Preventing computer from turning off the network device - Proceed to the Advanced tab and disable any settings related to energy saving.
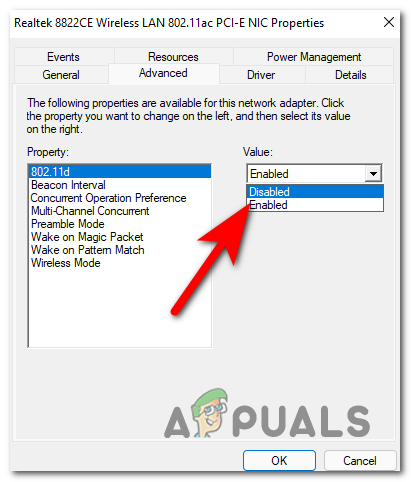
Disabling energy-saving options - After applying these changes, close the Device Manager and check if your ping remains high during gaming.
5. Enable IPv6 in the network adapter settings
If previous remedies have not proved successful, your next course of action could involve enabling IPv6 (Internet Protocol Version 6) in your network connection’s settings.
You can reach network settings via the Control Panel or directly through the Run dialog box.
Note: IPv6 is the latest iteration of Internet Protocol, which outlines the system for identifying and locating computers across networks and is fundamental in routing internet traffic.
- Invoke a Run dialog box using Windows key + R. Type ‘ncpa.cpl’ and hit Enter to open the Network Connections.

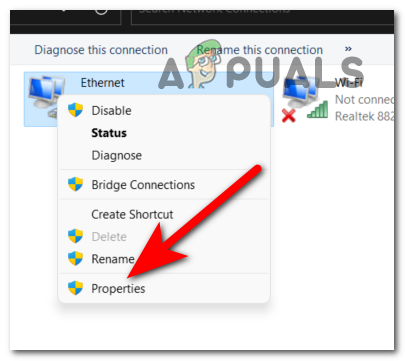
Network Connections menu - Within Network Connections, right-click your active network connection and select Properties.
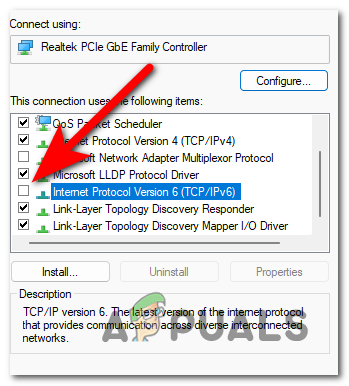
Network Connection Properties - In the Properties dialog, scroll until you find Internet Protocol Version 6 (TCP/IPv6) and ensure the box next to it is checked to enable it.
Enabling IPv6 - Click OK to apply the changes. Next, test your games to determine if high ping is still an issue.
6. Remove and Reconnect to the Problematic Network
Some players who have successfully remedied their ping problems reported that removing the problematic network connection and then reconnecting to it after a system reboot can be effective.
Note: This method applies primarily to users connected to a Wi-Fi network.
- Press Windows key + R to open a Run dialog box, type ‘ms-settings:’, and press Enter to bring up the Settings menu.

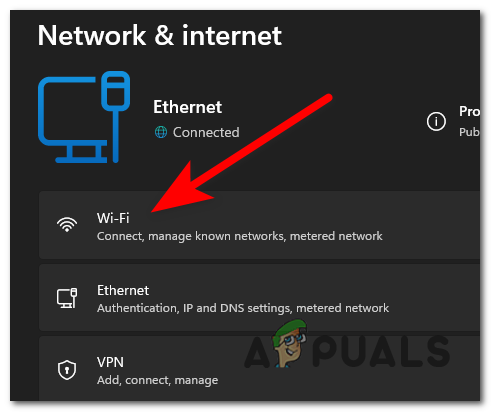
Settings - In Settings, navigate to the Network & Internet section and select Wi-Fi.
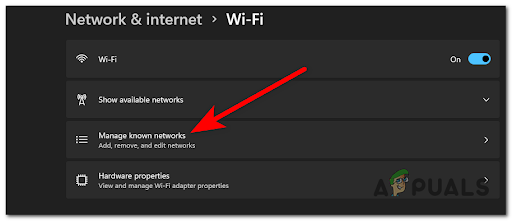
Wi-Fi Settings - Click on Manage known networks.
Managing Known Networks - Find the network that is causing issues and click on `Forget` to remove it from the list of known networks.

Forgetting a Network - Restart your computer. Once it has booted up, reconnect to the network you had forgotten and check if the ping has improved.
If none of the above methods alleviate the high ping issue, you might need to explore further networking troubleshooting steps or contact your Internet Service Provider for assistance.


