How to Enable IPv6 on a Windows Computer
The system responsible for the identification and location of computers on a network and for routing traffic all across the World Wide Web is a communications protocol known as the Internet Protocol. The Internet Protocol is what a computer on a network uses to locate another computer on the same network, identify it and connect to it. As the Internet Protocol has improved and changed for the better, newer versions of the system have been developed and put to use. IPv6 (Internet Protocol Version 6) is the most recently developed version of the Internet Protocol after IPV5.
At this moment, all versions of the Windows Operating System and all of their various iterations and editions that are currently supported by Microsoft are capable of using both IPv6 and its predecessor, IPv4. In most cases, a Windows computer has both IPv4 and IPv6 enabled by default to make sure the user receives nothing short of the very best when it comes to networking and connectivity. However, IPv6 can, in some cases, be disabled – either by default or of the user’s own volition. If you are using a Windows computer and would like to enable IPv6 but don’t know exactly how you’re supposed to go about doing that, fear not – all you need to do is:
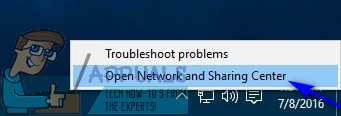
- Right-click on the Network icon in your computer’s Notification Area. If you’re using Windows 7 or Windows 10, the Notification Area will be located at the bottom right of your screen in your Taskbar. If you’re using Windows 8 or 8.1, on the other hand, you are going to have to click on the Desktop tile in the bottom left corner of your screen to see the Notification Area where the Network icon will reside.
- Click on Open Network and Sharing Center in the resulting context menu.
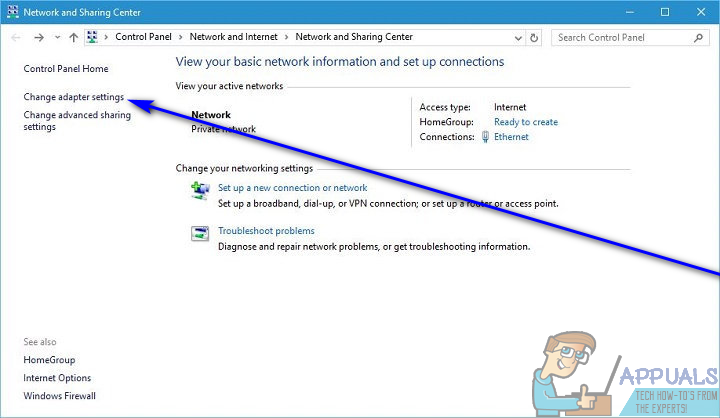
- Click on Change adapter settings in the left pane of the window.
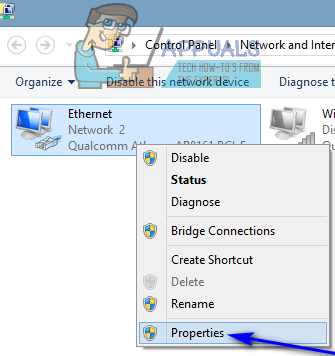
- Locate the network connection that is currently your computer’s active network connection and right-click on it.
- Click on Properties in the resulting context menu.
- Under the “This connection uses the following items:” section, locate the Internet Protocol Version 6 (TCP/IPv6) option and check the checkbox beside it to enable it or turn it on.
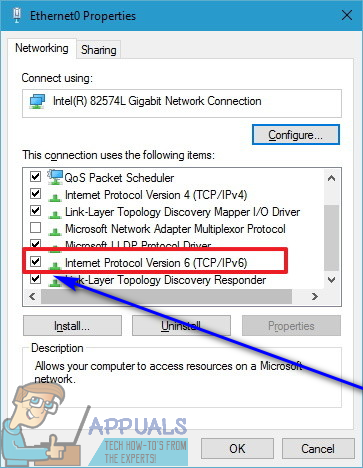
- Click on OK.
- Close the Network and Sharing Center.
what numbers do you put in