How to Hide the Family Options Area in Windows 10?
The Family Options area is one of the seven areas of the Windows Defender Security Center that protect your device. It provides easy access to manage your children’s online experience on the device. It helps in protecting your kids online and keeping their devices clean. However, the Family Options area can be hidden from the users. This is pretty useful if as an admin you don’t want other users to view or have access to this specific area. In this article, we will show you methods through which you can easily hide the Family Options section in the Windows Defender Security Center.

The Group Policy Editor is only available in the Windows 10 Pro, Windows 10 Education, and Windows 10 Enterprise versions. If you are using the Windows Home version, then try using the Registry Editor method, because Group Policy Editor isn’t available in that version.
Method 1: Using the Local Group Policy Editor
The Group Policy is a Windows feature through which users can configure many different types of settings for their operating system. The Group Policy has a setting for hiding each section of the Windows Defender Security Center. The user just needs to modify the specific setting to hide the specific settings in the Settings app. Follow the below steps to hide the Family Options area on your system:
This setting is supported on at least Windows 10 version 1709 and Windows Server 2016.
Note: If you are using Windows Home edition, then skip this method.
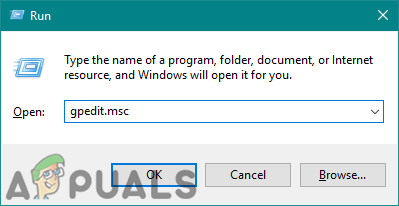
- Hold the Windows key and press R to open a Run dialog. Type “gpedit.msc” in the box and press the Enter to open the Local Group Policy Editor.
Opening the Local Group Policy Editor - Now navigate to the following location in the Local Group Policy Editor.
Computer Configuration\Administrative Templates\Windows Components\Windows Security\Family options\
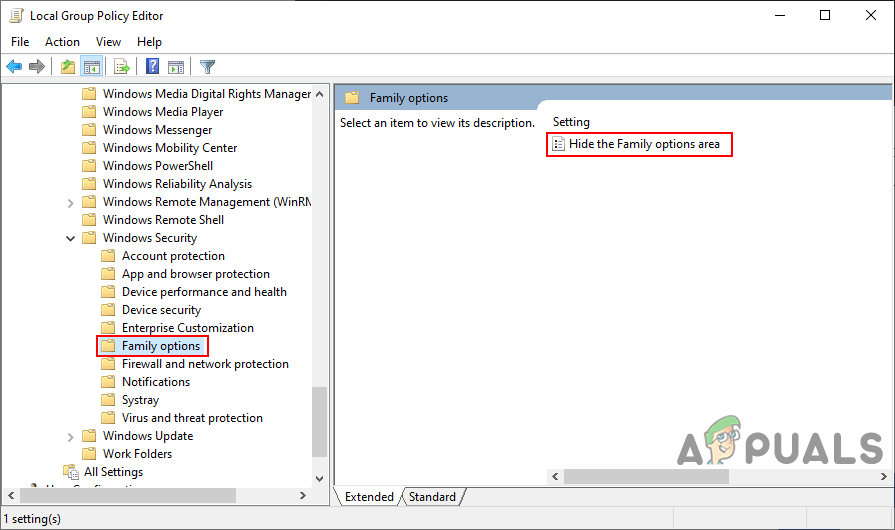
Navigating to the setting - Double-click on the setting named “Hide the Family option area” and that will open in another window. Now you need to change the toggle option from Not Configured to Enabled.
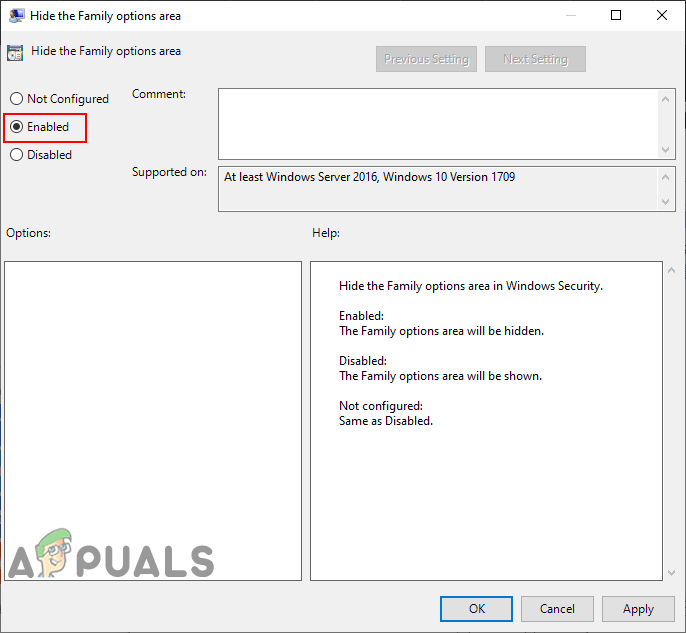
Enabling the setting - Click on the Apply and Ok buttons to save the changes. Basically, the group policy will automatically update the new configurations.
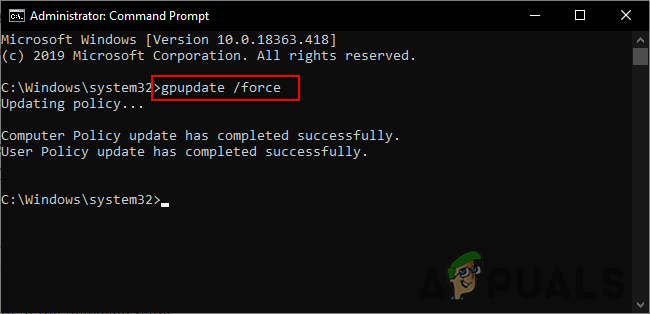
- However, if it does not update automatically, then you need to force update it. Search for CMD in the Windows search feature and run it as an administrator.
- Type the following command in Command Prompt (Admin) window and press Enter.
gpupdate /force
Force update the group policy - You can always enable the Family Options area again by changing the toggle option to Not Configured or Disabled in step 3.
Method 2: Using the Registry Editor
Another method for hiding the Family Options area is by using the Registry Editor. This does a similar job as the Group Policy method does. However, if you already used the Local Group Policy Editor method, then it will automatically update the keys and value for this specific setting. For Windows Home users, this is also the only available method for hiding the Family Options area. Try following the below steps carefully for configuring the setting:
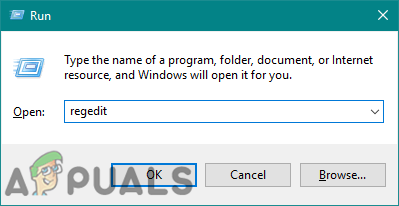
- Press the Windows + R key together to open a Run dialog box. Now type “regedit” and press the Enter key to open the Registry Editor. If prompted by the UAC (User Account Control) dialog, then click on the Yes button.
Opening the Registry Editor - You can also create a Registry backup before making any new changes. Click on the File menu and then choose the Export option. Now name the file and select the location for it. Click on the Save button to save it.
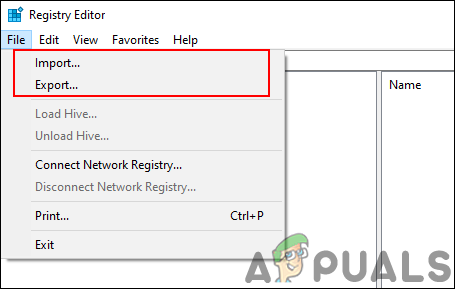
Creating a Registry backup Note: You can recover a backup by clicking on the File > Import option and then selecting the file that you previously created.
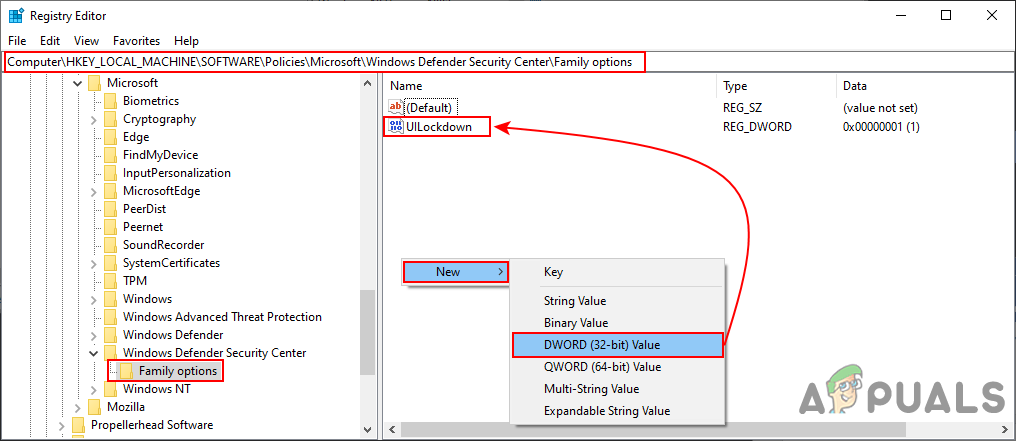
- You need to navigate to the following path in the Registry Editor window:
HKEY_LOCAL_MACHINE\SOFTWARE\Policies\Microsoft\Windows Defender Security Center\Family options
Note: If some keys are missing, you can create them by right-clicking on the available key and choosing the New > Key option.
- Right-click on the right pane of the Family options key and then choose the New > DWORD (32-bit) Value option. Now name the key as “UILockdown “.
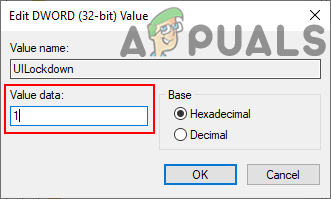
Creating a new value - Double-click on the UILockdown value to open it. Now change the value data to 1.
Changing the value data - Finally, after making all the changes, make sure you reboot your computer to apply these changes.
- You can always enable the Family Options area by changing the value data to 0. You can also simply remove the UILockdown value from the Registry Editor to enable it back.