How to Fix Google Voice Couldn’t Place your Call
Placing calls through the Google Voice app is really easy and without any hassles. However, there are times when you are prompted with an error message that prevents you from making the call that you wish. The “Google Voice couldn’t place your call” error message is one of those issues which pops up when you are trying to place a call through the Google Voice app.
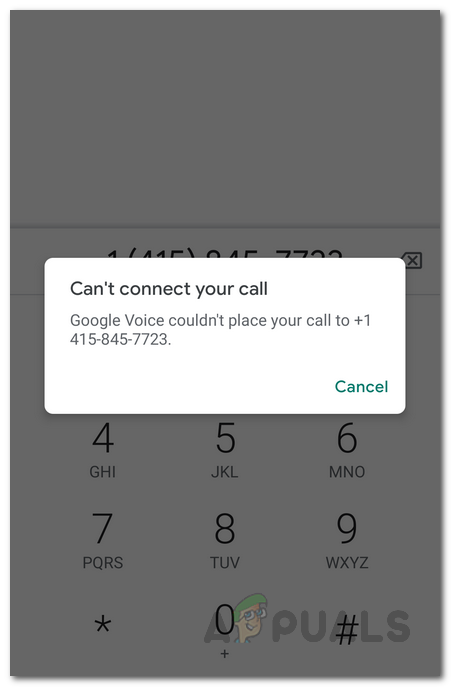
As it turns out, the error message in question suggests that the Google Voice app is not able to put the call through. This is something that can be caused by your app’s data settings that decides how the call is made. However, that may not always be the case and in certain scenarios, other things may be at play. For understanding this in a better way, let us have a quick look at the possible causes of the error message.
- Google Voice App Files — In some cases, the app may not be able to place your calls if your app is not up to date and lacks important updates. In addition, the temporary cache files can also contribute to this error message. Thus, in such a scenario, you have the choice of clearing your app’s cache followed by an update if the former doesn’t get the issue resolved.
- Data Settings — The data settings on the app that you have chosen are responsible for choosing how the call is placed. Thus, if you are using the wrong data settings on your app, it will most likely result in an error message as Google Voice won’t be able to place the call properly.
With that out of the way, at this point, we are aware of what could be potentially causing the issue. So, without further ado, let us get into the different solutions that you can use to get rid of the error message.
Change Data Settings
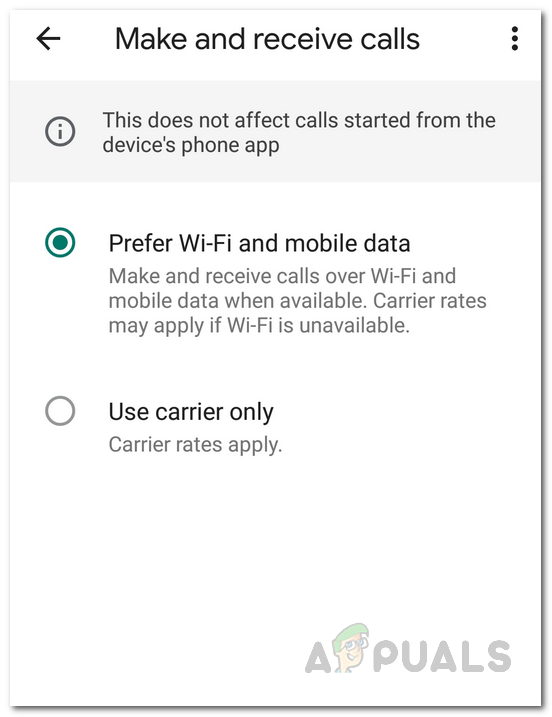
The first thing that you should do when you face the error message in question is to make sure that your data settings on the app are correct. This usually involves ensuring that you have WiFi calls enabled from your settings so that the Google Voice app can prefer making calls over the WiFi network instead of using your carrier. Keep in mind that this doesn’t mean you won’t be able to make calls through your mobile data. It just gives preference to your WiFi network and mobile data when it’s available over your carrier. To do this, follow the below instructions:
- First of all, open up the Google Voice app.
- Tap on the Menu button found in the top-left corner.
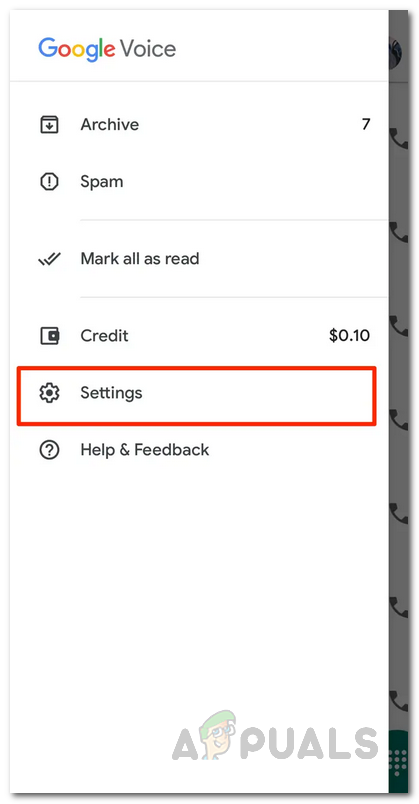
Google Voice Menu - From the menu, tap on Settings.
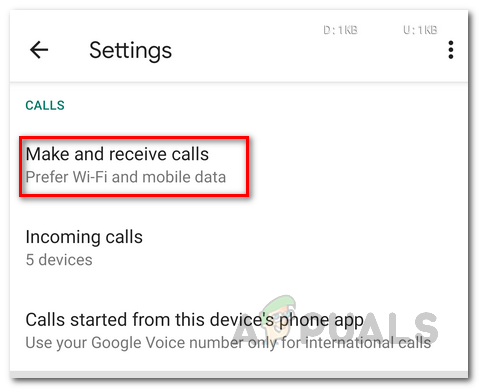
- On the settings screen, tap on the Make and receive calls option under Calls.
Google Voice Settings - There, choose the Prefer Wi-Fi and mobile data option.
Changing Calls Settings - See if that resolves the issue.
Clear Google Voice App Cache
As it turns out, every app uses temporary files that are saved when you open up the app for the first time. They’re basically used for storing general app settings. In some cases, certain issues can arise when you are dealing with damaged cache files. A quick and easy fix here is to simply clear the cache. This is totally harmless and you won’t lose any of your data. The cache files are generated automatically when you open up the app the next time. To do this, follow the instructions down below:
Android
- On your Android phone, open up the Settings app.
- There, tap on the Apps option. You might have to tap on Installed Applications here but this depends on your smartphone. You can alternatively go to Storage > Other Apps.

Android Settings - From the list of apps shown, find Google Voice and tap on it.
- This will take you to the App Info screen. Here, tap the Storage option.
- Finally, tap on the Clear Cache button. This will remove the app’s cache.
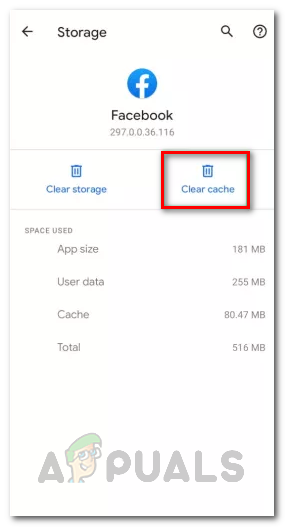
Clearing Cache on Android - Try placing a call again to see if it works.
iOS
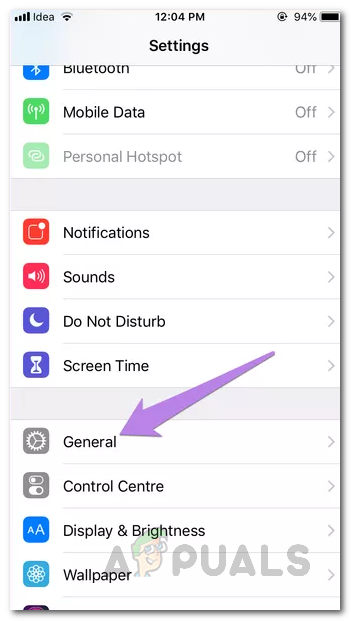
- On your iPhone, open up the Settings app.
- There, tap on the General option.
iOS Settings - On the General settings screen, tap on the iPhone Storage option.
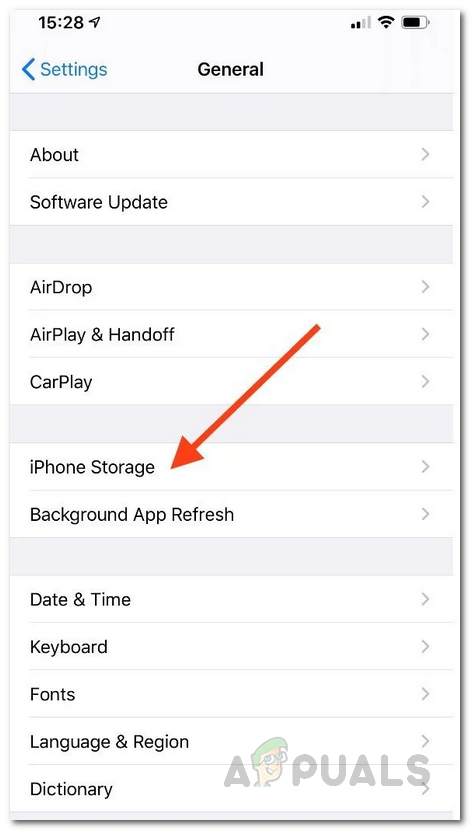
iOS General Settings - This will take you to a list of all the apps installed. Locate Google Voice and tap on it.
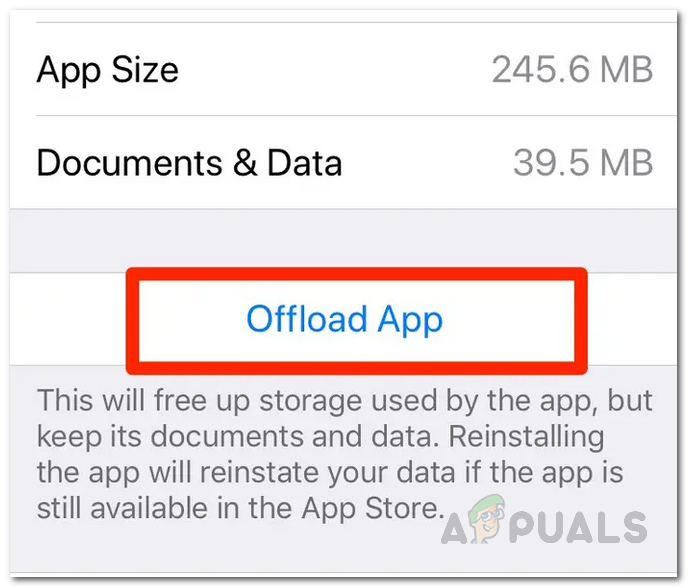
- There, click on the Offload App option and then try placing a call again.
Clearing Cache on iOS
Update Google Voice App
Running an outdated version of an app is never a good idea. Updates bring a lot of new features and often change certain aspects of the app which is why if you don’t keep your apps up-to-date, they might not function as intended. This also includes bug fixes that contribute to making sure your app runs without any issues. Therefore, if you haven’t updated the Google Voice app in a while, there is a good chance that the issue is being caused by outdated files and all you need to do is simply update the app. This has reportedly worked for several users who were running an outdated version and were back on track the moment they installed the latest updates available.
So go ahead and check for any updates to the Google Voice app from your respective store to make sure that you are not running on an older version. If there is an update available, install it and then see if the issue persists.


yes thank you- this worked for me on an mini ipad i have.