[FIXED] Steam Image Failed to Upload
The Steam client may fail to upload images on Steam servers if the client’s installation itself is outdated. Moreover, the corrupt download cache of the client or the wrong configuration of the Family settings of the Steam may also cause the issue at hand.
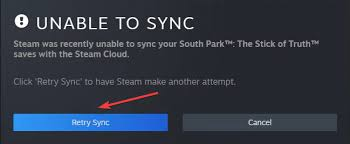
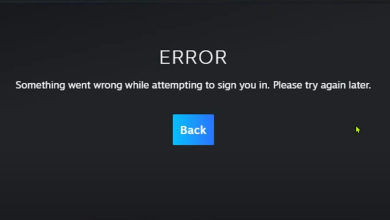
The user encounters the error when he tries to upload an image to Steam (in chat, guide, or profile picture) but fails to do so with the following type of message.

Before moving on with the solutions, check if retrying to upload the image 4-5 times (you may click and hold the Upload button, just not click) clears out the issue. Also, check if uploading a different image lets you upload (if so, then the problem is with the image). Moreover, make sure you are not running out of space on the Steam server. Furthermore, check if uploading the image at the business time of Seattle Valve HQ (not at night time) solves the issue.
Solution 1: Update the Steam Client to the Latest Release
The Steam client may fail to upload images to the servers if its installation is outdated as it can create incompatibility between the client and server. In this context, updating the Steam client to the latest release may solve the problem.
- Launch the Steam client and in the menu bar, expand Steam.
- Now, in the menu shown, click on Check for Steam Client Updates and if an update is available, apply the update.

Check for Steam Client Updates - Then relaunch the Steam client and check if the images can be uploaded to Steam.
Solution 2: Logout and Log Back into the Steam Client
The temporary glitch between the Steam client and its servers may be causing the ‘image failed to upload’ issue. In this context, logging out of the Steam client and logging back into it may clear the glitch and thus solve the problem.
Similar Articles: How To Fix Steam Disk Write Error
- Launch the Steam client and in the menu bar, expand Steam.
- Now select Change User and in the dialogue box, click on Logout.
- Then close the Steam client and make sure to end all of its related processes in the Task Manager.

Logout of the Steam Client - Then relaunch the Steam client and check if it is clear of the ‘failed to upload’ issue.
Solution 3: Change Your Status to Online
You may fail to upload an image to the Steam servers if your status is set as offline. In this context, setting your status as “online” may solve the problem.
- Launch the Steam client and expand the Friends menu.
- Now select Online and relaunch the client to check if an image can be uploaded to Steam.

Change Your Status to Online in Steam - If the issue persists, check if setting your avatar to official and then reverting to the custom avatar resolves the upload issue.
Solution 4: Use the Big Picture Mode
If you cannot upload images in the Steam client, then using the Steam chat in the Big Picture mode may let you upload images and thus solve the problem.
- Launch the Steam client and near the top right of the client window, click on Big Picture.

Open the Big Picture Mode in the Steam Client - Now open the Steam chat and check if you can upload images to Steam.
Solution 5: Clear Download Cache of the Steam Client
The Steam client may show the ‘failed to upload’ issue if the download cache of the Steam client is corrupt. In this scenario, clearing the download cache of the Steam client may solve the problem.
- Launch the Steam client and open its menu.
- Now select Settings and in the left pane, select Downloads.
- Then, in the right pane, click on the Clear Download Cache button and then confirm to delete the cache.

Clear Download Cache of the Steam Client - Now relaunch the Steam client and check if it is operating fine.
Solution 6: Enable/Disable VPN and Proxy
The ‘failed to upload’ message may be shown by the Steam client if the network connection (or proxy/VPN) of your system is blocking access to a source essential for the operation of the Steam client. In this context, using another connection (or enabling/disabling VPN/proxy) may solve the problem.
- Exit the Steam client and make sure no process related to it is operating in the Task Manager of your system.
- Then click Windows, type: Proxy, and open Proxy settings.

Open Proxy Settings - Now disable the following options:
Automatically Detect Settings

Use Setup Script

Manual Proxy Setup

Disable Proxy in Windows - Then relaunch the Steam client and check an image can be uploaded to Steam.
- If not, then check if using a VPN client lets you upload images to the Steam servers.
- If the issue persists, then check if using another network (e.g., hotspot of your phone) resolves the image upload issue.
Solution 7: Disable Family View of the Steam Client
Family members can share games while keeping their games separate but this setting may break the ability of the users to upload images to the Steam servers. In this scenario, disabling the Family View may solve the problem.
- Launch the Steam client and expand the Steam menu.
- Now select Settings and in the left pane, steer to the Family tab.
- Then, in the right pane, select Manage Family View and make sure to disable the Family View.

Open Manage Family View in Steam - Now relaunch the Steam client and check if the image issue is resolved.
- If the issue persists, then check if enabling the ‘Friends, Chat, and Groups’ and ‘My Online Profile, Screenshots, and Achievements’ options resolve the upload issue.

Enable ‘Friends, Chat, and Groups’ and ‘My Online Profile, Screenshots, and Achievements’
Solution 8: Join the Beta Program of the Steam Client
To add new features and hunt down the reported bugs, Steam continuously releases new updates to the client. If you are still encountering the issue (even with the most updated version of the client), then joining the beta program of the Steam client may clear out the bug and thus solve the problem.
- Launch the Steam client and in the menu bar, expand Steam.
- Now select Settings and under Beta Participation, click on Change (in the Account tab).

Click on the Change Button for the Beta Participation of Steam - Then expand the dropdown of Beta Participation and choose Steam Beta Update.

Select Your Beta Participation Option - Now apply your changes and click on the Restart Now button.
- Upon relaunch of the client, check if the images can be uploaded to Steam.
- If the issue persists, then check if opting out of the Beta Participation (by repeating steps 1 to 4 but at step 3, choose Opt-Out of All Beta Programs) resolves the upload issue.
Solution 9: Rename and Resize the Image File
You may encounter the issue at hand if the size of the image file or its image name (or its path) has an unsupported character (or the Steam server “thinks” that the same file has been uploaded, although it is not shown by the server). In this scenario, resizing or renaming the image file may solve the problem.
- Exit the Steam client and open your screenshots folder.
- Now copy the image file and paste it into the same folder.
- Then rename the pasted file and add _vr at the end of the file name (e.g., 20210417914_1.jpg to 20210417914_1_vr.jpg).
- Then check if you can upload the image file to the Steam servers.
- If not, place the image file in another directory in the screenshots folder and check if you can upload the file from that directory.
- If not, then rename the file (for testing, try to keep as short as possible) and try again to upload the image file.
- If the issue persists, click Windows, type: Paint, and open Paint.

Open Paint - Now expand the File menu and select Open.

Open the Problematic Image in Paint - Then navigate to the problematic image file and double-click it.
- Now, in the paint window, click on Resize (in the Image section) and select Pixels.

Click Resize in Paint - Then (for testing), lower the pixels as suits you and apply the changes.

Resize Image in Paint - Now save the file and check if the image can be uploaded to the Steam servers.
- If that did not do the trick, then open the image again in the Paint and click on Resize.
- Now select Pixels and uncheck the box of Maintain Aspect Ratio.

Disable Aspect Ratio and Set the Same Horizontal & Vertical Value - Then, enter the same value in the Horizontal box and Vertical box (e.g.,250) and apply your changes.
- Now save the file as Jpeg and then check if Steam is clear of the image failed to upload issue.
If the issue persists, then check if uploading the image in the PNG (you may use Paint>> Save as>> PNG to convert the image) format solves the problem.
Solution 10: Use a Web Browser to Upload Images
If you are still not able to load images by using the Steam client, then using a web browser to upload the images may do the trick for you.
- Launch a web browser (e.g., Chrome) and steer to the Steampowered website.
- Now log in using your credentials and make sure the website starts from https:// (not http://). If you are using a browser’s extension to force HTTP (or HTTPS) on all pages, then disable that extension (like HTTPS Everywhere).

Open the https Version of the SteamPowered Website - Now check if you can upload images (either to chat, guide, etc.) to the Steam servers.
- If the upload fails, refresh the web page (by pressing the F5 key) and try again to upload the image.
- If the issue persists, then retry the upload but keep an eye on the URL of the page in the address bar. If a small shield icon is shown at the end of the URL, then click on the shield icon and click on View All Content (or Load Unsafe Scripts).

Load Unsafe Scripts of the Steam Website
If that did not do the trick, then check if trying another browser (preferably Edge or IE) solves the image upload problem.
If the issue persists, then check if using an upload utility (like SteaScree) resolves the upload issue. If that did not do the trick, you may upload the image on an external website and share its link in the chat. If all else fails, you may reinstall the Steam client (but make sure to back up the essentials and remove all the traces of the previous installation) to solve the upload issue.


Family View was the problem, disabling it solved but I want to use it while Family View activated…