Fix: Windows Update Error Code 80070308
Naming all Windows update error codes would definitely require a full page just name them all one by one and the methods for solving one or the other differ greatly. The biggest problem regarding Windows update error codes is that the error occurs because of different causes in different scenarios and you never know which one applies to your situation.
Regarding the error code 80070308, we have gathered several working solutions and put them together in an article to show that the problem can be solved easily. Make sure you follow the entire article throughout various methods.
Solution 1: Use System Restore
This method sounds like a last resort but restoring your computer to a restore point just before the error started to occur will definitely be an easy process considering the fact that plenty of restore points are created automatically as soon as you install something.
Make sure you restore your computer to a restore point before the error started to occur which will bring back the original version without errors.
In order to see how to perform this operation, check out our article on the topic.
Solution 2: Try the Following Registry Tweak
The following registry tweak is quite easy to process and it only requires a fraction of your time. What is even better is the fact that this method has helped countless users who were struggling with the error code! This is one of those error code-specific methods which simply works for this one.
Before proceeding with this solution, it’s recommended that you close all of your running programs and it’s advisable to create a backup of your registry just in case something goes terribly wrong while you edit it. Backup your registry by following the instructions in our article.
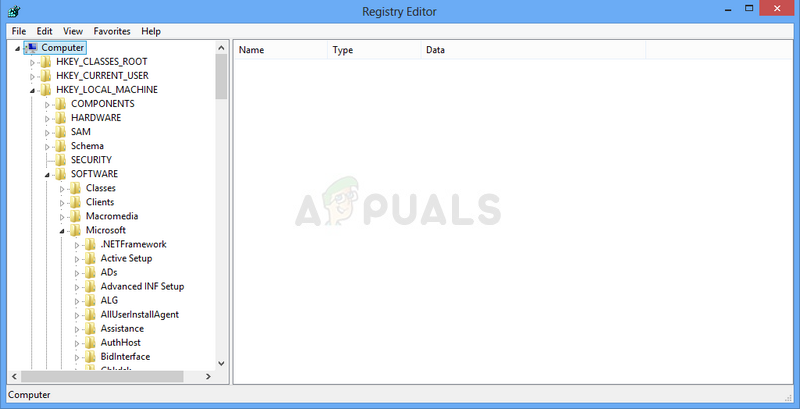
- Open the Registry Editor by typing “regedit” in either the search bar or the Run dialog box. Navigate to the following key in Registry Editor:
HKEY_LOCAL_MACHINE >> Components
- Locate the REG_DWORD called “pendingrequired” at the right side of the window, right-click on it and choose Rename. Rename it to something like “pendingrequired.old” and confirm any security dialog boxes which might show up.
- Check to see if the problem with Windows Update is solved after restarting your computer.
Note: Some users have reported that the Components key was missing from HKEY_LOCAL_MACHINE. This can be worked through easily by actually adding this key to the registry manually. That can be performed by following the steps below:
- Open the Registry Editor by typing “regedit” in either the search bar or the Run dialog box. Navigate to the following key in Registry Editor:
HKEY_LOCAL_MACHINE
- Click on the File button at the top menu and choose the Load Hive option. In the window which appears, navigate to the location presented below and load the file located in in the config folder with the name “COMPONENT”.
%windir% >> System32 >> config (usually C >> Windows >> System32 >> config)ž
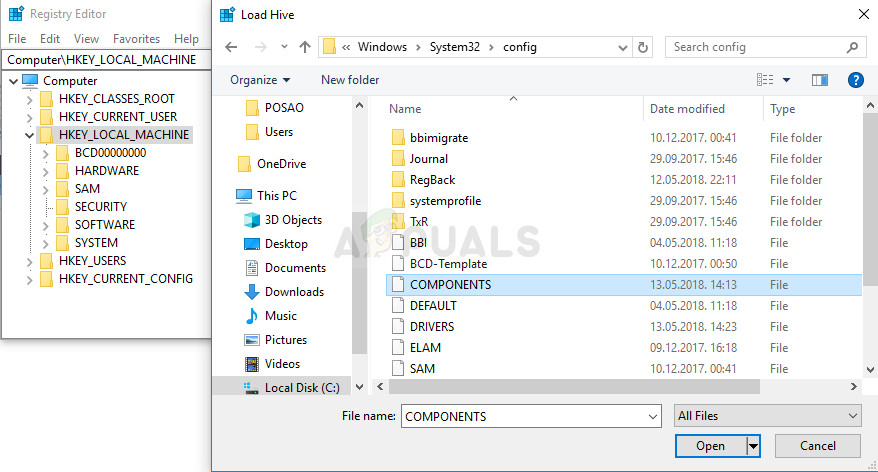
- After that, you can follow the beginning of the solution to get rid of the key.
Solution 3: Fix Your .NET Framework Installation
Having a properly running and the latest version of .NET Framework if vital if you want all of your updates to install properly without throwing errors such as this one. However, you need to make sure these prerequisites are matched before running the update by following the steps below.
Navigate to this link and click the red download button in order to download the latest version of Microsoft .NET Framework. After the download has finished, locate the file you downloaded and run it. Note that you will need to have constant access to the Internet.
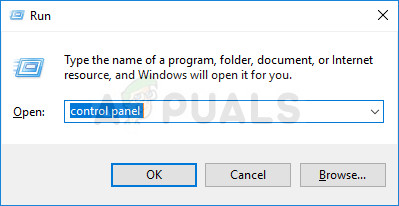
- After installing the latest version, it’s time to check its integrity. On your keyboard, use the Windows Key + R key combination to open the Run dialog box.
- Type in Control Panel and click OK in order to open it.
- Click the Uninstall a Program option and click Turn Windows features on or off. Make sure you locate the .NET Framework 4.x.x entry and make sure it’s enabled. (x.x. is for the version you installed in the beginning.
- If the check box next to .NET Framework 4.x.x is not enabled, enable it by clicking the box. Click OK to close the Windows Feature window and reboot the computer.
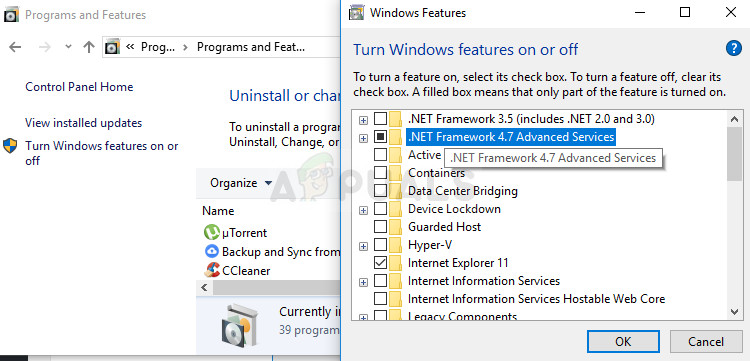
- If .Net Framework 4.x.x is already enabled, you can repair .Net Framework by clearing the box and rebooting the computer. After the computer has restarted, re-enable .Net Framework and restart the computer again.
Note: If you are using a version of Windows other than Windows 10, the latest version may be different which you should also install.
Solution 4: Install Certain Fixes and Manual Updates
If you are struggling with this problem for a long time, it’s highly likely that you are behind on plenty of updates and that is why it’s important that you follow the instructions below carefully. Make sure there are no running updates regarding third-party apps on your computer and that there are no resource-heavy processes running.
If you are running Windows 7, make sure you disable the automatic updates feature by following the steps below:
- Click on the Start menu and open Control Panel by searching for it. Alternatively, you can click on the gear icon in order to open settings if you are using Windows 10.
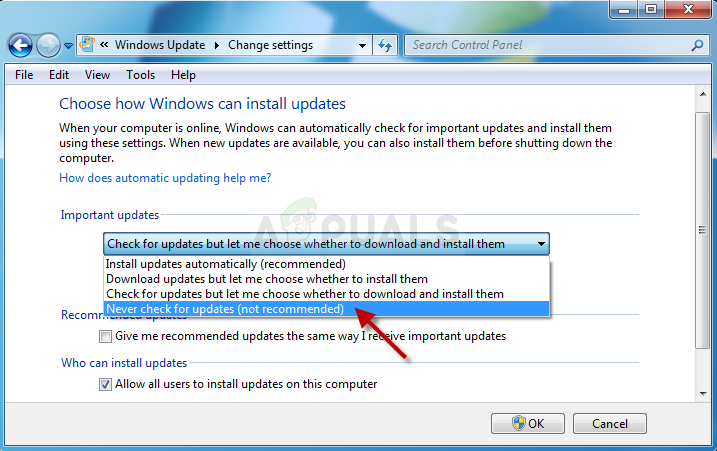
- In Control Panel, select to View as: Large Icons at the top right corner and click on Windows update.

- At the left side of the screen under the list of various settings, click on Change settings and look under Important updates. Click on the dropdown list and choose the Never check for updates (not recommended) option.
Now, let’s get to business.
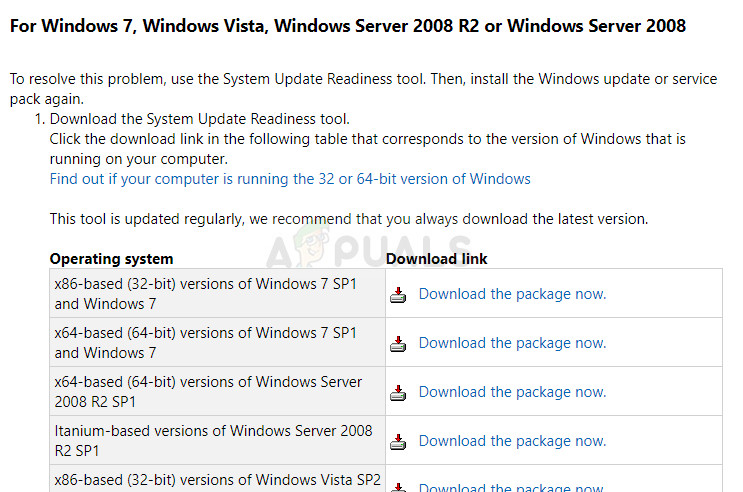
- If you are using Windows 7 or Windows Server 2008, download the System Update Readiness tool from this link, save it to your PC, run it, and wait for it to finish with its business. Note that the process will likely take several hours, depending on the current state of your PC.
- If you are using Windows 8, 8.1 or 10, you can directly use the DISM tool which contains the CheckSUR functionality which will also scan and run certain repairs regarding the Windows Update functionality. Check out our article on how to run DISM.
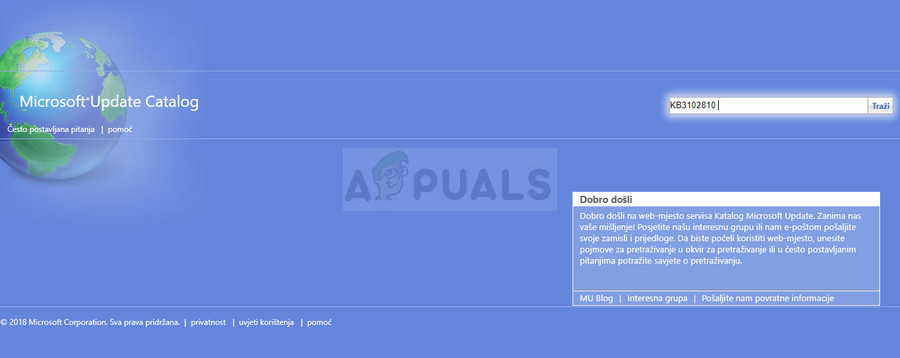
- The next step is to install several updates from the Windows Update Catalog. This downloads bring several fixes to your computer and it’s quite easy to install them. Here are their KB numbers you will need to search for them: KB3102810 and KB3145739.
- Open the Microsoft Update Catalog and perform a search by clicking on the search button at the top right corner.
- Click on the Download button to the left and choose the architecture of your PC (32bit or 64bit). Make sure you know the architecture of your PC’s processor before choosing this option.
- Run the file you downloaded and follow the instructions on screen carefully in order to complete the updating process. Do the same for both files needed to be installed.
- After the update has finished, make sure you restart your computer and try to run Windows Update again. You will again need to stay patient for the process to complete.
Solution 5: Reset Windows Update Components
The longest and the most advanced solution is almost always the most secure one and it delivers is a large percentage of similar scenarios.
Since you are going to edit the registry, we recommend you check out this article in order to safely backup your registry to prevent further problems. You can then follow the steps in Solution 2 of 0x800706b5 to reset Windows Update Components.
Solution 6: Get Rid of Norton Antivirus
Free antivirus tools can be quite helpful and they can do their job protecting your computer but sometimes they just don’t get along well with other things on your computer. For example, some users have reported that it was the free version of Norton which caused the same error on their computers and the only way to solve it was to uninstall Norton. Follow steps in this uninstall antivirus software to get rid of your AV.


