Fix: Windows Update Error 800B0100
Various Windows update error codes are hard to even put down on a list since there are quite many of them and they often differ greatly by the thing which causes them and the method which needs to be performed in order to get rid of the error.
This specific error is somewhat obscure and it often occurs on somewhat older versions of Windows such as Windows 7 and Windows XP. The error itself has somewhat complicated methods as its solutions but various users online confirmed the validity of these methods and we highly recommend you follow through the entire article and try out these methods yourself before giving up.
Solution 1: Use the Built-in Windows Update Troubleshooter
Windows comes prepared when it comes to solving issues related to different aspects of your computer. Troubleshooters which are preinstalled on your computer are not certain to solve your issue but they can definitely help you at least to figure out what the problem is so that you can possibly submit it to Microsoft or that you can explain to someone more experienced.
Additionally, if the problem’s solution is obvious, troubleshooter may suggest a solution or it may even try to fix the problem automatically which is a great thing, especially for inexperienced users. Also, there are users who confirmed that this is the only thing they needed to do to solve the problem.
- Open the Settings app by clicking on the Start button and then the gear icon just above. You can also search for it.
- Open the Update & Security section and navigate to the Troubleshoot menu.
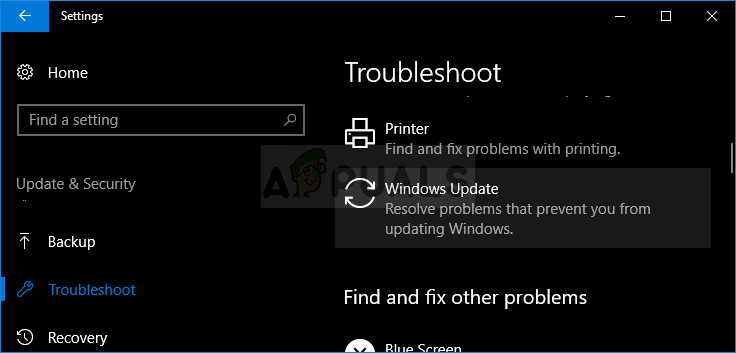
- First of all, click on the Windows Update option and follow the instructions on screen to see whether there is something wrong with Windows Update services and processes.
- After the troubleshooter finishes, navigate to the Troubleshoot section again and open the Internet Connections troubleshooter.
- Check to see if the problem is solved.
Older Versions of Windows:
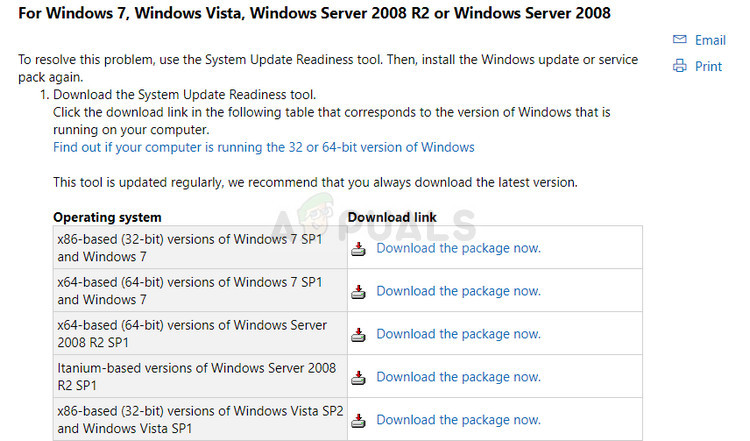
Since Windows 7 does not have the Settings app as well as older versions of Windows OS, you can download the Fixit troubleshooter by navigating to this link and choosing the Windows 7 download. Run the file you downloaded and follow the instructions on-screen. Unfortunately, the support for this tool was cancelled for older versions of Windows OS.
Solution 2: Consulting the Log File
The second method on the list is probably one of the longest but it has yield success to many users who stumbled upon it in a blog post. However, the method is somewhat lengthy to undertake and it requires some advanced troubleshooting. However, we will walk you through step by step below:
- Navigate to this link in order to run the Microsoft Update Readiness Tool.
- After the scan has completed, navigate to the C >> Windows >> logs >> CBS >> Checksur.log file, open it and look for lines looking similar to these ones:
Unavailable repair files:
servicing\packages\Package_for_KB978601~31bf3856ad364e35~amd64~~6.0.1.0.mum
servicing\packages\Package_for_KB979309~31bf3856ad364e35~amd64~~6.0.1.0.mum
servicing\packages\Package_for_KB978601~31bf3856ad364e35~amd64~~6.0.1.0.cat
servicing\packages\Package_for_KB979309~31bf3856ad364e35~amd64~~6.0.1.0.cat
- These are the files which are corrupt and which need to be copied in the %systemroot\Windows\Servicing\Packages folder. In order to do this, you will first need to take ownership of the folder so that you can copy and paste things into it.
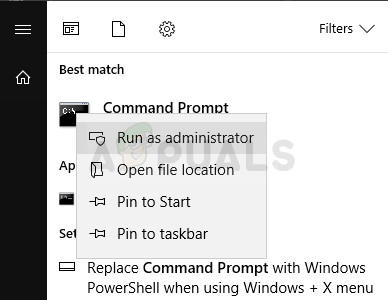
- Search for “Command Prompt”, right-click on it, and select the “Run as administrator” option. Copy and paste the following commands and make sure you click Enter after each one:
takeown /F c:\Windows\Servicing\Packages /D y /R
cacls c:\Windows\Servicing\Packages /E /T /C /G “UserName”:F
- Now you will need to download the missing files which you can locate from the Checksur.log file you opened before. In the example text we provided, these files would be KB978601 and KB979309. Copy the KB (Knowledge Base) number together with “KB” letters as well (e.g. KB978601).
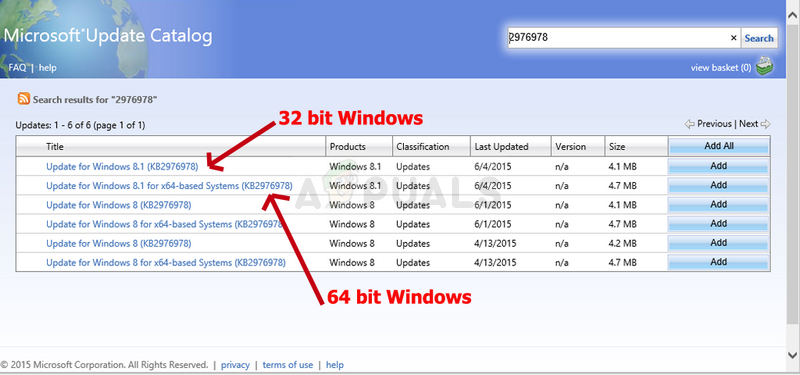
- Open the Microsoft Update Catalog and perform a search by clicking on the search button at the top right corner.
- Click on the Download button to the left and choose the architecture of your PC (32bit or 64bit). Make sure you know the architecture of your PC’s processor before choosing this option.
- You will need to repeat the same process for each different KB number in the Checksur.log file. You will also need to unpack the files you downloaded by typing in the following command in Command Prompt:
Expand -F:* UpdateKBXXXX.msu x:\DestinationDirectory
- The DestinationDirectory is chosen by you. After this process, you will be able to see the UpdateKBXXXX.cab which also needs to be expanded by the following command:
Expand -F:* UpdateKBXXXX.CAB x:\DestinationDirectoryCAB
- Inside of this cab you should be able to locate two files: update.mum and update.cat The same goes for no matter how many problems Checksur.log mentions. You will need to rename the files exactly as in the log file. For example, the update.mum file for the KB978601 update should be named:
Package_for_KB978601~31bf3856ad364e35~amd64~~6.0.1.0.mum
- Repeat the same process for all files and you will need to place them in a proper directory. The directory is also shown in the log file. For example, the full location to the update.mum file for the KB978601 file after you rename it as above should be:
servicing\packages\Package_for_KB978601~31bf3856ad364e35~amd64~~6.0.1.0.mum
- After you have performed this, restart your computer and check to see if your problem is solved.
Solution 3: Run an In-Place Update
This method is going to be quite easy for users who have the CD key and the original DVD for the operating system they use and this method is only going to update and replace system files and settings without messing with your applications and personal data. You can also perform an update to Windows Vista or Windows 7Follow the instructions below for more info:
- Start the computer by using the current OS you have installed on your PC and insert the new DVD for which you have the key.
- If Windows is able to automatically detect the DVD, the Install now screen will appear and you can immediately click on Install now. However, if that is not the case, you should click the Start menu icon, type “Run” and click Enter. Type in “X:\setup.exe” and click OK where X is the drive letter of the DVD drive. Click on Install now either way.
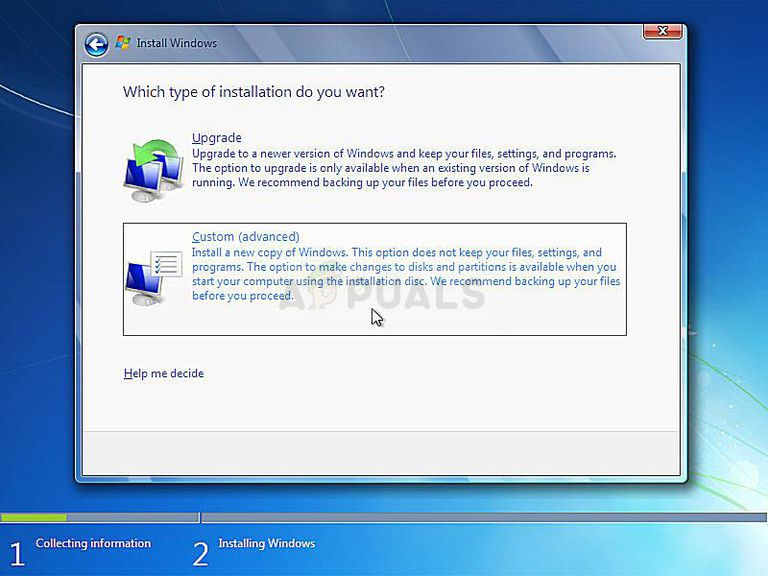
- Follow the instructions on-screen until the “Which type of installation do you want?”. Click on Update the current operating system to “Operating system you inserted”.
- Check to see if the problem is solved.
Solution 4: Reset Windows Update Components
This solution helped plenty of users deal with their Windows 10 Update issue so it’s recommended that you check this out. This method may turn out to be sort of advanced for casual users, but if you follow the instructions carefully, you may fix your issue in no time.
Since you are going to edit the registry, we recommend you check out this article in order to safely backup your registry to prevent further problems.
You can then follow the steps in Solution 2 of 0x800706b5 to reset Windows Update Components.


