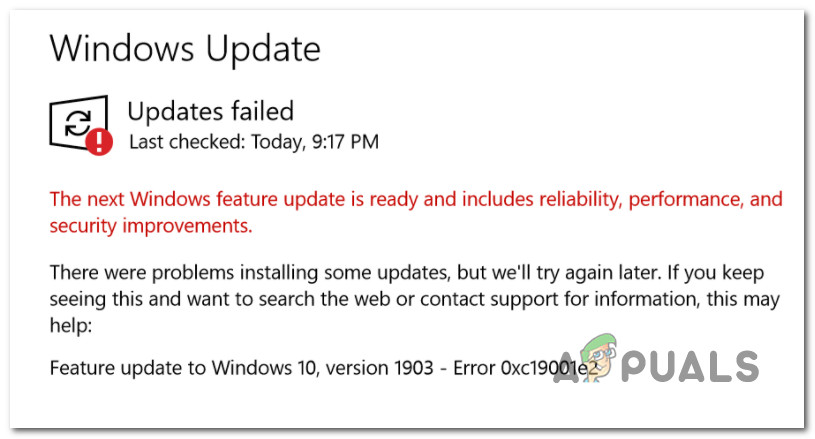
Fix Windows Update Error 0XC19001E2 in Windows 10 (Fix)
Some Windows 10 users are reporting that every attempt at installing a few particular Windows feature update (version 1903 and version 1909) ends with the error 0XC19001E2. In most cases, the problem is related to a Windows Update glitch or some kind of system file corruption.
After investigating this particular issue thoroughly, it turns out that there are several different underlying issues that might trigger this Windows Update error code. Here’s a list of potential culprits:
- Dell Encryption and Dell Data Security interference – In case you’re encountering this issue on a Dell computer, laptop, or ultrabook, chances are this particular issue is being caused by an interfering service maintained by the Dell Encryption or Dell Data Security programs. To remedy this issue, you’ll need to uninstall the supporting Dell software.
- BitLocker interference – As it turns out, BitLocker is also known to interfere with the installation of certain feature updates on Windows 10. If you’re actively using BitLocker, you should be able to bypass the error by temporarily disabling the encryption layer prior to starting the installation of the pending update.
- Common Windows Update glitch – According to a lot of affected users, this problem will occur due to a common glitch that Microsoft is already aware of. In this case, running the Windows Update Troubleshooter should be enough to fix the problem automatically.
- WU process is stuck in a limbo state – You can also expect to see this error code because one or more essential WU services are stuck in a limbo state. In this case, you’ll need to reset every Windows Update component in order to fix the issue.
- System file corruption – A rare but possible scenario that might cause this issue is some kind of system file corruption that is affecting the WU component. Several users facing the same problem have managed to fix the issue by using the Windows Update Agent to circumvent the issue. In more serious circumstances, you might need to deploy SFC and DISM scans to resolve the corrupted files first.
Now that you are familiar with every potential cause of this issue, here’s a list of verified fixes that other affected users have successfully used to get to the bottom of this error code:
1. Deleting Dell Encryption and Dell Data Security (if applicable)
If you’re encountering this issue on a Dell computer, laptop, or ultrabook, chances are this particular issue is being caused by an interfering service maintained by the Dell Encryption or Dell Data Security programs.
As it turns out, there is one service that is shared between these two applications that is known to conflict with the installation of the 1903 feature update.
Several Dell users that we’re also encountering the 0XC19001E2 error code while attempting to install a feature update, have confirmed that the issue was resolved and pending Windows Update was finally installed after they went through the trouble of uninstalling both Dell Encryption and Dell Data Security.
If you find yourself in this particular scenario, follow the instructions below to uninstall Dell Encryption and Dell Data Security and ensure that you’re not leaving behind any remnant files:
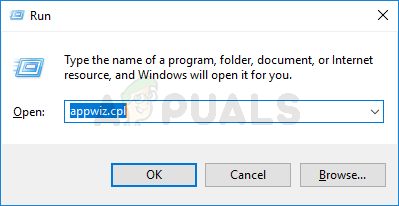
- Press Windows key + R to open up a Run dialog box. Inside the text box, type ‘appwiz.cpl’ and press Enter to open up the Programs and Features menu. When you’re prompted by the UAC (User Account Control), click Yes to grant admin access.
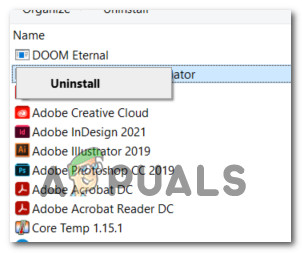
Opening the Programs and Features menu - Inside the Programs and Features menu, scroll down through the list of installed programs and locate the two problematic programs Dell Encryption and Dell Data Security.
- Once you locate them, right-click on the first entry and choose Uninstall from the context menu. Next, follow the on-screen prompts to complete the uninstallation of the first Dell supporting software.
Uninstalling the problematic Dell suite - After the first tool is installed, go ahead and repeat the step above with the remaining until both are completely removed from your system.
- Once both Dell Encryption and Dell Data Security are uninstalled, navigate to the following location and make sure that there are no remnant files still present that might interfere with the operation:
C:\Program Files (x86)\Dell\Dell Data Protection
- Finally, repeat the update that was previously triggering the 0XC19001E2 error and see if the problem is still occurring after you performed the modifications above.
If this scenario was not applicable or you have already uninstalled the problematic Dell supporting software to no avail, move down to the next method below.
2. Pause Bit-Locker (if applicable)
As it turns out, another fairly common cause that might cause the 0XC19001E2 error when attempting to install a feature update is Bitlocker.
This feature allows you to encrypt the entire system drive to protect your personal files, but it’s known to sometimes conflict with the installation of certain Windows Updates.
Several users dealing with the same problem have confirmed that the problem was finally resolved after they temporarily paused Bit-Locker and installed the feature update before resuming the encryption feature.
If you’re currently using BitLocker on the affected computer, follow the instructions below to temporarily pause it:
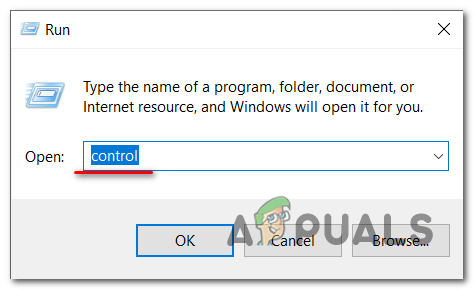
- Press Windows key + R to open up a Run dialog box. Next, inside the text box, type ‘control.exe’ and press Ctrl+ Shift + Enter to open up Control Panel with admin access. At the UAC (User Account Control), click Yes to grant admin access.
Opening the Control Panel window - Inside the Control Panel window, access the System and Security tab from the list of available options.
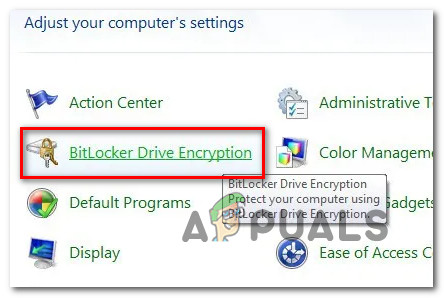
- Next, from the System and Security menu, click on BitLocker Drive Encryption.
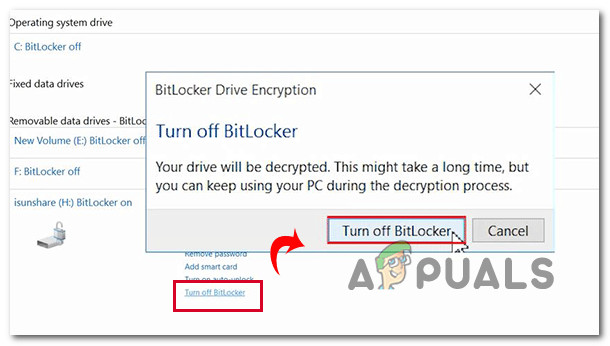
Opening the Drive Encryption menu - Next, you’ll see a list of all partitions. Look for the affected drive and click on the Turn off Bitlocker hyperlink. Next, confirm the operation by clicking on Turn off BitLocker.
Turning off the Bitlocker - When you are prompted by the UAC (User Account Control), click Yes to grant admin access.
- After BitLocker has been disabled for the affected partition, go ahead and attempt to install the pending update once again and see if the issue is now fixed.
If you aren’t using BitLocker you already tried this fix to no avail, move down to the next potential fix below.
3. Running the Windows Update Troubleshooter
Now that we’ve eliminated any potential causes that might be triggered by a 3rd party component, let’s start investigating culprits that have to do with your system files.
Before you go into more advanced repair strategies capable of resolving the 0xC19001e2, you should start by verifying if your OS installation is capable of resolving the issue automatically.
Windows 10 includes a lot of built-in repair strategies capable of resolving the majority of failures to install a pending Windows 10 update.
Some users that we’re facing this issue have managed to resolve the problem and install the pending update by running the Windows Update troubleshooter and applying the recommended fix.
Note: The Windows Update Troubleshooter contains dozens of repair strategies that will be applied automatically if some type of inconsistency is found. If the scan finds a viable repair strategy, the utility will automatically recommend a viable fix that you can apply with a simple click.
Follow the instructions below to deploy the Windows Update troubleshooter to resolve the 0xC19001e2 error code on Windows 10:
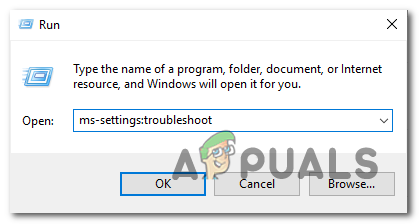
- Start by opening up a Run dialog box by pressing Windows key + R. Next, inside the text box, type “ms-settings-troubleshoot” and press Enter to open up the Troubleshooting tab of the Settings app.
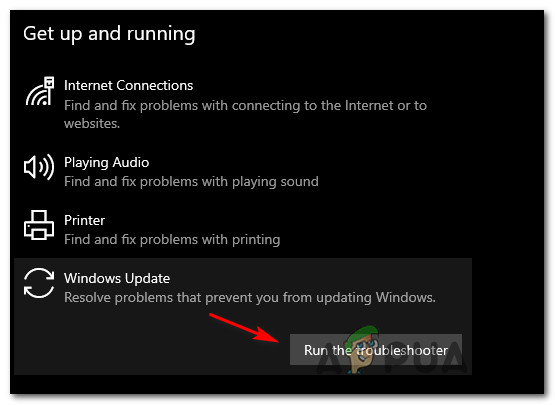
Opening the Troubleshooting tab - Once you get to the Troubleshooting tab, go to the right section of the Settings screen then move down to the Get up and running section and click on Windows Update.
- From the context menu of Windows Update, then click on Run the troubleshooter from the newly appeared context menu.
Running the Windows Update troubleshooter - As soon as you start this utility, it will automatically begin to scan your system of any inconsistencies. Wait patiently until the initial scan is complete.
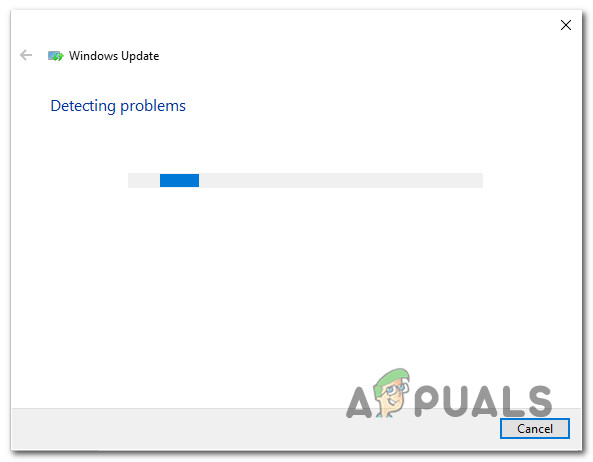
Detecting problems with Windows Update Note: This operation will determine whether any of the repair strategies included with it are a match for the updating problem you’re currently dealing with.
- Once a viable repair strategy is found, you will be presented with a new window in which you can click on Apply this fix to apply the recommended fix.
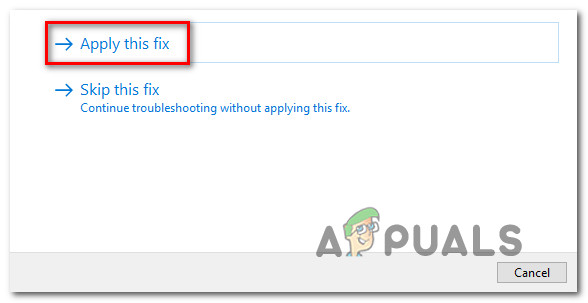
Applying the Fix Note: Depending on the fix that the troubleshooter recommends, you might need to follow a series of additional instructions to enforce the recommended fix.
- After the recommended fix is successfully applied, restart your computer and see if the issue is resolved once the next startup is complete.
If the error code 0xC19001e2 is still occurring when you attempt to install the pending update or the Windows Update troubleshooter didn’t find a viable repair strategy, move down to the next potential fix below.
4. Restart every relevant WU service
If the Windows Update troubleshooter was not able to resolve the 0xC19001e2 error, you’re likely dealing with a persisting bug that is affecting the Windows Update component.
In this case, the best course of action is to deploy the same repair strategies in order to reset every Windows Update component that might be causing issues with your pending Windows updates.
Note: The most common instance that will cause this kind of issue is one or more WU (Windows Update) components that are currently stuck in a limbo state (they’re neither open nor closed).
If this scenario is applicable, you will be able to fix the problem by resetting all WU components that are involved in the updating process.
Follow the instructions below for step by step instructions on how to do so:
- Press Windows key + R to open up a Run dialog box. Then, type “cmd” inside the text box and press Ctrl + Shift + Enter to open up an elevated Command Prompt.
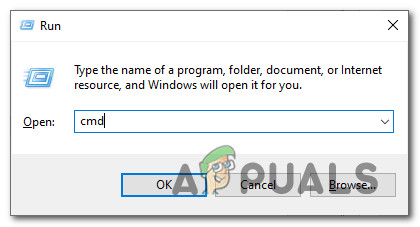
Opening a CMD prompt Note: Once you see the UAC (User Account Control) prompt, click Yes to grant administrative privileges.
- Inside the elevated Command Prompt, type the following commands in order and press Enter after each command to stop all WU-related services:
net stop wuauserv
net stop cryptSvc
net stop bits
net stop msiserver
Note: These commands will successfully stop the Windows Update Services, MSI Installer, Cryptographic services, and BITS services.
- After every relevant service is stopped, run the following commands to clear and rename SoftwareDistribution and Catroot2 folders:
ren C:\Windows\SoftwareDistribution SoftwareDistribution.old
ren C:\Windows\System32\catroot2 Catroot2.old
Note: Renaming these folders with the commands above will essentially ‘convince’ your OS to create new healthy equivalents that will not be affected by corruption.
- Now that the folders have been cleared, run the following commands to re-enable the services that we’re previously disabled:
net start wuauserv
net start cryptSvc
net start bits
net start msiserver
- Finally, restart your computer once again and see if the issue has been resolved at the next computer startup.
If the same 0xC19001e2 error is still occurring even after you followed the instructions above, move down to the next potential fix below.
5. Running SFC and DISM Scans
If refreshing every Windows Update component didn’t fix the issue, you should also consider that some kind of system file corruption is causing the 0xC19001e2 error.
In this case, you should start by running a couple of scans with two built-in utilities – System File Checker (SFC) and Deployment Image Servicing and Management(DISM).
Note: SFC and DISM share some similarities, but we recommend that you run both scans in quick succession in order to improve your chance of fixing the corrupted system files.
The ideal place to start is with a simple SFC scan.
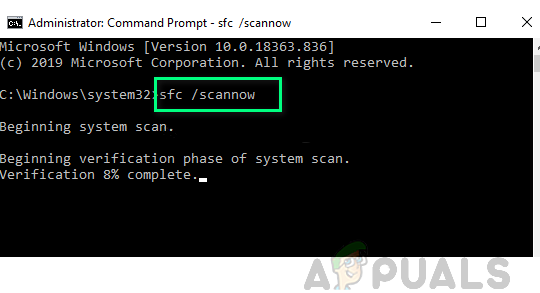
Note: This tool is entirely local and will not require you to be actively connected to the internet.
Important: Once you initiate this procedure, it’s very important to not close the CMD window even if the utility looks like it froze. Wait until the process is complete because interrupting the operation might cause logical errors on your HDD/SSD.
Once the SFC scan is completed successfully, reboot your computer and see if the issue is fixed once the next computer startup is complete by attempting to install the Feature Update once again.
I the same error is still occurring, deploy a DISM scan and follow the on-screen prompts to complete the operation.

Note: This tool uses a sub-component of Windows Update to download healthy equivalents to replace corrupted system files. Due to this, you need to make sure that you have reliable Internet before initiating this operation.
Once the DISM scan has been completed successfully, restart your computer once again and see if the 0xC19001e2 error is now fixed.
In case you’re still dealing with the same issue, move down to the final method of installing the feature update and avoiding the error.
6. Using the Windows Update Assistant
If none of the methods above have worked for you, one last thing you should try is to circumvent the apparition of the error entirely by using the Windows Update Assistant to install the feature update that is causing the 0xC19001e2 error.
A lot of users facing the problem when attempting to install a Windows update have confirmed that using Windows Update Assistant was the only thing that worked for them.
Follow the instructions below to use the Windows Update Assistant to install the failing Windows Update:
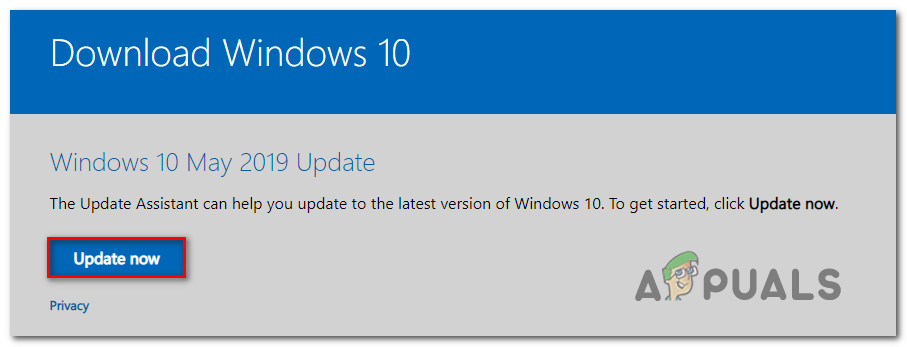
- Visit this link download page of Windows Update Assistant from your default browser and click on Update Now to use the Update Assistant.
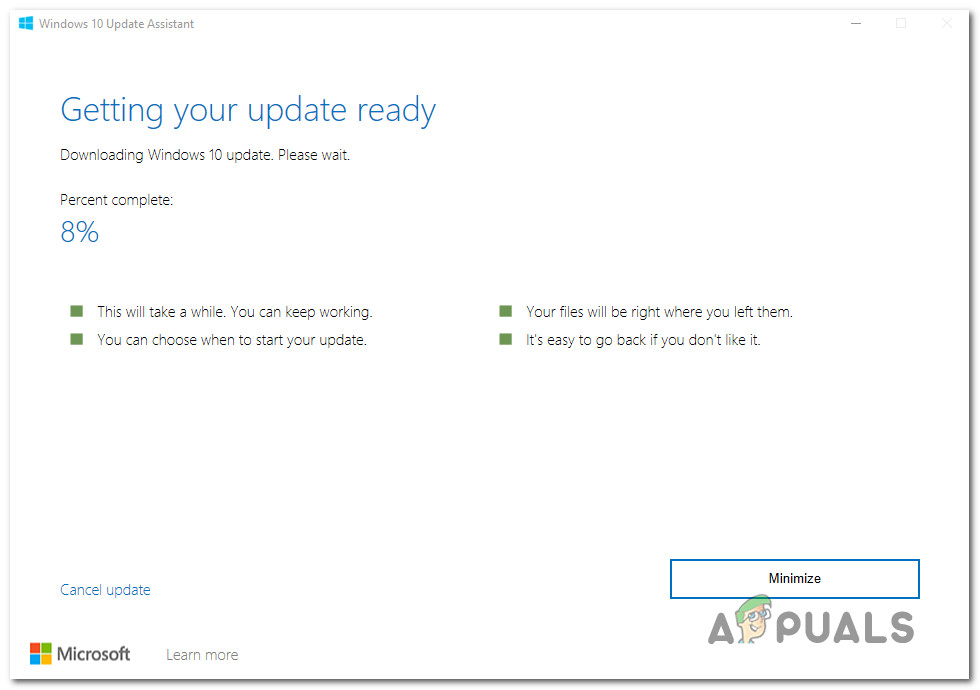
Updating via Windows Update Assistant - Open the Windows10Upgrade.exe installation executable that you just downloaded and click on Update Now to initiate the updating process.
- A scan will soon commence with the purpose of determining if your PC is ready to handle the update. If all is good, click on Update to make the Update assistant download the update.
- Wait until the operation is complete, but don’t close the window until the process is complete.
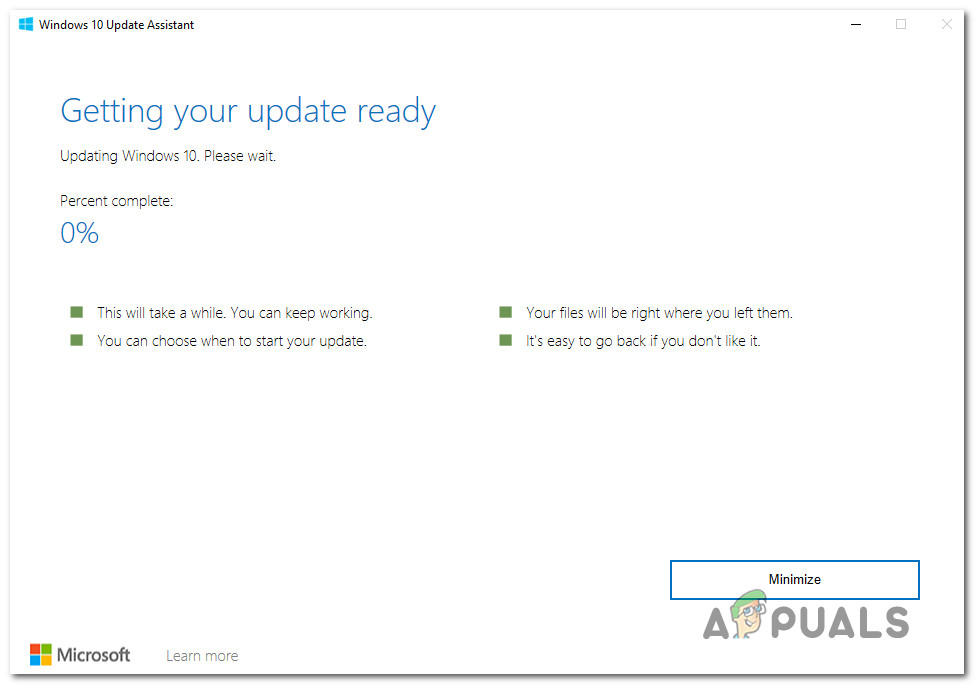
Updating via Windows Update - Once the download is complete, the Update Assistant will automatically begin to install the file that it previously downloaded. Wait patiently until your Windows build is updated to the latest version, then restart your computer.
Installing the missing updates - At the next system startup, you will have the latest Windows build, so there’s no need to use Windows Update in order to install the update that was previously failing.


