How to Fix ‘Unable to Contact your DHCP Server’ Error
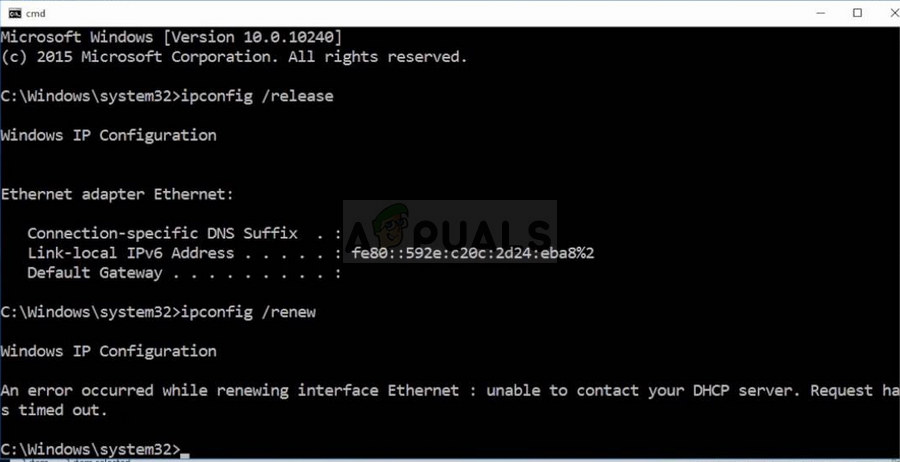
Unable to Contact DHCP Server appears when you try to lease, release or renew an IP Address. This error means that your NIC cannot speak with the DHCP Server in order to obtain a new lease to retrieve a new IP Address that it can use.
What is a DHCP Server
DHCP or Dynamic Host Configuration Protocol is a network protocol used for assigning IP Addresses automatically.
Why am I getting ‘Unable to Contact DHCP Server’
The error will often occur after you try to run the “ipconfig /renew” command in Command Prompt and it can become difficult to solve Windows problems that rely on this method. Below you will be able to find several methods that were confirmed to work for other users so make sure you try them out and hopefully solve your problem!
Solution 1: Update or Roll Back Your Network Drivers
To be honest, updating and rolling back the driver are two opposite actions but it all depends on which driver brought the error to your computer. If you are running old, no-longer-supported drivers on your computer, then an update is almost certain to solve the problem.
However, if the problem started to occur after you have updated your driver one way or another; a rollback might be good enough until a new, more secure driver is released. You should also update or rollback the network device you are using to connect to the Internet (Wireless, Ethernet, etc) but performing the same process all of them should do no harm.
- First of all, you will need to uninstall the driver you currently have installed on your machine.
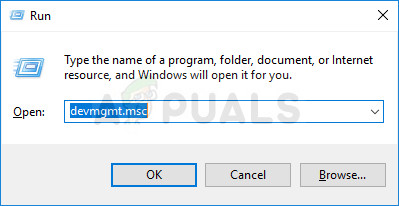
- Type “Device Manager” into the search field next to the Start menu button to open the device manager window. You can also use the Windows Key + R key combination in order to open the Run dialog box. Type devmgmt.msc in the box and click OK or Enter key.
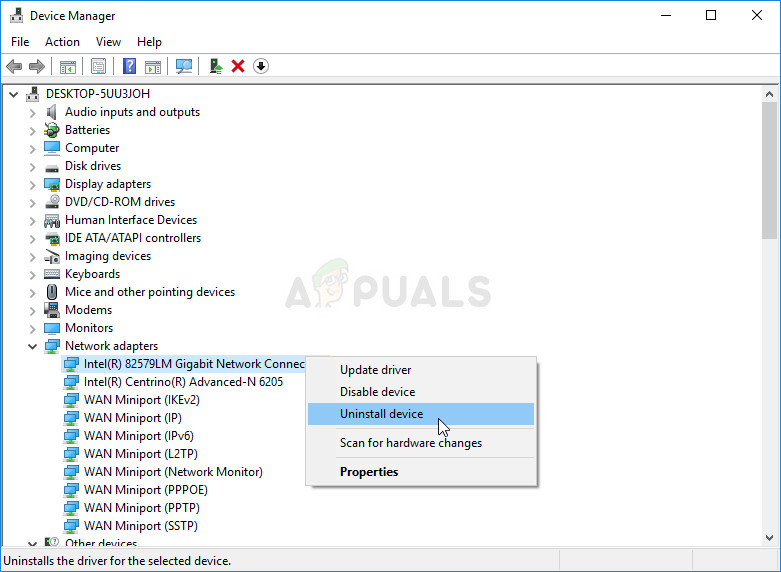
- Expand the “Network Adapters” section. This will display all network adapters that the machine has installed at the moment.
Update the Driver:
- Right-click on the network adapter you want to uninstall and select “Uninstall device“. This will remove the adapter from the list and uninstall the networking device.
- Click “OK” when prompted to uninstall the device.
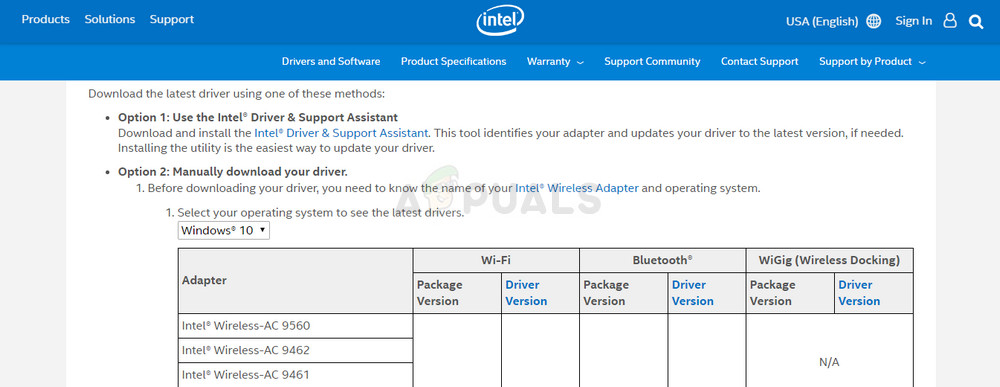
- Remove the adapter you are using from your computer and navigate to your manufacturer’s page in order to see the list of available drivers for your operating system. Choose the latest one, download it, and run it from the Downloads folder.
- Follow the instructions on-screen in order to install the driver. If the adapter is external such as a Wi-Fi dongle, make sure it stays disconnected until the wizard prompts you to reconnect it to your computer. Restart the computer and check to see if the problem has disappeared.
Rolling Back the Driver:
- Right-click on the network adapter you want to uninstall and select Properties. After the Properties window opens, navigate to the Driver tab and locate the Roll Back Driver option.
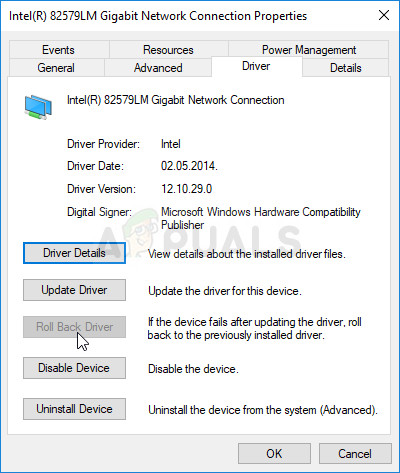
- If the option is grayed out, it means that the device wasn’t updated recently as it has no backup files remembering the old driver. This also means that the recent driver update is probably not the cause of your problem.
- If the option is available to click on, do so, and follow the instructions on-screen to proceed with the process. Restart the computer and check to see if the problem still occurs in Command Prompt.
Solution 2: Disable the VirtualBox Related Driver
VirtualBox is a program developed and published by Oracle and it’s used to run and visualize various operating systems on various platforms. It can be downloaded and installed from their website and you might have used it in the past or you might be using it now.
However, their driver may mess things up a bit on your computer, and disabling it from the Internet connection you are using won’t affect the program significantly but it may just help you solve your problem.
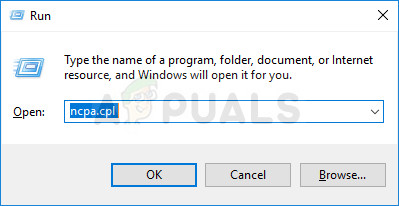
- Open the Run dialog box by pressing the Windows logo key + R key together. Then type “ncpa.cpl” in it and click OK. It can also be achieved by opening the Control Panel. Change the view to Category and click on Network and Internet. Click on the Network and Sharing center section in order to open it and locate the Change adapter settings option at the left side of the window and click on it.
- Now that the Internet Connection window is open, double-click on your active Network Adapter.
- Then click Properties and locate the VirtualBox Bridged Networking Driver entry on the list. Disable the check box next to this entry and click OK. Restart your computer in order to confirm the changes and check to see if the error appears again.
Solution 3: Register DNS using CMD
This simple command did the trick for a lucky user who complained about a problem on an online forum and it appears what this answer helped other users as well. That being said, plenty of Microsoft officials were stunned by the fact that this worked but it’s a viable solution so you might as well try it out!
It won’t do any harm to your computer as it initiates manual dynamic registration for the DNS names and IP addresses that are configured at a computer and it’s actually used to solve network-related problems..
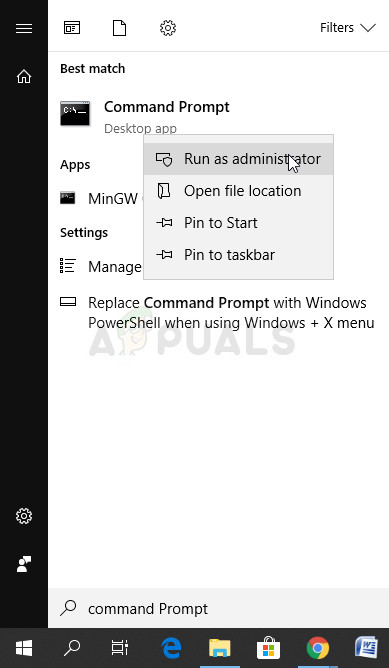
- If you are a Windows 10 user, you can easily locate Command Prompt simply by clicking the Start menu button or the Search button next to it and type in “cmd” or “Command Prompt”. Right-click on the first result and choose the Run as administrator option.
- If you are running a version of Windows older than Windows 10, the Start menu search might or might not work properly but you can still navigate to C >> Windows >> System32, right-click on the “cmd.exe” entry and choose Run as administrator.
- Type in the command below and make sure you click Enter afterwards:
ipconfig /registerdns
- After you see the “operation completed successfully” message in Command Prompt, click the close button or type in “exit” in Command Prompt, restart your computer and check to see if the problem is gone.
Solution 4: Disable IPv6 on Your Active Connection
This “ipconfig” error sometimes occurs if IPv6 is enabled for your active connection and you don’t have a local gateway which is needed to connect. There are several users who were able to solve the problem this way and it won’t affect your consumer experience.
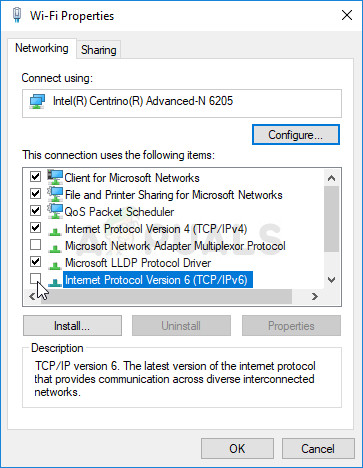
- Open the Run dialog box by pressing the Windows logo key + R key together. Then type “ncpa.cpl” in it and click OK.
- When the Internet Connection window opens, double-click on your active Network Adapter.
- Then click Properties and locate the Internet Protocol Version 6 entry on the list. Disable the checkbox next to this entry and click OK. Restart your computer in order to confirm the changes and check to see if the problem occurs in “ipconfig” again.
Solution 5: Restart Your DHCP Client Service
DHCP Client Service managed these problems and if the service has stopped or malfunctioned, the best thing you can do is to simply (re)start it and hope for the best. It has helped several users as this service absolutely needs to be running on your computer in order for commands like “ipconfig /renew” to work.
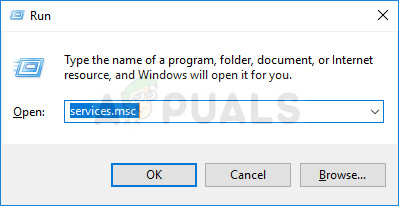
- Open the Run dialog box by using the Windows Key + R key combination on your keyboard. Type “services.msc” in the box without the quotation marks and click OK in order to open Services.
- Locate DHCP Client Service in the services list, right-click on it, and select Properties from the context menu which appears.
- If the service is started (you can check that just next to the Service status message), you should spot it immediately by clicking the Stop button in the middle of the window. If it is stopped, leave it as it is (for now, of course).
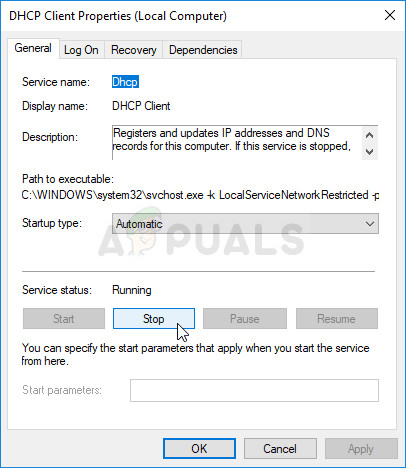
- Make sure that the option under the Startup type menu in the DHCP Client Service’s properties is set to Automatic before you proceed with the instructions. Confirm any dialogue boxes which may appear when you set the startup type. Click on the Start button in the middle of the window before exiting.
You may receive the following error message when you click on Start:
“Windows could not start the DHCP Client Service on Local Computer. Error 1079: The account specified for this service differs from the account specified for other services running in the same process.”
If this occurs, follow the instructions below to fix it.
- Follow steps 1-3 from the instructions above in order to open DHCP Client Service’s properties. Navigate to the Log On tab and click on the Browse… button.
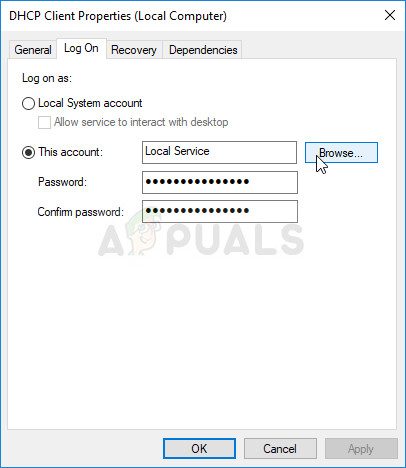
- Under the “Enter the object name to select” box, type in your account’s name, click on Check Names and wait for the name to become recognized.
- Click OK when you are finished and type in the password in the Password box when you are prompted with it, if you have set up a password. It should now start without issues!
Solution 6: Replace the Antivirus Program You are Using
Even though this final method may sound like too much, it was reported by several users that certain free antivirus tools actually caused this problem and removing them managed to solve the problem after all of the methods above have failed.
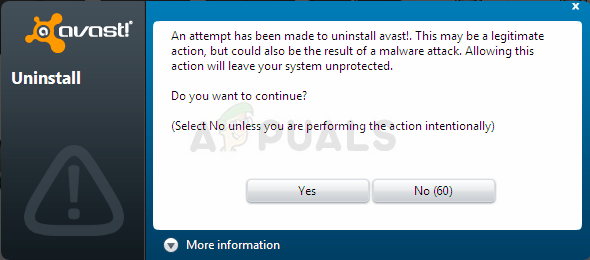
If you have tried out the solutions above with no success, consider using a different virus, especially if you are not paying for it. The major culprits for this issue include Avast and McAfee. However, the uninstall process can sometimes be avoided if you are using BitDefender Total Security which will be discussed at the bottom
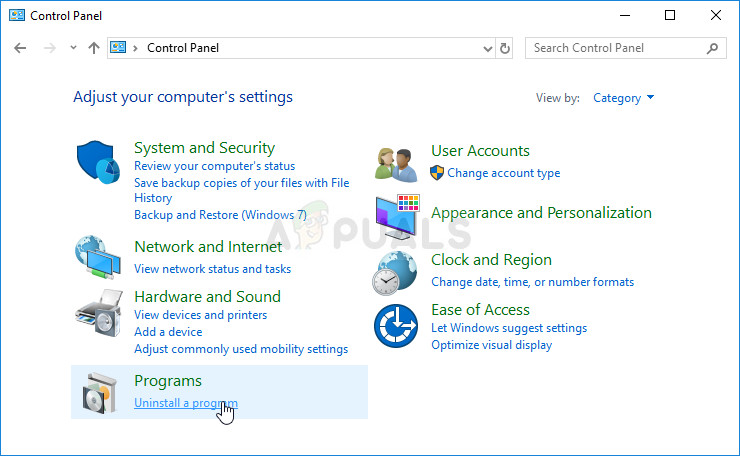
- Click on the Start menu and open Control Panel by searching for it. Alternatively, you can click on the gear icon in order to open settings if you are using Windows 10.
- In Control Panel, select to View as: Category at the top right corner and click on Uninstall a Program under the Programs section.
- If you are using the Settings app, clicking on Apps should immediately open a list of all installed programs on your PC.
- Locate McAfee or Avast in Control Panel or Settings and click on Uninstall.
- Its uninstall wizard should open either prompting you to confirm your choice to uninstall or to offer to Uninstall or Repair. Choose Uninstall and follow the instructions on the screen.
- Click Finish when the uninstalled completes the process and restart your computer to see whether errors will still appear.
BitDefender Total Security Users:
The problem can sometimes be solved if you are using this antivirus program by disabling a certain option in Firewall settings. It appears that its firewall is preventing this process from going through via this option so you will have to disable it in order to proceed.
- Open the BitDefender user interface by double-clicking its icon on the desktop, searching for it in the Start menu, or by double-clicking its icon in the system tray.
- Click on the Protection icon on the left sidebar of the Bitdefender user interface and click on View Features.
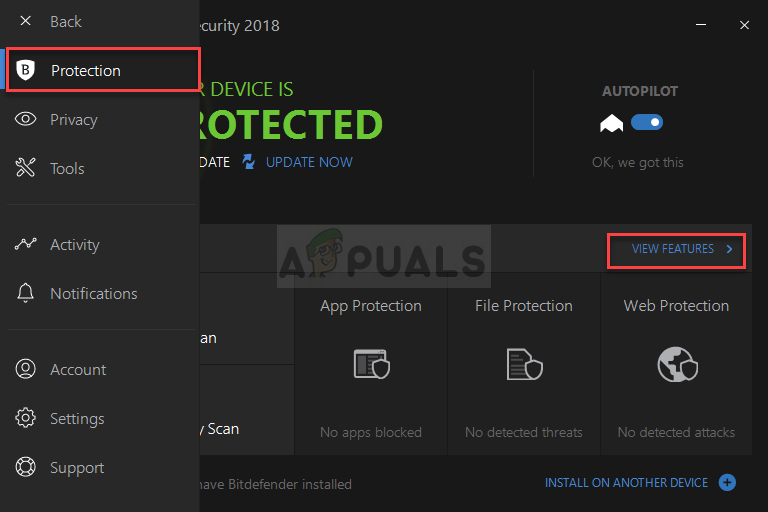
- Click the Settings icon in the upper-right corner of the FIREWALL module and navigate to the Settings tab. Here you should be able to see the Block port scans in the network option so make sure you disable it before checking if the problem is still active.


Reinstalling network drivers worked great! Just make sure you write down the one you have before you uninstall it 😛