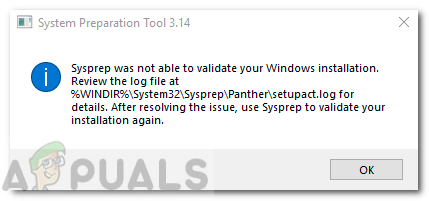
Fix: Sysprep Was Not Able to Validate Your Windows Installation
The error ‘Sysprep was not able to validate your Windows installation’ is often caused by the apps that you might have downloaded from the Windows Store or if you have removed the default apps from the system. Users have reported that whenever they try to run the Sysprep tool, they are presented with the said error message followed by the path of the file the contains more details.
Sysprep can be really useful if you want to save up some time and automatically deploy an operating system on a group of computers. However, when you are faced with one of its issues, it can be, at times, an obstacle to pass. Nonetheless, you can learn how to deal with the issue by going through this article.
What causes the ‘Sysprep Was Not Able to Validate Your Windows Installation’ Error on Windows 10?
Well, if you navigate to the file specified in the error message and go through it, you will find the possible cause of the error. In different scenarios, it can vary, therefore, for a basic insight, it is often due to the following factors —
- Windows Store apps: In some cases, the error occurs if you have downloaded an app from the Windows Store which is preventing the tool. Mostly, Candy Crush and Twitter were found to be the culprits.
- Default Windows apps: Another reason due to which the error occurs can be the removal of default Windows applications. If you have, prior to running Sysprep, removed any Windows default app, that might be the cause of the error.
Getting onto the solutions, you can fix your issue by following the workarounds given down below.
Uninstalling Candy Crush and Twitter
For some odd reason, most of the users were encountering this issue because of the apps that they had downloaded some apps from the Windows store. If you have installed Candy Crush or Twitter on your system, they can be the responsible party. If this case is applicable to you, you will have to uninstall both Candy Crush and Twitter from your system and then try running Sysprep again. Here’s how to uninstall them:
- Go to the Start Menu and search for either Candy Crush or Twitter.
- Right-click on the application and click Uninstall.
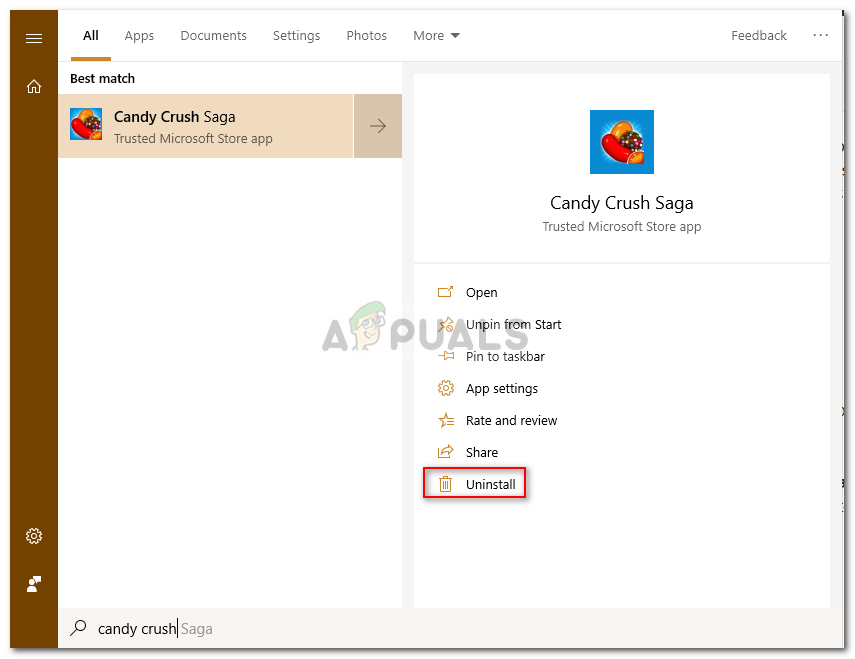
Uninstalling Candy Crush - On the pop-up, click Uninstall.
Do the same for Twitter.
Installing Default Windows Apps
In some cases, refreshing the default Windows applications might be the cause of the error. In such an event, you will simply have to install the default applications again. Here’s how to do it:
- Go to the Start Menu, type in Windows Powershell, right-click on it and select ‘Run as an administrator’.
- Once the Window Powershell loads up, paste in the following command and press Enter:
Get-AppxPackage -AllUsers| Foreach {Add-AppxPackage -DisableDevelopmentMode -Register “$($_.InstallLocation)\AppXManifest.xml”}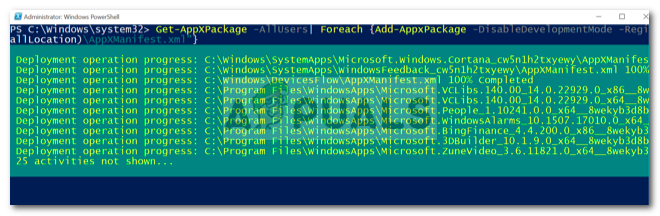
Installing Windows 10 Default Apps - Wait for it to complete and then run Sysprep again.
Modifying Windows Registry
If you are receiving the error message after upgrading to Windows 10, this will most likely be due to the Upgrade DWORD key in the Windows Registry. In such a case, you will just have to delete key and then run Sysprep again. Here’s how to do it:
- Press Windows Key + R to open Run.
- In the Run dialog box, type in ‘regedit’ and then press Enter.
- Navigate to the following path:
HKEY_LOCAL_MACHINE\SYSTEM\Setup\
- Locate the Upgrade key in the right-hand pane and right-click it.
- Select Delete to delete the key.
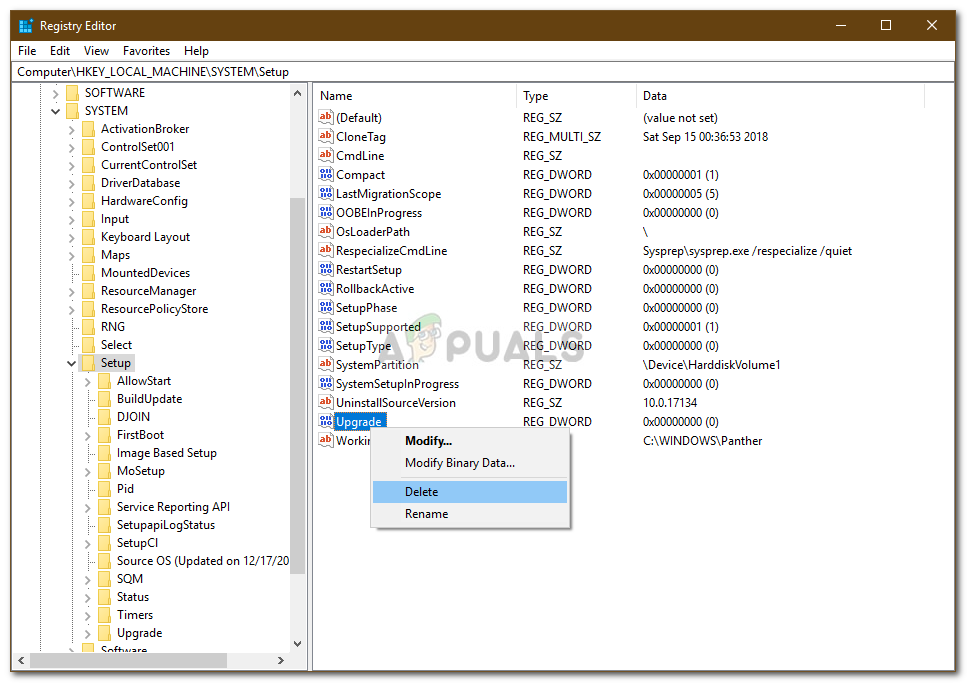
Deleting the Upgrade Key - Restart your system and then try running Sysprep.
Creating a New Administrator Account
If you are unable to find the Upgrade key in the Windows Registry and the above solutions do not work out for you, creating a new administrator account will certainly fix the issue. Some users have reported that upon creating a new administrator account and then deleting all the old ones, their issue was resolved. Here’s how to do it:
- First of all, you will have to create a new administrator account. For this, make sure you are logged in as an administrator.
- Press Windows Key + I to open Settings.
- Go to Accounts and then navigate to Family & other users.
- Click ‘Add someone else to this PC’.
- Afterward, click ‘I don’t have this person’s sign-in information’.
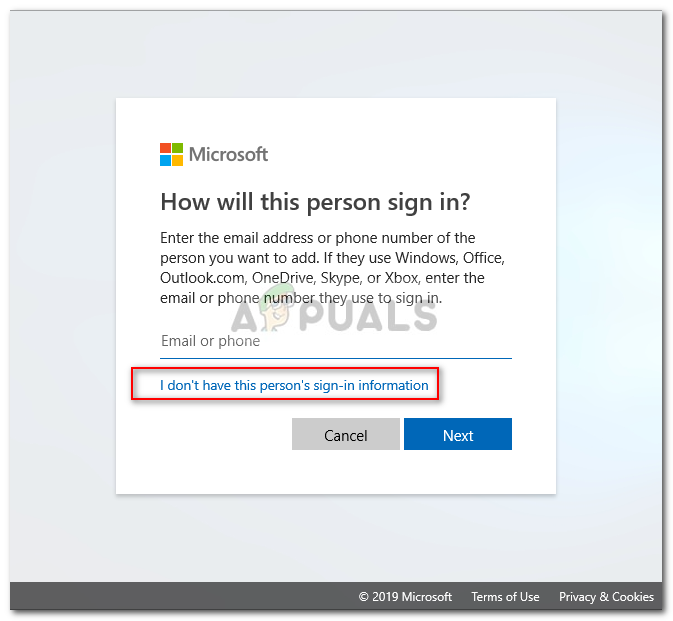
Creating New Local User Account - Then, click on ‘Add user without a Microsoft account’ and enter a username of your choice and password.
- Once done, click on the newly created account and select ‘Change account type’.
- On the pop-up, from the list under Account type, choose Administrator and then click OK.
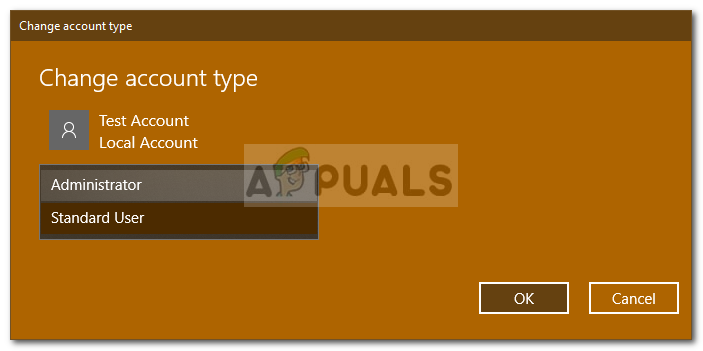
Changing User Account Type - Now, restart your system and log in using the newly created account.
- Press Windows Key + I again and go to Accounts.
- Switch to the Family & other users tab and select your old account.
- Click ‘Remove’ to remove the user account.
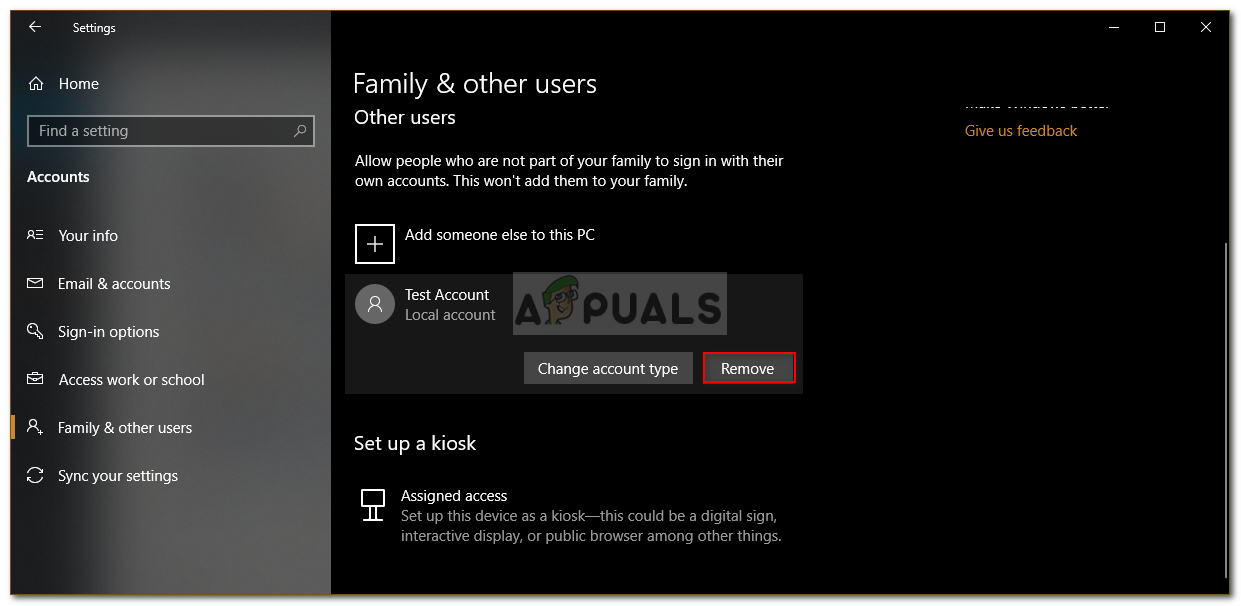
Removing Local User Account - Once done, restart your system again and then run Sysprep.
Please make sure that you delete all the previous accounts if you have more than one.


It’s case sensitive it has to be AppxManifest.xml not AppXManifest.xml if it doesn’t work