Fix: iTunes Not Playing Through Headphones
Some users are reporting that they are unable to play sound through their headphones when using iTunes. Most affected users are reporting that the sound is still coming out of the speakers (even when the headphones are plugged in). Everything else, including Youtube, the default Music app and even games are outputting audio through the headphones. The issue is frequently reported on multiple Windows versions including Windows 7, Windows 8 and Windows 10.
What is causing the “Headphones not working on iTunes issue”?
We investigated this particular issue by looking at various user reports and the repair strategies that they used to get the error resolved. Based on our investigations, there are several potential culprits that might trigger this particular error message:
- Default Audio is set to Windows Audio Session – One of the most common causes that will trigger this particular error message is if the Default Audio is set to Windows Audio Session. Some affected users have managed to resolve this particular issue by switching the setting to Direct Audio.
- The headphones are not set as the default Playback devices – You might also encounter this behavior if your headphones are properly connected but aren’t set as the Default Playback devices under Windows Settings. In this case, accessing the Windows Sound settings and establishing the headset as the default playback device will resolve the issue.
- Corrupted iTunes app – Another potential culprit that might trigger cause this behavior is file corruption inside the iTunes folder. In this particular scenario, reinstalling the iTunes app (desktop or UWP versions) should resolve the issue.
- Bad driver installation – As some users have reported, this error might also occur if some Windows drivers are improperly installed or corrupted. Based on user reports, there are two drivers that are confirmed to cause this issue (Sound driver and USB Controller driver)
If you’re you’re looking for ways to resolve this particular error message, this article will provide you with several troubleshooting strategies that other users in a similar situation have used to get the issue resolved.
For the best results, follow the methods below in the order that they are presented since they are ordered by efficiency and severity. One of them is bound to resolve the issue in your particular scenario.
Method 1: Plugging headphones before launching iTunes
If you’re looking for a quick fix, starting (plugging in) the headphones before launching the iTunes app might resolve the issue automatically. This forces the application to recognize the audio output that is currently active during the initialization process.
Several affected users have confirmed that this procedure is effective for both the desktop app and the UWP (Universal Windows Platform) version.
However, this is is merely a workaround and you’ll have to remember to do this every time you want to listen to music through the Windows iTunes app.
If you want a permanent fix which ensures that iTunes sound is coming out of your headphones as soon as you plug them in, move down to the next method below.
Method 2: Changing the default Audio to Direct Sound
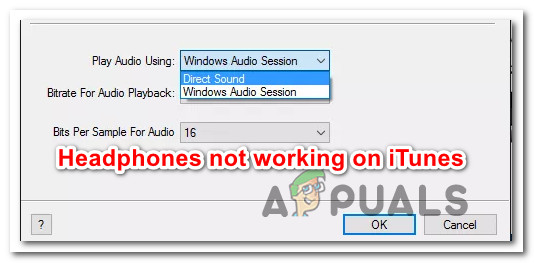
Several affected users have reported that they managed to fix the problem by going to the Preferences menu and changing the default Play Audio platform to Direct sound. This forces the application to dynamically change to any new device that is plugged in during the playback session.
This procedure is confirmed to be effective on Windows 7, Windows 8 and Windows 10. You should be able to follow the steps below regardless if you’re using the desktop or the UWP app.
Here’s what you need to do:
- Open iTunes and go to Edit > Preferences using the ribbon menu at the top.
- Inside the Playback Preferences menu, go to the Playback tab.
- Change the drop-down menu associated with Play Audio Using to Direct Audio. Then, click Ok to save the changes.
- Restart the iTunes app, plug your headphones/headset and play some audio. You should now be able to hear sound coming out of them.
If you’re still unable to hear any sound coming out of your headphones while playing audio on iTunes, move down to the next method below.
Method 3: Changing the Default Playback device
Another potential reason that might cause the audio playback to fail on iTunes is if the headphones are not set as the default device inside the Sound settings menu. Several affected users have reported that the audio issue was resolved after they set their headphones as the Default Playback device.
Here’s what you need to do:
- Press Windows key + R to open up a Run dialog box. Then, type “mmsys.cpl” and press Enter to open up the Sound settings screen.
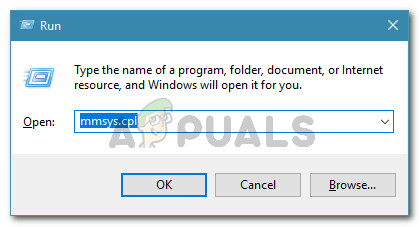
Running dialog: mmsys.cpl - Once you get inside the Sound settings screen, right-click on your headphones and choose Set as Default Device.

Setting the Headphones as the default device - Restart iTunes and see if the audio has been fixed.
If you still don’t hear sound coming out of your headphones, move down to the next method below.
Method 4: Reinstalling the iTunes app
As it turns out, the audio playback component can also be affected if the iTunes folder contains corrupted files. This can occur if you’re dealing with a malware infection or after an antivirus scan has removed some files from the iTunes installation folder.
In this case, you’ll be able to resolve the issue by reinstalling the iTunes application. However, the steps of doing this will be different depending on which version of the iTunes application you installed (the desktop version or the UWP version).
Because of this, we created two separate guides that will help you reinstall the iTunes app. Make sure to follow the steps that are applicable to the iTunes application that you’re using.
Reinstalling the Desktop version of iTunes
- Press Windows key + R to open up a Run dialog box. Then, type “appwiz.cpl” and press Enter to open up the Programs and Features window.

Type appwiz.cpl and Press Enter to Open Installed Programs List - Inside the Programs and Features screen, scroll down through the list of applications, right-click on the iTunes app and choose Uninstall (or use the action menu above). Then, follow the on-screen prompts to complete the uninstallation process.
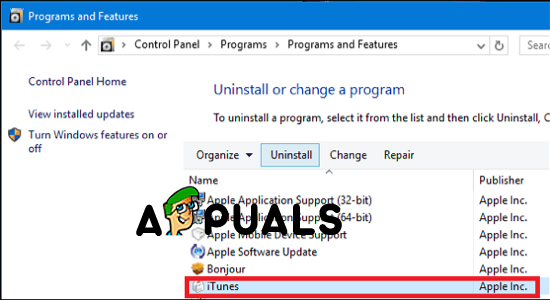
- Uninstall the rest of complementary Apple software using the same procedure. Make sure you uninstall everything that has Apple Inc. listed as the publisher (including Apple Mobile Device Support, Apple Application Support, and Apple Software Update).
- Once every Apple application has been uninstalled, restart your computer.
- At the next startup, visit this link (here) from your browser and click on Windows (under Looking for other versions).

Downloading the desktop version of iTunes - Scroll down back to the top of the page and click on Download now (64-bit).
- Once the download is complete, open the installation executable and follow the on-screen prompts to complete the installation process.
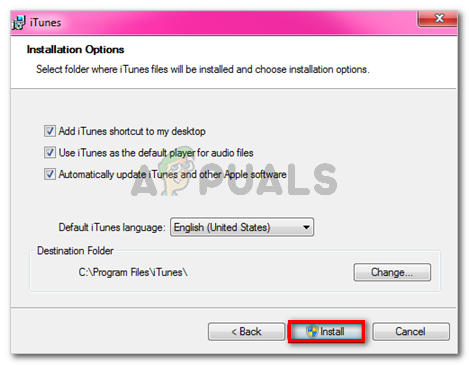
Installing iTunes on your computer - Once the installation is complete, restart your computer once again and see if the issue has been resolved.
Reinstalling the UWP (Universal Windows Platform) version of iTunes
- Press Windows key + R to open up a run dialog box. Then, type “ms-settings:appsfeatures” and press Enter to open the Apps & Features tan of the Settings app.
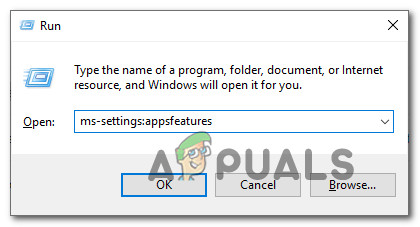
Accessing the Apps & Features menu of the Settings app - Once you reach the Apps & Features menu, use the search function under Apps & features to search for “iTunes“. Then, click on Advanced options (under iTunes).
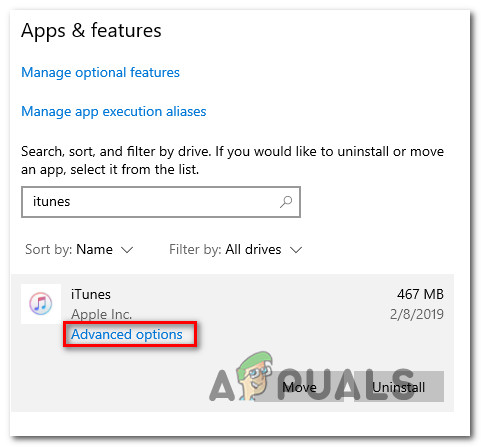
Accessing the Advanced Options menu of iTunes - Inside the Advanced options menu of iTunes, scroll down to the Reset tab and click the Reset button.
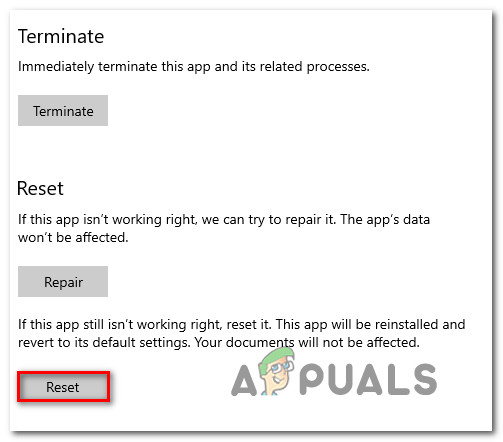
Resetting the iTunes app - At the confirmation prompt, click the Reset button again to commence the resetting process. Once you do so, the app will be reinstalled and reverted back to its default settings. You’re locally downloaded media and playlists will not be affected.
- Once the resetting procedure is complete, open iTunes again and see if the issue has been resolved.
If this procedure didn’t allow you to listen to iTunes music through your headphones, move down to the next method below.
Method 5: Reinstalling the sound driver and/or USB controller driver
If you’re encountering this particular issue (to some degree) with other applications, chances are you’re dealing with a faulty sound driver. Another potential scenario (if you’re using a headset that connects through USB) is that the USB controller driver is not properly recognizing the device.
Several affected users have reported that the issue was resolved after they reinstalled the Sound driver and/or the USB controller driver.
Here’s a quick guide on how to do this:
- Press Windows key + R to open up a Run dialog box. Then, type “devmgmt.msc” and press Enter to open up Device Manager.

Run Device Manager using Run Dialog Box - Inside Device Manager, expand the Sound, video and game controllers drop-down menu. Then, right on every Audio device listed under there and choose Uninstall. At the confirmation prompt, click the Uninstall button to commence the uninstallation process.
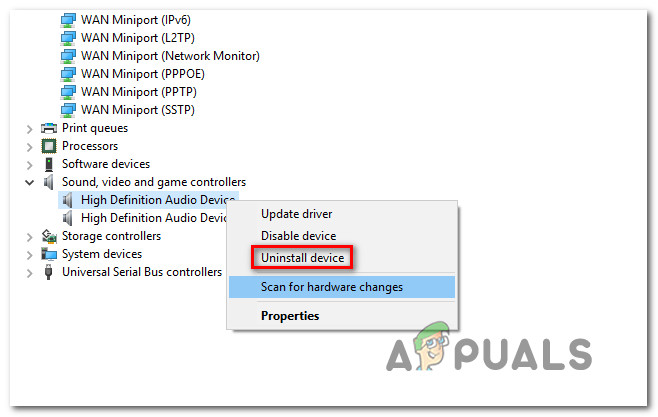
Uninstalling the audio devices - Expand the Universal Serial Bus controller drop-down menu and install every Host controller that you see there.
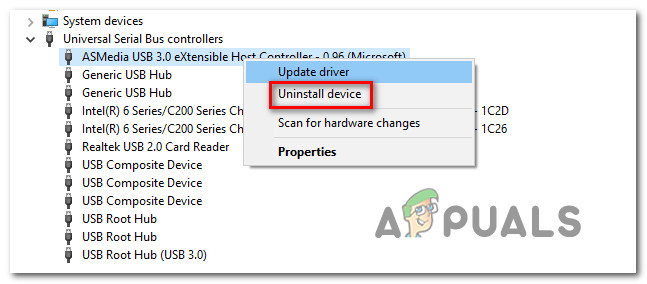
Uninstalling every available host controller Note: Step 3 is not necessary if the headphones connect through the Jack.
- Once all drivers have been uninstalled, restart your computer. At the next startup, Windows will automatically identify & install the missing drivers.
- Plug-in the headphones and allow the initial installation to complete (If they connect through USB). If the issue was caused by a faulty driver, you should now be able to hear through your headphones.

Every tip about this issue that I have seen on the internet is of the form
1. Make some change
2. Restart iTunes
It will work now.I have not been able to switch from my speakers to my headphones and vice versa unless I change the output device and restart iTunes. In other words none of the things I have tried in step 1 (changing the iTunes play audio setting to Direct Sound, making the headphones the default audio device, etc.) have made any difference, but I can switch from speakers to headphones and from headphones to speakers if I restart iTunes in between, regardless of what the iTunes play audio setting and Windows default audio are set to, and that has always been the case. I’m surprised that Apple hasn’t noticed this.and fixed it.