Fix: HDMI TV Not Detecting Windows 10
There is a widespread problem with users who make use of HDMI for connection between a computer and a TV. It seems that after upgrading to Windows 10, the computer fails to detect the HDMI TV attached. There can many reasons behind this problem as there are different configurations for each machine; however, there are some common workarounds which work for the majority of the people.
Before we start the troubleshooting process, you should first ensure that there is no problem with your HDMI cable and it is working perfectly as expected. First of all, unplug the TV and plug the HDMI cable again after it has successfully booted up. Also, try using another HDMI cable for the connections. A broken HDMI cable can cause the connection failure which you are experiencing.
Solution 1: Display Output Settings
For your computer to display the output on the TV, it is necessary to enable the relevant display output settings. There are a number of display settings available. Make sure that you enable the correct one using the settings.
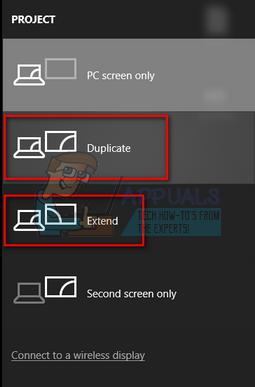
- Press Windows + R to launch the Project Screen options.
- Once the options come forth, select “Duplicate”. In duplicate mode, your PC will duplicate the exact screen which is present on your machine to your TV screen. If that doesn’t work, trying switching to “Extend” and check if that makes any difference.
Solution 2: Updating Graphics Driver
Old/Corrupted graphics drivers are the foremost reason why this problem occurs. Drivers are the main driving force behind all your hardware and it is the graphics driver which is running the display on your computer. We can try updating it manually or automatically and check if it makes any difference in our situation.
Before we update drivers manually, we can try installing the drivers back to its initial state. If this doesn’t work, we can proceed with updating.
- Press Windows + R to launch the Run application. Type “devmgmt.msc” in the dialogue box and press Enter.
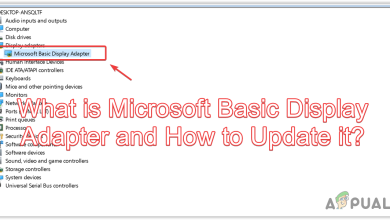
- Once in the device manager, expand the category of “Display adapters”. Your graphics card will be listed here.
- Right-click on it and select “Uninstall”.
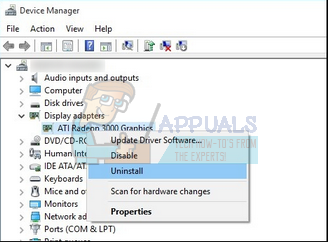
- Now reboot your computer and check if this solves the problem. If you are prompted with a UAC while uninstalling, don’t worry and click Yes.
If installing the default drivers don’t work, we can try updating the graphics drivers manually. Do note that you should try updating the drivers automatically (select the first option after clicking “Update driver”). Below is the solution on how to update the drivers manually.
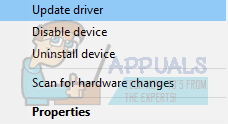
- Right-click on the hardware and select “Update driver”.
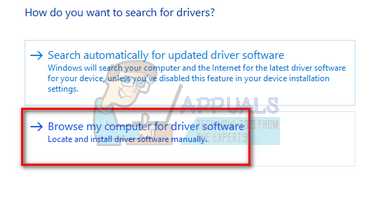
- Select the option “Browse my computer for driver software”.
- Instead of browsing to the given driver, select “Let me pick a list of available drivers manually”.
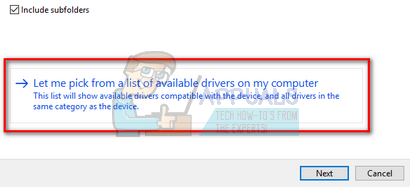
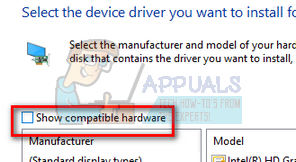
- Uncheck the option “Show compatible hardware”. This will display all the available drivers on your computer. Select the compatible driver according to your hardware and install it.
- Restart your computer after installing the driver and check if the problem got solved.
Note: If you can’t find the previous drivers for your hardware, you can head over to your manufacturer’s site and download it manually. Once downloaded, repeat the above steps until you come across “Browse”. From there browse to your downloaded driver and install it. Don’t forget to restart your computer after the installation.
