(Fix) Event ID 7009: A Timeout was Reached (30000 milliseconds)
Some Windows 10 users are reporting that their Event Viewer is filled with Event ID 7009 errors (A timeout was reached while waiting for the Lights-Out connect). Normally, these error events will start occurring immediately after the startup is complete.
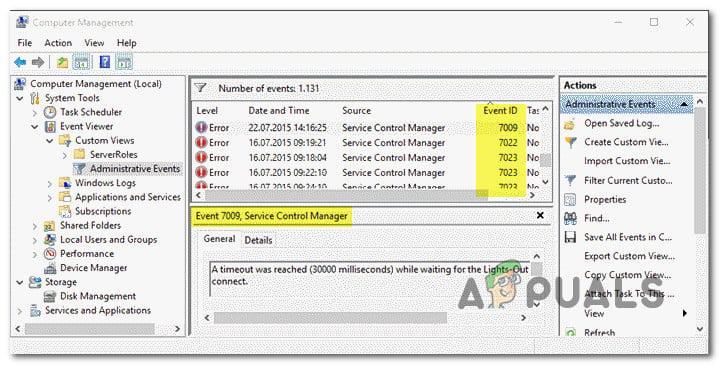
After investigating this particular issue thoroughly, it turns out that there are several different underlying causes that might cause these types of Event ID errors. Here’s a list of potential culprits:
- Traps service is Disabled -If you have the Traps Endpoint Security Manager installed on the affected PC, chances are the issue is occurring because the main Traps service is not configured to start automatically. To resolve this particular issue, you’ll need to use the Services screen to change the default behavior of the main Traps service.
- The issue is caused by a Windows-native service – As it turns out, this particular issue can also be caused by a couple of native Windows services that have a tendency to stall their dependencies on low-end computers. In this case, you’ll need to modify the default behavior of these services and ensure that they start at every system startup.
- Windows Trace Session Manager doesn’t have enough time to start – According to a lot of affected users, you can expect to see this error in an instance where you’re using a low-end PC that is not strong enough to start all required services within the allocated time-spawn (60 seconds). To rectify this, you’ll need to reconfigure the behavior of the Windows Trase Session Manager by establishing a custom Registry Editor rule.
- A major System change interfered with the service startup behavior – An important update, driver installation or even some kind of 3rd party interference can also result in this particular Event Viewer error. Since there’s no definitive culprit list, your best chance at resolving the issue is to restore your OS back to a healthy state by using the System Restore utility.
Now that you are familiar with every potential event that might trigger the Event 7009 errors, here’s a list of methods that other affected users have successfully used to get to the bottom of the issue and prevent new instances of this error from populating the Event Viewer:
1. Re-configure the Traps service to Automatic (if applicable)
If you’re always seeing the 7009 error when booting up your computer and you have the Traps Endpoint Security Manager installed, most often than not the problem is caused by the Traps service not being started automatically.
According to Microsoft technicians, this issue is facilitated when multiple applications are launching at the same time during startup and attempting to grab system resources to launch their respective services. If your computer is not strong enough to supply every application with the required processing power, some services will eventually time out causing this error.
And since Traps Endpoint Security Manager is not priorities by default, it’s a prime candidate for getting timeouts.
Fortunately, you can prevent this issue from occurring by modifying the default behavior of the Traps service and set it to Automatic in order to be prioritized.
If you want step by step instructions guiding you through the entire process of reconfiguring the Traps service, follow the guide below:
- Press Windows key + R to open up a Run dialog box. Next, type ‘services.msc’ inside the text box and press Enter to open up the Services screen. When you see the UAC (User Account Control) prompt, click Yes to grant admin access.

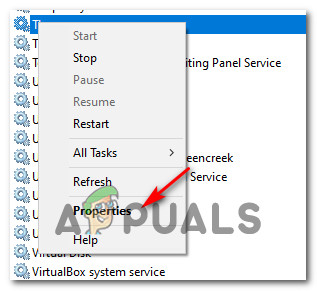
Accessing the Services screen - Once you’re inside the Services screen, scroll down through the list of services and locate the Traps service.
- When you see it, right-click on it and choose Properties from the context menu.
Accessing the Traps Properties screen - Once you’re inside the Services screen, access the General tab from the context menu that just appeared.
- Next, use the Startup type drop-down menu to change the default behavior to Automatic before clicking on Apply to save the changes.
- Restart your computer and monitor the Event Viewer utility to see if new instances of the 7009 error are still appearing.
If the problem is still not resolved, move down to the next potential fix below.
2. Verify the most likely culprits
If the first method was not applicable as you don’t have the Traps Endpoint Security Manager installed on your computer, the next troubleshooting step should be to ensure that every Windows-native service that is known to cause this issue is enabled and configured to start at every systems startup.
Here are the services that you need to take a closer look at:
- DCOM Server Process Launcher
- RPC Endpoint Mapper
- Remote Procedure Call (RPC)
- Security Accounts Manager
- Server
Several affected users have confirmed that that new instances of the Event ID 7009 error have stopped occurring after they utilized the Services screen to ensure that every relevant service is properly configured.
Follow the instructions below to ensure that every culprit service starts at every system startup:
- Press Windows key + R to open up a Run dialog box. Next, type ‘services.msc’ inside the text box and press Enter to open up the Services screen. When you see the UAC (User Account Control) prompt, click Yes to grant admin access.
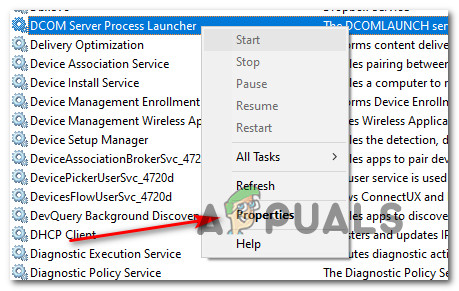
Accessing the Services screen - Once you’re inside the services screen, scroll down through the list of services and locate the DCOM Server Process Launcher service.
- When you see it, right-click on it and choose Properties from the context menu that just appeared.
Accessing the Properties screen - Inside the Properties screen of the DCOM Server Process Launcher service, access the General tab and change the Startup type to Automatic, then click on the Start button to start it.
- Next, repeat step 3 and step 4 with the remaining services until each one is configured to Automatic startup type and actively running:
RPC Endpoint Mapper
Remote Procedure Call (RPC)
Security Accounts Manager
Server
- Once you’ve ensured that every relevant service is started, take a look at your Event Viewer and see if the problem is now fixed.
If you’re still seeing new instances of the Event ID 7009 error appearing inside your Event Viewer, move down to the next potential fix below.
3. Reconfigure the Windows Trace Session Manager
If the two fixes above didn’t resolve the issue in your case, you should start considering the fact that the default time-out value (60 seconds) is not enough to allow the Service Control Manager to start.
Note: The Service Control Manager is configured by default to wait for the specified time (60 seconds) by the ServicePipeTimeout entry before logging 7009 events.
The problem most likely occurs because the Windows Trace Session Manager might require more than 60 seconds to start on low-end computer configurations.
If this is the main cause triggering the 7009 errors, increasing the value of the ServicePipeTimout registry value will give all dependent services enough time to start properly.
Here’s a quick step by step guide that will walk you to the process of modifying the value of ServicePipeTimeout in order to resolve the 7009 error:
Note: To avoid any unpleasantries, we recommend taking the time to backup your Registry cluster, just in case something goes wrong during this operation.
- Press Windows key + R to open up a Run dialog box. Next, type ‘regedit’ inside the text box and press Ctrl + Shift + Enter to open up the Registry Editor with admin access.
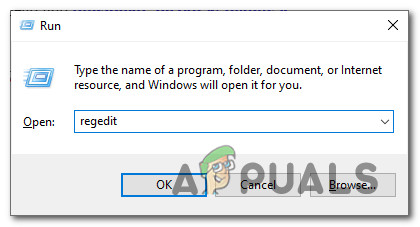
Opening the Registry Editor with admin access Note: When you see the UAC (User Account Control), click Yes to grant admin access.
- Once you’re inside the main screen of the Registry Editor, use the menu on the left-hand side to access the following location:
HKEY_LOCAL_MACHINE\SYSTEM\CurrentControlSet\Control
Note: You can either navigate to this location manually or you can paste the location directly into the navigation bar and press Enter to get there instantly.
- With the Control registry folder selected on the left-hand side, move over to the right-hand section and double-click on ServicesPipeTimeout.
- Next, inside the Properties of ServicesPipeTimeout value, set the Base to Decimal, then type 600000 under Value Data before clicking Ok to save the changes.
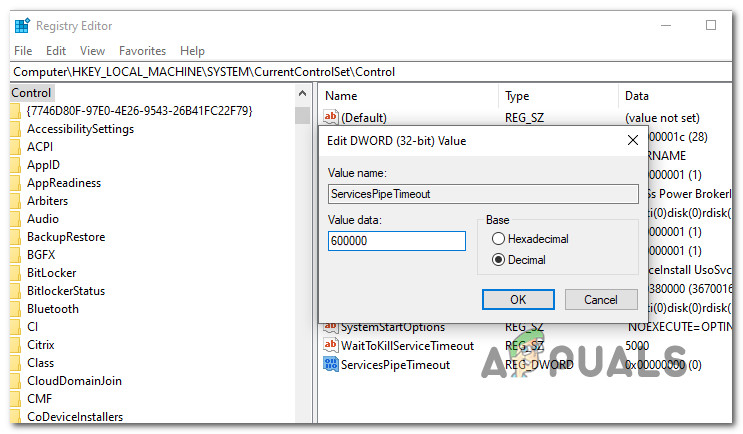
Configuring the ServicesPipeTimeout Note: If the ServicesPipeTimout entry doesn’t exist in your case, you need to create it yourself. To do this, click on the Edit menu (or right-click on an empty space) and then choose New > DWORD (32-bit) Value and name it SerivesPipeTimeout before pressing Enter.
- Once the modifications have been successfully enforced, close the elevated Registry Editor and reboot your computer.
- After your computer boots back up, check the Event Viewer to see if you can spot any new instances of the error.
If the issue is still not resolved, move down to the final potential fix below.
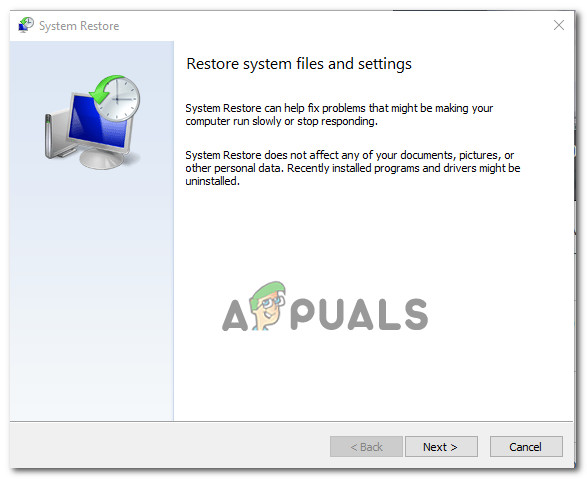
4. Perform a System Restore
If none of the methods above have been successful in your case, you can conclude that this particular issue started to occur after a major system change like the installation of an important update, driver installation, or an unexpected machine shutdown created this scenario where the 7009 error occurs at every startup.
Since it’s virtually impossible to list out every potential culprit that might be causing this error, one quick way to revert every system change that might cause this issue is to use System Restore.
System Restore allows you to restore your machine state back to a healthy state when the circumstances that are causing the current Event Viewer errors where not being met.
Note: Keep in mind that by default, System Restore is configured to regularly save restore snapshots right before important system events (driver installations, Critical WU updates, etc.). Unless you modified the default behavior, it’s very likely that your computer has already created a snapshot right before the apparition of this issue.
Go ahead and identify the best restore snapshot and using it via System Restore and you’ll be able to revert your computer back to a previous point in time where this problem was not occurring.
Note: Keep in mind that once you go through with the operation, every change you made since your OS created that restore snapshot will be lost.


