Troubleshoot Headphones not Working / Detected on Windows
Some users have been reporting having trouble connecting their headphones with their computers. Most of the time, this particular issue is reported on laptops but some users have also reportedly encountered it on desktops with dedicated sound cards.
This issue is not specific to any Windows versions and is frequently reported on Windows 7, Windows 8 and Windows 10.
Note: Before you go through with the methods below, make sure you install any dedicated audio drivers that your motherboard might need. If you have a dedicated sound card, please install the correct drivers for it. In the event that you encounter this problem on a laptop, visit the manufacturer’s download website and download all audio drivers that are recommended for your particular model.
If your Windows version doesn’t recognize your headphones (headset) when you plug them in, the following fixes will most likely help. Below you have a collection of methods that users in a similar situation have used to resolve the issue. Please follow each of the following methods in order until you encounter a fix that solves the problem in your particular situation.
1. Disable front panel jack detection (if applicable)
Some users have discovered that this issue occurs because of the way that the Realtek software manages the panel jacks. By disabling the headphone’s jack detection from the front panel jack, some users have managed to get their headphones recognized. This seems like an isolated Realtek software bug and might not occur in every version.
Note: This method won’t be applicable if you’re not using Realtek HD Audio Manager to manage your sound streams.
Here’s a quick guide on disabling headphone jack detection from the Realtek software:
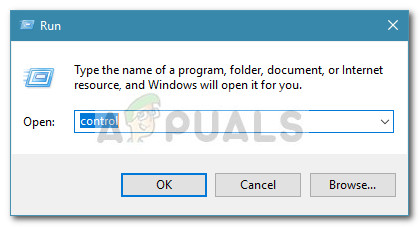
- Press Windows key + R to open up a Run box. Then, type “control” in the Run box and hit Enter to open Control Panel.
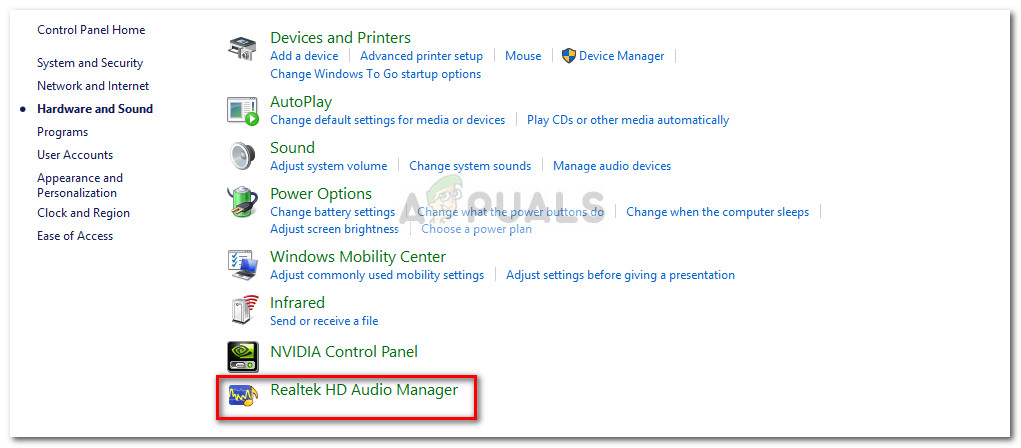
- In Control Panel, select Hardware and Sound then click on Realtek HD Audio Manager.
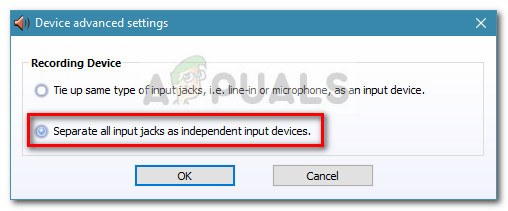
- Click on Device advanced settings and select Separate all input jacks as independent input devices, then hit Ok to save the changes.
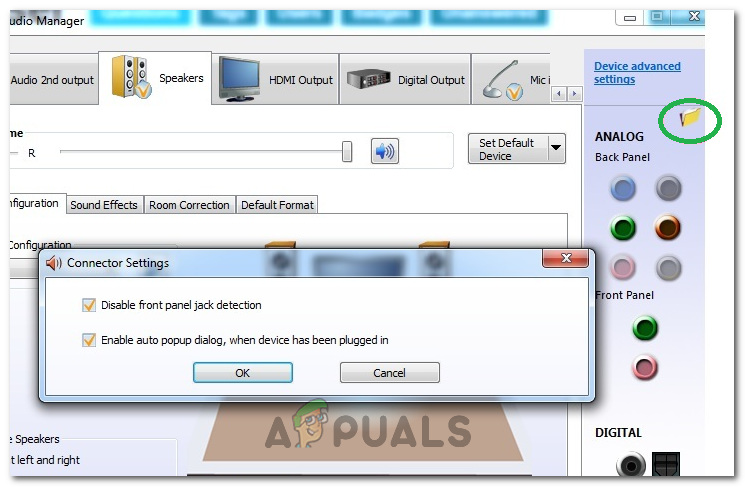
 Note: If you have an older version of the Realtek HD Audio manager, go to Connector settings and enable the checkbox associated with Disable front panel jack detection.
 - Once the change has been performed, close “Realtek HD Audio Manager” and restart your computer. At the next startup, see if the issue has been resolved. If your PC is still unable to detect your headphones/headset, continue with Method 2.
2. Enable Multi-stream mode (if applicable)
Most of the time, this particular issue is caused by a Realtek HD Audio Manager setting. Some users have reported that their headsets were detected as soon as they enabled Multi-stream mode in Realtek HD Audio Manager settings.
Note: This method is only applicable if you’re using a Realtek Audio driver.
Here’s a quick guide on enabling multi-stream mode:
- Press Windows key + R to open up a Run box. Then, type “control” and hit Enter to open the Control Panel.
- Inside Control Panel, click on Hardware and Sound and then click on Realtek HD Audio Manager.
- Then in the top-right corner, click on Device advanced settings and enable Multi-stream mode. Hit OK to save the changes.
- Reboot your computer and see if the issue is resolved at the next startup. If the headset is still not getting recognized by your PC, move down to the method below.
3. Updating to the latest audio drivers
Some affected users have managed to resolve the issue and get their PC to recognize their headphones by updating to the latest audio drivers available.
Your computer might fail to recognize your headphones because Windows is not using the correct audio drivers or the drivers where corrupted after a bad installation – happens frequently when users update from an older version to Windows 10.
The quickest way to inspect if your PC is using the correct audio drivers is via Device Manager. Here’s a quick guide on how to do this:
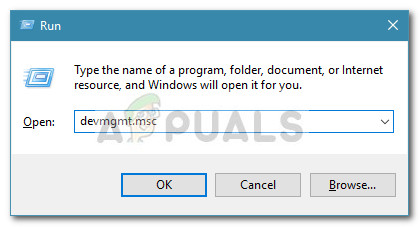
- Press Windows key + R to open up a Run box. Then, type “devmgmt.msc” and hit Enter to open Device Manager.
- Inside Device Manager, expand the Sound, video and game controllers drop-down menu and see whether your headset is listed here. If it is listed, right-click on it and choose Update driver. Then, click on Search automatically for updated driver software and see whether there’s a new version available.
 Note: If you manage to install a new driver version, reboot your computer and see if the issue is resolved at the next startup. If your headset is not visible inside the Sound, video and game controller menu, continue with step 3.
 - See whether any of the entries in Device Manager have a yellow exclamation point in the icon. Most likely, they can be found by expanding the Unknown Devices drop-down menu.
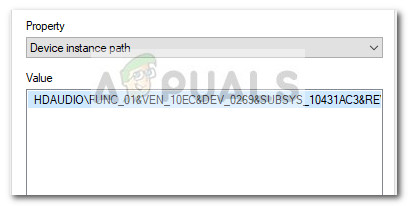
- If you find any device listed under Unknown devices, right-click on them and choose Update Driver. If the updating component doesn’t manage to find a driver, double-click on the entry and go to the Details tab.
- Use the drop-down menu to select Device Instance Path, then copy the value and paste it in an online search. You should then get a clear picture of which driver you need to install.
- Install the driver that is not getting recognized and reboot your computer. At the next restart, see if the issue has been resolved.
4. Change Default Sound Format
It is possible that the sound format that you have configured on your computer isn’t functioning properly with your headphones. Therefore, in this step, we will be changing the default sound format being used by the computer and check if that fixes this issue with the headphones. For that:
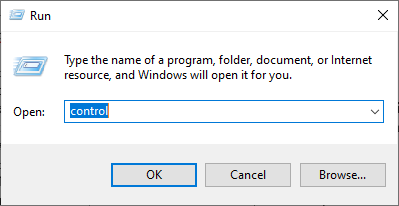
- Press “Windows” + “R” to open the Run prompt.
- Type in “Control” and press “Enter” to launch the control panel.
Accessing the Classic Control Panel interface - Click on the “Hardware and Sound” option and then select the “Sound” button.
- Click on the “Playback” tab and then double click on the “Default Playback Device” that is being used by your computer.
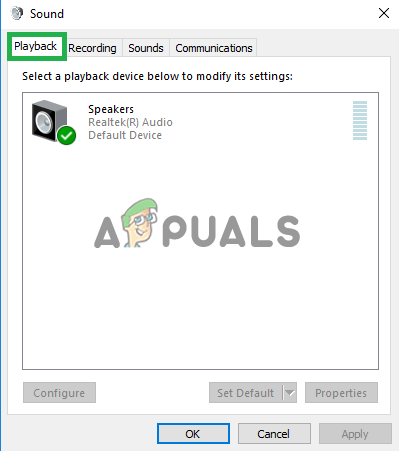
Selecting the “Playback” option. - Click on the “Default Format” option and then select a different option from the list.
- Select “Apply” and then click on “OK”.
- Now check to see if your headphones are recognized by your computer.
5. Change Driver
It is possible that the driver that you are using on your computer is preventing the proper detection of your headphones. Therefore, in this step, we will be configuring the computer to use the default audio driver used by Windows instead of the one that you have installed on your computer. For that:
- Press “Windows” + “R” to open the Run prompt.
- Type in “devmgmt.msc” and press “Enter” to launch the device manager.
Run dialog: devmgmt.msc - In the device management window, expand the “Sound, Video and Game Controllers” option and right-click on the sound driver currently being used by your computer.
- Select the “Update Driver” button and then click on the “Browser my computer for Driver Software” option.
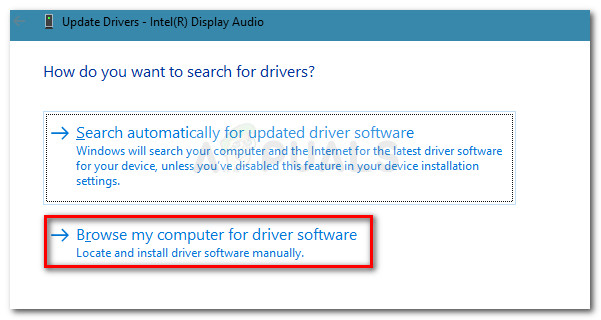
Browser for the driver manually - On the next screen, click on the “Let me pick from a list of available drivers” button and then select the “High Definition Audio Device” option.
- Click on “Next” and confirm the prompts on the next screen.
- Check to see if the issue persists after installing these drivers.
6. Selecting the Proper Device
One common issue with the Realtek Audio Drivers is that you sometimes need to point out the device that you have just plugged into the computer for it to properly detect it. Therefore, in this step, we will be defining this device from the Realtek Control center. For that:
- Right-click on the speaker icon in the system tray and select “Sound Manager”.
- This should now open up the Realtek Sound Manager, if it doesn’t, search for it in the search bar located inside the taskbar.
- In the Realtek Audio Manager, click on the “Small Yellow Folder” on the right side of the window and check the “Enable auto pop dialogue” option.
enable autopop dialogue - Make sure to save your changes if you have selected this option.
- Now, unplug the 3.5mm cable that you are using to connect the headphones to the computer and make sure to disconnect the USB cable if your headphones use the USB mode of connection.
- A dialogue should pop up asking you “Which Device did you plugin”, this dialogue should contain a dropdown and you have to select “Headphones” from it.
- After selecting headphones, check to see if the issue still persists.
7. Scan for Hardware Changes
Sometimes you have to reinitialize your drivers in order for the headphones to work properly if they have been glitched out. Therefore, in this step, we will be navigating to the device manager and then uninstall every instance of the Realtek Audio Drivers. After that, we will be scanning for hardware changes to reinstall them automatically. For that:
- Press “Windows’ + “R” to open the Run prompt.
- Type in “Devmgmt.msc” and press “Enter”.
Run dialog: devmgmt.msc - In the device manager, expand the “Sound, Video and Game Controllers” option and right-click on the “Sound drivers” that you are currently using.
- Select the “Uninstall Device” option and follow the on-screen prompts to uninstall this driver from your computer.
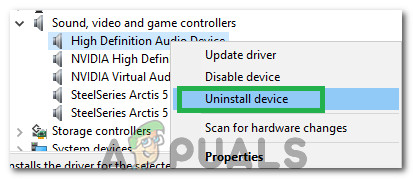
Clicking on the “Uninstall Device” option - Also, expand the “Audio inputs and outputs” option and uninstall all devices from there in the same manner.
- Now, press “Windows” + “R” to open the Run prompt again and type in “Control”.
- Press “Enter” to launch the control panel and click on the “Uninstall a Program” option.
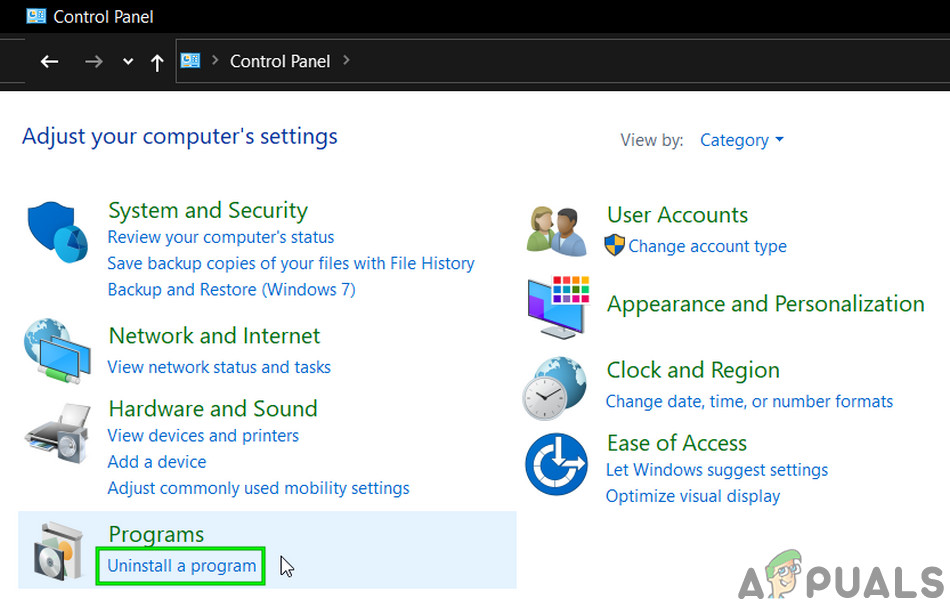
Uninstall a Program - In the app list, right-click on the “Realtek Audio Drivers” option and select the “Uninstall” button.
- Follow the on-screen prompts to uninstall the driver from your computer.
- Also, if you have downloaded this driver onto your computer at any point in time, make sure to delete it completely.
- Now, launch the device manager again and click on the “Scan for Hardware Changes” icon on the top of the window.
- The drivers will now automatically be replaced.
- Check to see if the headphones are now recognized.
8. Deferring Auto Upgrades
This step is vital for those people whose headphones/speakers aren’t being detected after a driver was updated. Therefore, in this step, we will first be downgrading to a previous version of the drivers and then we will prevent Windows from updating the drivers. For that:
- Press “Windows’ + “R” to open the Run prompt.
- Type in “Devmgmt.msc” and press “Enter”.
Run dialog: devmgmt.msc - In the device manager, expand the “Sound, Video and Game Controllers” option and right-click on the “Sound drivers” that you are currently using.
- Select “Properties” and then click on the “Driver” tab and select the “Rollback Driver” option.

Selecting “Rollback Driver” option - Follow the on-screen prompts to rollback your driver updates.
- After that, download this troubleshooter onto your computer to prevent Windows from automatically updating certain drivers.
- Run the troubleshooter and follow the on-screen instructions to prevent all future updates.
- Check to see if the issue is fixed by doing this.
9. Disable Exclusive Control
In some cases, applications might be taking exclusive control of your driver due to which the headphones might not be getting recognized. Therefore, in this step, we will be reconfiguring the driver settings to prevent applications from being able to take exclusive control of the device. For that:
- Press “Windows” + “R” to open the Run prompt.
- Type in “Control” to launch the Control Panel and click on the “Hardware and Sound” option.
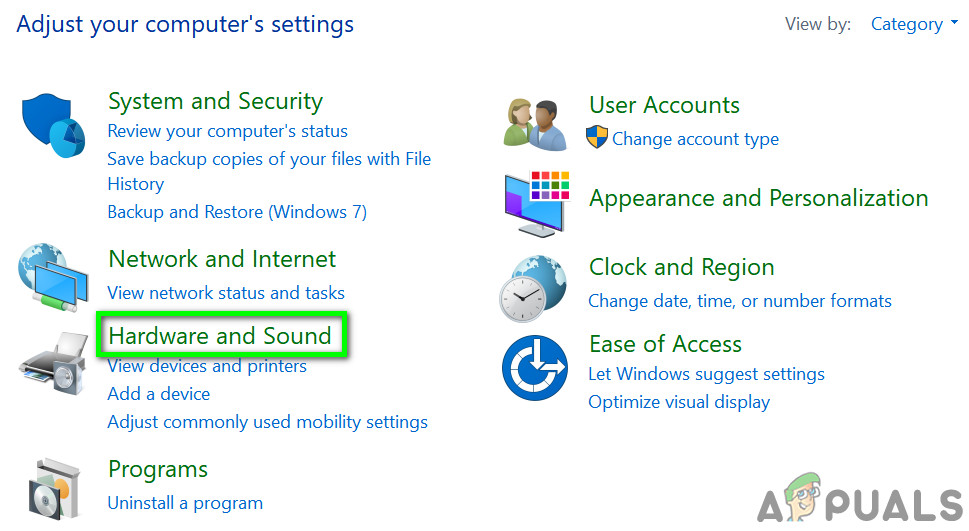
Open “Hardware and Sound” - Click on the “Sound” button and then click on the “Playback” tab.
- Double-click on your playback device and then click on the “Advanced” tab.
- Uncheck the “Allow applications to take exclusive control of this device” option and select the “Apply” option.
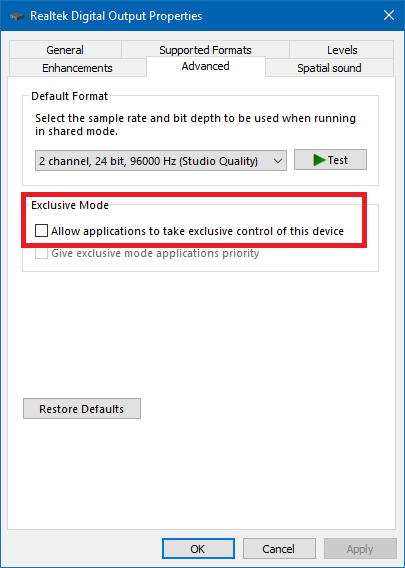
Uncheck Allow applications to take exclusive control of this device - Click on “OK” to close out of the window.
- Check to see if doing so has fixed the issue with your headphones.
10. Hiding Cortana from Taskbar
Some people have fixed this issue by hiding Cortana from their taskbar and some by disabling it temporarily. Therefore, in this step, we will be reconfiguring some Windows settings to first hide Cortana from our Taskbar and if that doesn’t work, we will try disabling Cortana completely. For that:
- From your desktop, right-click on an empty space on the taskbar.
- Uncheck the “Show Cortana button” button and check if the Cortana button has now disappeared.
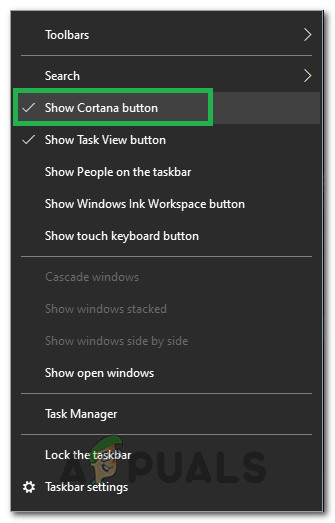
Disabling Show Cortana button in the Taskbar - Check to see if the issue has been fixed.
- If the issue isn’t fixed, you can completely disable Cortana from here.
- Check and see if disabling Cortana fixes the issue with your computer.
11. Running the Troubleshooter
It is possible that the headphones aren’t being recognized because the audio on your computer has been glitched out due to a driver failure. Therefore, in this step, we will be running the Windows Troubleshooter from the settings to check and fix any audio-related issues automatically. For that:
- Press “Windows” + “I” to open the settings.
- Click on “Update and Security” and then select the “Troubleshoot” button from the left pane.
- Click on the “Playing Audio” option from the list and then select the “Run the troubleshooter” button.
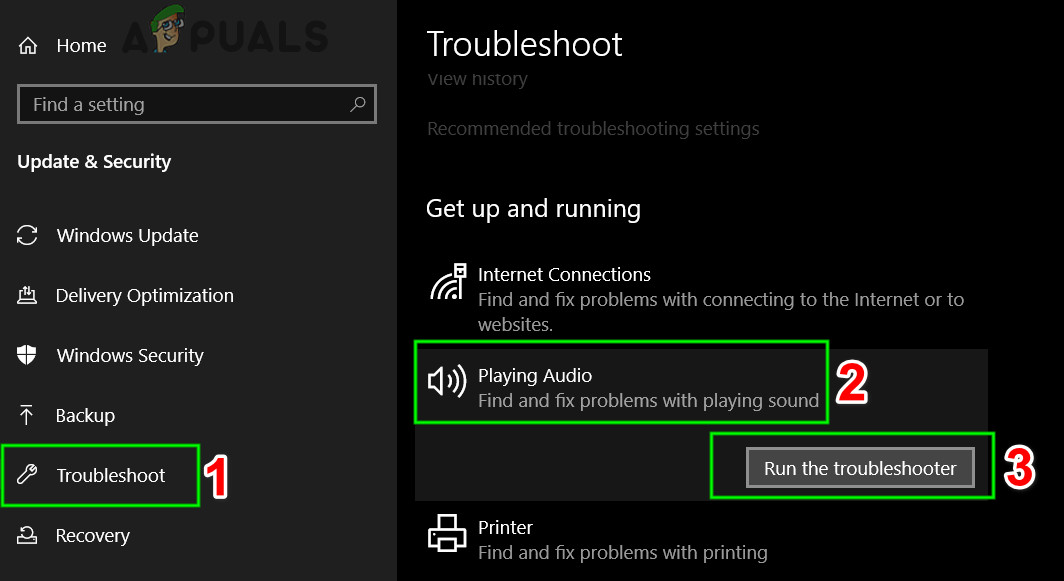
Troubleshoot Playing Audio - Wait for the troubleshooter to proceed and then click on the device that you want to troubleshoot.
- Follow the on-screen instructions to successfully troubleshoot all the issues with your computer’s audio and check to see if the headphones are now recognized.
12. Selecting Headset
Some people were facing this issue with their headphones where either their microphone or their headphones weren’t being detected on Realtek Drivers. Therefore, in this step, we will be selecting headset instead of headphones to allow the computer to be able to recognize both your microphone and your headphones together. For that:
- Right-click on the speaker icon in the system tray and select “Sound Manager”.
- This should now open up the Realtek Sound Manager, if it doesn’t, search for it in the search bar located inside the taskbar.
- In the Realtek Audio Manager, click on the “Small Yellow Folder” on the right side of the window and check the “Enable auto pop dialogue” option.
enable autopop dialogue - Make sure to save your changes if you had to change your selection for it to take effect.
- Remove the 3.5mm cable that you were using to connect your headphones to the computer or remove the USB cable that you might be using for the headphone connection.
- Reconnect the cable to your computer and you should see the “Which Device did you plugin” popup, this dialogue should contain a dropdown and you have to select “Headset” from it.
- After selecting the headset option, make sure to check if the issue is still occurring.
13. Changing Realtek Settings
In some cases, your Headphone might not be properly set up inside the Realtek Audio Manager due to which it isn’t being recognized by the computer. Therefore, in this step, we will be changing some Realtek settings which will allow us to set our headphones up as Stereo instead of 7.1 but for this, we will have to first change it to the latter. In order to do that:
- Right-click on the “Speaker” icon in the system tray and then select the “Realtek Audio Manager” option or you can also open the Realtek Audio Manager by searching with Windows Search in the taskbar.
- After launching the Realtek Audio Manager, click on the “Speakers” icon and then select the “Speaker Configuration” dropdown.
- Select “7.1 surrounds” from the list and save your settings.
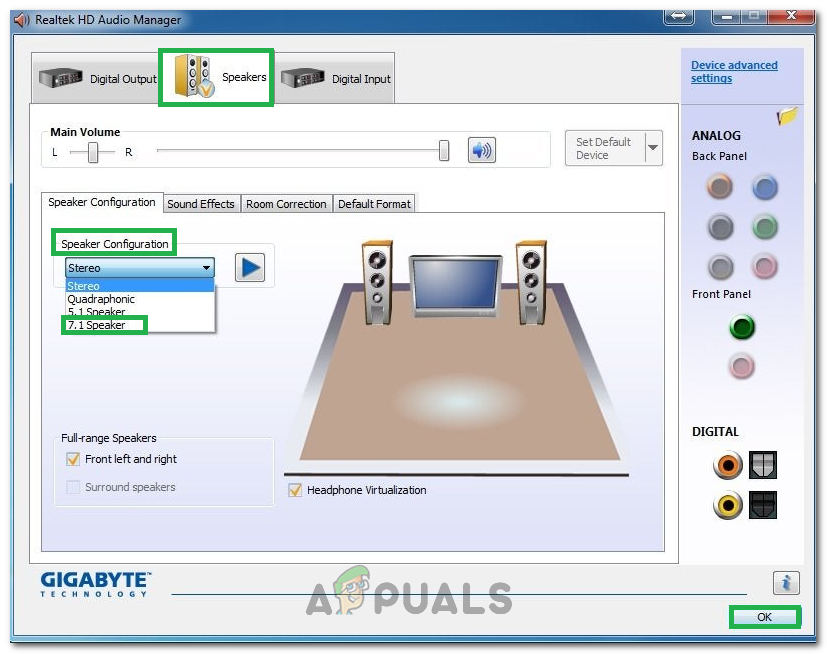
Selecting 7.1 Surround option from the list of speaker configuration buttons - Without closing the Realtek Audio Manager, disconnect your headphones from your computer by removing the 3.5mm cables from the audio jack.
- Wait for some time and reconnect the cable to your computer.
- This time around, select “Stereo” from the speaker configuration dropdown and save your changes.
- Check to see if doing so fixes the headphones not being recognized issue on your computer.
14. Uninstall Realtek Drivers and Clean Registry
If you have been unable to fix this issue on your computer so far, you should try and get rid of the Realtek Drivers installed on your computer. In order to do this, we will have to uninstall the drivers completely, clear the registry of any residue, and then reinstall the drivers from a new source. In order to do this:
- Press “Windows’ + “R” to open the Run prompt.
- Type in “Devmgmt.msc” and press “Enter”.
Run dialog: devmgmt.msc - In the device manager, expand the “Sound, Video and Game Controllers” option and right-click on the “Sound drivers” that you are currently using.
- Select the “Uninstall Device” option and follow the on-screen prompts to uninstall this driver from your computer.
Clicking on the “Uninstall Device” option - Now, press “Windows” + “R” to open the Run prompt again and type in “Control”.
- Press “Enter” to launch the control panel and click on the “Uninstall a Program” option.
Uninstall a Program - In the app list, right-click on the “Realtek Audio Drivers” option and select the “Uninstall” button.
- Follow the on-screen prompts to uninstall the driver from your computer.
- Now that the Realtek drivers have been uninstalled from our computer, we can move on towards cleaning the registry.
- Download CC Cleaner from here and run the tool to clean your registry of any residue.
- After clearing your registry as well, click on the “Scan for Issues” option inside of CC Cleaner and follow the on-screen instructions to fix any issues.
- After that, reboot your computer and download any other driver from your system manufacturer’s website if Windows doesn’t automatically install one.


thank you very much i was searching to solve this problem for 4+h now <33333