Fix: CldFlt Service Error
There are quite a few seemingly random error codes which regularly appear on Windows, usually after a change has been made to the operating system such as a new update or similar. One of these errors is definitely the “The CldFlt service failed to start” error and solving it can be confusing without proper guidance.
That is why it’s important to follow the instructions below carefully without exposing your computer to risk. Certain risky parts will be marked such as editing the registry since improper handling can cause damage to your system.
Solution 1: Editing the Registry
The first method on our list has been declared as quite a successful one so that is the reason why you should first try this one out. The method includes editing the registry which can be somewhat dangerous if you are not sure what you are doing or if you accidentally edit the wrong key.
Follow the instructions displayed in this article in order to safely backup your registry so that you can fix the potential damage if it occurs.
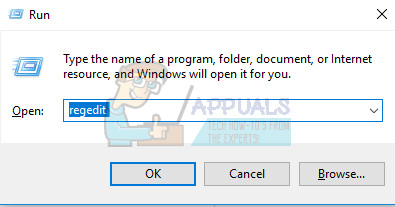
- Open the Registry Editor by typing this into the Start menu or in the search bar located at the left part of the taskbar. You can also open the Run dialog box and type in “regedit”.
- Navigate to the following location in your registry by navigating through the folders located at the left side of the Registry Editor’s window:
HKEY_LOCAL_MACHINE\SYSTEM\ControlSet001\Services\CldFlt
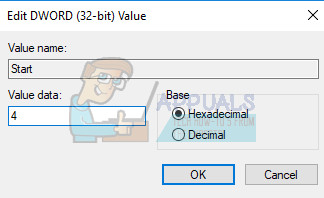
- Locate the Start key which should be marked by type as REG_DWORD. Its default value is usually 2. Right-click on it and choose Modify.
- When the Edit window appears, under the Value data section, change the value from 2 to 4 and click OK.
- Check to see if the error still appears.
Solution 2: Hiding the Error From Appearing
This method can be considered to be a workaround but the fact is that this issue is usually harmless if it’s not preventing you from enjoying any of the activities on your PC. However, the issue can be annoying and you may wish to prevent it from appearing ever again.
Note: If the error code is preventing you from gaming or opening a certain program, than this workaround may not solve the problem for you.
- Open the Registry Editor by typing this into the Start menu or in the search bar located at the left part of the taskbar. You can also open the Run dialog box and type in “regedit”.
- Navigate to the following location in your registry by navigating through the folders located at the left side of the Registry Editor’s window:
HKEY_LOCAL_MACHINE\SYSTEM\CurrentControlSet\Control\WMI\Autologger\EventLog-Application\{f1ef270a-0d32-4352-ba52-dbab41e1d859}
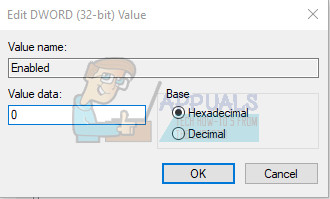
- Locate the Enabled key at the left side of the screen. Its default value is usually 1. Right-click on it and choose Modify.
- When the Edit window appears, under the Value data section, change the value from 1 to 0 and click OK.
- Check to see if the error still bugs you by appearing as a error window.
Solution 3: Run the System File Checker Tool and DISM
This problem may occur if some of the system files are either missing from your system or if they are corrupt and can’t be accessed. This is especially valid if the error code makes your computer restart or if it prevents you from some demanding processes such as gaming. Make sure your follow the instructions below in order to fix this.
- Run the DISM (Deployment Image Servicing and Management) tool. This tool is particularly useful if you want to check whether your system is ready for the following update. The tool can be used to scan and check your Windows image for errors and inconsistencies.
If you want to take a look at detailed instructions on how to operate this tool, check out our article on the topic: How to Use DISM to Repair Windows 10. - Use the SFC.exe (System File Checker) tool which is accessed via the administrative Command Prompt (the same as DISM tool). The tool will scan your Windows system files for broken or missing files and it’s able to fix or replace the files instantly. This can be quite useful if you need those files for the updating process since the ERROR_SXS_ASSEMBLY_MISSING appears if there is a problem with one of your system files.
If you want to take a look at detailed instructions on how to operate this tool, check out our article on the topic: How to: Run SFC Scan in Windows 10.
Solution 4: Reinstall OneDrive
Since the CldFlt is an abbreviation for Cloud Files Mini Filter Driver, the issue may as well be caused by the configuration of OneDrive on your computer, if you have it installed, of course. The issue can be fixed simply by uninstalling OneDrive from your computer and installing it again if you see that the issue is fixed.
However, if the issue disappears after uninstalling OneDrive and it comes back after reinstalling it, we suggest you to get rid of it completely and use the online version of the client.
- First of all, make sure you are logged in with an administrator account as you won’t be able to delete programs using any other account. Backup the data you want to save because uninstalling OneDrive will remove it.
- Click on the Start menu and open Control Panel by searching for it. Alternatively, you can click on the gear icon in order to open Settings if you are using Windows 10.
- In Control Panel, select to View as: Category at the top right corner and click on Uninstall a Program under the Programs section.
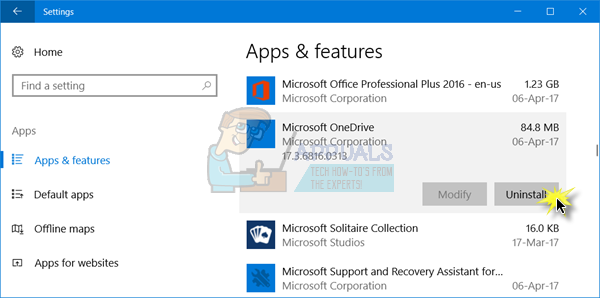
- If you are using the Settings app, clicking on Apps should immediately open a list of all installed programs on your PC.
- Locate OneDrive in Control Panel or Settings and click on Uninstall.
- Its uninstall wizard should open with two options: Repair and Remove. Select Remove and click Next in order to uninstall the program.
- A message will pop up asking “Do you want to completely remove OneDrive for Windows?” Choose Yes.
- Click Finish when the uninstalled completes the process and reinstall OneDrive by downloading the client from this site, running the OneDriveSetup.exe file from your Downloads folder, and following the instructions on-screen.
Solution 5: Change Your Power Options
The Power Options on your computer are also a valid reason for the error to occur since there is a Fast Startup option in your Power Options which boots your computer faster and it’s quite possible that this option prevents one of the drivers from loading properly on your PC.
There are a few other options your should take care of as well in order to make sure the error does not appear again on your PC.
- Open Control Panel by searching for it in the Start menu.
- Switch the View by option in Control Panel to Large Icons and locate the Power options button.

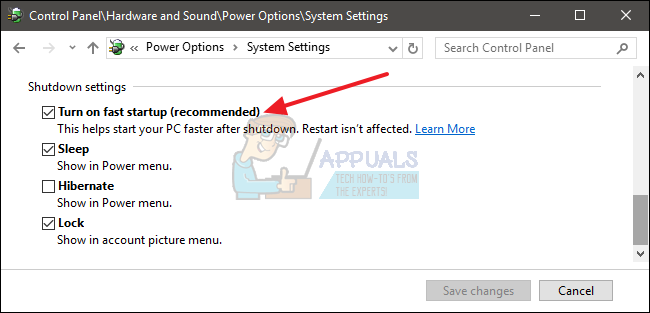
- Open it, click on the “Choose what the power buttons do” option at the left side of the window, and take a look at the top of the window where the “Change settings that are currently unavailable” option should be located. Click on it and navigate to the bottom of the window where the Shutdown settings are located.
- Turn of the “Turn on fast startup (recommended)” option, Sleep option, and the Hibernate option. Click the Save Changes button at the bottom right part of the window.