How to Fix Windows 10 Black Screen with Cursor Issue?
The black screen with cursor issue occurs when Explorer.exe does not load at startup. Although the issue can be resolved quickly, it may not be fixed if the Explorer.exe entry is removed from the shell in the registry editor.

Corrupted graphics drivers and system files are some of the main contributors that cause this issue. However, there are numerous ways to troubleshoot the Black Screen with Cursor without making major changes to the system. Below, we have outlined some of the main reasons that can be considered as culprits.
-
- Corrupted Graphics Driver- This type of issue usually occurs when there are corrupted files in the device drivers. Therefore, you may need to reinstall the drivers to fix this issue.
- Corrupted System Files- System files are crucial for operating systems, and they can also become easily corrupted, which can cause Windows to crash. If that’s the case, you must repair the system files by executing some commands to address this issue.
- Outdated Bios- As it turns out, an outdated BIOS can be one of the main reasons for connection issues, as it plays a significant role in connecting the hardware to the computer. For that reason, check for available updates on the manufacturer’s website.
- Conflict Of Services– According to the affected users, the problem may be caused by a conflict between services. To fix this, you need to end the problematic service’s task or perform a clean boot.
- Corrupt Windows Update- Sometimes, the Windows update becomes corrupt, and you may encounter a black screen with a cursor. Therefore, uninstall a recent Windows update or restore Windows to a previous state.
1. Basic fixes.
Some technical issues can cause problems. According to affected users, if you use a dual-monitor screen, pressing Win + P and then pressing the arrow down key four times in a row to select the second screen can fix the issue. Although you can also choose the 1st option, which is the PC Only screen, it may not resolve the issue. However, if you disconnect the 2nd monitor and then restart the computer, it may aid in fixing the black screen with the cursor. Additionally, you can check cables and ensure they are properly connected to the computer, as this can also cause the issue.
2. Restart Explorer.exe.
Another solution that helps to fix this issue is to restart Explorer.exe, a process that takes responsibility for starting the apps, taskbar, Start Menu, desktop, and more. In simple words, it renders most of the User Interface (UI). Therefore, restarting the Explorer.exe will fix this issue if it is not indicating to the corrupted Windows or drivers.
There are two ways to restart explorer.exe. If neither of these fixes the issue, you will need to boot your Windows in Safe Mode for some basic troubleshooting operations. Below are the steps:
- Press Ctrl + Shift + Esc at the same time to launch Task Manager
- Under Process, find and right-click on Windows Explorer, and then select Restart.
- In case Windows Explorer is not showing, click on File at the top, then click Run New Task.
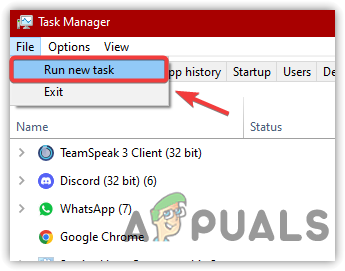
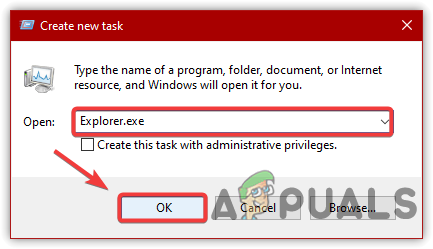
Running a New Task - Type ‘Explorer.exe‘ and click ‘OK‘.
Restarting Windows Explorer
3. Restart the graphics driver.
The easy and quick fix for the black screen with cursor issue is to restart the graphics driver. To do this, press Win + Ctrl + Shift + B simultaneously to restart your graphics driver.
4. Access the Registry Editor.
A Trojan program is designed to take complete control of your computer by removing the entry of Explorer.exe from the shell in the registry editor. Therefore, you need to access the registry editor to ensure the Value data of the shell is Explorer.exe. If it has been changed, then remove the incorrect entry and enter Explorer.exe. Below are the steps:
- Open Task Manager. To do that, press Ctrl + Shift + Esc simultaneously.
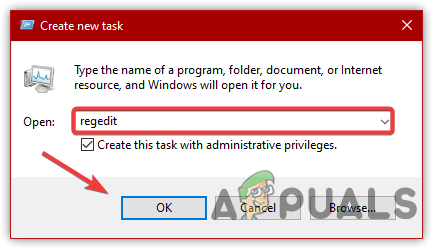
- For the file, click “Run New Task” and type “regedit.
- Select ‘Create This Task with Administrator Privileges‘.
- Then, press Enter to launch the Registry Editor.
Accessing Registry Editor - Now, navigate to the following path:
Computer\HKEY_LOCAL_MACHINE\SOFTWARE\Microsoft\Windows NT\CurrentVersion\Winlogon
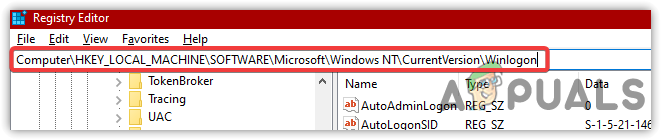
Navigating to the Shell from Registry Editor - In the right pane, click on Shell and check its value data. If it is not explorer.exe, then change it to explorer.exe.
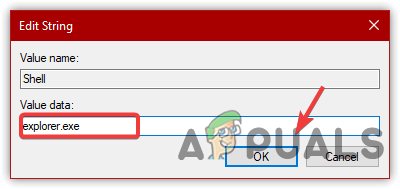
Change Entry to Explorer.exe - Once completed, click “OK” and restart.
5. Disable the App Readiness Service.
App Readiness is a default service that prepares Windows apps for use when users sign in to the PC. However, it has been discovered that disabling App Readiness resolves slow boot and other issues, including the Black Screen with Cursor problem. Follow these steps to disable the App Readiness service:
- Press Ctrl + Alt + Delete to select Task Manager from the listed options.
- Once the Task Manager is opened, click on File > Run New Task.
Click to Run a New Task - Type ‘services.msc’ and hit ‘Enter‘.

Launching Services Window - Locate and right-click on “App Readiness,” and then click “Properties.

Click to Navigate into Properties - Change the startup type to ‘Disabled‘.
- Click “Apply,” and then click “OK” for the changes to take effect.
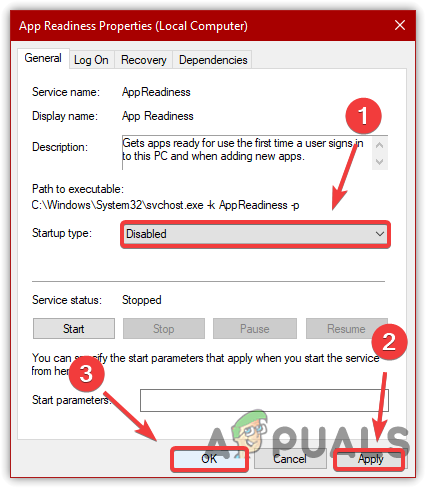
Restarting Windows Service - Restart your computer and see if the issue is fixed.
6. Restore registry files.
A black screen with a cursor can be caused by corrupted registry files. If the registry files are corrupted, you may encounter issues, such as this and similar to BSOD errors. Restoring the registry files can potentially fix the BSOD error, and according to several affected users, this method may also apply to a black screen with a cursor issue. Below are the steps to restore default registry files:
- Switch off your computer and restart it three times to initiate the automatic repair.
- To restart, wait for the Windows logo screen to appear, and then hold the power button for 8 seconds to turn off.
- After restarting for the 4th time, you will be directed to the automatic repair screen.
- Click on Advanced Options, then navigate to Advanced Options > Troubleshoot > Advanced Options > Command Prompt.
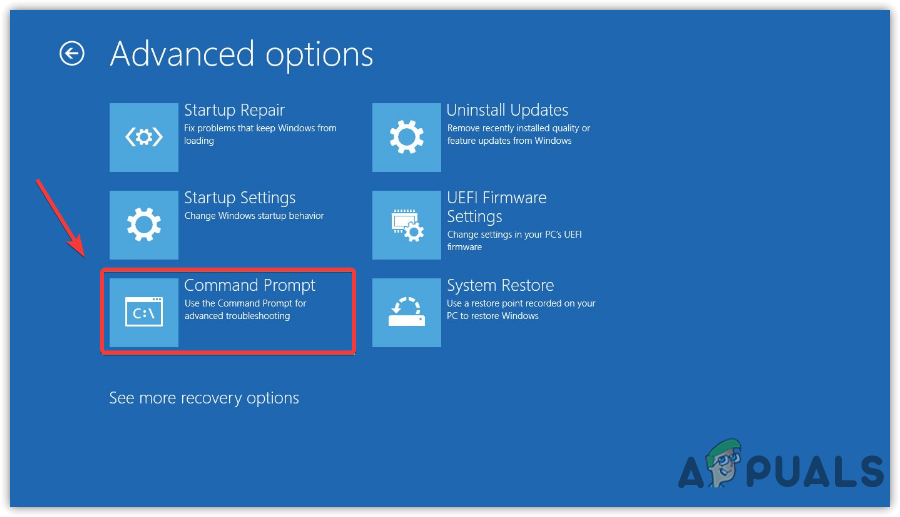
Launching Command Prompt From Advanced Options - Once you launch the terminal, type “C:” and hit Enter.
- Note: If you have installed Windows on a different drive, replace ‘C’ with the appropriate drive letter.
- Type “dir” and hit enter.
- Then, type the following commands and hit enter to start the process.
xcopy c:\windows\system32\config\regback c:\windows\system32\config
- Once done, type “exit” and press enter.
- Restart your computer and see if it fixes the black screen with a cursor.
7. Perform a clean boot.
A conflict involving third-party services can cause a black screen with a cursor. This issue can occur at any time, and as a result, you may encounter various problems like this one. Performing a clean boot disables all unnecessary services and third-party programs that load at startup. This process enables Windows to operate with a minimum number of drivers and services. Therefore, performing a clean boot may resolve this issue.
- To perform a clean boot, open the Task Manager by pressing Ctrl + Shift + Esc.
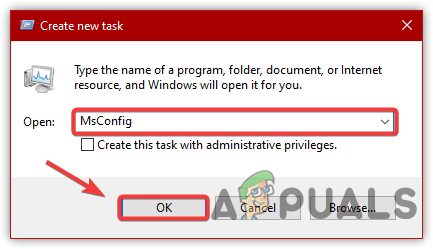
- Click “File” from the top, and then select “Run New Task.
Run a New Task - Type “MSConfig” and click “OK.
Open System Configuration - A short window will appear; click on Selective Startup and proceed to the Services tab.
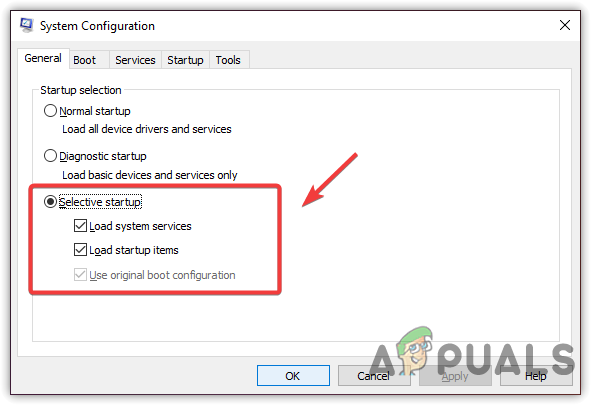
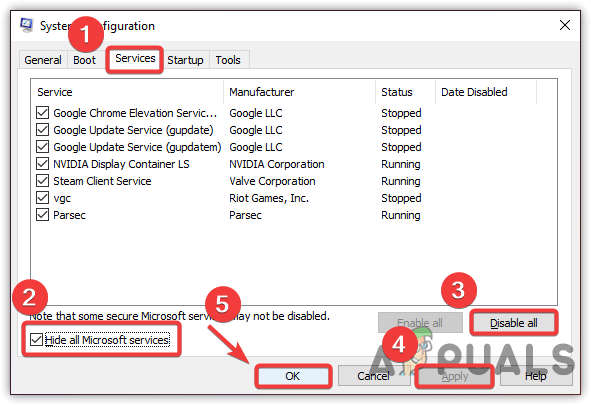
Click to Choose Selective Startup - Tick the ‘Hide All Microsoft Services‘ option, and then click ‘Disable All.’
- Click “Apply,” then click “OK,” and restart your computer to see if the issue persists.
Executing a Clean Boot Process
8. Run the DISM and SFC commands.
If the issue persists, try repairing Windows images by running DISM and SFC commands. These commands are used to restore corrupted files such as DLL and system files. If you are able to open Task Manager, then run these commands in the terminal by following the instructions below.
- To run repair commands, open the Task Manager by pressing Ctrl + Shift + Esc.
- Click File > Run New Task.
Click File to Run a New Task - Type ‘cmd‘ and check the option ‘Create This Task with Administrator Privileges.’
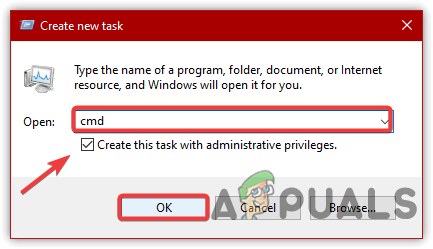
Launch CMD Through Run Program - A terminal will open; please copy and paste the following command into the terminal, and then wait for the process to finish.
DISM /Online /Cleanup-Image /RestoreHealth
sfc /scannow
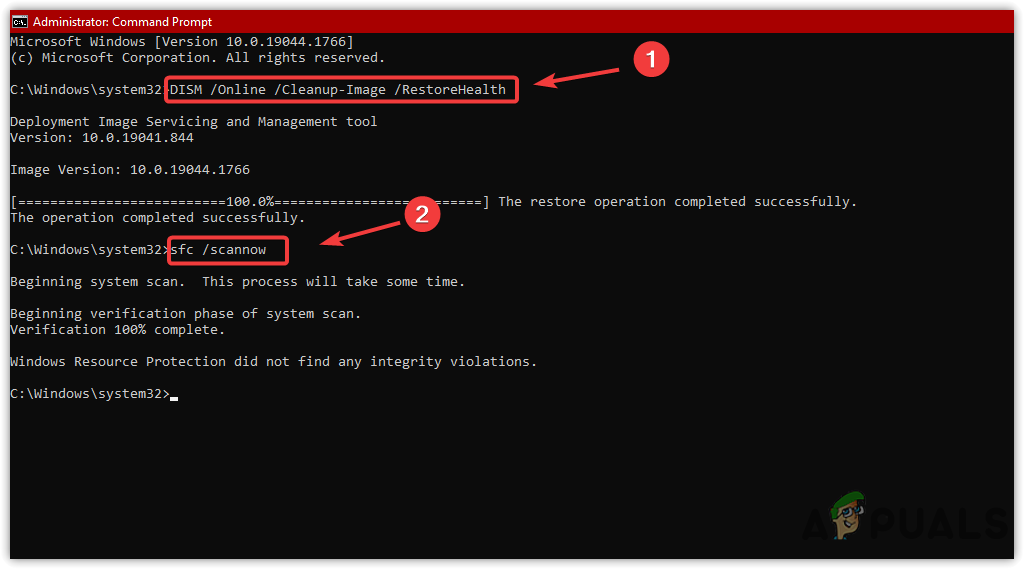
Executing Repair Commands - Once done, restart your computer and see if it fixes the issue.
9. Add a new user account.
Another solution that can fix this issue is to add a new user account. After adding a new user account, you will need to update all your drivers and transfer your data to the new user account.
- To add a new user account, press Ctrl + Shift + Enter or Ctrl + Alt + Delete to open the Task Manager.
- From the File menu, select Run New Task.
- Type “netplwiz” and press Enter.
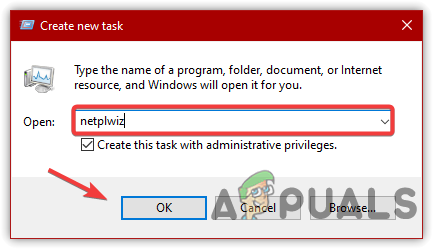
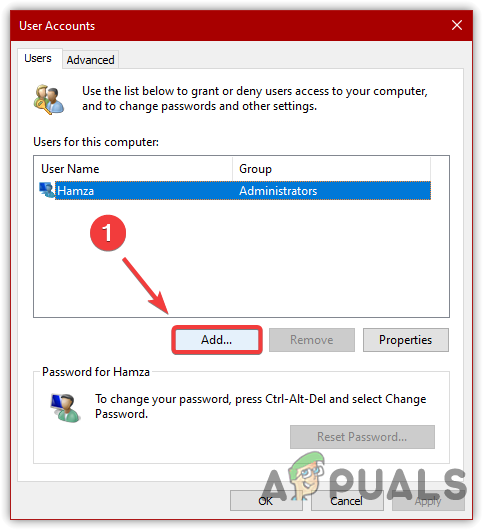
Type Command To Add New User - Click ‘Add‘ to create a new user account.
- Click ‘Sign in without a Microsoft Account.’
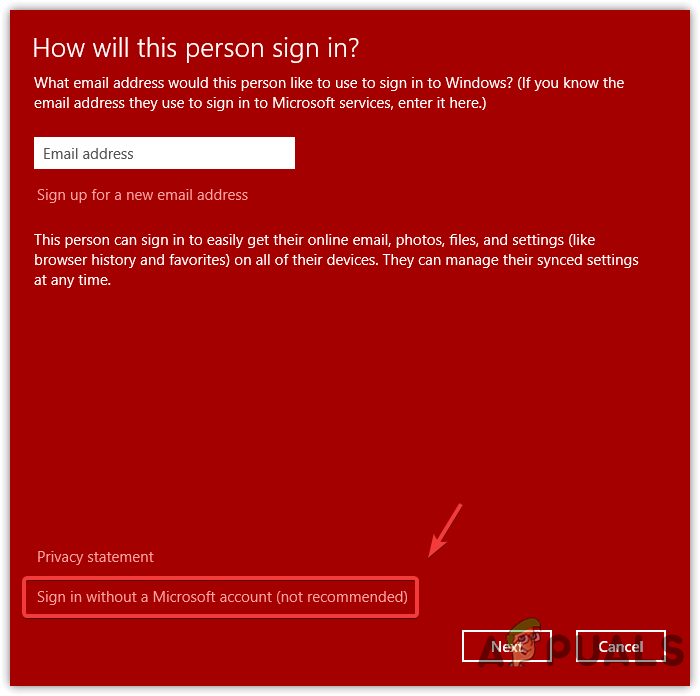
Click To Continue - Click on ‘Local Account‘, fill out the details, then click ‘Next‘, and finally click ‘Finish‘.
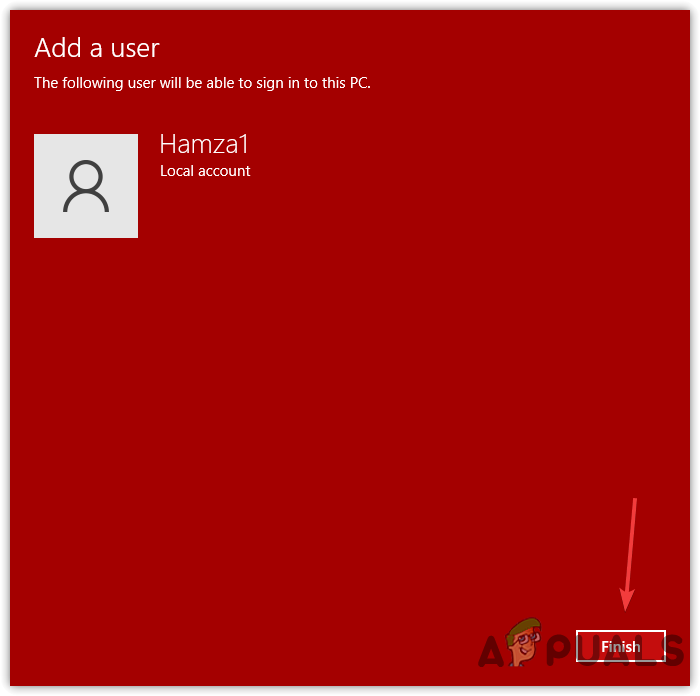
Click To Finish - Once you have created a new local account, go to the user account page, select ‘Create a Local Account,’ and then click ‘Properties.’
Click Add to Create User Account - Please go to Group Membership and select Administrator.
- Once done, click “Apply” and then click “OK.
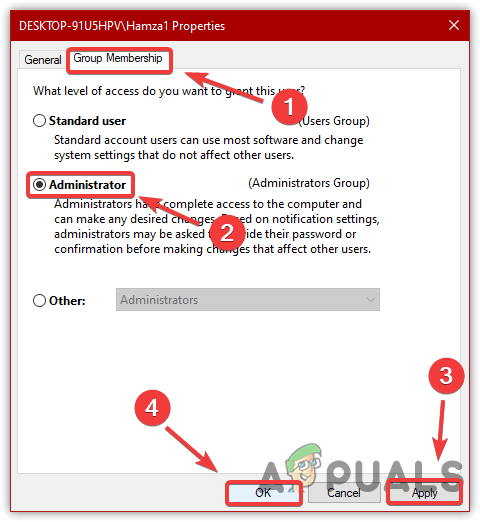 Add administrator permissions to the account.
 - Now, press Ctrl + Alt + Delete and choose “Sign Out.
- Once you have signed out, now select a different account to sign in again and see if it fixes the issue.
10. Use the System Restore feature.
If you created a restore point before encountering this issue, we expect that you are familiar with System Restore. If you don’t know about System Restore, you can proceed to the other steps, but we recommend visiting this article so you can be prepared for future situations by creating a restore point.
- To use a restore point, open the Task Manager. To do that, press Ctrl + Shift + Esc.
- Click “File,” then select “Run New Task.
- Type “rstrui” and click “OK.
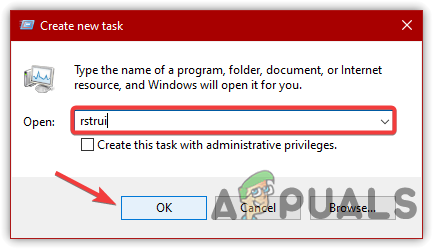
Open System Restore Settings - Click ‘Next‘ to select a restore point.
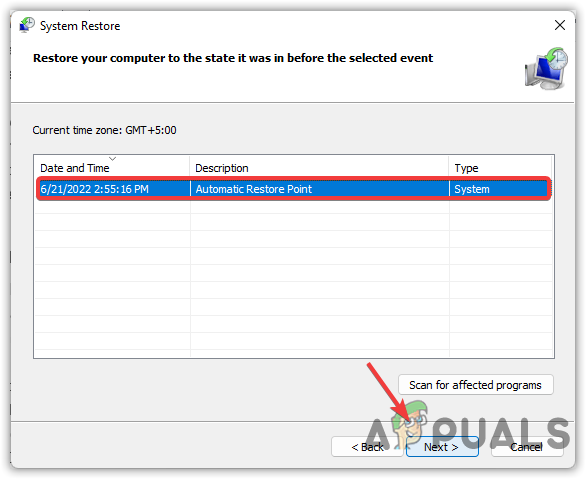
Select Restore Point - Once you have selected a restore point, click Next and then click Finish.
- Once completed, check if the issue is resolved.
11. Uninstall the recent update.
A corrupt Windows update can also contribute to causing a black screen with a cursor issue. However, there are fewer chances of a corrupt Windows update being the cause, but it is good to give it a try, as sometimes users install a corrupt update due to insufficient internet speed or other reasons.
- To uninstall a recent Windows update, open the Task Manager by pressing Ctrl + Alt + Esc simultaneously.
- Click File > Run New Task.
- Type “Appwiz.CPL” and press Enter.
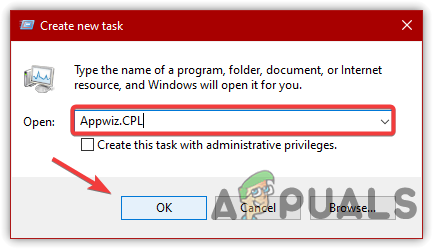
Navigating to Uninstall Program & Features - Click “View Installed Updates” from the left pane.
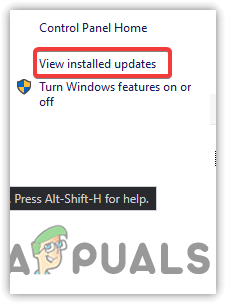
Click to View Installed Updates - Select the recent Windows update and click ‘Uninstall‘ at the top.
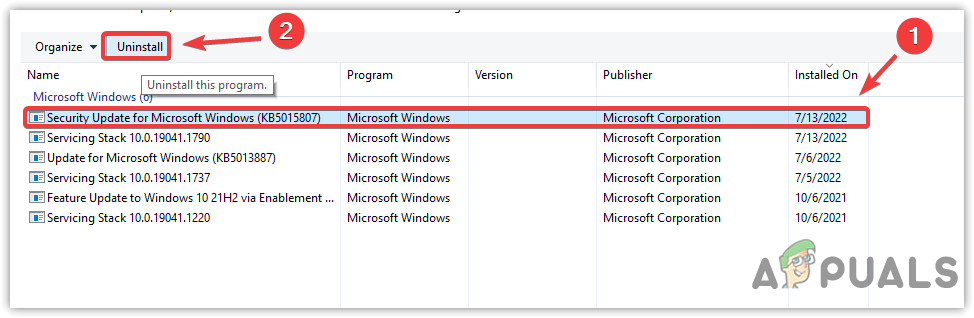
Uninstalling Windows Update - Once completed, restart your computer and see if it resolves the issue.
12. Run the Startup Repair.
Startup Repair is an inbuilt Windows feature that resolves issues with the files required for normal Windows booting. It addresses problems that prevent Windows from loading properly. Follow the steps below to run Startup Repair:
- First, turn off your computer and then turn it on again.
- Once you see the Windows logo, press the power button to switch off the computer.
- Please repeat this process two more times to trigger the Advanced Startup options.
- Navigate to Troubleshoot > Advanced Options.
- Click on “Startup Repair” to begin the repair process.
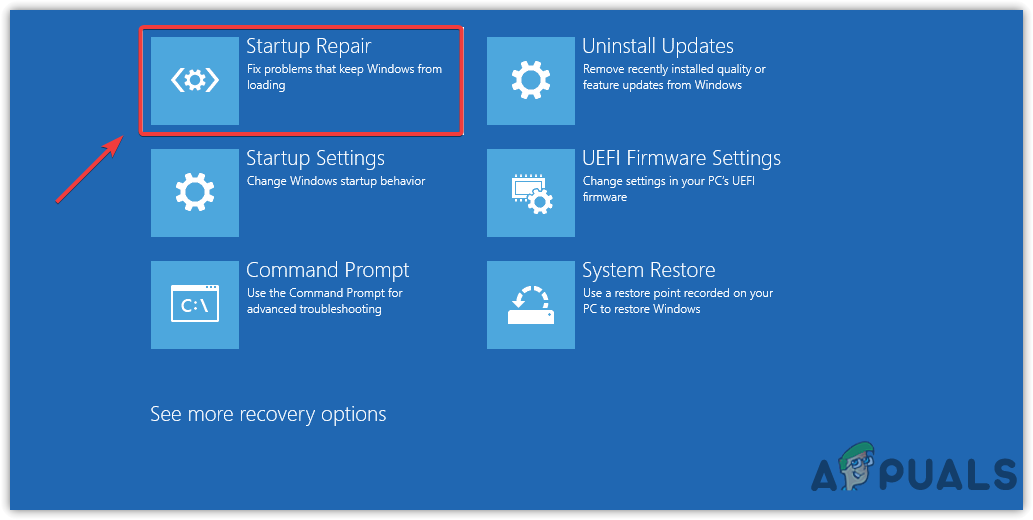
Run Startup Repair - Once done, check whether the issue is fixed.
13. Disable the Fast Startup option.
Fast Startup is a utility added to Windows by Microsoft. It reduces the time Windows takes to boot up from sleep mode or shutdown. However, according to several users, it creates compatibility issues while booting up Windows. For that reason, we advise you to disable the Fast Startup option.
- To disable Fast Startup, open the Task Manager by pressing Ctrl + Alt + Esc simultaneously.
- Click “File” from the top, and then click “Run New Task” to open the “Run Program.
- Type “powercfg.cpl” and press Enter.
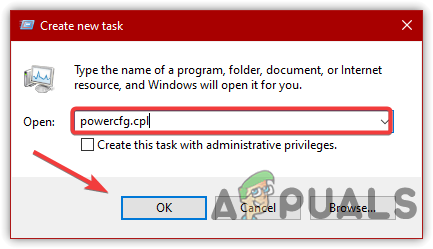
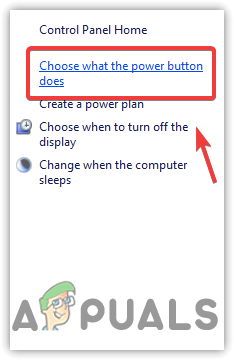
Launching Fast Startup Settings - Click “Choose What the Power Button Does.
Navigating to the Power Settings - Click on “Change Settings That Are Currently Unavailable.
- Uncheck “Turn On Fast Startup” and then click “Save Changes.
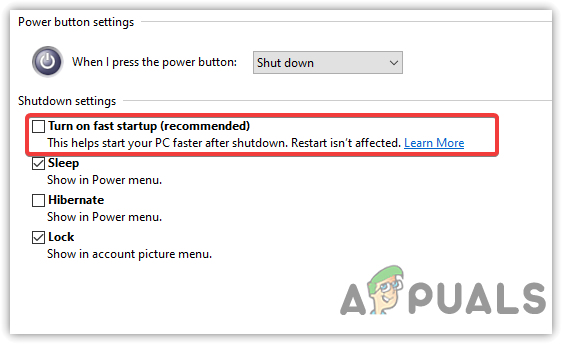
Untick Turn Of Fast Startup - Once finished, restart your computer.
14. Boot Windows in Safe Mode.
If the above method fails to fix this issue, and neither your Windows is displaying Task Manager nor running programs, then it is most likely due to corrupted drivers, system files, conflicts of services, or corrupt Windows updates. These are some of the factors that we need to troubleshoot in Safe Mode in order to use Windows. Below are the steps:
- Press Ctrl + Shift + Esc, and then click the Power button in the bottom right corner.
- Hold the Shift key and click Restart.
- Once you saw the advanced startup options.
- Navigate to Troubleshoot > Advanced Options > Startup Settings, and restart.
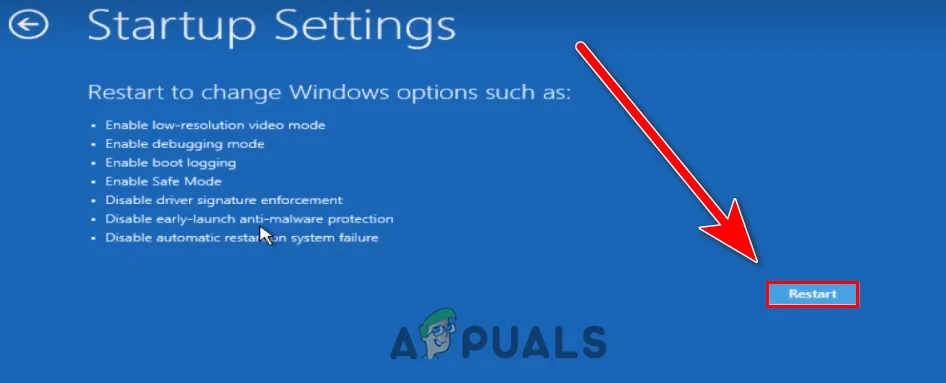
Restart to select in Safe Mode - After rebooting, you will see numerous startup options; press F5 to access Safe Mode with networking. Note: If you are unable to access safe mode, turn off your computer three times in a row by pressing the power button. Ensure that you wait for a Windows logo screen before turning it off.
- Once you access safe mode, follow the methods below.
14.1: Reinstall the Graphics Driver.
Corrupted graphics drivers can be the sole reason for this issue, as they can prevent Windows from loading. If your graphics driver is corrupted, either disable or reinstall the graphics driver.
14.2 Uninstall the Graphics Driver
There is an application called Display Driver Uninstaller, which is used to entirely uninstall drivers from the computer. Sometimes, the device manager does not remove the drivers completely, leaving some files behind. These leftover files can cause serious problems, such as driver conflicts and BSOD errors.
- To uninstall the driver, download the Display Driver Uninstaller.
- Once you have downloaded it, right-click on it and select “Extract to DDU.
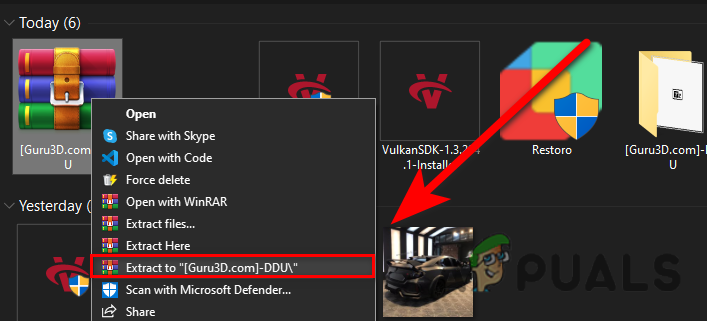
Extract to DDU Folder - Once it’s done, navigate to the folder and open the Display Driver Uninstaller.
- A shortcut window will appear; click “Extract.
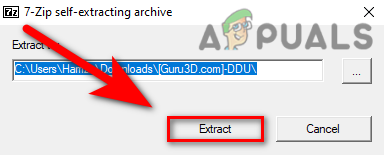
Extracting DDU Application - Go to the extracted folder and finally launch Display Driver Uninstaller
- Select your GPU vendor and device type from the top.
- Then, click Clean And Restart
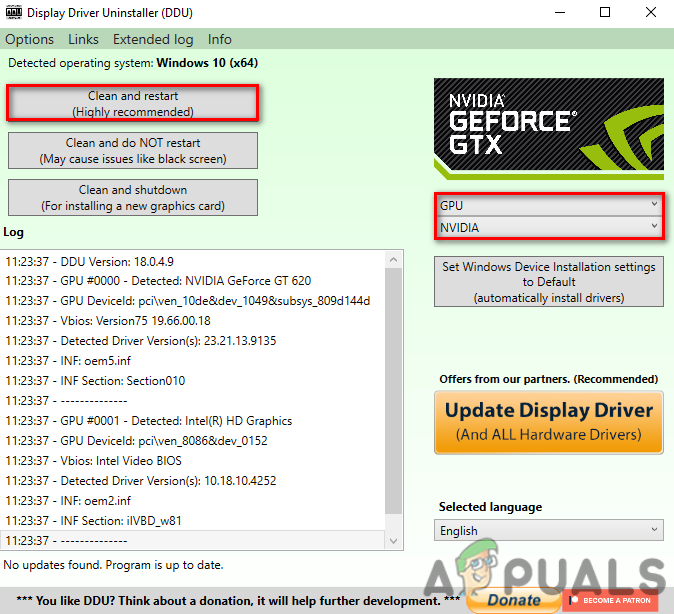
Choosing Graphics Card Vendor
15.3 Install the Graphics Driver.
- To install the latest driver, visit the manufacturer’s website for your graphics card.
- Navigate to the Drivers & Support section.
- Choose your graphics card and click on “Search.

Search For Driver - If the website asks for the operating system, select your OS.
- Then, download the latest driver.
- Once completed, open the installer and follow the subsequent instructions to install the driver.
- After installing the driver, reboot your computer and see if the issue is fixed.
If neither of the solutions worked, then your Windows may be affected by malware or third-party programs. To fix this, either try repairing or reinstalling Windows with the help of a USB. Fortunately, we have articles on both repairing and reinstalling Windows. Thank you.
Well, I really didn’t know what exact graphic card driver in my laptop. So I used Driver Talent to scan and it found the compatible one for me. Though there were some other steps I followed, at least I updated the graphic card driver easily. Thank you. I will share this with my friends. Thank you. Merry Christmas and Happy New Year. 🙂