Fix: Audio Device is disabled
Many people come across an issue where after the audio troubleshooting, they come across an error message named “Audio device is disabled”. This error message usually means that the computer is detecting your audio device but, the device itself is disabled.
This error message might come forward when you have manually disabled the device yourself or when because of some bad configurations, the audio device cannot be enabled. This is a very well-known problem with quick fixes. Take a look below.
Solution 1: Enabling the audio device in control panel
Chances are that you have manually disabled the audio device and when you did, the audio is not be seen in the list of devices. This is very normal behavior as Windows by default hides all audio devices which are disabled to remove the clutter but in some cases, it does the opposite and causes problems.
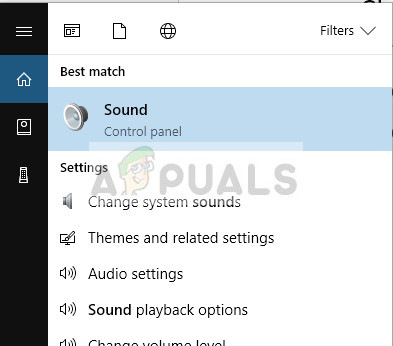
- Press Windows + S, type “sound” in the dialogue box and open the control panel application which comes forth. Alternatively, you can navigate to the control panel yourself and open the settings.
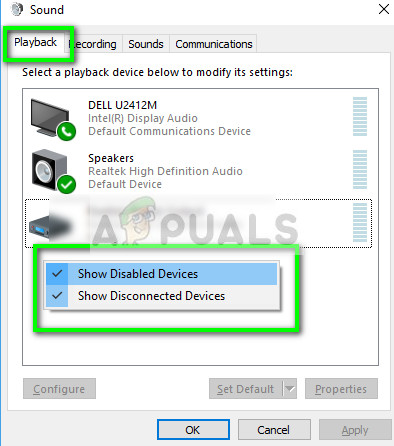
- Now click on the Playback tab, right-click on any empty space and make sure that both options are checked i.e. “Show Disabled Devices” and “Show Disconnected Devices”.
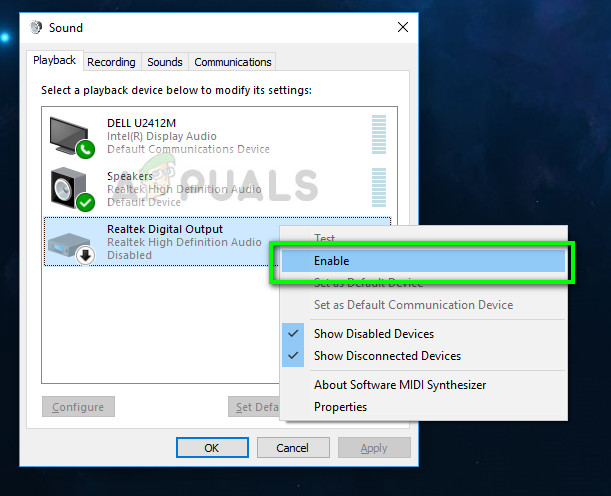
- Press Apply to save changes. Now the disabled audio device will automatically become visible on the playback tab. Right-click on it and select “Enable”.
- Press Apply again to save changes and exit. Now check if the problem at hand is solved.
Solution 2: Enabling audio device in device manager
Device manager consists of all the devices connected with your computer. It is also possible that the audio device is disconnected from there hence popping the error message. We can navigate to the device manager, enable the device manually and see if this does the trick.
- Press Windows + R, type “devmgmt.msc” in the dialogue box and press Enter.
- Once in the device manager, right-click on the audio device which is disabled and select “Enable device”. You can instantly see which device is disabled by checking the black arrow beside it pointing downwards.
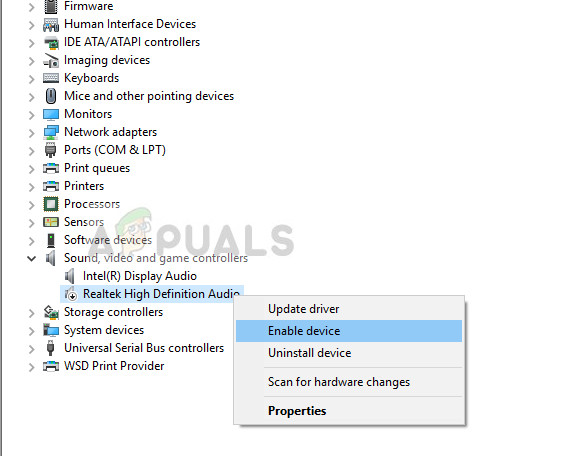
- After enabling the device, check if the problem is solved.
Solution 3: Adding a Network Service
Before we move on to configuring and updating different sound drivers on your computer, it is wise to check if adding a network service on your computer solves the problem for us. You will require an administrative account to execute this solution. There were numerous reports and positive feedback by the users that executing these commands fixed the problem instantly.
- Press Windows + S, type “command prompt” in the dialogue box, right-click on the application and select “Run as administrator”.
- Now execute the following command one by one and wait for the previous one to execute completely before you type in the next command.
net localgroup Administrators /add networkservice

net localgroup Administrators /add localservice
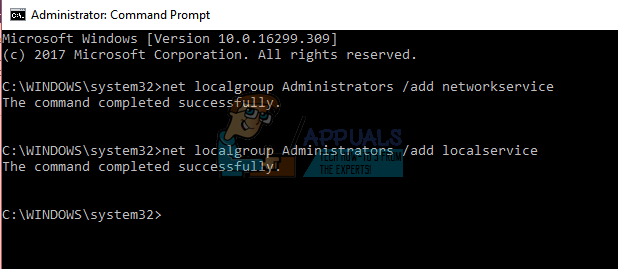
- After both the commands are executed, restart your computer and see if you can successfully head the audio on your device.
Solution 4: Updating Sound Drivers
There can also be an issue of your sound drivers not properly installed or being outdated. They relay information to your speakers and are practically running your speakers and producing the sound. We can try updating them through reinstallation and checking if the problem gets solved. If after restarting the computer the problem gets fixed, you can stop there. If it doesn’t, we can try updating the drivers further.
- Press Windows + R button to bring up the Run application on your computer. In the dialogue box type “devmgmt.msc”. This will launch your computer’s device manager.
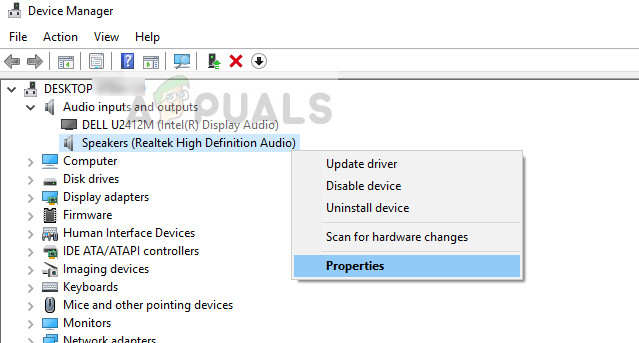
- All connected devices to your computer will be listed here according to the category. Click on the category of “Audio inputs and outputs”
- Right-click on Speakers and select Properties.
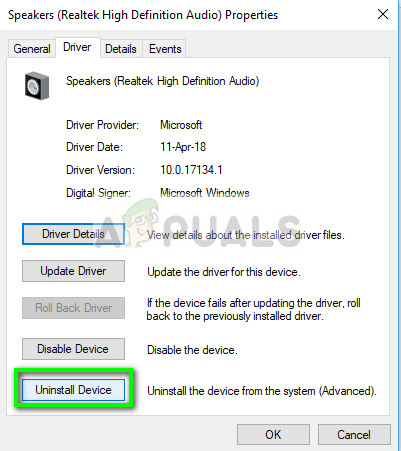
- Click on Driver tab present at the top of the screen. Here you will see an option to uninstall your sound driver. Click it.
- Now Windows will confirm your action. After confirming the driver will be uninstalled from your system.
- Restart your PC Upon the restart, Windows will install the default drivers for your speakers. Now check if there is correct sound output. If there is, you can stop here. If there isn’t any sound, you can continue to update the drivers.
- Head over to the sound options just like we did. Right click on Speakers and open its properties.
- Now click on the option of “Update Driver”. Windows will prompt you to either install the drivers manually or automatically. Select automatically and let Windows search and install the drivers.
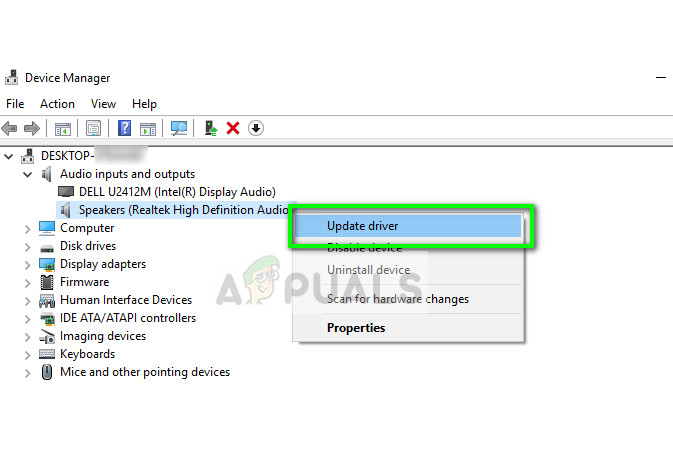
- Once the drivers are installed, restart your computer completely and check if this solves the problem.
In addition to the proposed solutions, you can also try:
- Navigating to the registry key “HKEY_LOCAL_MACHINE\SOFTWARE\Microsoft\Windows\CurrentVersion\MMDevices\Audio\Render”, right-clicking on Render and select Properties. Once in properties, select Permissions, ALL APPLICATION PACKAGES, and give ownership to all users through that. Perform the same steps after clicking render and also grant permissions to the keys present there.
- You can perform a system restore if the problem came into existence after an update.
- You can also use third-party applications (such as Audio switcher) which allows you to switch between audio devices by predefined hotkeys. This will solve the problem if you change your audio devices a lot and face this problem.


