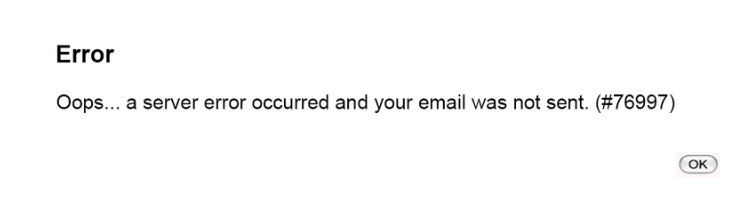
Fix: A server error occurred and your email was not sent. (#76997)”
This error appears when users are trying to send an email using their Gmail account and the error prevents them from doing so. It appears among the lines of “Oops… a server error occurred and your email was not sent. (#76997)” and it mostly occurs when using a browser to send an email.
What Causes the Issue to Appear?
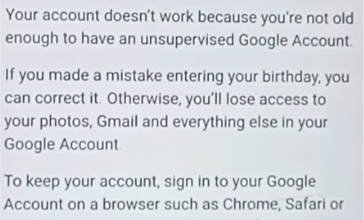
The problem is sometimes caused when users are trying to send an email from an account they have just created which hasn’t been registered by Google yet. Also, the same error can appear when trying to send a single email to multiple users.
This can be a huge issue for business users who are struggling to send an important email and it’s important to handle the problem as soon as possible. Let’s check out some of the most helpful methods which have worked for users with the same problem!
Solution 1: Clear Browsing Data on Your Browser
Users were able to solve this problem when it occurred on their respective browser simply by clearing out browsing data. This data adds up over time and it can cause all kinds of errors, especially with mail credential. Check out our instructions on how to clear your browsing data (cookies and cache) on the two major browsers.
Mozilla Firefox:
- Open your Mozilla Firefox browser by double-clicking its icon on your Desktip or by searching for it in the Start menu.
- Click on the library-like button located at the top right part of the browser’s window (left from the menu button) and navigate to History >> Clear Recent History…
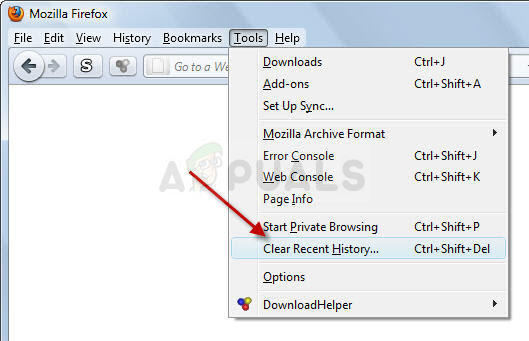
- There are several options for you to manage now. Under the Time range to clear setting, choose Everything by clicking the arrow which will open the dropdown menu.
- Click on the arrow next to Details where you can see just what gets deleted when you select the Clear history option as the meaning is not the same as on other browsers and it includes all types of browsing data.
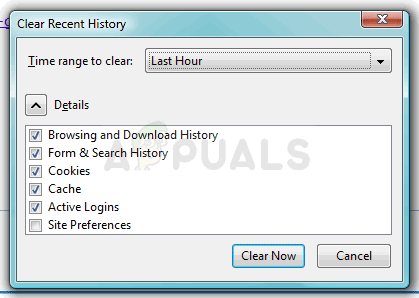
- We recommend you choose Cookies and Cache before you click on Clear Now. Wait for the process to finish and restart your browser. Check to see if the problem is gone now.
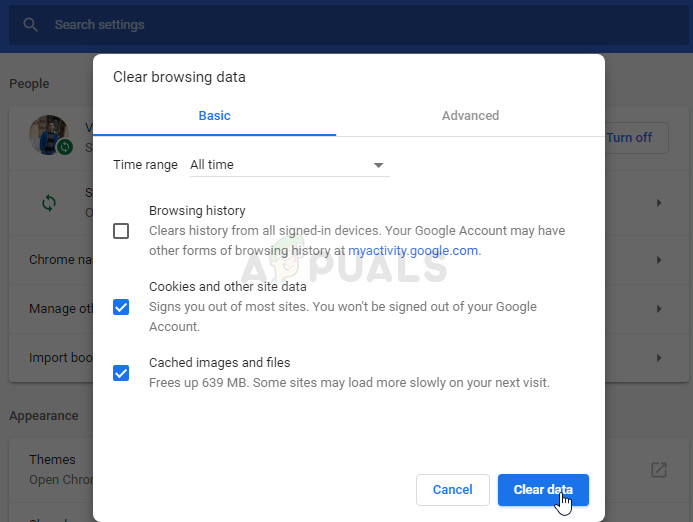
Google Chrome:
- Clear your browsing data in Google Chromeby clicking on the three vertical dots in the top right corner of its window. After that, click on the “More tools” option and then “Clear browsing data”. In order to clear everything choose the “the beginning of time” setting as the time period and select what types of data you wish to delete. We recommend you clear out the cache and cookies.
- Make sure you restart your computer afterwards and unplug your DSL Internet cable or turn your Wi-FI adapter on and off before continuing.
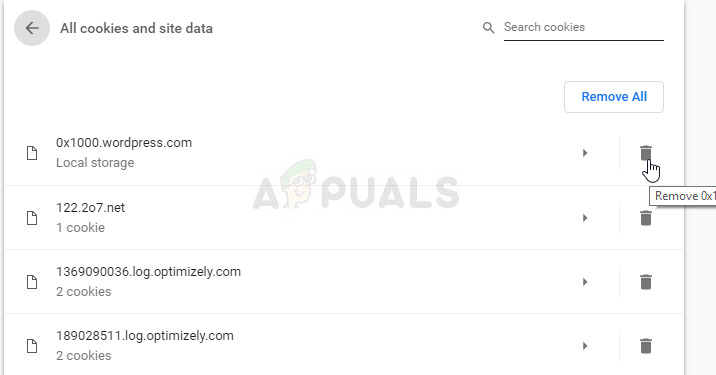
- In order to get rid of ALL cookies, again click on the three dots and select Settings. Scroll down to the bottom and expand the Advanced settings.
- Open Content settings and click the See all cookies and site button to view the list of all cookies that remained after you have already deleted them in the Step 1. Delete either all cookies you find there by clicking the trash icon next to them.
- Restart your computer again and check if the problem is solved.
Solution 2: Log out and Back into Your Gmail Account
If there was a minor issue with your account, it can be fixed simply by logging out back in since it will reset your data on the server. It’s also advisable to exit out and back into your browser just to make sure. Additionally, simply restarting the browser has worked for some users whereas others also needed to log into their Gmail account.
- Open the Gmail client in your browser by navigating to this link and wait for your mail to load.
- Click on your account picture at the top right part of the screen and choose the Sign out option below. Close your browser by clicking the X button at the top right part of the window and wait for a while.
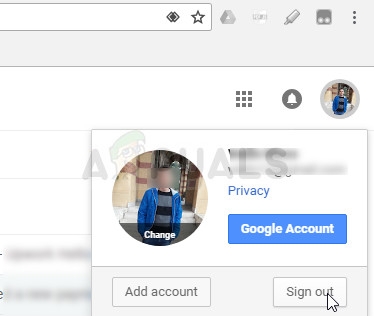
- Open up your browser by double-clicking its icon or by searching for it. When you visit Gmail again, you should see a window prompting you to sign into GMail. Click on the Email or phone bar and enter you account’s credentials in order to log back in. Check to see whether the error still appears when trying to send an email.
Solution 3: Uninstall Google Earth
Because of a bug in Google Earth, if you were trying to send a mail using a browser installed on your computer or the mail client on Windows 10, you might want to try and uninstall Google Earth and check to see if the problem still appears. The correlation between these things seems unnatural but it’s worth checking this out as you can redownload Google Earth quite easily.
- First of all, make sure you are logged in with an account which owns administrator privileges as you won’t be able to uninstall programs using any other account.
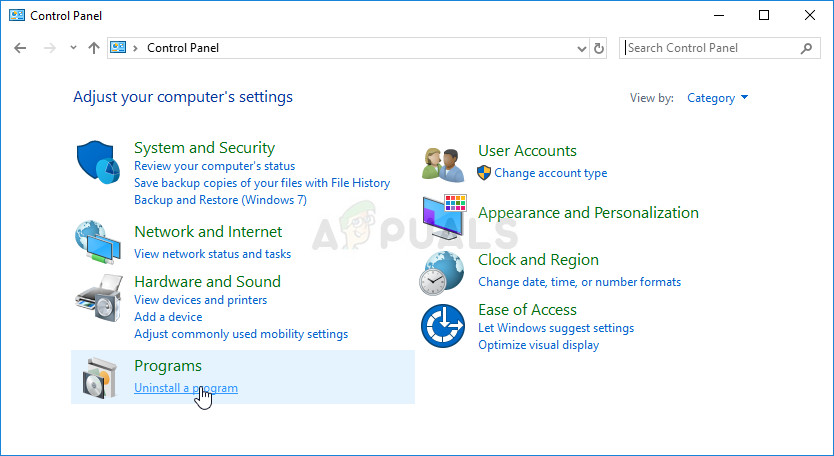
- Click on the Start menu and open Control Panel by searching for it. Alternatively, you can click on the gear icon in order to open the Settings app if you are using Windows 10.
- In Control Panel, select to switch View as: Category at the top right corner and click on Uninstall a Program under the Programs section.
- If you are using the Settings app, clicking on Apps should immediately open a list of all installed programs on your PC.
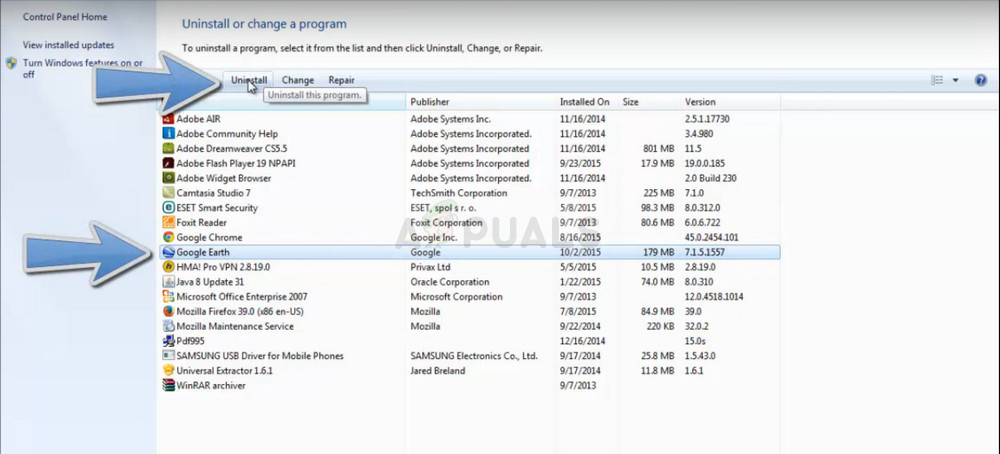
- Locate the Google Earth entry on the list and click on it once. Click on the Uninstall button above the list and confirm any dialog choices which may appear. Follow the instructions on-screen in order to uninstall Google Earth and restart your computer afterwards.
- Check to see if emails can be sent via your Gmail account. Try installing the latest version of Google Earth from this link and check to see if Google has solved these problems.
Solution 4: Add Exception for Google Servers for AVG
AVG is a free antivirus tool which does its job quite well but it has been reported that it caused this error to occur when trying to send a mail using Gmail. Users have tried disabling all AVG shields for a while and the error stopped occurring. However, disabling antivirus shields is not a good permanent solution as your PC stays unprotected. Instead, you can allow Google server traffic through AVG.
- Open AVG user interface by double-clicking its icon on the Desktopor by locating it in the system try at the bottom right part of your screen. Right-click on the icon in the system tray and choose Open
- Navigate to Menu >> Settings and click to switch to the Components tab in the new window which will open.
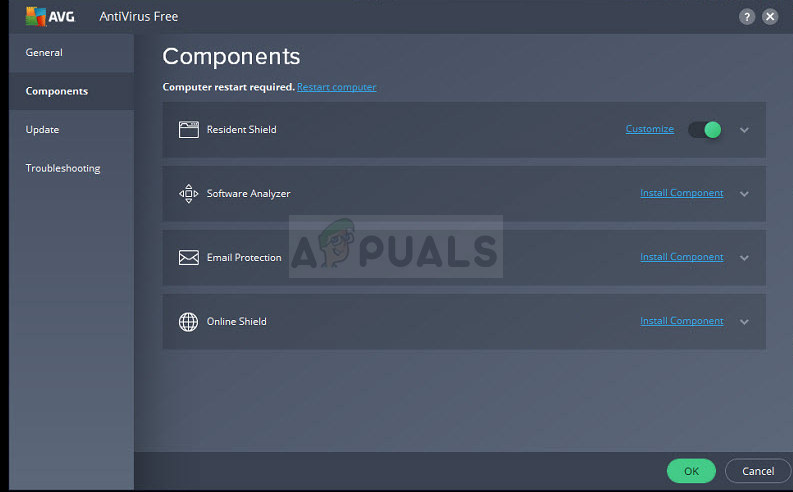
- Click on the Customize button next to the Web Shield entry on the list and navigate to the Exceptions tab.
- Under the URLs to exclude part type in the following entries in order to try and fix the error code 76997 on Gmail:
google.com/*
*.google.com