How to Fix FileHistory Error 201 on Windows 10
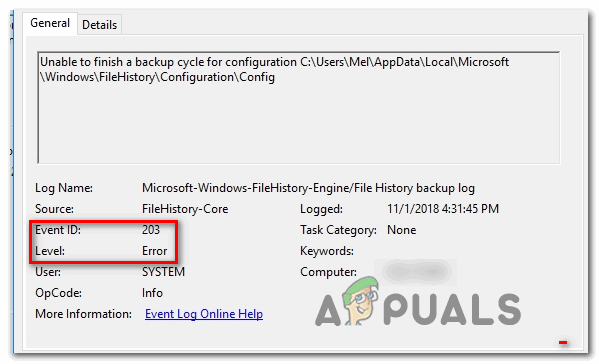
The File History Error 201 is encountered when users attempt to add files inside the Documents directory. The operation stops abruptly, and when checking the Event Viewer for information on the crash, some affected users have discovered this error. This problem seems to be exclusive on Windows 10.
This particular issue can occur due to a selection of different causes:
- File name contains special characters – As it turns out, File History seems to have a problem with special characters that are restricted to certain languages. A lot of affected users have confirmed that they managed to fix this problem by removing the special characters like ä,ö,ü, and ß from the name of the files.
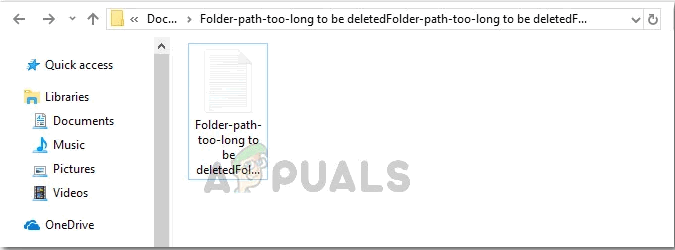
- File path or name is too large – Keep in mind that there’s a maximum file length that any given file can have in order to File History to be able to process it. If this scenario is applicable, you should be able to fix the problem by shrinking the file name or path beyond 220 characters.
- Folder permission issue – This problem can also occur due to a folder permission issue that can be automatically corrected by running the File and Folder troubleshooter. This fix was confirmed to be effective by several different users that were previously seeing the problem on Windows 10.
- Windows 10 glitch – As it turns out, you might also see this error due to a bad Windows Update that was pushed at the end of 2019. However, since then, Microsoft has pushed a hotfix that resolves this problem. So if you didn’t already, install every pending Windows update to fix the 201 error.
- System File Corruption – System file corruption can also be responsible for the apparition of this error code. In this case, you should be able to fix the problem by running a couple of native utilities capable of replacing corrupted Windows files with healthy equivalents (DISM and SFC).
Method 1: Removing Special Characters from Filename
If the file you are attempting to back up using File History contains special characters (typical characters from a foreign language), it’s possible that is causing the 201 error.
There are a lot of user reports that have to manage to fix this problem by eliminating the special characters like ä,ö,ü, and ß from the name of the files. This is weird as the official documentation doesn’t mention anything about this type of restriction.
So if you’re encountering this problem when trying to back up files that contain special characters specific to a certain language, clear them from the name of the file and try the operation once again.
In case this scenario is not applicable or you’ve already tried this with no success, move down to the next potential fix below.
Method 2: Shrinking the File Path/name
Just as File Explorer and any other native Windows utility that uses the same infrastructure, there is a maximum length that file paths are allowed to have. If the files you’re currently trying to back up with File History exceed the maximum length restriction limit, you will see the error 201 error as a result.
If this scenario is applicable, try reducing the size of the file path or, if the name is too long, right-click on the file in question and rename so it has fewer characters.
If shrinking the folder name/path didn’t fix the issue for you, move down to the next potential fix below.
Method 3: Running the File and Folder Troubleshooter
As it turns out, it’s possible that you might be dealing with a permission issue that prevents you from backing up content with the FileHistory utility. If this scenario is applicable, you should start this troubleshooting guide by running the File & Folder troubleshooter.
Several affected users have confirmed that this operation successfully resolved the File History Error 201 issue and allowed them to use the File History utility normally.
If you want to apply this potential fix, follow the instructions below to run the File & Folder Troubleshooter:
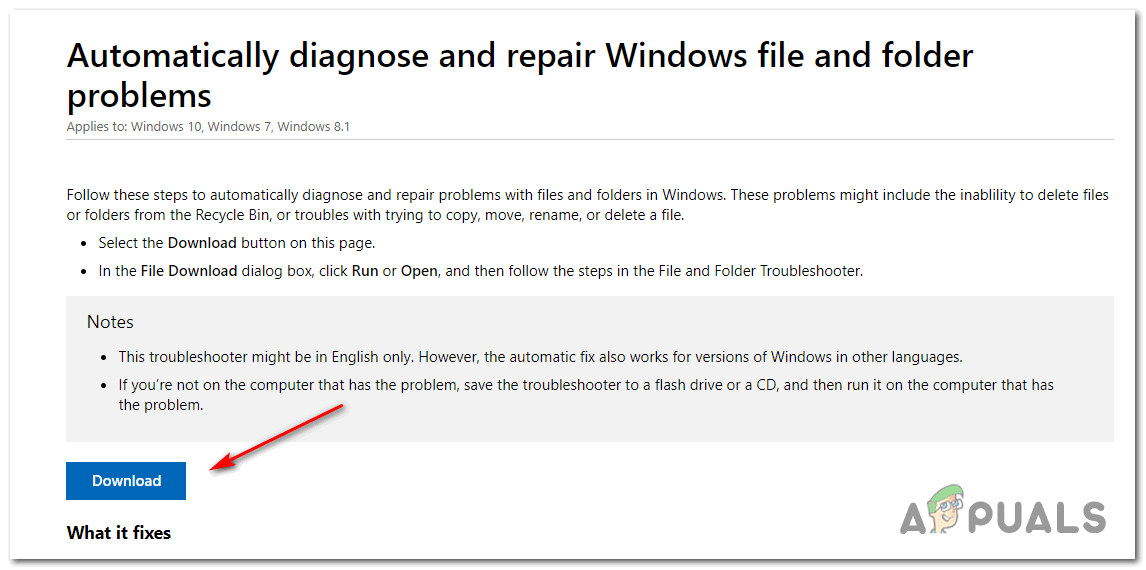
- Open your default browser and access the download page of the Windows File & Folder troubleshooter and click on the download button.
Downloading the File & Folder troubleshooter - Wait until the download is complete, then double-click on the file you’ve just downloaded and click Yes at the UAC (User Account Control) to grant admin access.
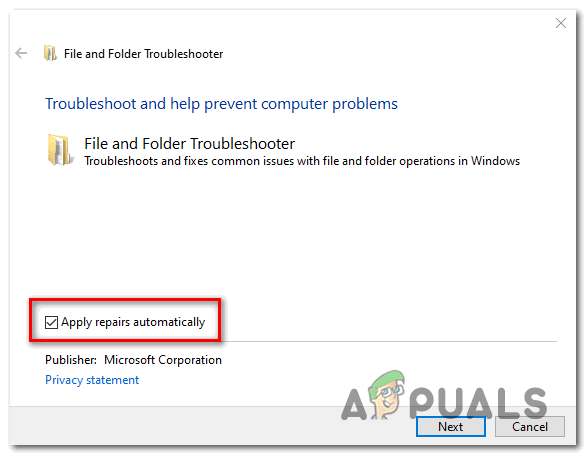
- Once you arrive at the first screen of the File and Folder Troubleshooter, start by clicking on the Advanced hyperlink, then check the box associated with Apply repairs automatically.
- After the utility is configured and ready to go, click on Next to initiate the scan with the Windows File & Folder Troubleshooter.
Enabling the ‘Applying repairs automatically’ box - Wait until the initial scan is complete, then follow the on-screen instructions to apply the recommended fix (if necessary).
- Next, restart your computer and see if the problem is fixed at the next system startup.
In case the problem is still not resolved, move down to the next potential fix below.
Method 4: Install every Pending Windows Update
As it turns out, this problem can also be caused by a glitch on Windows 10 that was initially created by a bad Windows update that affected the File History service. Fortunately, Microsoft has since released a hotfix for this problem and included it in a Windows update released at the end of 2019.
If your Windows build is already up to date, then you already have the hotfix installed, so this method is not applicable.
But if you haven’t installed the latest pending updates or you’re actively blocking them, you should be able to fix the problem by forcing Windows Update to install every pending update (including optional ones). This operation was confirmed to fix the 201 File History error by several different users.
To install every pending update on Windows 10, follow the instructions below:
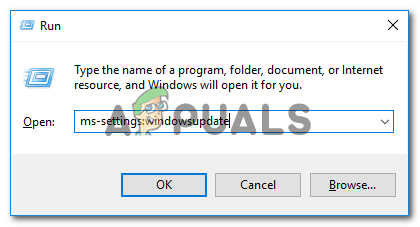
- Open up a Run dialog box by pressing Windows key + R. Next, type ”ms-settings:windowsupdate” and press Enter to open up the Windows Update tab of the Settings app.
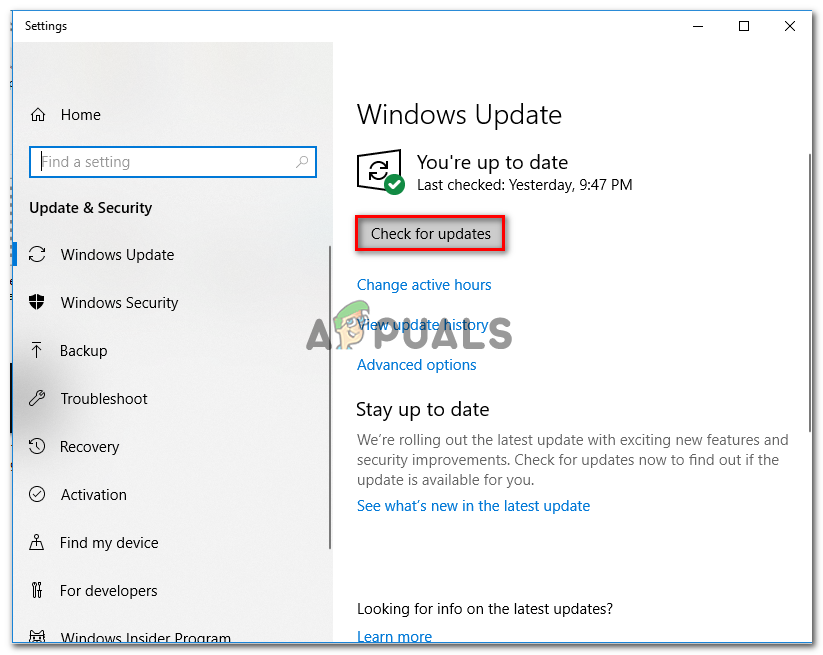
Opening the Windows Update screen - Once you’re inside the Windows Update screen, start by moving over to the right-hand section and clicking on Check for Updates. Next, follow the on-screen prompts to complete the installation of every Windows Update that is currently waiting to be installed.
Installing every pending Windows update Note: If you have a lot of pending updates waiting to be installed, your computer might ask you to restart before each and every update is installed. If this happens, do as instructed, but make sure to return to the same Windows Update screen once the next startup is complete to complete the installation of the remaining updates.
- Once you manage to bring your Windows to build up to date, restart your computer one final time and see if the problem is fixed at the next system startup.
In case you are still seeing new entries of the same 201 error in Event Viewer, move down to the next potential fix below.
Method 5: Performing SFC and DISM scans
System file corruption can also be an underlying cause that might end up producing this File History Error 201.
Several affected users that were previously dealing with the same problem have reported that they finally managed to fix the problem by running a couple of built-in utilities that are capable of replacing corrupted system files with healthy equivalents – SFC (System File Checker) and DISM (Deployment Image Servicing and Management).
The way they operate is a little different and the results are mixed, that’s why we recommend that you run both types of scans in quick succession in order to improve your chances of fixing the 201 error.
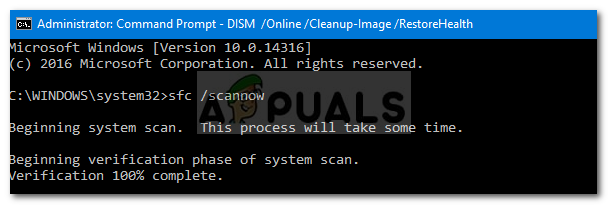
Start with an SFC scan and wait for the operation to complete. Depending on the size of your OS drive and the type of storage your using SSD or HDD, this operation might end up taking over one hour.
Important: After you start an SFC scan, interrupting it unexpectedly is NOT recommended. Doing this might leave your system exposed to additional logical errors.
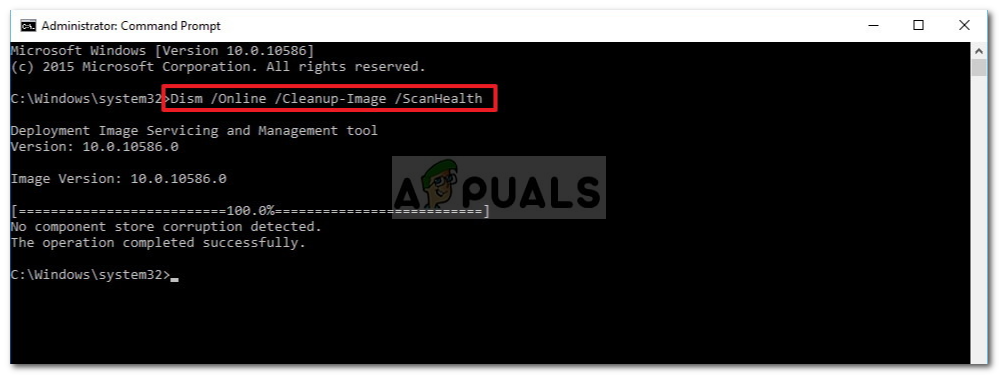
After the SFC scan is complete, restart your computer and see if the problem is fixed at the next computer startup. If the issue is persisting, move forward by initiating a DISM scan, then wait for the operation to complete.
Note: Before initiating this procedure, ensure that you have a stable internet connection since DISM uses a subcomponent of Windows Update to download healthy files needed to replace corrupted equivalents.
After the DISM scan is complete, reboot your computer one final time and see if the problem is now fixed.
In case the same issue is still persisting, move down to the next potential fix below.


How to Fix FileHistory Error 201 on Windows 10 – Appuals.com
There is a typo in:
Method 3: Running the File and Folder Troubleshooter
Open your default browser and access the download page of the Windows Fire & Folder troubleshooter and click on the download button.
If I ever have a Windows Fire I will surely download this troubleshooter.