How to Fix eSIM Option Missing on iPhone After an iOS Update?
Your iPhone’s Add eSIM button is missing after an iOS update, leaving no obvious way to install a cellular plan. The existing number may have disappeared too, even though it worked before the update.
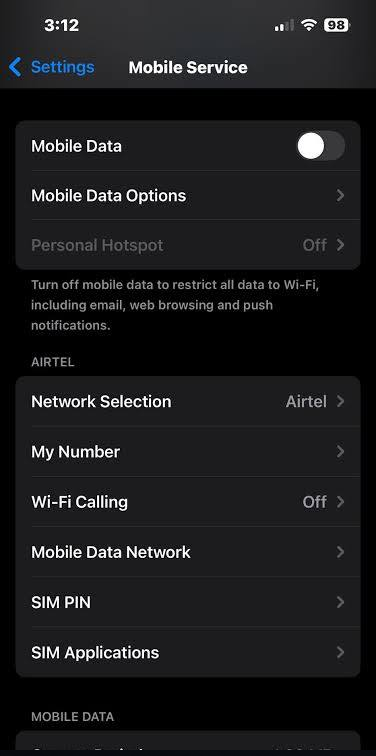
A missing setup button is different from an eSIM that appears but will not activate. It does not, by itself, prove that your plan was cancelled or the phone needs a hardware repair.
1. Check the Setup Label and Restart the Cellular Connection
iOS may label setup Set Up Cellular rather than Add eSIM. Restarting the iPhone reloads its cellular services, while switching a listed line off and on reconnects it without deleting the plan.
- Open Settings > Cellular, Mobile Service or Mobile Data, depending on your region. Scroll down and look for either setup label.
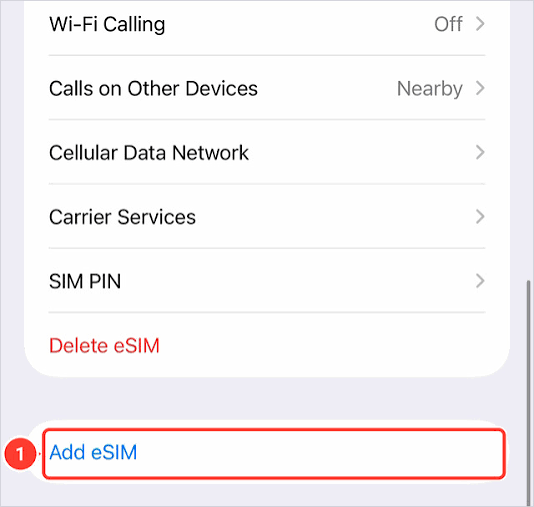
Show the lower part of Cellular or Mobile Service where Set Up Cellular or Add eSIM normally appears. Redact plan names and phone numbers. - If your existing number is listed, tap it. Switch Turn On This Line off briefly, then on again. Leave this step out if no line is listed.
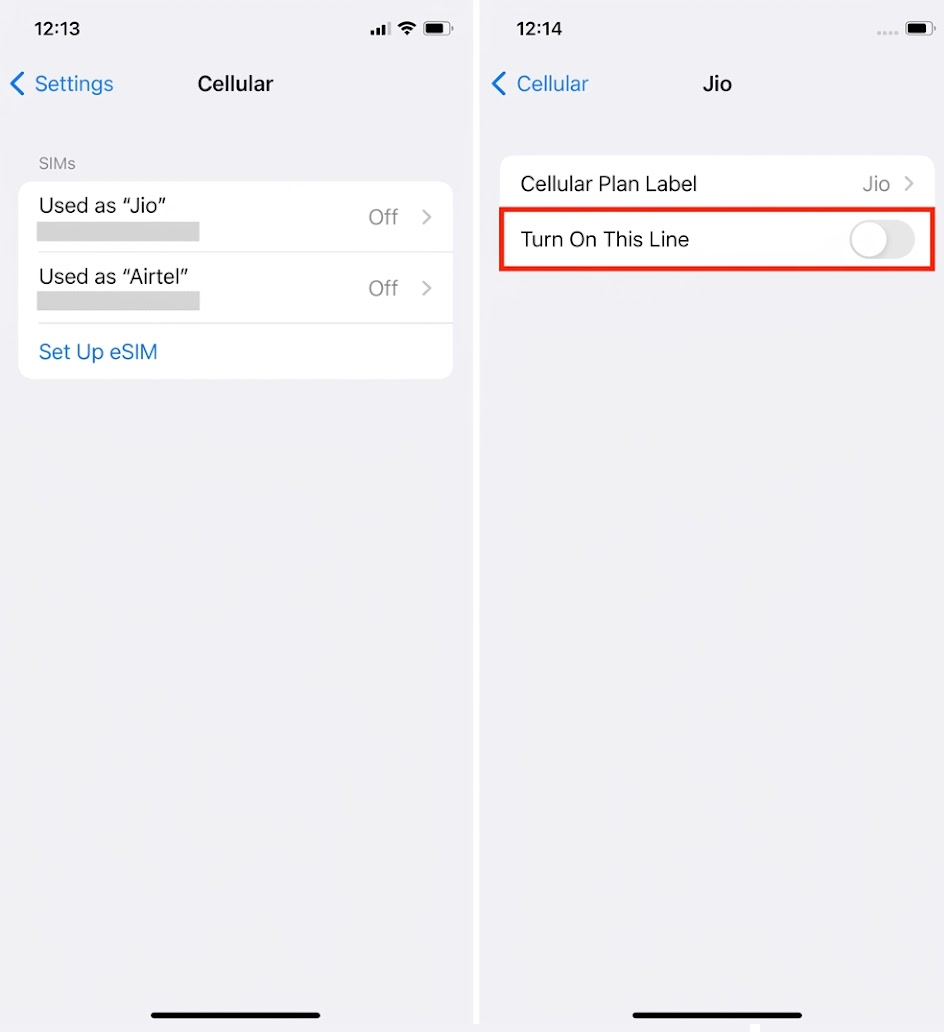
Show the existing line and Turn On This Line control without exposing the phone number, carrier account, or personal plan label. - Turn Airplane Mode on for at least 15 seconds, then turn it off.
- Open Settings > General > Shut Down and slide to power off. Hold the side button to turn the iPhone back on, then recheck the cellular settings.
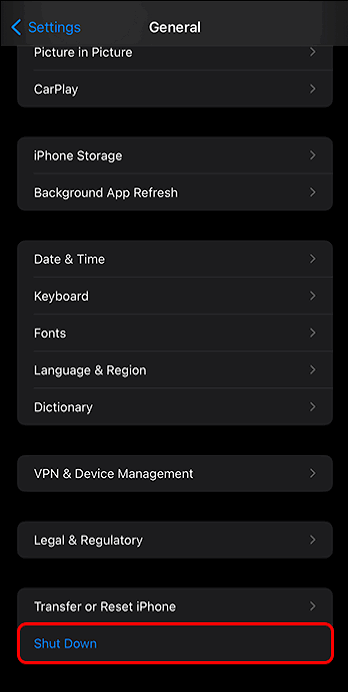
Use a composite showing Airplane Mode and the power-off screen. Hide notifications, device names, and nearby network details.
When the setup option returns, use your carrier’s activation instructions. If the number is visible but calls or data still fail, the cellular connectivity checks address that separate problem.
2. Install Any Available Public iOS Update
A later public iOS release may correct a cellular software problem. Check the update offered for your own iPhone rather than installing a beta or an older version.
- Back up the iPhone, connect to Wi-Fi and power, then open Settings > General > Software Update.
- Install an available public iOS update. If the phone is already up to date, there is nothing to reinstall here.
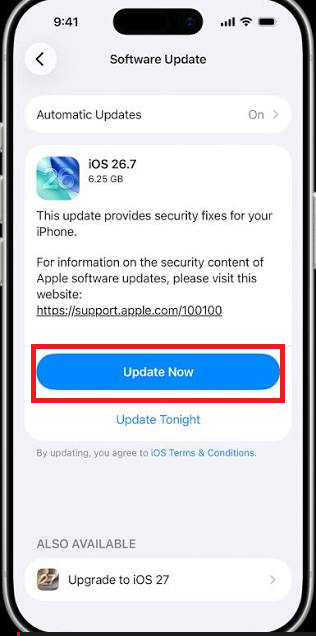
Show Settings > General > Software Update with the public update and version visible. Hide Apple Account information and device identifiers. - After restarting, check the installed version under Settings > General > About.
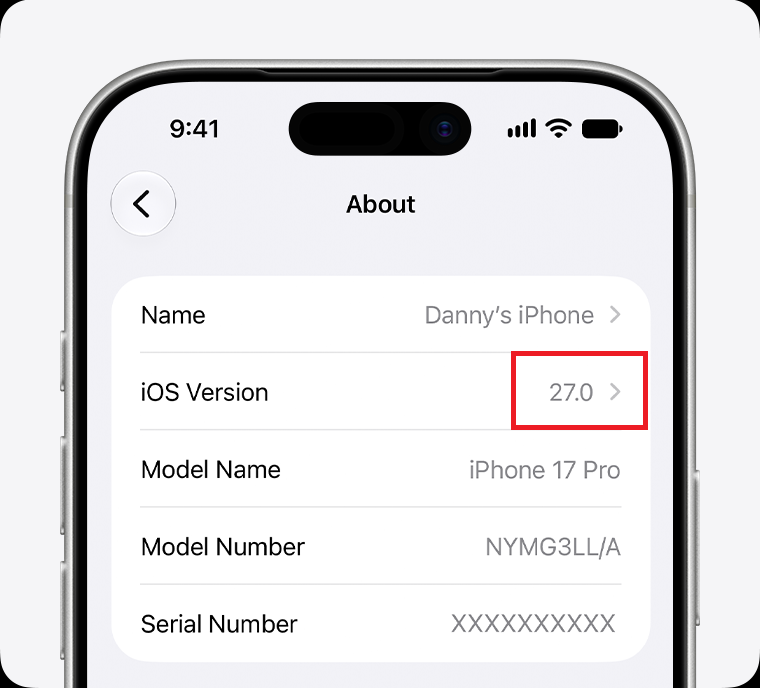
Show the iOS version after restarting. Redact the device name, serial number, IMEI, EID, and network details.
Check whether the setup button and existing lines have returned. If they have not, keep the installed version number for support.
3. Check the Exact Model and Any Restrictions
Imported iPhones can look identical while supporting different SIM arrangements. Check this especially if you have never used eSIM on this phone; a previously working eSIM already establishes support. Work or school management can also prevent plan changes.
- In Settings > General > About, tap Model Number to reveal the code beginning with A, rather than the part number ending in /A. Compare it with Apple’s model identification list.
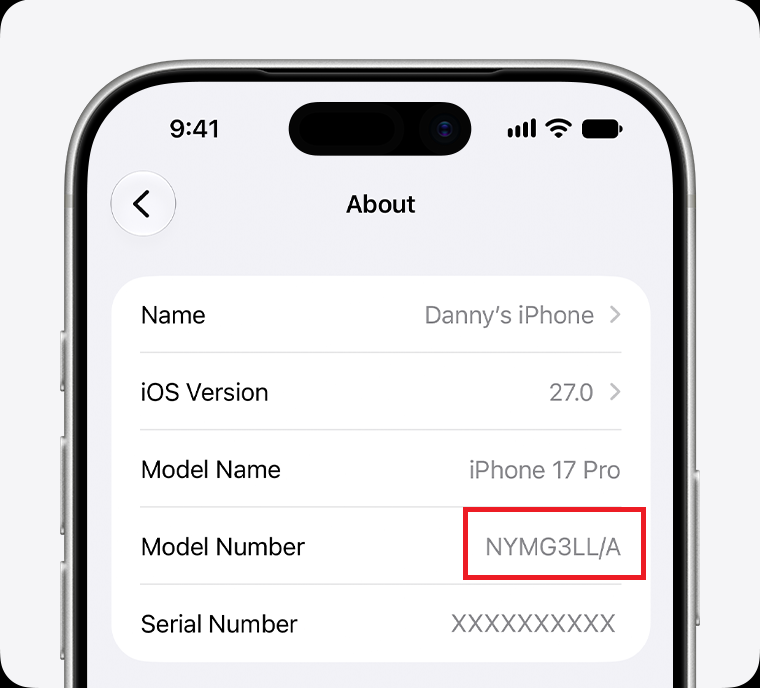
Show the A-number model code only. Redact the serial number, device name, IMEI, EID, and other unique identifiers. - Scroll down and check whether EID, IMEI and Modem Firmware appear. EID identifies the phone’s eSIM hardware; its presence does not confirm that a plan is active or the hardware is fault-free.
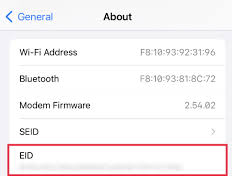
Frame the EID, IMEI, and Modem Firmware labels, but fully blur every identifier and value before publication. - For a different carrier’s plan, check Carrier Lock. No SIM restrictions means unlocked. A carrier lock can block activation even when the Add eSIM button is visible.
- On a managed phone, open Settings > General > VPN & Device Management. Ask the administrator whether eSIM changes are restricted. A downloaded profile alone does not prove that management is installed.
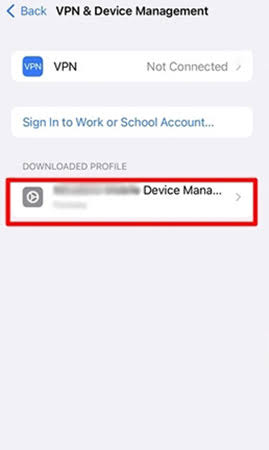
Show whether the iPhone is managed. Hide organization names, profile identifiers, certificates, email addresses, and enrollment details.
| What you find | What it means for this problem |
|---|---|
| A regional model without eSIM support | Changing the iPhone’s Region setting cannot add support. |
| A mainland China, Hong Kong or Macao model | Check Apple’s regional eSIM requirements. Some models support eSIM; others use two physical SIMs. |
| Missing EID on a phone that previously used eSIM | Report this to Apple. Do not assume the hardware is unsupported or permanently damaged. |
| An administrator blocks eSIM changes | Have the administrator review the policy rather than removing the management profile. |
Mainland China also has specific device and activation rules, including restrictions on installing foreign-carrier eSIMs while there. Follow those rules rather than changing regions or using a VPN.
For a physical SIM reporting No SIM, the comparison with another SIM card can help establish whether the card or phone is failing.
4. Check Carrier Settings and the Missing Plan
Carrier settings tell the iPhone how to use your provider’s network; the provider also controls plan activation. These checks matter when EID is present but a line is missing, or setup returns and activation fails.
- Connect to Wi-Fi and open Settings > General > About. Accept a Carrier Settings Update prompt if one appears.
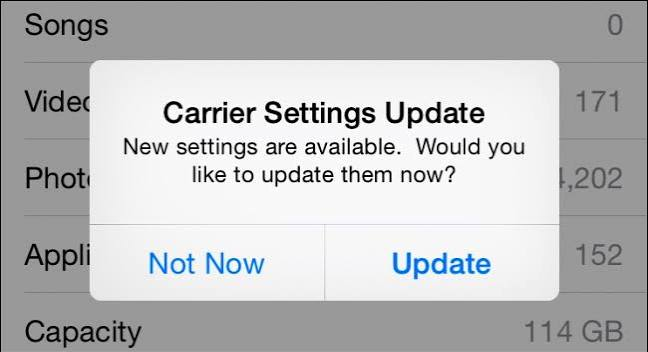
Show the Update or OK prompt in Settings > General > About. Redact the device name, phone number, IMEI, EID, and carrier account details. - If a carrier entry is present, record its version. No prompt does not necessarily mean something is wrong; the installed settings may already be current.
- Contact your carrier through its official app, website or store. Ask it to confirm the active plan, exact model’s eligibility and correct IMEI/EID assignment, and whether the missing activation needs to be reissued.
- Follow the carrier-approved setup notification, app or activation instructions. Ask before reusing an old QR code or deleting a plan; reuse rules depend on the provider.
Once a plan activates, test the calls, texts and data it includes. If the button is still missing after the carrier confirms your account is ready, contact Apple.
5. Run Cellular Diagnostics and Contact Apple
If Cellular will not open, or EID or Modem Firmware has unexpectedly disappeared, ask Apple to check the phone. The problem may involve its cellular software or hardware, not just the plan.
- On iOS 18 or later, connect to Wi-Fi and get the latest Apple Support app. Select the affected iPhone and run any offered cellular diagnostics.
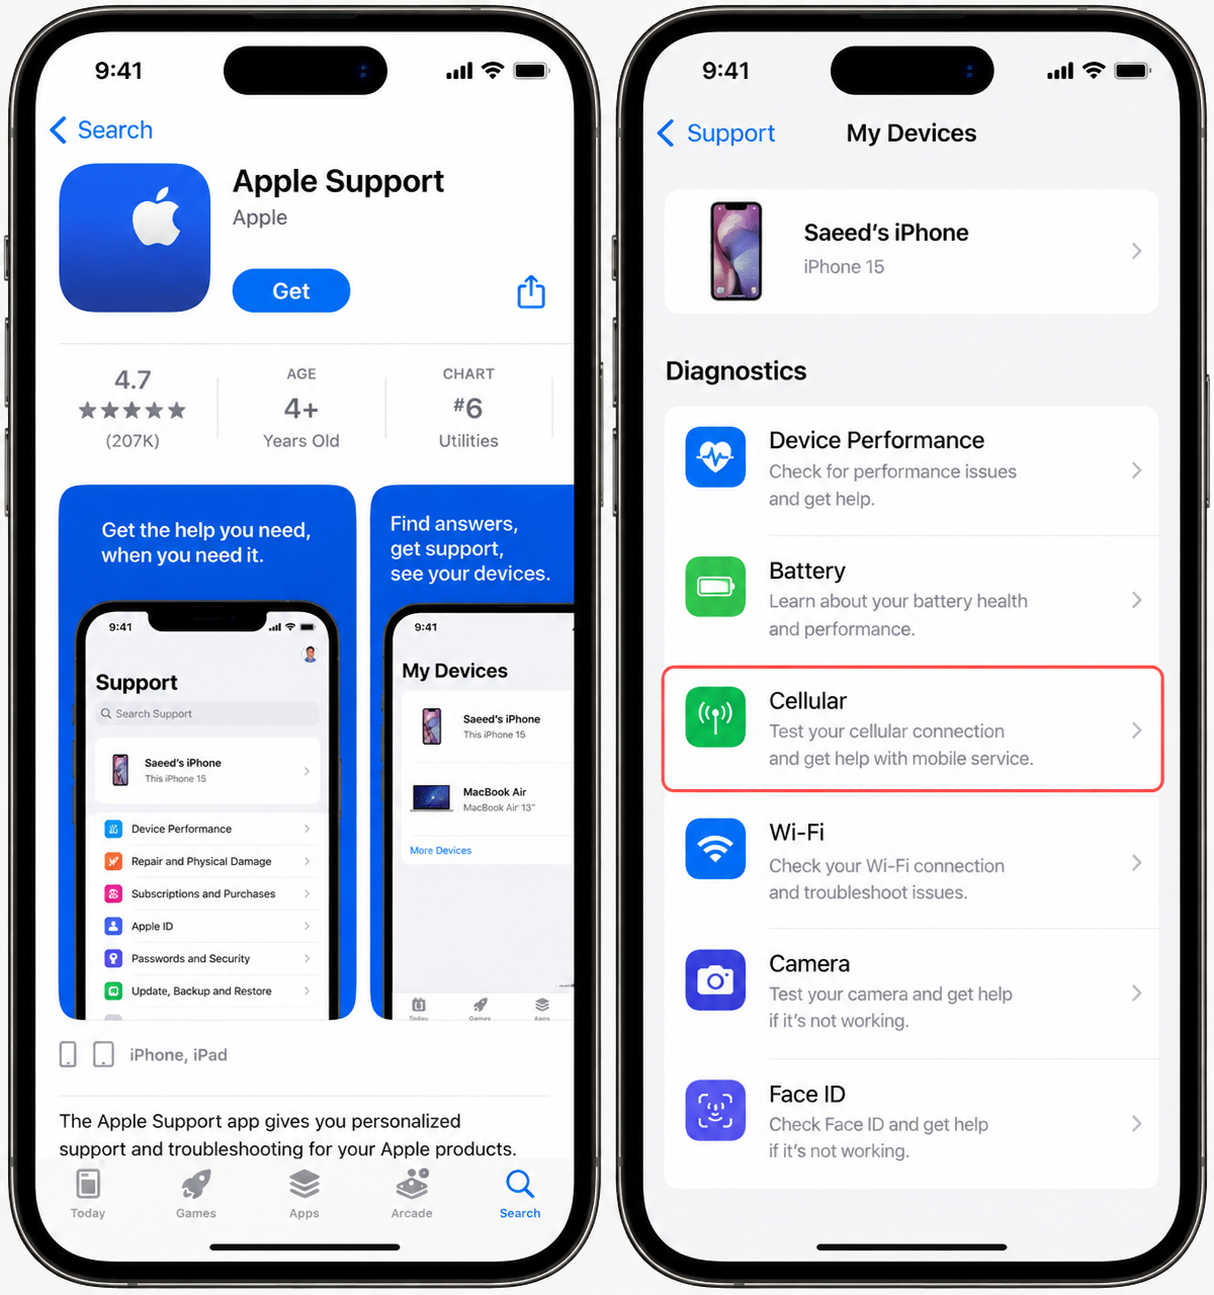
Show only the result category needed for escalation. Redact device identifiers, carrier details, personal data, and support reference numbers. - Contact Apple through the app or Apple’s support website if diagnostics are unavailable or the problem remains. Provide the model, iOS version, when the menu disappeared, identifier fields that are missing, and the carrier’s findings.
- Follow Apple’s advice about further software checks or authorized inspection. Back up before any restore or repair, and confirm how your carrier will recover the eSIM before an erase.
Keep identifiers, activation QR codes and account details out of public screenshots. Share them only when needed through verified Apple or carrier support. A temporary restart fix or a clear diagnostic result does not rule out an intermittent fault.


