How to Fix “Error Code: 0x00000018” in Windows 10?
REFERENCE_BY_POINTER, also called 0x00000018, is a particular issue that indicates an illegal reference count of an object based on its state. Users encountering this issue face a Blue Screen of Death, which is typically hardware-related. Typically, this error code crashes the system, leaving the users unable to perform any operations.

Some of the common issues that lead to the error code 0x00000018 are outdated drivers, timing inconsistency, and generic bugs infecting the system. Below we have listed several effective troubleshooting methods that will help you fix the issue in no time. Let’s get right into it!
Check Your System’s RAM
If you run into the error code 0x00000018 in Windows, then the first thing you should do is check your system’s RAM, since this error is often caused by corrupted memory.
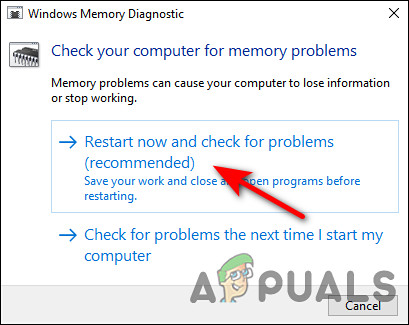
To do this, run the built-in Windows Memory Diagnostic tool which is very helpful for troubleshooting the problem when the computer starts running slowly, freezes, hangs or displays a blue screen. Using it, you can identify problems with applications installed on the computer, whether or not these problems are caused by memory errors.
- Type Windows Memory Diagnostic in the search area of your taskbar and click on Open.
- In the dialog box that pops up on your screen, select Restart now and check for problems. Then wait for the memory test to complete.
Run the Memory Diagnostic Tool - Once your computer has restarted, a diagnostic message will appear. In Windows 10, you will see this message in the bottom right corner.
If no memory errors are detected, your memory module is working correctly. In this case, proceed with the next troubleshooting method mentioned below. However, if there are any errors found by the tool, you should contact your PC manufacturer for assistance since memory errors usually indicate a problem with the memory chips in your PC. Alternatively, you can check your RAM’s health status and troubleshoot for any errors by running the Passmark Memtest 86 freeware tool.
Run the CHKDSK Utility
If your RAM is error-free, then the next thing that you should do is check your hard drive for errors. This can be done by running the chkdsk utility by either Command Prompt or your computer.
In this method, we will walk you through the steps of running this utility via computer.
- Launch File Explorer and right-click on the drive you want to check for errors.
- Select Properties from the context menu.
- In the Properties window, navigate to the Tools tab and click on the Check button under Error checking.
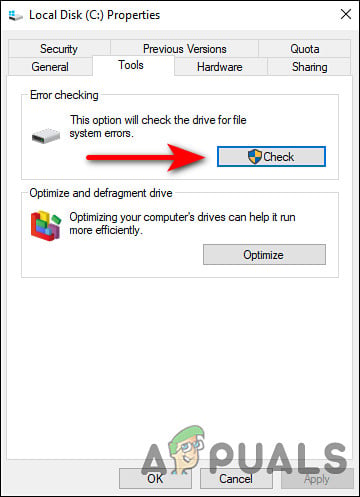
- Upon launching the utility, it will start to scan the selected drive for file system errors and other problems, such as bad sectors.
- If an issue is identified, restart your system to start the repairing process.
In the first few seconds after your computer boots up, CHKDSK will run to fix any and all errors it detects and fix any bad sectors or other problems it finds on your hard drive to resolve the 0x00000018 error.
Reinstall Your Graphics Card Driver
You might also be facing the 0x00000018 error if your Graphic card driver is corrupted or outdated. The solution to this is simple, as all you need to do is reinstall the driver.
- Type Device Manager in the search area of your taskbar and hit Open.
- Inside the Device Manager window, expand Display adapters.
- Now right-click on your Graphics Card driver and select Uninstall device.
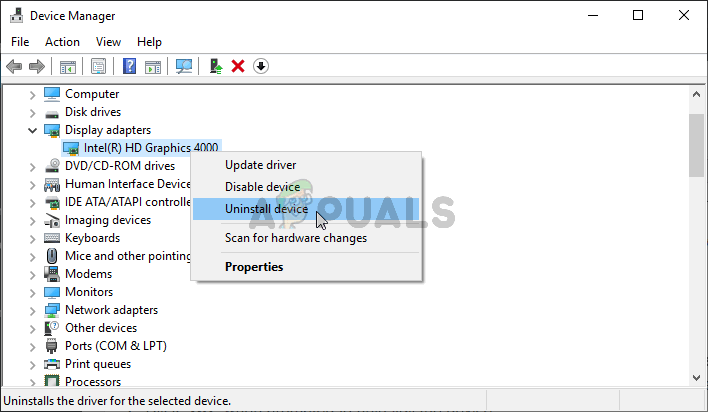
Uninstalling your graphics card driver - Follow the on-screen instructions to proceed and once done, restart your PC. Windows will automatically install the latest driver version following your restart.
Run SFC and DISM Commands
As we discussed earlier, errors like the one at hand are commonly caused by corruption errors and bugs within the system.
The good news is that Windows comes with several built-in troubleshooting utilities that let you scan for errors and fix them without much involvement from the user. System File Checker (SFC) and Deployment Image Servicing and Management (DISM) are two such utilities.
Most cases of file corruption can be resolved by running the SFC and DISM utilities, which is why we encourage you to give it a shot. Hopefully, it will resolve the issue in no time.
Run Driver Verifier Manager Tool
It is also possible to identify the corrupted driver that might be causing the 0x00000018 issue by using the Driver Verifier Manager tool.
As its name suggests, Driver Verifier is a program that identifies which drivers have malfunctioned. This tool doesn’t fix the problem like SFC, CHKDSK, and other troubleshooting tools do, but rather helps isolate the driver to blame for the error.
- Type cmd in the search area of your taskbar and select Run as administrator to launch Command Prompt with administrative privileges.
- Inside the Command Prompt window, type the command mentioned below and hit Enter to execute it.
verifier 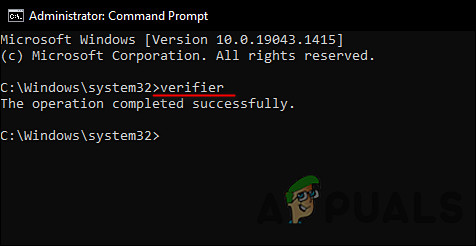
- Then, in the Driver Verifier Manager, select Create standard settings and press Next to proceed.
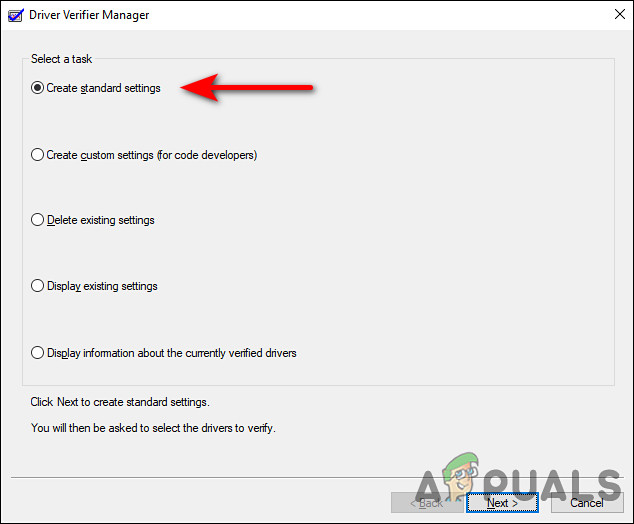
Choose Create standard settings option - Select the Automatically select all drivers installed on this computer option and then hit Finish.
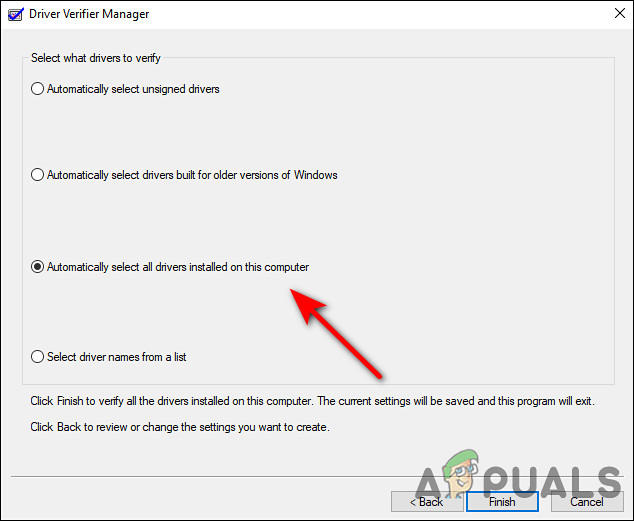
Allow the Driver Manager to select all the available drivers - Now let the utility scan for errors and then restart. Your computer will analyze all installed drivers when it restarts next time. You will be notified of any issues it finds.
If any broken drivers are found, update them.
Troubleshoot in a Clean Boot State
Clean Boot State can be used to diagnose and fix advanced Windows problems. If none of the fixes above worked for you, try launching Windows in Safe Mode and then repeat the action that caused the 0x00000018 error. In case the issue does not appear in Safe Mode, then perform a Clean Boot.
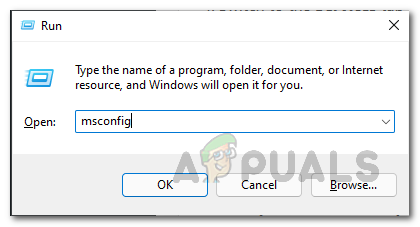
- Press Windows + R keys on your keyboard to open a Run dialogue box.
- In the text field of the dialogue box, type msconfig and hit Enter.
Opening up System Configuration - In the General tab, select Selective startup and uncheck the box against Load startup items.
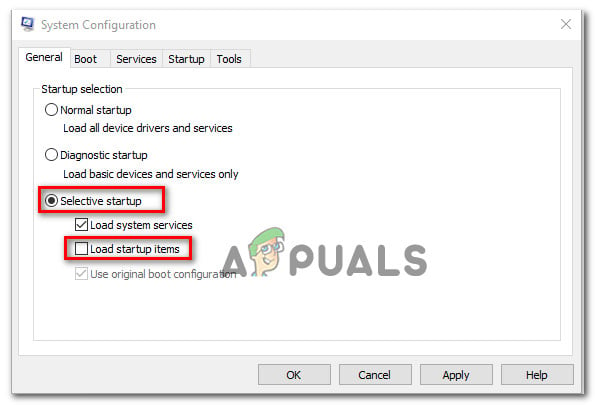
Preventing Startup Items from loading - Now click on Normal startup and go to Services tab.
- Check the box against Hide all Microsoft services and then click on the Disable all button.
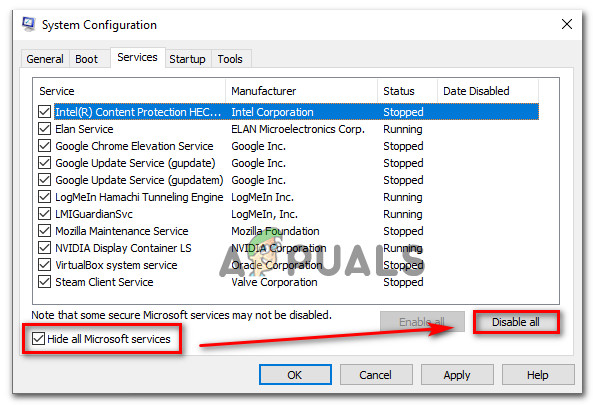
Hide all Microsoft services - Hit Apply and then OK.
- Finally, restart your PC and check if the issue persists.


