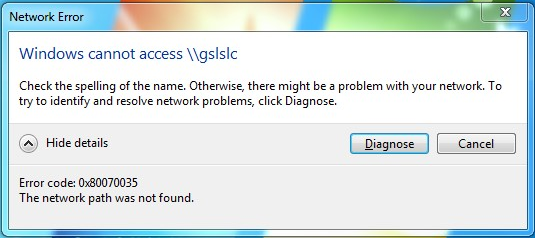
Fix: Error 0x80070035 ‘the network path was not found’
This error 0x80070035 occurs when you cannot access network resources. It is a somewhat confusing error because you may still be able to ping the resource, indicating that it is online, and establish a remote desktop connection, suggesting there is some access. However, before you proceed, make sure you can ping the resource to ensure that it is online. Once you have confirmed that the resource is online, follow the methods listed below and stop at the one that resolves the issue for you.
Usually, the most common reasons for this error revolve around firewalls, anti-virus software, or DNS.
Method 1: Disabling the Firewall.
Disable the firewall and also temporarily disable the antivirus. Once they have been disabled, return to the Network & Sharing Center and check if you can access the resource. If not, delete the share, re-add it, and test. If it works, the issue is with your firewall, which needs configuration; if it doesn’t, keep the firewall disabled and proceed to Method 2.
Method 2: Checking Network Discovery
Ensure that network discovery is enabled on the computer attempting to access the resource.
Method 3: Reinstalling Network Adapter Drivers.
First, try to update your network drivers and see if that solves the issue for you. If not, then uninstall and reinstall the drivers for your network adapter. You can do so by following the steps below.
- Press “Windows” + “R” to open the Run prompt.
- Type “devmgmt.msc” and press “Enter.
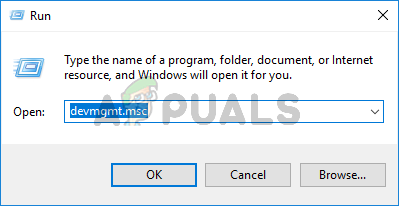
Type devmgmt.msc and Press Enter to Open Device Manager - Double-click on the “Network Adapters” dropdown and right-click on your drivers.
- Click on the “Uninstall Device” option and wait for the driver to be removed from your computer.
- Now you can either download the drivers manually from the manufacturers’ website, or click on the ‘Scan for Hardware Changes‘ option at the top to automatically reinstall these drivers.
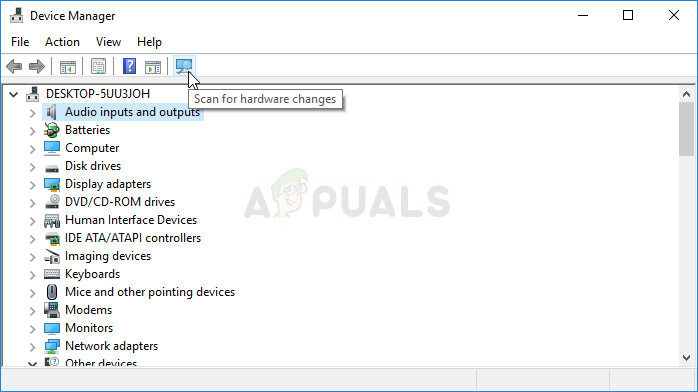
Scan for hardware changes
Method 4: Check the Device Manager.
1. Go to the Device Manager and expand the Network Adapters.
2. Click ‘View from Top’ and select ‘Show Hidden Devices‘.
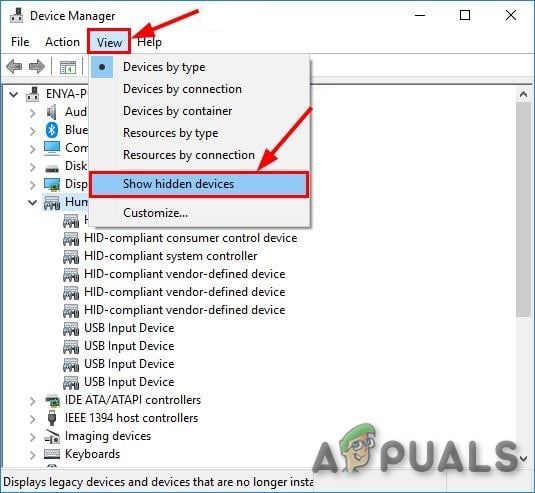
3. Examine the adapters; if you notice a long list of 6to4 Adapters, right-click on them and delete all except for one.
4. Once you have only one of these adapters left, reboot the PC and test.
Method 5: Enable NetBIOS over TCP/IP.
1. Hold the Windows key and press R. Type ‘ncpa.cpl‘ and click ‘OK‘.
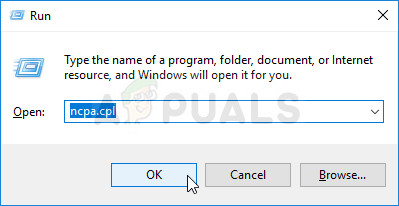
2. Right-click on the connection, and choose Properties.
3. Click “Internet Protocol (TCP/IP) Version 4” in the list.
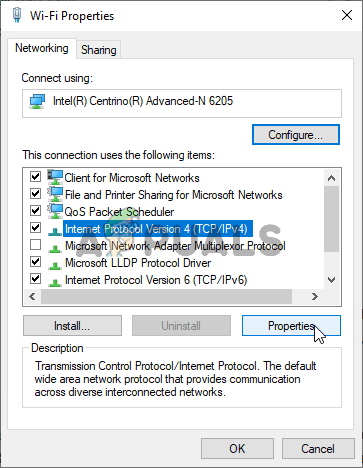
4. Click “Properties,” and then click “Advanced
5. On the Advanced TCP/IP Settings window, go to the “WINS” tab.
6. Under the NetBIOS settings, click on “Enable NetBIOS over TCP/IP,” and then click “OK.
Method 6: Using the Correct IP Address Command.
In some cases, if you are trying to connect to a specific IP address on the computer or are attempting to connect using the hostname, you need to be certain that you are using the correct command. Make sure to use the following command format to prevent any miscommunications.
\\(IP Address)\i
Method 7: Sharing a Folder
It is possible that the “network path not found” error is being triggered because the network path you are trying to access has not been shared. Therefore, in this step, we will check the path properties to see if it has been shared on the network. To do this:
- Open the File Explorer and navigate to the location of the folder.
- Right-click on the folder and select “Properties.

Click on Properties in the context menu - Click on the “Sharing” tab and select the “Advanced Sharing” button.
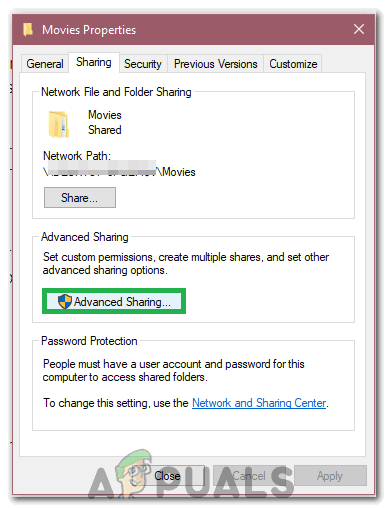
Clicking on the “Advanced Sharing” screen - In the advanced sharing window, check the “Share this Folder” option.
- Now the folder will be shared and its shared network path will be displayed in the sharing tab.
- Use this to connect to the folder and check if the issue persists.
Method 8: Enabling the Service
There are some services that enable file sharing on a network by facilitating communication between two computers. If these services are disabled, the network path might not be detected. Therefore, in this step, we will enable these services. To do so:
- Press “Windows” + “R” to open the Run prompt.
- Type in “Services.msc” and press “Enter.
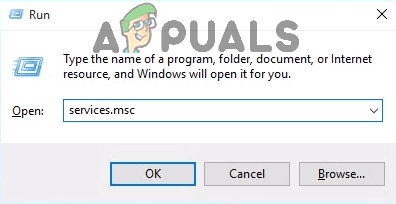
Type “services.msc” into the Run dialog and press Enter - Scroll down until you find the “TCP/IP Net Bios Helper” service.

Right-clicking on the service - Right-click on it and select “Properties”.
- Set its “Startup Type” to “Automatic,” and then click on the “Start” button.
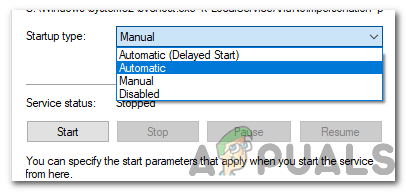
Selecting Automatic as the Startup Type - Apply and save your changes.
- Check to see if the issue still persists.
Method 9: Deleting the Registry Folder
It is very important that you back up your registry before proceeding with this step. This step is necessary because, in some cases, the registry folder we are going to delete is filled with incorrect or outdated configurations that prevent the network path from being found. To do so:
- Press “Windows” + “R” to open the run prompt.
- Type in “Regedit” and press “Enter.

regedit.exe - In the Registry Editor, navigate to the following location.
Computer\HKEY_LOCAL_MACHINE\SOFTWARE\Microsoft\MSLicensing
- Right-click on the “Hardware IDs” folder within the expanded MSLicensing hierarchy and select “Delete Folder.
- Confirm any prompts and then check to see if the issue persists.
Method 10: Changing Security Policies
In certain situations, local security policies may prevent your computer from functioning properly. Therefore, in this step, we will open the policy manager and define a policy for our local security. To do so:
- Press “Windows” + “R” to open the Run prompt.
- Type in “Secpol.msc” and press “Enter.
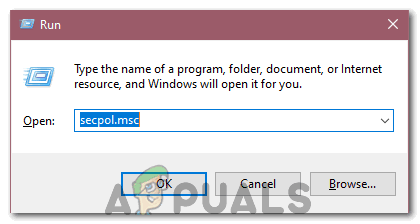
Entering “Secpol.msc” - Select “Local Policies” from the left side and then click on the “Security Options” dropdown.
- In the right pane, scroll down, and in the last couple of rows, you should see the “Network Security: LAN Manager Authentication Level” entry.
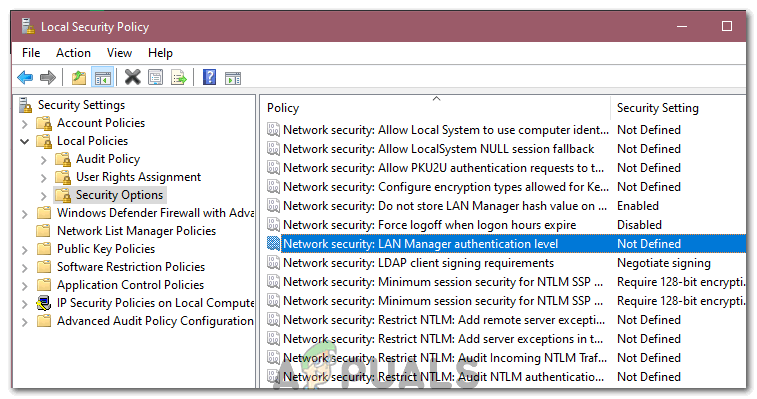
Selecting the entry - Double-click on this entry, and then click on the next dropdown menu.
- Select the “Send LM and NTLM – use NTLMv2 session security if negotiated” option from the list, and click on “Apply.
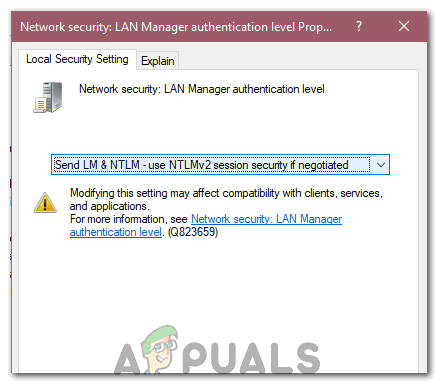
Selecting the option - Check to see if the issue still exists
Method 11: Editing the Hosts File
In certain cases, you will need to edit your host file to resolve the hostnames of your machine. This host file can be found in the System32 folder and is used by the operating system as an instruction manual to resolve hostnames. In order to edit the hosts file, follow these steps:
- Open the File Explorer and go to the following location.
C:\Windows\System32\drivers\etc.
- In this folder, right-click on the hosts file and select “Open With.
- Select “Notepad” from the list, and then type in the IP address of the domain you want to connect to, followed by the domain name.
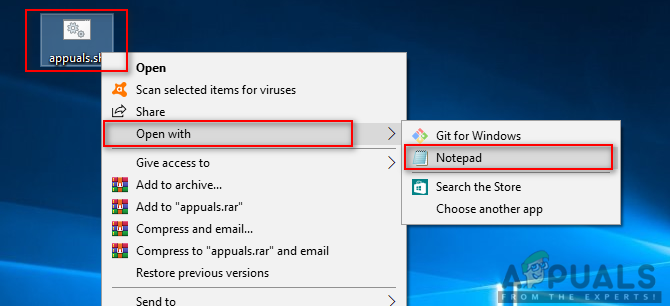
Opening with Notepad - Press “Ctrl” + “S” to save your changes.
- Check to see if the issue persists.
Note: If you are trying to access the network on a Virtual Machine, try using an older boot image and see if that resolves the issue.
Method 12: Use SMB1.
In some cases, the SMB3 protocol might be the reason behind the occurrence of this error on Windows Server. Therefore, in this step, we will enable the use of SMB1. To do so:
- Press “Windows” + “R” to open the Run prompt.
- Type in “Powershell” and press “Shift” + “Ctrl” + “Enter” to grant administrative privileges.
- Type the following commands into PowerShell to enable SMB1 and disable SMB3.
FOR Windows Server: Get-WindowsFeature FS-SMB1 Set-SmbServerConfiguration -EnableSMB2Protocol $false For Windows 10,8: Get-WindowsOptionalFeature –Online –FeatureName SMB1Protocol Set-SmbServerConfiguration –EnableSMB2Protocol $false - Check to see if the issue persists after executing these commands.
Method 13: Flush the DNS.
If all else fails, flush your DNS and enter ‘ncpa.cpl’ in the Run prompt; then, disable and enable your network adapter. This should fix the issue as a last resort.
- Press the Windows key once.
- Type “command prompt” in the search bar.
- Right-click the Command Prompt in the search results and select “Run as Administrator.
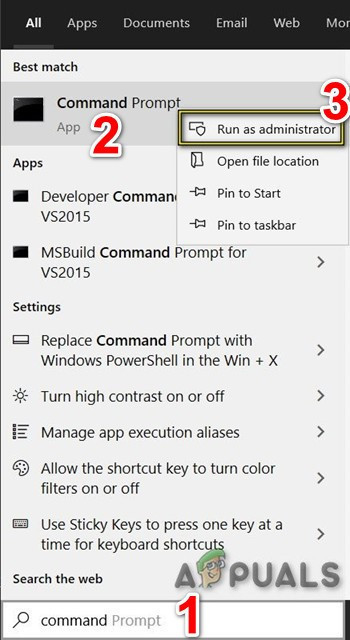
Open Command Prompt as Administrator ipconfig /flushdns ipconfig /release ipconfig /renew exit
- Check to see if the issue persists.
- If it does, press “Windows” + “R” to open Run and type in “ncpa.cpl.
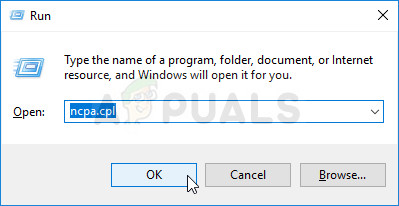
Run this in the Run dialog box - Right-click on your internet adapter and select “Disable.
- Select “Enable” after some time, and check again if the issue persists.