How to Enable or Disable Dynamic Refresh Rate (DRR) on Windows 11
Windows 11 is the first operating system from Microsoft that supports Dynamic Refresh Rate (DRR). This will allow your OS to change the display refresh rate on demand, but in order to use this functionality, you’ll need a display that supports it and you need to ensure that the feature is enabled in your Display Settings.
What is Dynamic Refresh Rate (DRR)?
With Dynamic Refresh Rate, your operating system will be able to dynamically switch between a higher refresh rate and a lower refresh rate depending on what you’re currently doing with your computer – This is a great way of keeping the power consumption in check when you’re not doing performance demanding tasks.
This technology has originally proven its worth on mobile where it has become kind of an industry standard for flagship devices. It was only logical for this technology to find its way on laptops in order to increase the battery life
The way DRR works on Windows 11 is quite simple. Let’s say you’re using the Dynamic 60Hz or 120Hz Mode:
When you’re doing productivity tasks like writing something in Word or writing an email in Outlook, your display will refresh at 60 HZ in order to conserve precious battery life. However, immediately after you start gaming or begin scrolling on YouTube, the display will begin refreshing at 120 Hz to facilitate a smoother and more responsive experience.
Dynamic Refresh Rate Requirements
Keep in mind that in order to be able to use DRR, you’ll first need to ensure that your graphic driver supports WDDM (Windows Display Driver Model) 3.0.
UPDATE: As of now, Microsoft is working with various display partners to bring updated graphics drivers with the support of DRR to the Windows Insider Program. Depending on your configuration, you might already be able to enable DRR or you might need to wait a little longer for the updated graphic driver to arrive for your display.
If you’re not certain if your current PC supports DRR, there’s an easy way to check – You’ll need to use the DirectX Diagnostic Tool to see if your current display driver supports WDDM 3.0.
Here’s how to check if WDDM 3.0 is supported by your display:
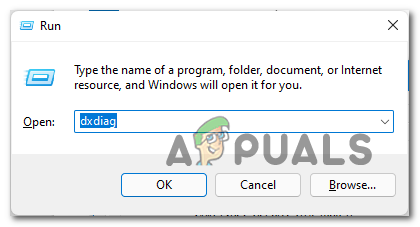
- Open up a Run dialog box by pressing Windows key + R at the same time. Inside the text box that just appeared, type ‘dxdiag’ and press Enter to open up the DirectX Diagnostic Tool. If you see the User Account Control (UAC), click Yes to grant admin access.
Opening the DirectX Diagnostics Tool - Once you’re inside the DirectX Diagnostic Tool window, select your active display from the ribbon menu at the top.
- Next, look under the Drivers category and check the Driver Model. If it’s under WDDM 3.0, it means that your display is not yet equipped to support DRR.
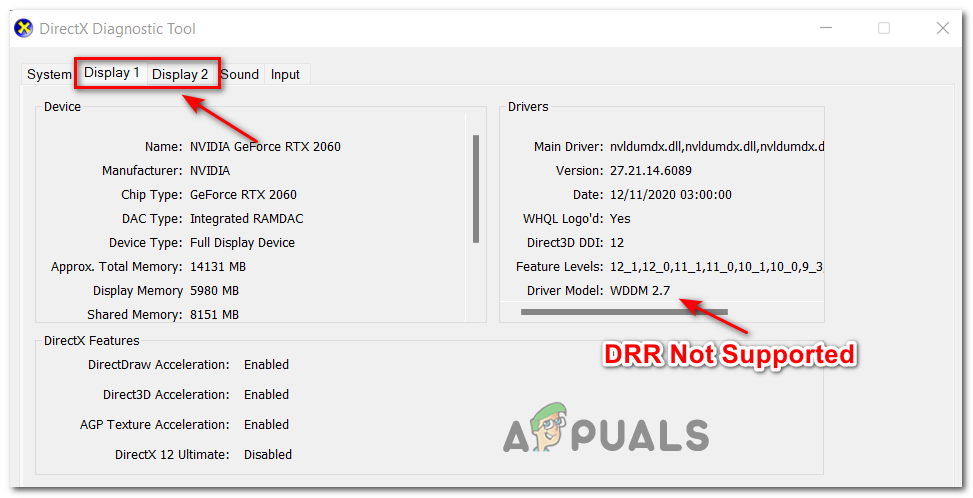
DRR Not supported
If you just find out that you don’t have WDDM 3.0 yet, it means that DRR is sadly not available for you yet. If you already updated to the latest Windows 11 build (from Settings > Windows Updates > Check for Updates) and you’ve confirmed that you’re running with the latest drivers available, your only option is to wait until Microsoft releases an updated driver for your display to make it support DRR.
How to Enable or Disable DRR on Windows 11
If you already confirmed that your computer supports DRR and you meet all the requirements, you can safely play around with the dynamic refresh rate settings and disable or enable them at your own will.
There are actually two different ways that will allow you to enable or disable Dynamic Refresh Rate (DRR) on Windows 11. We’ve covered both approaches, so feel free to follow the guide that’s closer to your preferred way of using Windows 11:
1. Enable or Disable DRR via Settings
- Press Windows key + I key to open the Settings window on Windows 11.
- From the list of available options inside the Settings screen, click on Display to expand the drop-down menu.
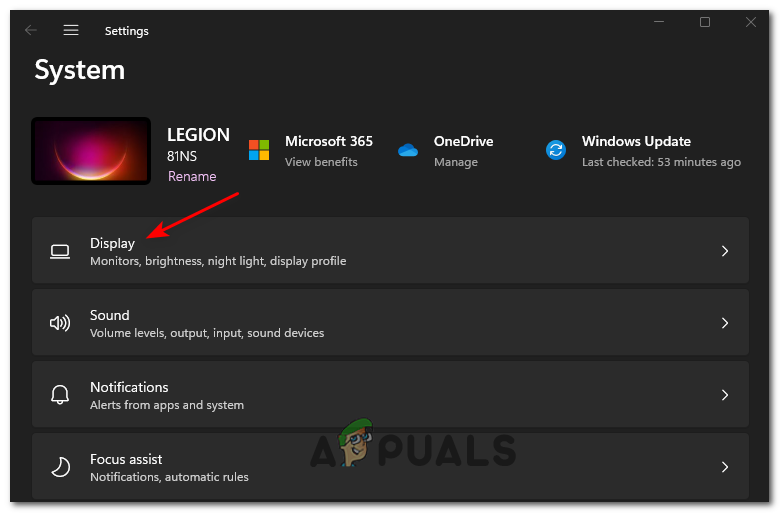
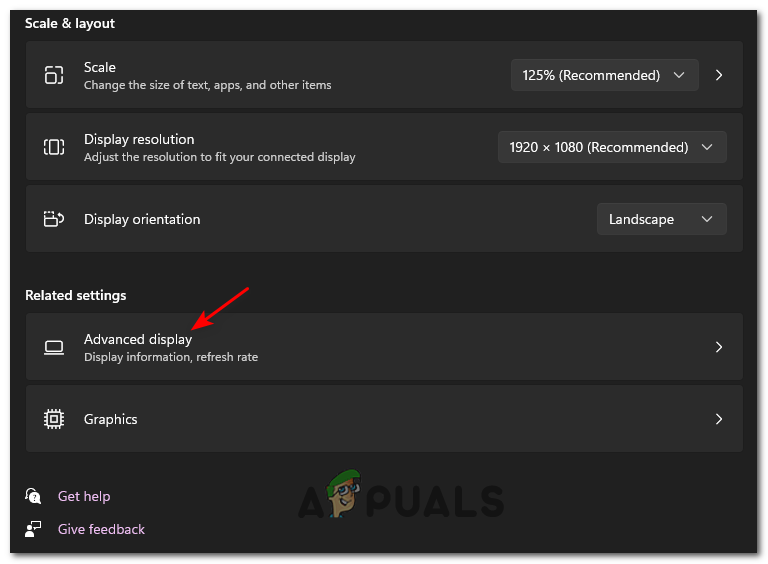
Accessing the Display tab - Once you’re inside the Display screen, scroll all the way down to the Related Settings category and click on Advanced Display.
Accessing the Advanced Display menu - From the Advanced display settings, select the correct display from the box at the top, then change the drop-down menu associated with Choose a refresh rate to Dynamic and select your favorite mode.
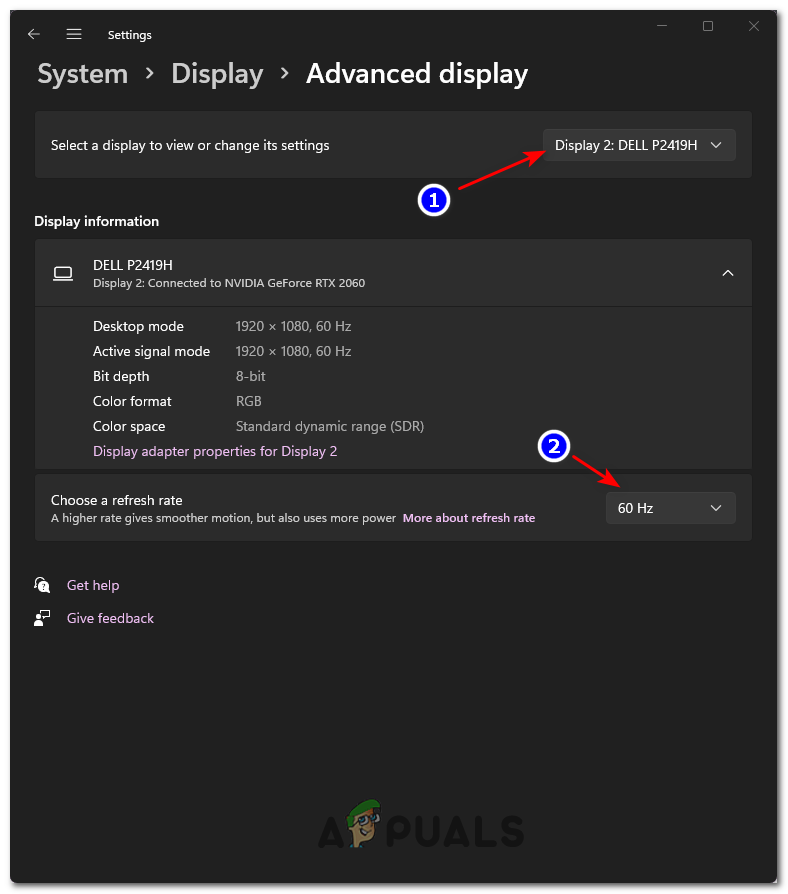
Enable DRR from the Settings menu Note: If the functionality is already enabled and you wish to disable it, simply select the correct display and change the refresh rate from Dynamic to a static rate like 60 Hz.
2. Enable or Disable DRR from Intel’s Graphics Command Center
This method will only be applicable if you’re relying on Intel’s GPU drivers.
Note: As of now, DRR switching is available only with 10th Generation Intel Processors (or newer) that are equipped with Displayport (eDP) tech.
- Press the Start key and use the search function to find and open the Intel Graphics Command Center.
- Once you’re inside Intel’s Graphics Command Center, select System from the left-hand side menu.
- Once you’re inside the Power tab, turn Dynamic Refresh Rate On or Off via the dedicated option on the right-hand side.
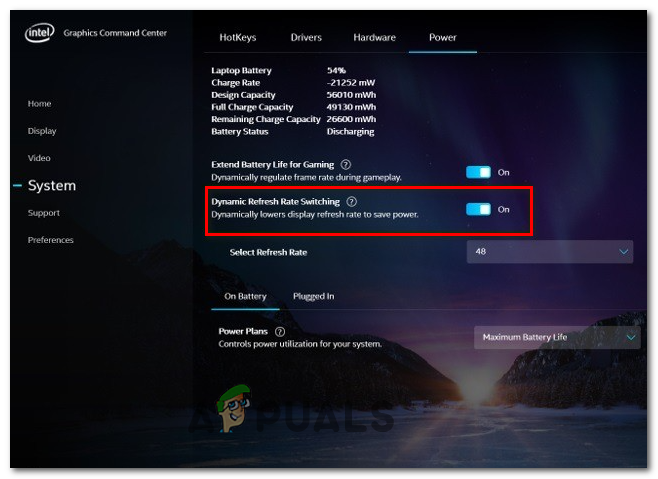
Enabling DRR on Intel’s Graphics Command Center - You can customize the Dynamic Refresh Rate switching even further by adjusting the Refresh Rates using the drop-down menu below.


