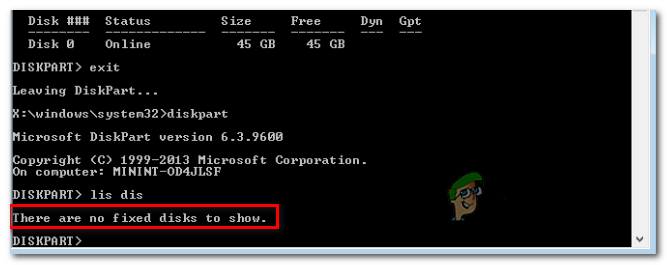
DiskPart Error ‘No fixed disks to show’
The ‘There Are No Fixed Disks to Show’ error is encountered when some Windows 7, Windows 8.1 or Windows 10 users are attempting to run the DiskPart utility. Most affected users are reporting that the PC is completely unable to boot from any connected HDD (but it’s able to boot from a Windows installation media).
What is causing the ‘There Are No Fixed Disks to Show’ error?
- HDD is improperly connected – As it turns out, one of the most common causes that will trigger this particular error is an HDD that is improperly connected. In most cases, this occurs if the SATA or ATI data cable is not pushed all the way or is malfunctioning. In this case, you can fix the issue by opening your Laptop or PC case and starting the PC without the HDD before establishing the connection once again.
- Missing VMware driver – If you’re encountering this problem after a NAT crash when using a VMware virtual machine, it’s likely the direct result of a kernel panic. To restore the Windows installation in this case, you will need to rely on Recovery mode to get things back to a working state. To do this, you’ll need to run a series of CMD in an elevated Command Prompt.
- Corrupted BCD data – It’s been confirmed by several affected users that this issue can also occur due to some kind of system file corruption inside the Boot Configuration Data. In this case, you should be able to fix the issue by opening an elevated Command Prompt and rebuilding the corrupted BCD files using a series of commands.
- Initialization Error – An initialization error can also be the leading cause of the apparition of this particular error message. If this scenario is applicable, the best possible fix for end-users is to use the Automatic Repair utility. But in order to implement this fix, you need to own a compatible Windows installation media.
How do i fix the No Fixed Disks to show error?
Now that we understand the most likely causes behind this error lets jump onto the steps you are supposed to take to troubleshoot and resolve the issue.
1. Reconnecting the HDD
As several affected users have reported, the ‘There Are No Fixed Disks to Show’ error can very well occur due to a hardware inconsistency caused by a pin that is not properly connected.
If you recently made some hardware modifications (E.G. moved the setup to a new case, or moved the HDD from one machine to another) the very first step is to make sure that the HDD is properly connected.
Here are some step-by-step instructions on ensuring that the HDD Is properly connected:
- Turn off your machine completely and make sure that the power to it is completely cut of by removing the cable from your power outlet.
- Equip an electrical wristband (if you have one) and open the case of your computer/laptop.
- Remove the power and data SATA/ATA cables from your HDD, then start your computer long enough for it to recognize that the HDD is no longer connected.
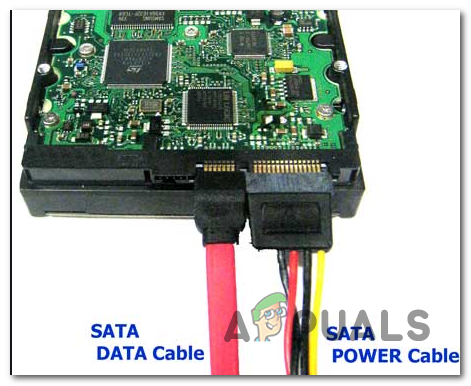
Disconnecting the HDD cables - You will get an error saying that there isn’t any storage device connected to this PC. As soon as you see it, should the computer down again and connect the two cables once again – Make sure both are properly connected (pushed all the way).
- Boot your computer once again and see if the issue is now resolved.
If you’re still encountering the same ‘There Are No Fixed Disks to Show’ error, move down to the next potential fix below.
2. Installing the missing VMware driver (if applicable)
If you’re encountering this problem in relation to a NAS crash when using a VMware virtual machine, it’s likely due to some kind of kernel panic. Typically, in situations like this, the problem will end up breaking the Windows installation, making it completely unbootable.
We managed to find several occurrences with users in a similar situation that tried to fix the problem by using Windows Recovery mode to get things back to a working state. Unfortunately, during the partitioning part, DiskPart showed ‘There Are No Fixed Disks to Show’ error which brought the reparation procedure to a halt.
If this scenario is applicable to your current situation, there’s a high chance that it’s occurring due to the fact that you’re using VMware PVSCSI for your virtual disks. Fortunately, this can be resolved by a series of commands ran from an elevated CMD prompt.
Here’s what you need to do:
- In your Vmware workstation, right-click on your virtual machine and click on Install Vmware Tools. Then, on the next menu, choose Mount and wait for the procedure to complete.
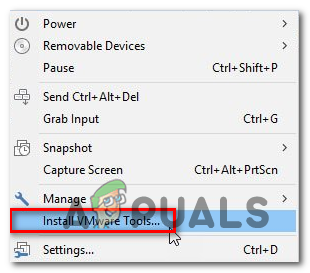
Install vmware tools - With the virtual machine mounted, you need to jump back into the Windows recovery menu. To do this, press Windows key + R to open up a Run dialog box. Once inside, type ‘cmd’ and press Ctrl + Shift + Enter to open up an elevated CMD prompt. When you see the UAC (User Account Control), click Yes to grant administrative privileges.

Running the Command Prompt - Once you’re inside the elevated CMD prompt, type the following command and press Enter:
drvload "X:\Program Files\VMware\VMware Tools\Drivers\pvscsi\Win8\amd64\pvscsi.inf"
Note: X is only a placeholder. Replace it with the correct letter where VMware is installed.
- Once the command is successfully processed, run the following command and press Enter to see if you can use the Diskpart utility without encountering the ‘There Are No Fixed Disks to Show’ error:
X:\windows\system32>diskpart
Note: Keep in mind that X is only a placeholder. Replace it with the letter of your OS drive.
- If the process was successful and you’re no longer encountering the same error, mount the virtual machine again and you are good to go.
3. Fixing BCD Data
As it turns out, this problem can also occur due to the fact that your system is struggling with some logical errors or even system corruption inside the Boot Configuration Data. If this scenario is applicable, you should be able to fix the issue by rebuilding the BCD files with a series of CMD commands.
Several affected users have confirmed that this operation allowed them to reach the DiskPart screen and complete the operation without encountering the ‘There Are No Fixed Disks to Show’ error.
Here’s a quick guide with what you need to do:
- Insert a compatible installation media into your computer and restart your computer in order to boot from it.
Note: If you don’t have one, you can create a compatible installation media from a healthy PC. - To boot from the installation media, press any key when you see the black screen and wait for the initial installer to load.
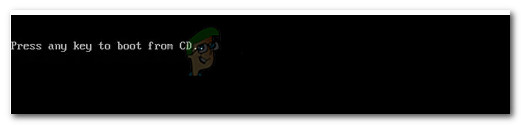
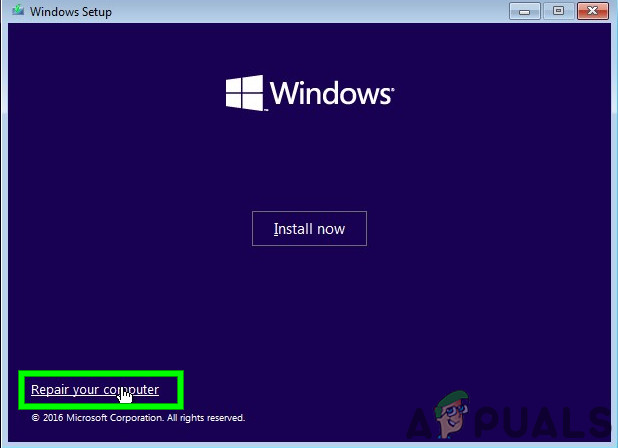
Press any key to boot from installation media - After you manage to successfully boot from the installation media, click on Repair your computer (bottom-left corner) and wait for the repair tool to load.
Click Repair your computer on Windows Screen Note: On Windows 10, you can force your way into the repair menu even without the installation media – By forcing 3 consecutive unexpected machine interruptions (by turning off your computer in the middle of the booting sequence).
- Once you manage to get inside the initial repair menu, click on the Troubleshoot menu from the list of available options. Next, click on Command Prompt from the list of sub-options.
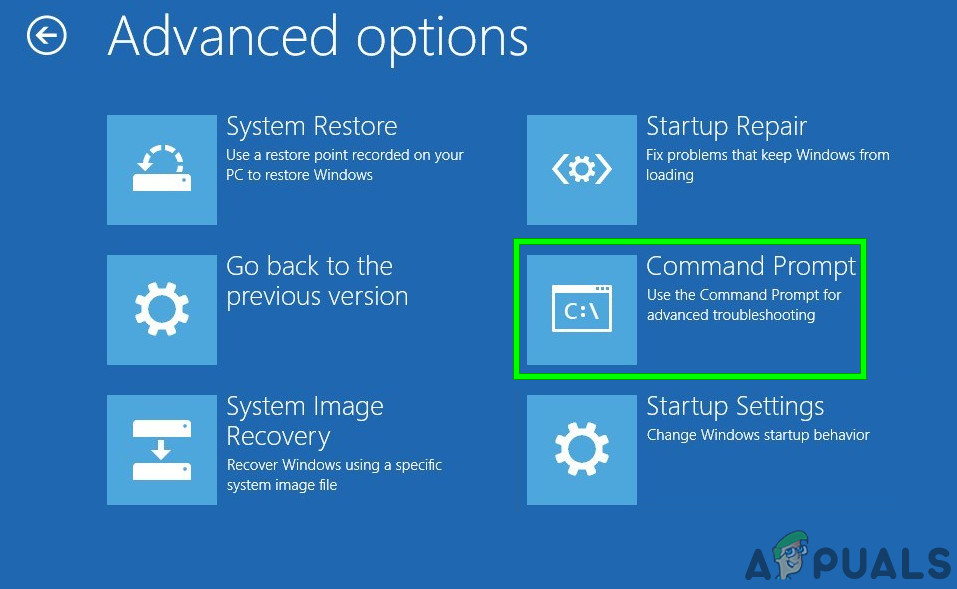
Click Command Prompt - Once you are inside the newly opened Command Prompt window, type the following command in order and press Enter after each one to rebuild the boot configuration data:
Bootrec /scanos
Bootrec /fixMBR
Bootrec /fixBoot
Bootrec /rebuildBCD
- After each command is processed successfully, close the CMD prompt and restart your computer to see if the problem is still occurring at the next system startup.
If the same ‘There Are No Fixed Disks to Show’ error is still occurring, move down to the next potential fix below.
4. Using Windows Startup Repair
If none of the instructions above have allowed you to fix the ‘There Are No Fixed Disks to Show’ error and run the DiskPart utility normally, it’s very likely that you’re dealing with some kind of initialization error that is being caused by one or more kernel files.
If this scenario is applicable, you should be able to fix the issue swiftly by using the most powerful tool that’s available to end-users – the Automatic Repair utility. Some users that were also encountering this problem have reported that the issue was completely resolved and they were able to boot normally after performing the instructions below.
IMPORTANT: The procedure below should be compatible with every Windows installation media. But you need to have a compatible installation media in order to be able to replicate the instructions below. If you don’t have a compatible installation media, here’s how to create one for Windows 10.
If you already own a compatible installation media or you used the guide above to create one, follow the instructions below to use the Startup Repair utility to fix the issue automatically. Here’s what you need to do:
- Power on your computer (restart it if it’s already on) and make sure that the Windows installation media is inserted into your DVD drive or USB port.
Note: Keep in mind that in case you are using a flash USB drive as installation media, you will likely need to ensure that your computer is configured to boot from it first. - Once you see that your computer is preparing to enter the booting sequence, wait patiently until you see the black screen saying ‘Press any key to boot from the CD or DVD’. When you see it, press any button to boot from this particular installation media
Press any key to boot from installation media - Once you get to the initial installation screen, turn your attention to the bottom-left corner of the screen and click on the Repair your Computer hyperlink located in the lower side section of the screen.
Click Repair your computer on Windows Screen - After several seconds of loading, you should see the Troubleshooting menu. Once you get there, you will have the option to choose from multiple options. Make sure to click on the Troubleshoot feature.
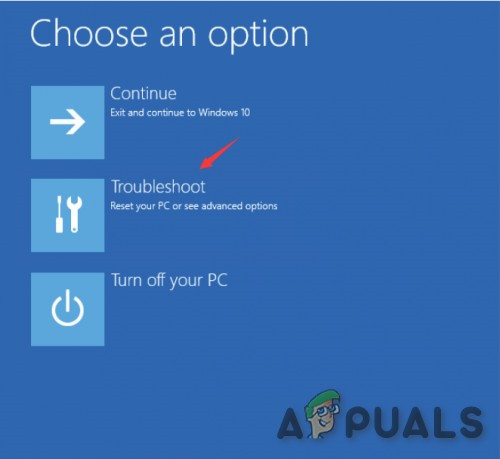
Click on Troubleshoot - From the Troubleshoot menu, click on Advanced Options from the list of available recovery options.
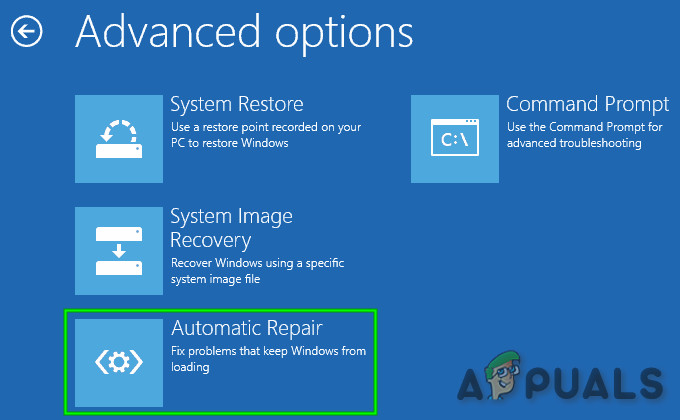
Automatic Repair in Advanced Options - If you have a dual boot setup, you will be asked which OS you want to repair. Select it, then wait patiently until the process is complete.

Automatic Repair screen - After the operation is complete, remove the installation media and reboot your computer to see if the problem has been resolved.


