Fix: ‘bootrec /fixboot’ Access Denied Error on Windows
The error message “Access is denied” usually occurs when you’re already having a problem with your computer. As such, when you’re performing some basic troubleshooting on your computer and trying to use the boot manager to fix any boot issues, you might encounter the Access denied error message. As it turns out, there are a number of reasons which can cause the error message in question, and you’ll have to look for your respective case in order to resolve the issue.
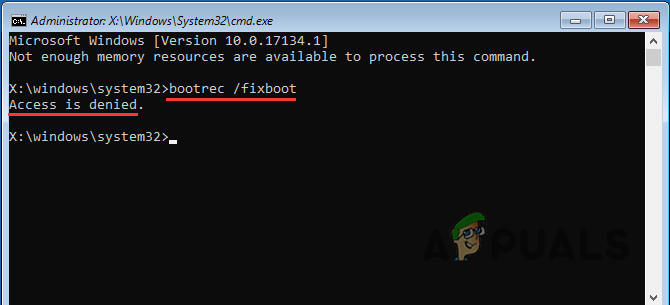
If you’re not already familiar, the fixboot option creates a new boot sector on your system partition that is compatible with your operating system. This is usually helpful when your boot sector is damaged and thus unable to boot into Windows. In this article, we are going to show you how to resolve the error message in question quite easily with a number of methods that have been used by other community members who were facing a similar issue. So with that said, let us get started and jump right into it.
1. Use Installation Media to Configure Boot Files
The first thing that you should do when you encounter the error message is to use an installation media to configure the boot files of your operating system. In this case, we will be using the BCDBoot utility, which will be copying the boot files into your system partition in order to fix any issues.
Therefore, as mentioned, you need to have an installation media in order to proceed with this method. If you do not have an installation media, we would recommend downloading the Windows ISO from the official website and then creating a mountable USB drive that you can boot into to fix the issue.
If you’re not sure how to create a bootable installation media, we have plenty of guides on our website available that can guide you through the process, such as how to create Windows 10 bootable USB using Rufus. Once you have a bootable Windows installation media ready, you can follow the instructions down below. Please make sure that the Windows version on your installation media is 1709 or newer. With that said, let us get started.
- First of all, go ahead and insert your installation media into your PC and then restart your computer.
- As your computer is restarting, make sure that you boot into the installation media using the Boot Menu.
- Once you have done that on the Windows setup window, choose your keyboard layout and then click Next.
- After that, click on the Repair your computer option.
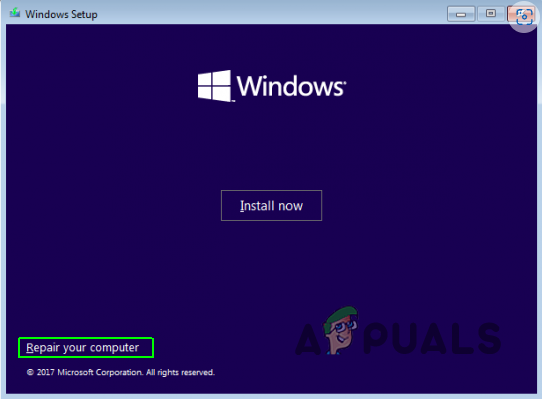
Windows Setup - Then go ahead and click on Troubleshoot. With that done, open up a Command Prompt window. You will find it in the Advanced Options menu.
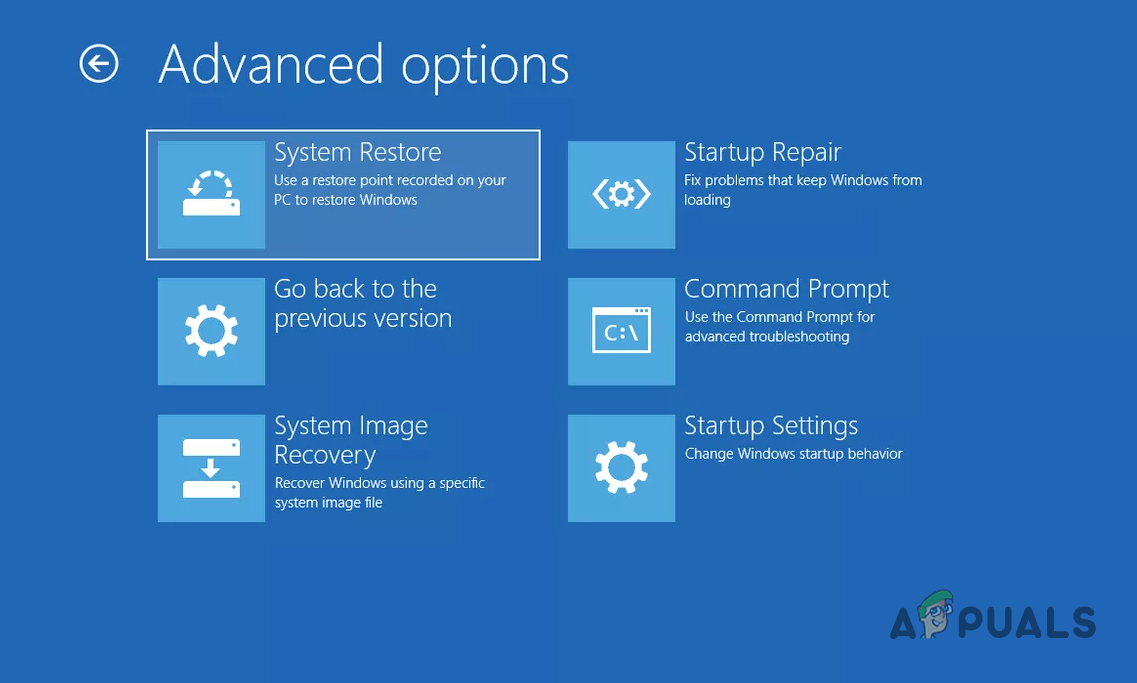
Advanced Options - Inside the command prompt will be using a utility called diskpart. This utility will help us to select the required system partition, and assign it a letter before we begin copying the boot files.
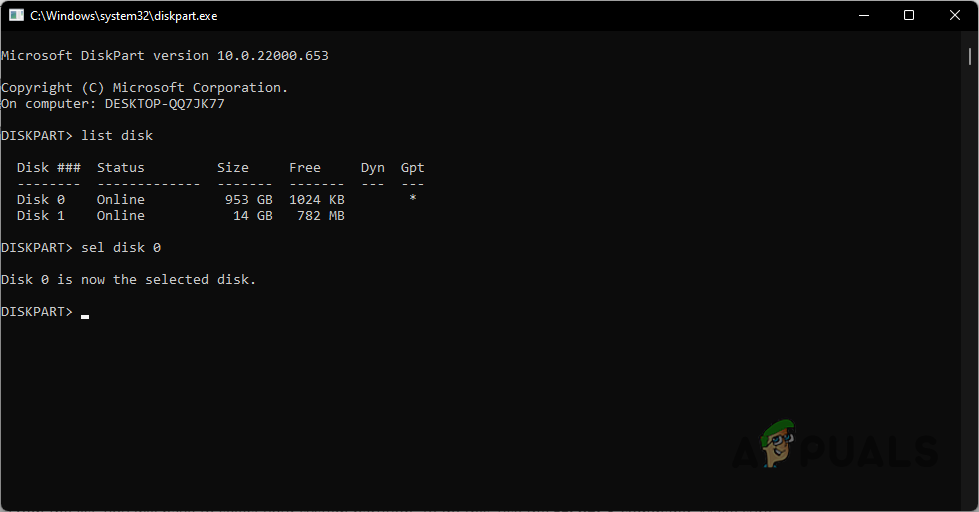
- Start off by typing diskpart in the command prompt.
- Then, go ahead and type list disk and press Enter.
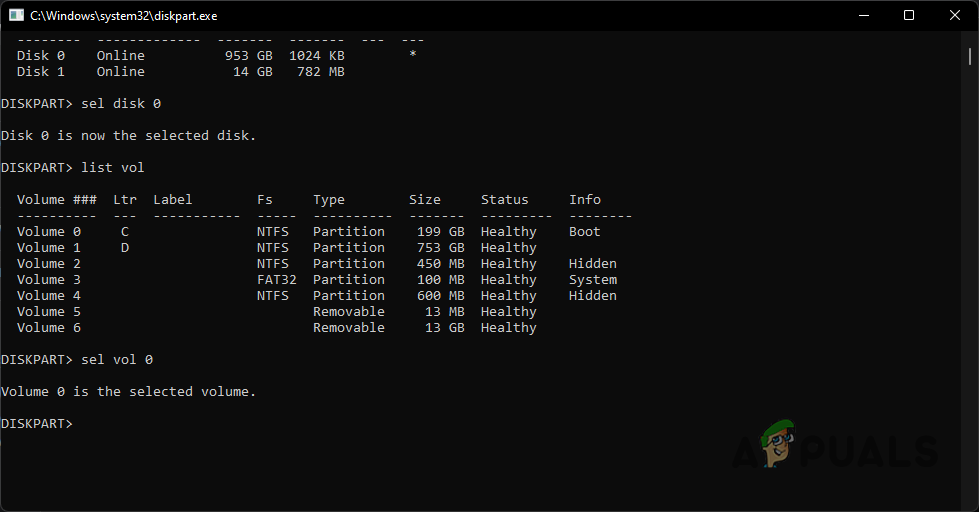
- From the list of drives available, select your boot drive by using the sel disk X command where you have to replace X with the number of your boot drive. For example, sel disk 0.
Selecting Disk - With that done, now you have to choose your system partition. To do so, type in list vol and press Enter.
- This will list down all of your partitions on the drive that you have selected.
- From the list, you will have to select your system partition. To do this, use the sel vol X command. Make sure to replace X with the number of your system partition again.
Selecting Volume - With the system partition now selected, you’ll have to assign it a letter. You can do this by using the assign letter=X: command. You can replace X: with anything except C:.
- Now type exit and then hit Enter.
- With that, you have exited from the diskpart utility. Now you’ll have to navigate to your system partition. You can do this by entering the letter that you just assigned to your system partition. For example, if you assigned it the letter V:, simply type in V: and then hit Enter.
- After that, go ahead and type in format V: /FS:FAT32. Make sure to replace V: with your respective letter.
- Finally, type in the command bcdboot C:\windows /s V: /f UEFI and hit Enter. Again, replace V: with the letter that you assigned to your system partition earlier.
- See if that fixes the issue for you.
2. Use Automatic Repair after Naming the System Partition
If the above solution does not fix the error for you, you can use the automatic repair utility to fix the boot issue. This is rather simple and can fix the issue for quite a few users. For this, you don’t really need the installation media, but you can do it using the media as well.
First of all, you will have to boot into the Advanced Options menu. If you don’t have an installation media, you can try pressing the F11 key or F8 key on your keyboard while your computer is booting up to boot into the Windows Recovery Environment. From there, the process is rather simple. Follow the instructions given down below to run the automatic repair utility.
- On the Choose an option screen, click on the Troubleshoot option.
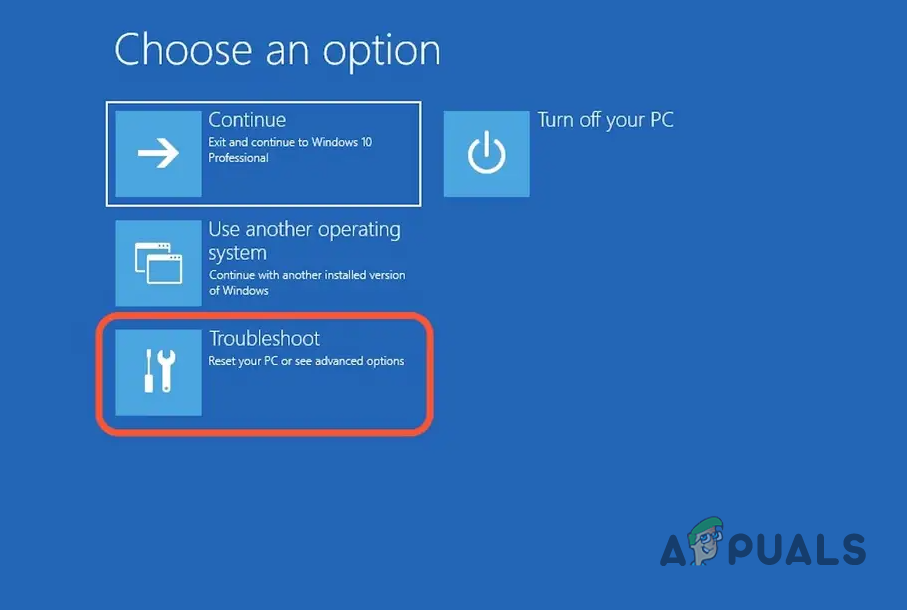
Navigating to Troubleshoot - Then, make your way to Advanced Options.
- There, click on the Startup Repair option to run the automatic repair utility.
Advanced Options - Wait for it to complete and see if that fixes the issue for you.
3. Disable Fast Boot in BIOS
As it turns out, in some cases the problem can be due to an option in the BIOS settings. This feature is known as Fast Boot and as is apparent from the name itself, it is basically used to reduce your computer’s boot time.
On some motherboards, Fast Boot is also called Quick Boot or Quick Boot On Self Test. In addition to Fast Boot, you will also have to disable Secure Boot in order for it to work. With that said, follow the instructions given down below to disable Fast Boot.
- First of all, start off by restarting your computer.
- As your computer is booting up, go ahead and boot into the BIOS menu.
- In the BIOS menu, navigate to the Boot tab and look for the Fast Boot option there. Remember that the name and the exact location might be slightly different on some motherboards.
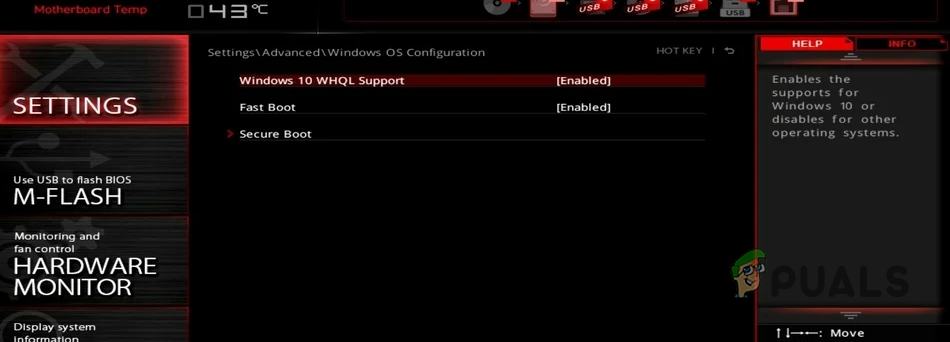
Disabling Fast Boot in MSI BIOS - Once you have located it, go ahead and disable the feature.
- Follow this up by locating Secure Boot in the Security tab and disabling it as well.
- Save your changes and then restart your computer. See if that fixes the issue.
4. Clean Install Windows
Finally, if none of these solutions have worked out for you, as a last resort, you will have to reinstall Windows on your system completely. This means that you will have to format your system partition and then reinstall a newer version of Windows. For this, you can use the same installation media that you have been using for the methods above and just simply go through the Windows setup to perform a clean install of Windows.


I would recommend looking through your commands and making some changes. I could not get this working as there are incorrect commands. For instance, under Solution 1 > step 3, you have ‘set vol‘ it should be ‘sel vol ‘ to select the volume you want to assign the letter to. And again Solution 1 > step 6, adding ‘All’ to the end causes the command to only show a list of correct usable commands rather than executing anything. There may be other issues that I may not be finding as I couldn’t get it to work. Of course, there is the possibility that besides those 2 errors the rest is correct and the computer I am working on is just unrecoverable.