How to Disable Hardware Tab in Properties Window?
The hardware tab is located in each hardware’s properties window on your system. The hard drive, keyboard, mouse, sound, and audio devices, all will have a hardware tab in their properties window. It allows users to access the settings like updating, disabling, rollback, and uninstallation of the driver for that hardware. However, if the computer is shared by multiple users, then other users can also use these settings through the hardware tab. As an administrator, you can simply disable this tab from the properties of all devices. In this article, we will show you methods through which you can easily disable the hardware tab from the properties window.
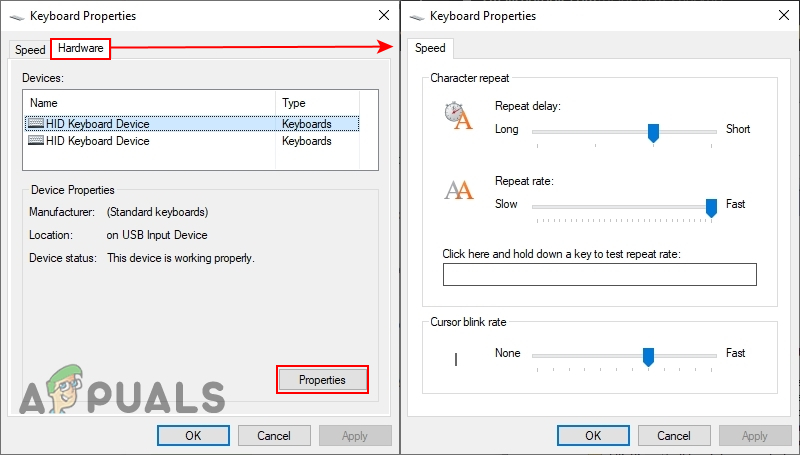
Some settings are not available in the default Control Panel and Settings app. There is a specific policy setting available for removing the hardware tab on your system. By using the Local Group Policy Editor, we can simply access this setting. However, the Local Group Policy Editor isn’t available for Windows Home users. Therefore, we have also included a Registry method, which will work similarly as the policy method.
Disabling Hardware Tab through the Local Group Policy Editor
The Local Group Policy is a Windows feature that allows users to control the working environment of their operating system. It has user configuration and computer configuration. The setting for removing the hardware tab can be found in the user configuration. Follow the below steps to disable the hardware tab:
Skip this method, if you are using Windows Home Edition and try the Registry Editor method.
- Press the Windows + R keys together on your keyboard to open a Run dialog. Now type “gpedit.msc” in the Run box and press the Enter key to open the Local Group Policy Editor.
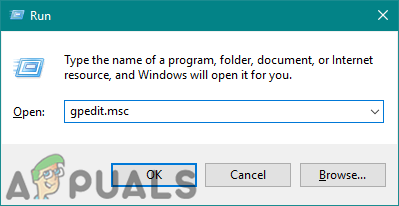
Opening Local Group Policy Editor - Navigate to the following setting in the Local Group Policy Editor:
User Configuration\Administrative Templates\Windows Components\File Explorer\
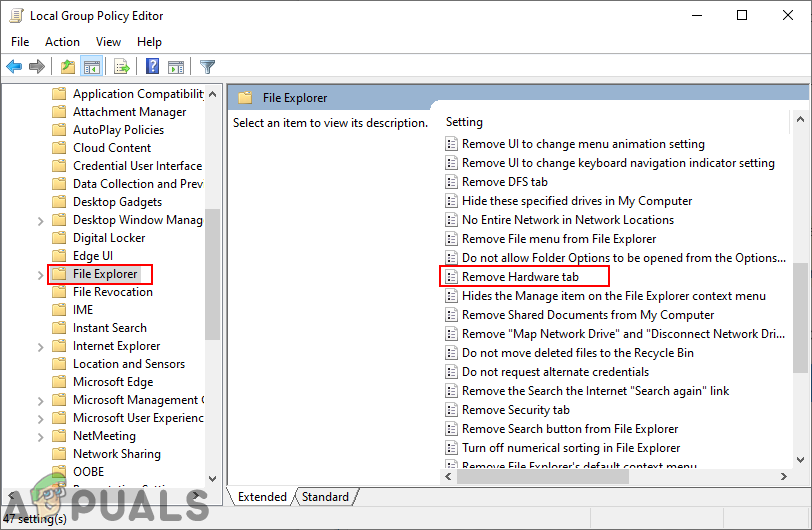
Navigating to the setting in the Local Group Policy Editor - Double-click on the setting named “Remove Hardware tab” in the list of the File Explorer. It will open a new window, now change the toggle options from Not Configured to Enabled.
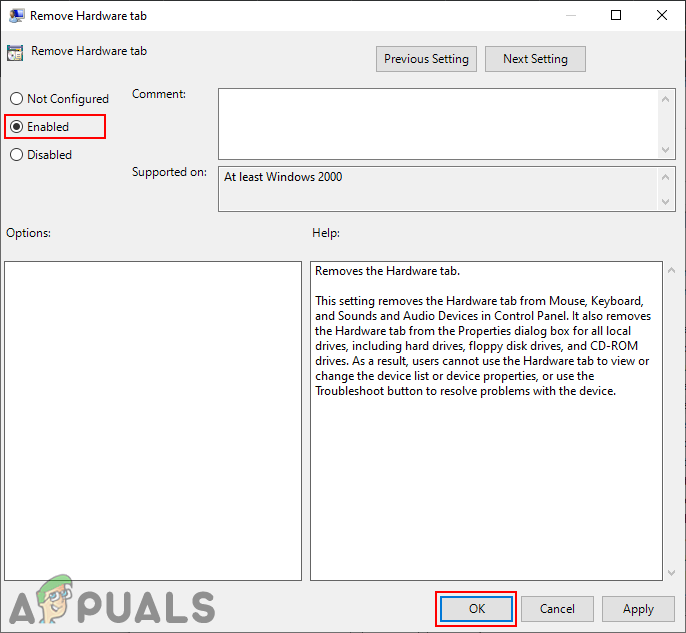
Enabling the setting to disable the hardware tab - Click on the Apply/Ok button to save the changes. Now the hardware tab will not show in most hardware properties windows.
- To enable it back, simply change the toggle option back to Not Configured or Disabled in step 3.
Disabling Hardware Tab through the Registry Editor
The Windows Registry is a hierarchical database that stores low-level settings for both applications and operating systems. The Registry Editor isn’t safe as the Local Group Policy Editor. A single wrong setting can cause the computer unusable or worse. It is best to create a backup before making any changes in the Registry Editor. Also, if you follow the below steps carefully, there will be nothing to worry about.
- Press the Windows + R keys together on your keyboard to open a Run dialog. Now type “regedit” in the Run box and press the Enter key to open Registry Editor.
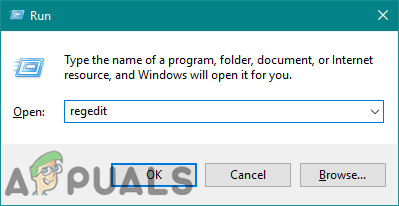
Opening the Registry Editor - In the Registry Editor window, navigate to the following path:
HKEY_CURRENT_USER\Software\Microsoft\Windows\CurrentVersion\Policies\Explorer
- Right-click on the right pane of the Explorer key and choose New > DWORD (32-bit) Value and name the value as “NoHardwareTab“.
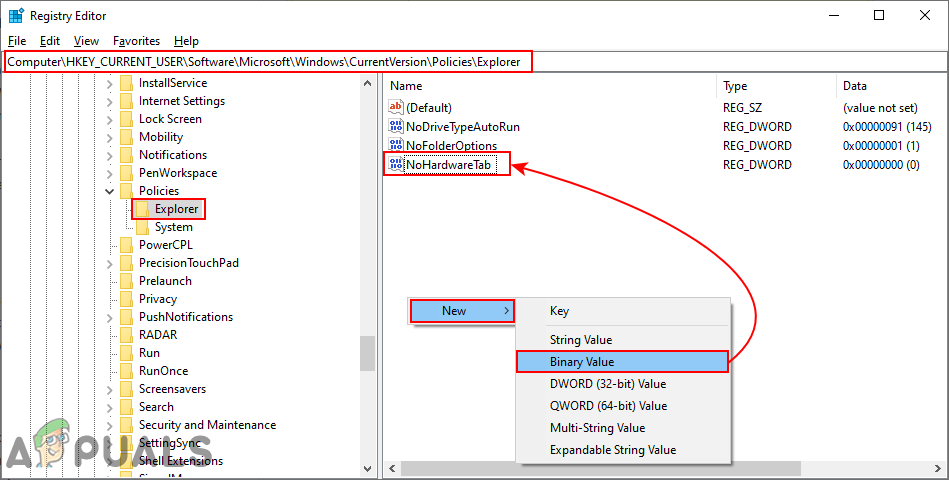
Creating a new value in the Registry Editor - Double-click on the value you just created and change the value data to 1.
Note: Value data 1 will enable the value and this value will disable the Hardware tab.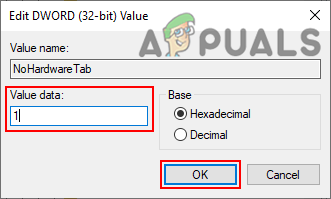
Changing the value data - After all the configurations, you need to restart the computer to apply the changes to your system.
- To enable the hardware tab again on your system, simply change the value data back to 0 or remove the value that you created in this method.


