How to Disable Automatic Learning in Windows?
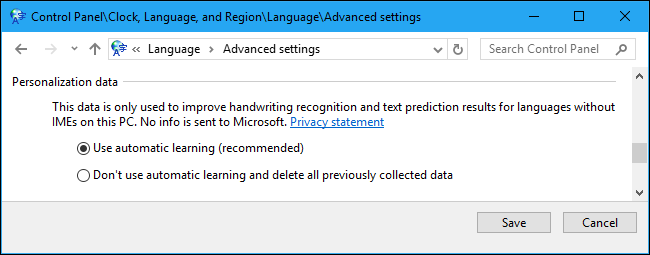
Automatic learning is one of the greatest handwriting features in the Windows operating system. It is recommended to keep this setting enabled so that Windows can recognize your handwriting better. However, there are situations where a user will want to disable this feature temporarily. Disabling this will remove all the saved data that it has learned. So, it is also a good way to refresh the saved data by disabling and enabling it back.
The Group Policy Editor is not available on Windows 10 Home Editions; therefore, we have included a registry method that you can use to modify the setting.
Disabling Automatic Learning
This was possible to disable in the control panel back in the early versions of Windows. However, in Windows 10 control panel the option for automatic learning has been removed. Now the only way to disable this policy is by going through the Local Group Policy Editor or Registry Editor. The amount of stored ink is 50MB and the amount of the text information is approximately is 5MB. When it reaches the limit, the old data will be deleted to make room for new data.
Method 1: Disabling Automatic Learning through Local Group Policy Editor
This setting can easily be accessed in the Local Group Policy Editor. The Local Group Policy Editor will also provide a lot of information related to this setting. A user just needs to double-click the settings and enable it by changing the toggle as shown below:
Note: The Local Group Policy Editor is only available on Windows 10 Pro, Windows 10 Enterprise, and Windows 10 Education editions. If you have a different Windows 10 version, then directly jump to method 2.
- Hold the Windows key and press R to open the Run dialog. Then, type “gpedit.msc” in the box and press Enter to open the Local Group Policy Editor.
Note: If it shows the UAC (User Account Control) prompt, then press Yes.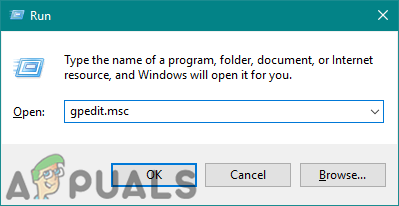
Opening Local Group Policy Editor - Navigate to the following location in the left pane of the Local Group Policy Editor:
Computer Configuration\Administrative Templates\Control Panel\Regional and Language Options\Handwriting personalization
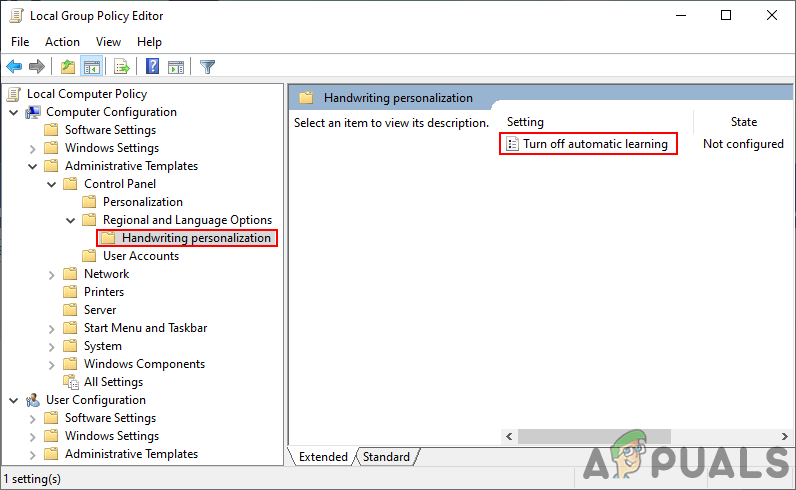
Navigating to the settings - Double-click on the Setting named “Turn off automatic learning“. This will open another window, change the toggle to Enabled option. Click on the Apply/Ok button to save the settings.
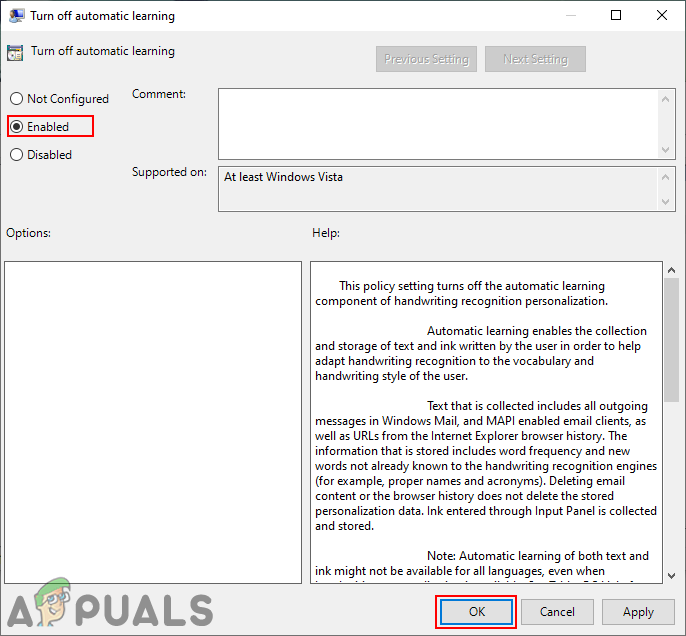
Enabling Policy - Automatic learning will be disabled now. To enable it back, just change the toggle option back to Not Configured or Disabled.
Method 2: Disabling Automatic Learning through Registry Editor
The second method is by enabling the registry value in the Registry Editor. This requires a bit more work than the first method because sometimes the key/value will be missing. Users need to create it manually by following the correct steps. The enable and disable in the Registry Editor, it is done with the 0 and 1 numbers. Follow the below steps to try disabling automatic learning:
- Open the Run dialog by pressing the Windows + R keys together. Now, type “regedit” and press the Enter key to open Registry Editor. Choose Yes for UAC (User Account Control) prompt.
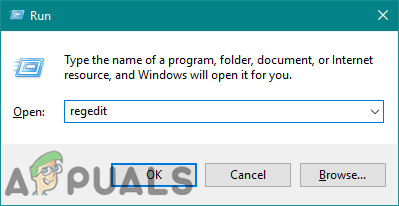
Opening the Registry Editor - On the left pane of Registry Editor, navigate to the following location to find the key:
HKEY_LOCAL_MACHINE\SOFTWARE\Policies\Microsoft\InputPersonalization
- If the InputPersonalization key isn’t there already, then create a new key by right-clicking on the left pane and choosing the New > Key option as shown below.
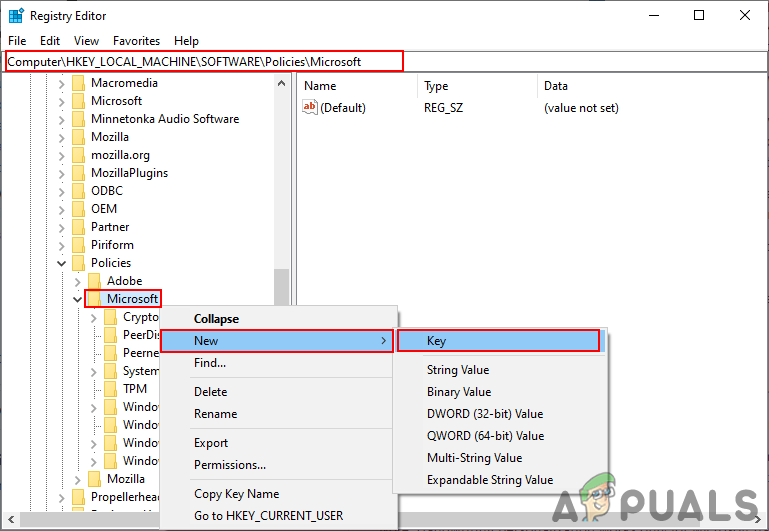
Creating the required key - Now create two different values in this key. Right-click on the right pane and choose New > DWORD (32-bit Value) option. Name the values as “RestrickImplicitTextCollection” and “RestrictImplicitInkCollection“.
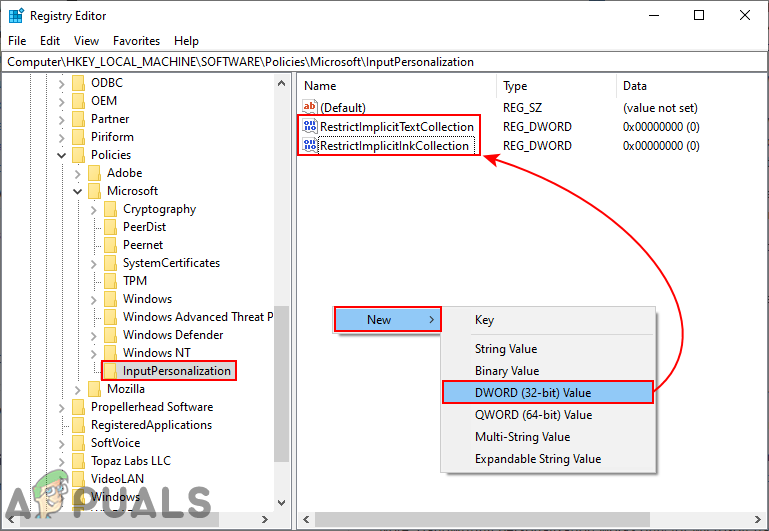
Creating two values - Open each of them by double-clicking on it and change the Data Value to “1” for both as shown below.
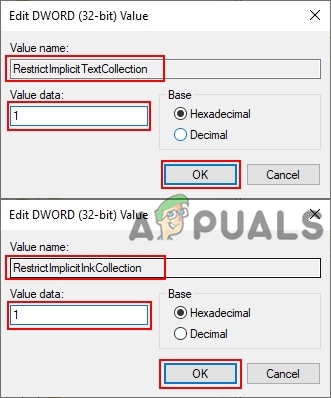
Enabling both values - This will disable the automatic learning through Registry Editor.


