How to Delete Locked Files and Folders in Windows 10
Some Windows 10 have been looking for solutions after being unable to delete certain files or folders. This is mostly associated with locked folders and files that the user doesn’t have the password to.
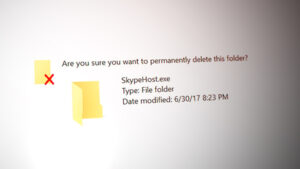
If you’re currently struggling with the same issue and the conventional deleting approach (Right-click > Delete) doesn’t work for certain files or folders, there are a few options that will allow you to get rid of these files.
Here’s a list of different approaches that will allow you to get rid of locked folders and files on Windows 10:
- Using Linux to delete locked files – One popular way to do away with problematic files that cannot be deleted conventionally is to boot from a Linux Live CD and use the Places functionality to access your Windows installation and delete the file from Ubuntu OS before booting back into your Windows installation.
- Taking ownership of the file or folder – If you’re unable to delete the item due to a permission issue, you should be able to resolve the problem by taking ownership of the file / folder using Takedown.exe before repeating the deletion operation.
- Using Unlocker to delete the locked files – If you’re comfortable with letting a freeware handle and delete your locked files, you can also use Unlocker to navigate to the location of the file and deleting it from your computer.
- Using Process Explorer to delete locked files – If you’re having trouble deleting a file or folder that you don’t have a password for, you should also consider using Process Explorer to identify the process handles that are preventing the deletion and closing them before attempting to delete the file again.
- Booting from Safe Mode – If the reason why you are unable to delete the folder or file is due to a 3rd party process or service that is currently using the item, you can boot in safe mode and repeat the operation in order to bypass the 3rd party interference.
- Using an Elevated CMD prompt to remove Windows.old – If you are encountering this problem while attempting to delete Windows.old (the leftover file left behind after an OS upgrade), the only way to remove it (if your OS won’t) is to use an elevated Command Prompt.
Now that you know every approach that you can take, follow any method below (the one you feel most comfortable with) to get rid of locked files & folders on Windows 10:
Method 1: Using Linux Live CD to delete Locked Files
If you’re comfortable with using Linux, one of the most reliable methods of deleting Windows files is to boot from an Ubuntu LIVE CD and delete the file that will not go away conventionally under Windows.
This method is very popular and was confirmed to work by a lot of users that were looking for ways to delete Windows locked files and folders.
If you’re looking for specific instructions on how to do this, follow the instructions below:
- First things first, follow this guide on creating an Ubuntu Bootable USB drive.
Note: If you still have a DVD/CD writer, you can also burn it on the legacy media directly. - After you manage to create the bootable Ubuntu drive/CD, plug it in, restart your computer and press any key when asked whether you want to boot from it.

Press any key to boot Note: If your computer doesn’t give you the option to boot from the Ubuntu Live CD/USB Disk, you most likely need to access your BIOS / UEFI settings and change the boot order.
- After the initial loading screen, click on Try Ubuntu from the list of options, then wait for it to boot fully on your system.

Try Ubuntu without installing it - Once Ubuntu Live is fully loaded (expect it to take quite a long time if you are booting from a USB drive), use the ribbon menu at the top to select Places.
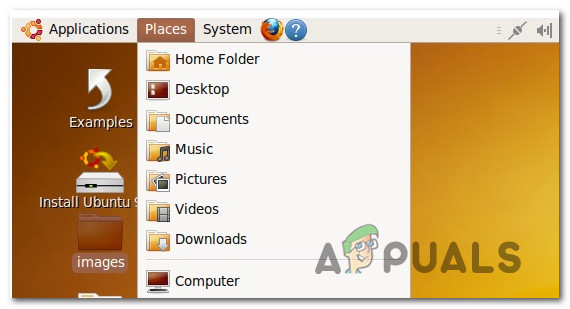
Accessing the Places menu in Ubuntu - Inside the Places screen, you should be able to click on the Windows drive from the list of items.
- Once you’re inside, find the locked file that you were previously unable to delete and get rid of it via Linux.
- After the deletion is completed successfully, shut down your computer, remove your LIVE CD / USB drive and boot back into your regular Windows installation.
If you’re looking for a different approach to deleting locked Windows files, move down to the next method below.
Method 2: Taking ownership of the file/folder
Keep in mind that a fairly common reason why you can expect to encounter resistance when attempting to delete certain files is a permission issue. This is much more common than you think as it’s been reported by a lot of Windows 10 users.
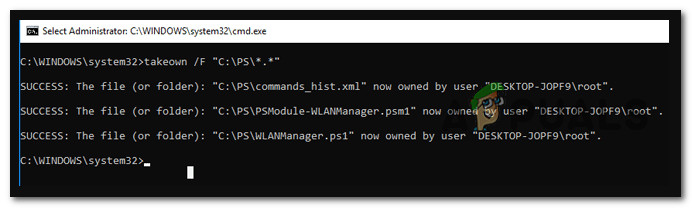
If you find yourself in this particular scenario, one way to resolve this issue is to use the ‘takedown’ command inside an elevated Command Prompt to take full ownership of the file or folder that is refusing to uninstall.
This tool (Takedown.exe) has been around since Windows 7 and will resolve the majority of permission issues that might be preventing you from deleting the files in Windows 10.
Here as some step-by-step instructions that will show you how to use takedown.exe to take full ownership of a file or folder.
Once you manage to take full ownership of a file, repeat the deletion attempt and see if it’s successful this time.
In case you’re still unable to remove the file/folder or you’re looking for a different approach, move down to the next potential fix below.
Method 3: Unlocking files via Unlocker
If you’re looking for a convenable method that will allow you to unlock files in order to be able to delete them conventionally, one of the easiest ways to do it is to use a free program like Unlocker – this is a freeware that will allow you to take control over your files and grant the necessary permissions so you can delete any locked files easily.
Several affected users have reported that this program allowed them to finally get rid of the locked Windows files.
If you’re comfortable with using a freeware to unlock and delete Windows files, follow the instructions below to install and use Unlocker:
- Open your default browser and visit the Softpedia download page of Unlocker. Once you’re inside, click on the Download Now button, pick a mirror and wait for the process to complete.

Downloading the Unlocker Software - Once the download is complete, double-click on the installer, then click Yes at the UAC (User Account Control).
- Next, follow the prompts to complete the installation of Unlocker, then restart your computer at the end of this process.

Installing Unlocker on Windows - Once Unlocker is installed, open it, then use the Browser window to navigate to the location of the file/folder, then click it once to select it before clicking Ok .
- From the next prompt, use the No Action drop drown menu to select Delete, then click Ok to successfully delete the locked object.
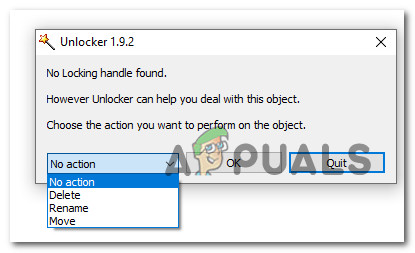
Deleting the locked folder/file
If you’re looking for a different method of getting rid of the file (or you are trying to remove Windows.old), move down to the next potential fix below.
Method 4: Deleting a locked file/folder via Process Explorer
Another approach that will allow you to delete locked files or folders that you don’t have a password to is to use Process Explorer to locate the process that is preventing the deletion and every associated handle before repeating the deletion operation from within the interface of Process Explorer.
This method was confirmed to be effective by a lot of affected users including those unable to delete unnecessary Windows processes.
If you’re looking for specific instructions on how to do via Process Explorer, follow the instructions below:
- First things first, you need to be aware of the folder you wish to delete.
- Next, open your browser and download the latest build of Process Explorer from the official Microsft download page.
- Inside the correct page, click on the Download Process Explorer hyperlink from the top of the page.

Downloading the latest version of Process Explorer - Once the download is complete, use an utility like WinZip or WinRar to extract the contents of the ProcessExplorer.zip folder in an easy-to-access location.
- After every file has been safely extracted, double-click on the procexp64 executable and click on Yes if prompted by the UAC (User Account Control). When asked to agree with the EULA, click on Agree.
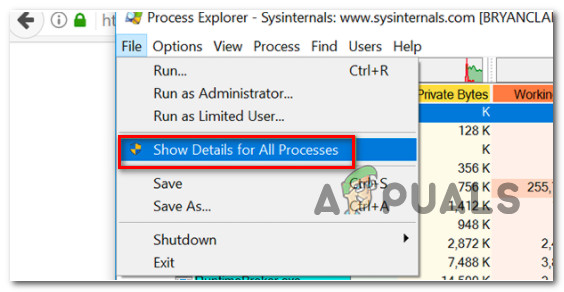
- Once you’re finally inside Process Explorer, click on Fille from the ribbon menu at the top, then click on Show Details for All Processes and confirm at the UAC prompt.
Show details of all processes - After you have ensured that every process shows up inside Process Explorer, click on the Find Handle and DLL button (under the ribbon menu).
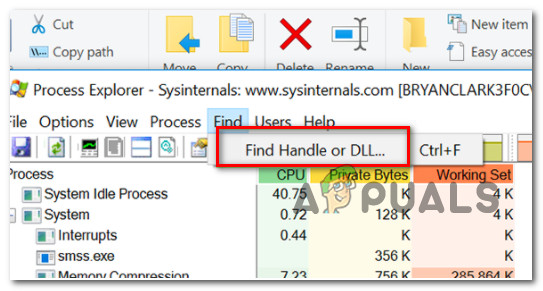
Using the ‘Find Handle or DLL’ feature - Inside the Process Explorer Search window, use the search function to find the file/folder that you are unable to delete then click on Search.
- From the list of results, right-click on the process associated with the locked file and choose Close handle.
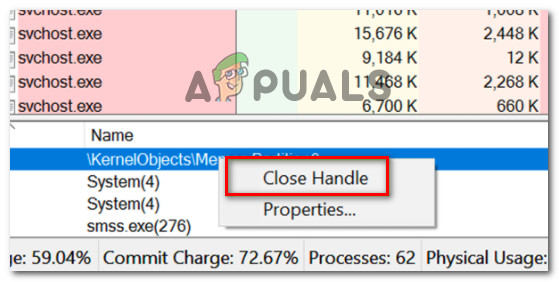
Closing every associated handle Note: If there are multiple processes associated with this file, you need to repeat this operation with each of them.
- Now that you’ve made sure every process handle is closed, navigate to the location of the file that you were previously unable to delete and retry the operation once again.
If the same problem is still occurring or you’re looking for a different approach, move down to the next potential fix below.
Method 5: Booting in Safe Mode
If the reason why you are unable to delete a particular file or folder is that it is currently used by a running application or driver, one way to ensure that the roadblock is no longer occurring is to boot your computer in Safe Mode and delete the problematic file or folder.
While booting in Safe Mode, your Windows is configured to load the bare minimum processes – Safe run will not run autoexec.bat, config.sys files, most drivers, dedicated graphics drivers, 3rd party processes, etc.
If you suspect that a driver or 3rd party process is interfering with your deletion attempt, follow these instructions to boot your Windows 10 computer in safe mode.
After you have successfully booted in Safe Mode, navigate to the location continuing the locked files and delete it conventionally (right-click > Delete), and see if the operation is succesfull.
If the same problem is still occurring or you’re trying to delete Windows.old file, move down to the next potential fix below.
Method 6: Removing Windows.old via Elevated CMD (if applicable)
If you’re encountering this issue while attempting to delete the Windows.old file, this is understandably frustrating as the file will refuse to go away conventionally. This locked file is known to take a lot of space (especially if it was generated after you upgraded to Windows 10 from an older version).
Keep in mind that in normal circumstances, the Windows.old file should be removed automatically by your OS after a certain period of time passes, but in certain circumstances, this might not happen.
If you find yourself in this scenario, you will be able to finally get rid of Windows.old by opening an elevated Command Prompt from the Advanced Options > Troubleshooting menu.
In case you need further assistance, we’ve created a guide that will walk you through the process of removing Windows.old.


