[FIX] CS GO ‘Failed to Find a Dedicated Server’ Error
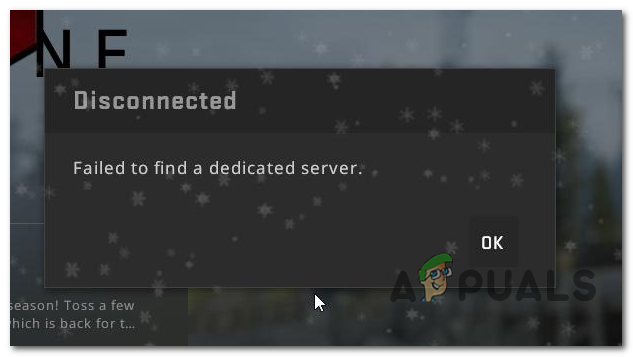
Some Counter-Strike GO players are encountering the ‘Failed to find a dedicated server‘ error when attempting to open a Workshop map. Most affected users report that this problem only occurs when they attempt to start a map with bots.
After investigating the issue, it turns out that multiple causes might ultimately lead to this particular error code. Here’s a shortlist of potential causes:
- Game Integrity issue – As it turns out, you might encounter this problem due to some type of game file corruption that affects the loading of workshop maps. If this scenario is applicable, you should be able to fix the problem by forcing an integrity check from your Steam settings. This operation was confirmed to be successful by many affected users.
- Improper workshop folders – If you installed some workshop maps manually, chances are you are seeing this error code because they were improperly installed. In this case, you should be able to fix the problem by deleting the improper workshop maps from the dedicated folder.
- Common Workshop glitch – As some affected users have reported, you might also see this problem in instances where you are subscribed to a lot of different workshop maps that confuse the installer into putting them into the same folder. In this case, you can fix the problem without uninstalling the game by unsubbing from every CS GO-related workshop and deleting the workshop folder where the maps are currently stored.
- NAT is Closed – In some cases, you might also see this error due to a network inconsistency that prevents your machine from establishing a stable connection with Steam’s server. If you’re encountering similar errors with other games you attempt to play via Steam, investigate whether your NAT is closed. If it is, you can open it either by enabling UPnP or by forwarding the used ports manually.
Method 1: Run a Game Folder Integrity Check
Before you try any other fix, start by checking whether this particular error is related to an inconsistency with the game files of Counter-Strike Global Offensive. Some users who were previously dealing with the Failed to find a dedicated server error reported that the issue was resolved after they performed a game folder integrity check via the Steam menu.
If you haven’t done this already, follow the instructions below to verify the game integrity of Counter-Strike GO:
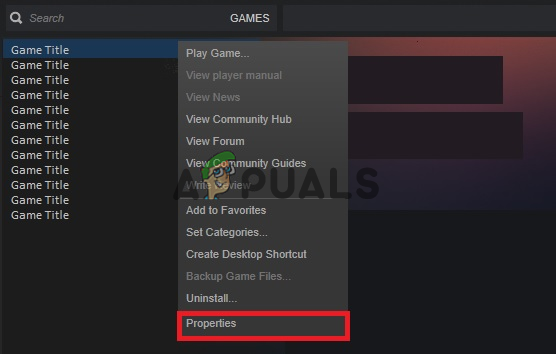
- Open your Steam client and go to the Library tab from the list of available options. Next, scroll down through your library items and right-click on the entry associated with CS GO.
- Next, from the newly appeared context menu, click on Properties.
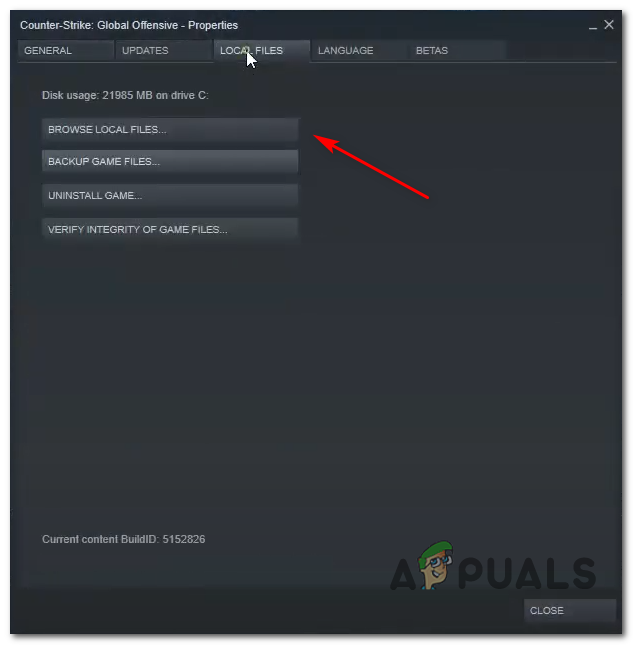
Opening Properties of Counter-Strike GO - Once you’re inside the Properties screen of Counter-Strike Global Offensive, select the Local Files tab and then click on Verify Integrity of the Game Files.
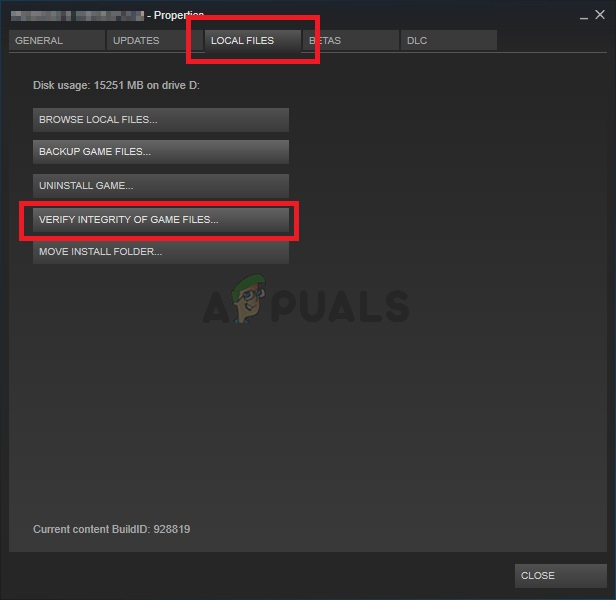
Verifying the Integrity of Game Files - Wait until the operation is complete, then restart your computer and repeat the action at the next startup to see if the problem is now fixed.
If the integrity check didn’t reveal any underlying corruption issues with the game installation, move down to the next potential fix below.
Method 2: Delete Improper Workshop Folders
According to some affected users, you might also see this error occurring due to improper workshop folders that Steam is unable to load into the game.
If this scenario is applicable, you should be able to fix this problem by navigating to the location of the workshop maps and deleting every improper map instance. After doing this and restarting the game, most affected users have reported that the ‘Failed to find a dedicated server‘ error has stopped occurring.
Here’s a quick guide on deleting the improper workshop folders:
- First, ensure that CS GO is completely closed and that there is no background process still running.
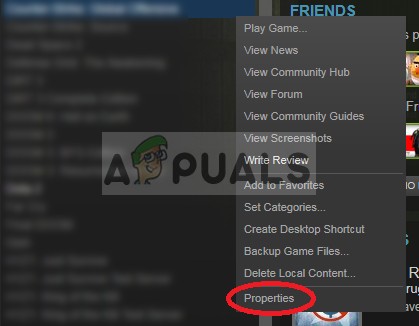
- Return to Steam, click on Library from the horizontal menu at the top, then right-click on Counter-Strike: Global Offensive and choose Properties from the newly appeared context menu.
Opening Game Properties in Steam - Inside the Properties screen, click on the Local Files tab, then click on Browse Local Files from the menu below.
Accessing the Local Files Tab - Inside the game folder, double-click on the CSGO folder, then go to Maps > Workshop.
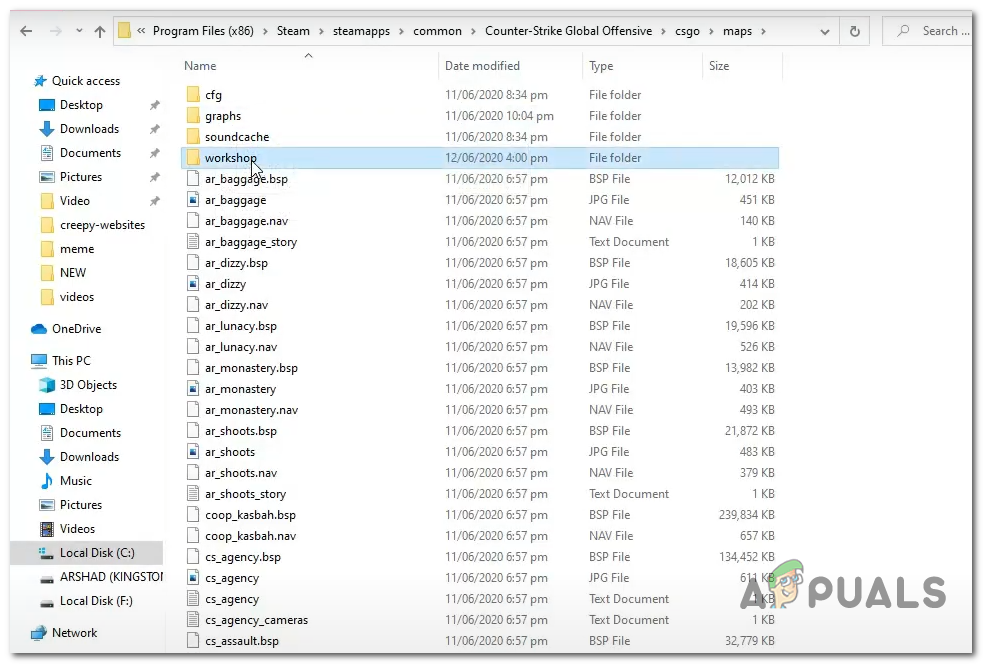
Accessing the Workshop Tab - Next, go ahead and double-click every folder inside the Workshop folder and check whether each entry contains a file that ends with .bsp. In case you discover that the .bsp file is missing and the folder only contains images, go ahead and delete the entire folder.
- Check every folder inside the workshop folder and delete every instance where the .bsp file is missing, leaving only proper workshop maps.
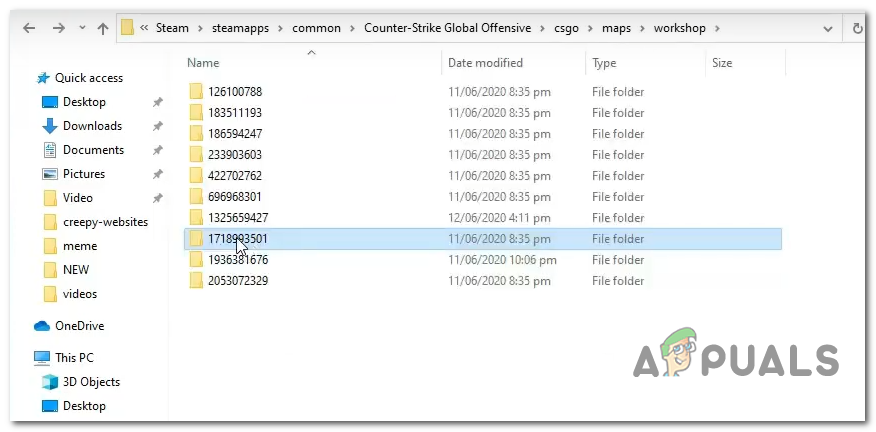
Checking for Improper Workshop Maps - Once you’ve ensured that every improper workshop map is removed, restart CS GO, open a workshop map, and see if the problem is now resolved.
In case you still end up seeing the ‘Failed to find a dedicated server‘ error when you try to open a CS GO workshop map, move down to the next potential fix below.
Method 3: Unsubscribe from All Workshop Maps
As it turns out, this problem can also occur due to a glitch with Steam’s Workshop subscription model. Several users who were previously encountering the same problem have reported that they managed to fix the issue by unsubscribing from everything.
After doing this, deleting the Workshop folder, and resubscribing to the maps they wanted to play, they reported that the problem was finally resolved and they were able to play Workshop maps with bots without seeing the ‘Failed to find a dedicated server‘ error.
Here’s a quick guide on unsubscribing from every Workshop map and deleting the workshop folder:
- Ensure that Counter-Strike GO is closed, then open Steam and click on the Community tab from the list of available options, then click on Workshop from the newly appeared context menu.
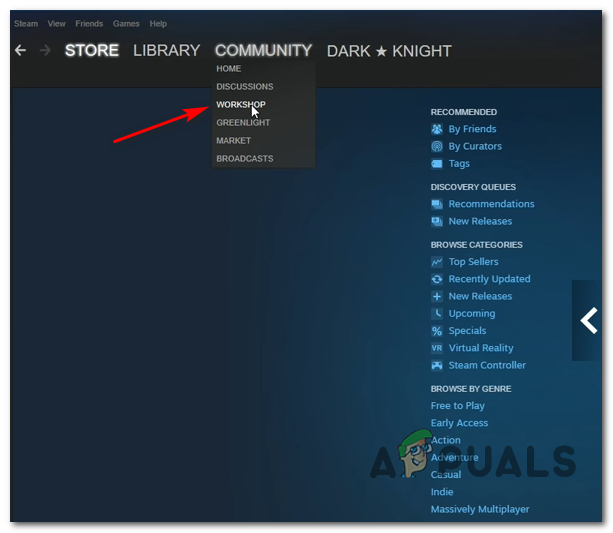
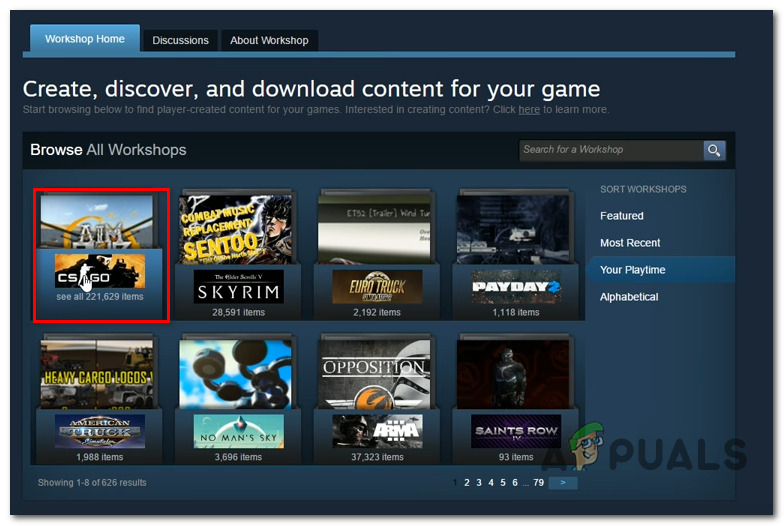
Accessing the Workshop Option from the Community Tab - Once you’re inside the Workshop page, click on CS GO from the list of available workshops.
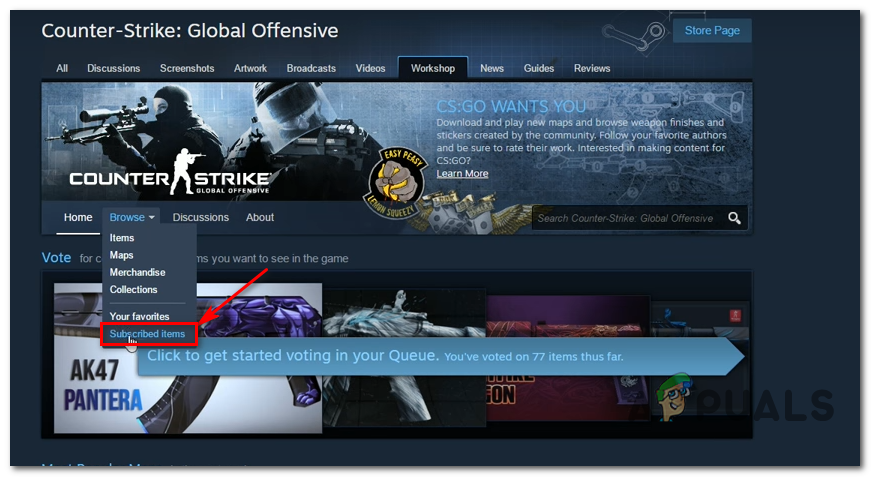
Accessing the CS GO Workshop Tab - Once you’re in the Workshop tab, click on the Browse tab, then click on Subscribed Items from the newly appeared context menu.
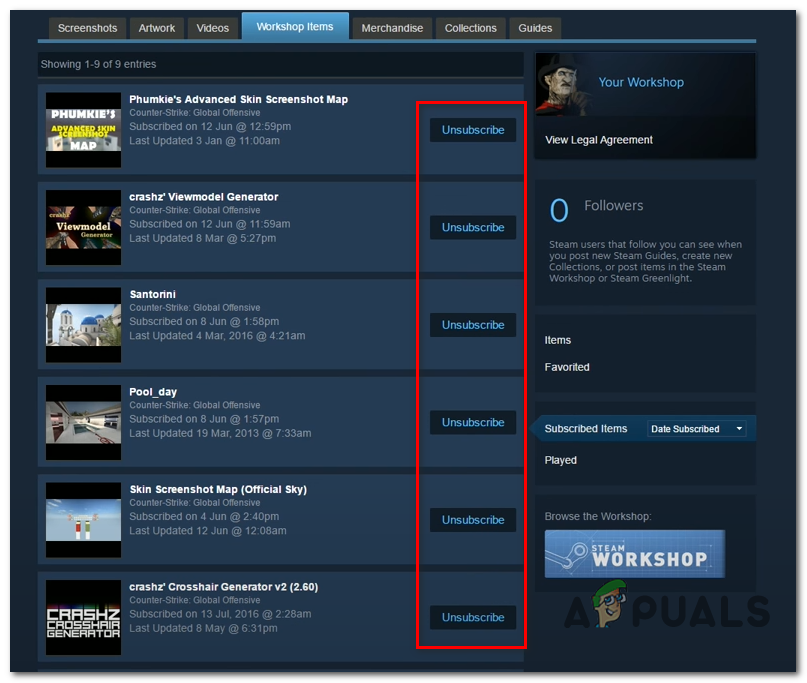
Accessing the Subscribed Items Tab - Once you’re in the Subscribed Workshop Items tab, scroll down through the page and click the Unsubscribe button for every CS GO map that you’re currently subscribed to.
Unsubscribe Button - Once you have successfully unsubscribed from every relevant CS GO Workshop map, return to the main menu of Steam. Next, click on Library from the horizontal menu at the top, then right-click on Counter-Strike: Global Offensive and choose Properties from the newly appeared context menu.
- Once you’re in the Properties screen, click on the Local Files tab. Next, click on Browse Local Files from the menu below.
Accessing the Local Files Tab - Inside the game folder, open the Maps folder, then right-click on the workshop folder and choose Delete from the newly appeared context menu.
Accessing the Workshop Tab - Now that you have successfully unsubscribed from every relevant workshop map and deleted the folder that contained the remnant files, go ahead and resubscribe to every workshop map, then launch the game and see if the problem is now resolved.
In case the problem is still not resolved and you still see the ‘Failed to find a dedicated server‘ error, move down to the next potential fix below.
Method 4: Ensure that Your NAT is OPEN
If you’re still encountering the same problem even after following every potential fix below, chances are you’re dealing with a NAT (Network Address Translation) issue. This important metric will ultimately determine if the game server accepts the connection with the machine or not.
If the NAT is closed, you should encounter the ‘Failed to find a dedicated server‘ error with every Workshop map you attempt to play and face a similar issue when trying to play regular maps.
If this scenario looks like it could be applicable, you should begin by checking if your NAT is closed on your computer, and if the NAT is indeed closed, you need to open it from your router settings.
Step 1: Check your NAT Type
- Open up a Run dialog box by pressing Windows key + R. Next, type ‘ms-settings:gaming-xboxnetworking‘ inside the text box, then press Enter to open up the Xbox Networking tab of the Gaming Settings app.
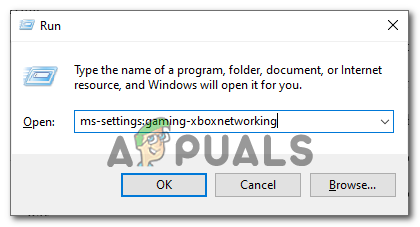
Opening the Xbox Networking Tab of the Settings App - Inside the Xbox Networking tab, wait until the operation is complete, then check the NAT Type once the results are displayed.
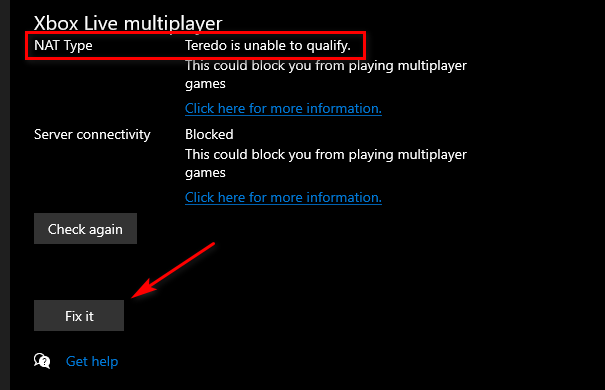
Investigating the NAT Type Note: If the NAT Type shows as ‘Closed’ or ‘Teredo is unable to qualify‘, you can conclude that the problem is indeed occurring due to your NAT.
- If the results show that the NAT Type is Closed or undetermined, move down to Step 2 below, where we’ll show you how to open your NAT from your router settings.
Step 2: Open Your NAT
If the investigation above revealed that you are indeed dealing with a NAT issue, you need to open it from your router settings. With the vast majority of routers, you can do this by opening Universal Plug and Play (UPnP).
UPnP has been an industry standard for years now, but if you’re using an older router model, you will likely need to forward the ports used by Steam and CS GO manually to allow the game servers to communicate with your computer.
Here’s a quick guide on how to do this:
Note: The instructions below are general since the exact steps of forwarding ports manually will vary from router to router.
- Open your default browser, type one of the following addresses, and press Enter to access your router settings:
192.168.0.1 or 192.168.1.1
Note: If none of these generic addresses take you to the login screen of your router, you will need to find out the correct address of your router.
- Once you’re at the login screen, enter the custom login credentials if you previously established any. Else, use 1234 or admin for both the username and password to see if you’re able to get in. Most router manufacturers use these defaults.
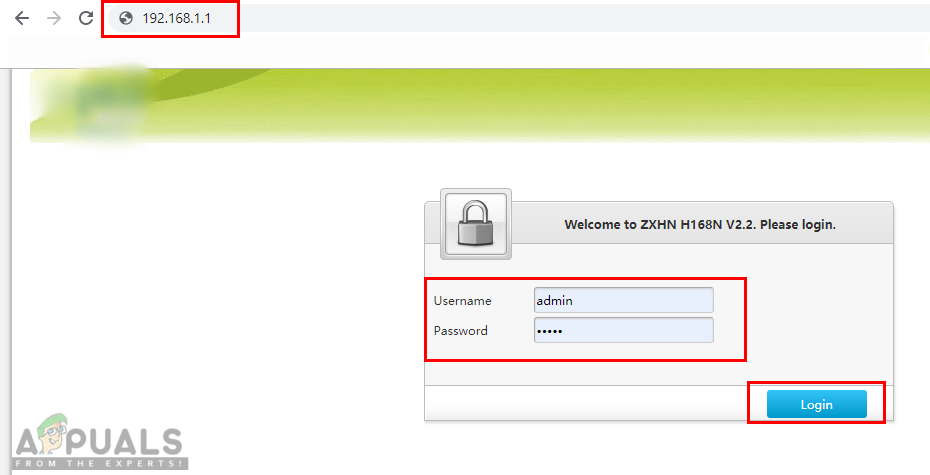
Opening Router Settings and Logging In Note: If the generic login credentials don’t work and you don’t know your custom credentials, press and hold the reset button on the back of your router to revert to the default values.
- After you have successfully logged into your router settings, expand the Advanced menu, and access the NAT Forwarding (Port Forwarding) menu.
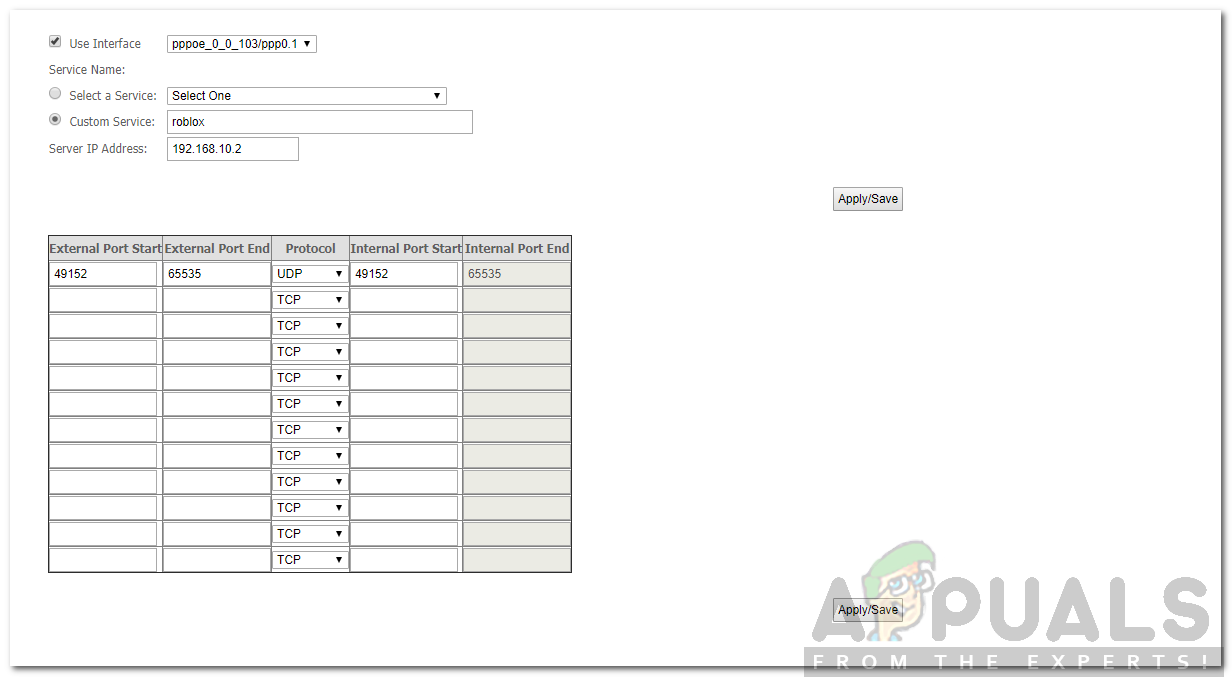
Forwarding Ports - Next, look for an option that will allow you to forward your ports manually and start adding the ports below (used by Steam and CS GO):
TCP: 27015-27030, 27036-27037
UDP: 4380, 27000-27031, 27036
- Once you successfully manage to forward the ports, save the modifications, then restart your computer and see if the problem is resolved at the next computer startup.


