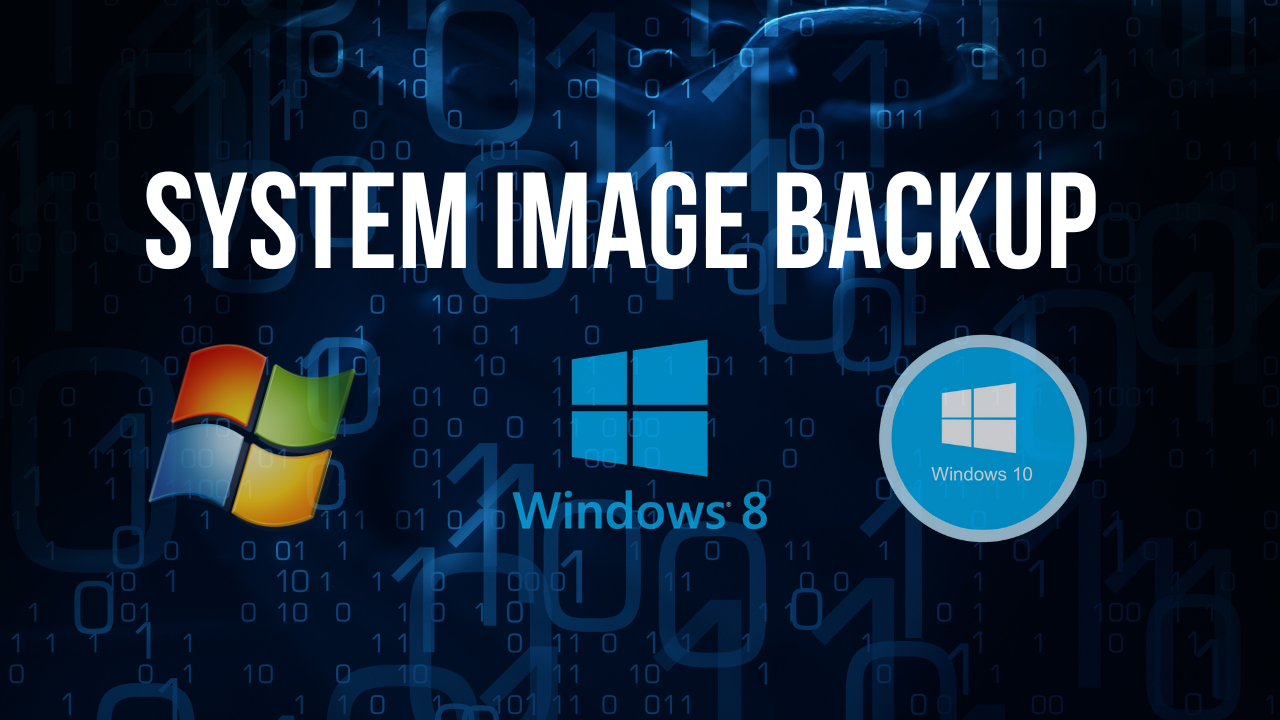
How to Create Windows 7/8/10/11 Image Backup For FREE?
There is a difference between backing up your personal or business data and doing a backup of the Windows images. When it comes to your data, you can access it from anywhere, anytime, and you don’t care about Windows apps and configurations. I wrote an article on how to back up your data from any Windows edition.
You can read about it here: How to Back up Your Data from Windows 11 for Free.
However, there are certain situations in which your Windows image is important because you are running various applications and configurations, and a complete reinstallation would not be easily possible. In that case, your backup Windows images truly matter.
In this article, I will show you how to back up your Windows images using BDRSuite, a free tool for end-users. This article is written using Windows 11, but it is fully applicable to older operating systems.
So, let’s dig deep into it.
Step 1: Install BDRSuite in your environment.
In the first step, you need to install BDRSuite on the Windows machine, a different machine than the one you want to back it up. Open your favorite web browser and download BDRSuite.
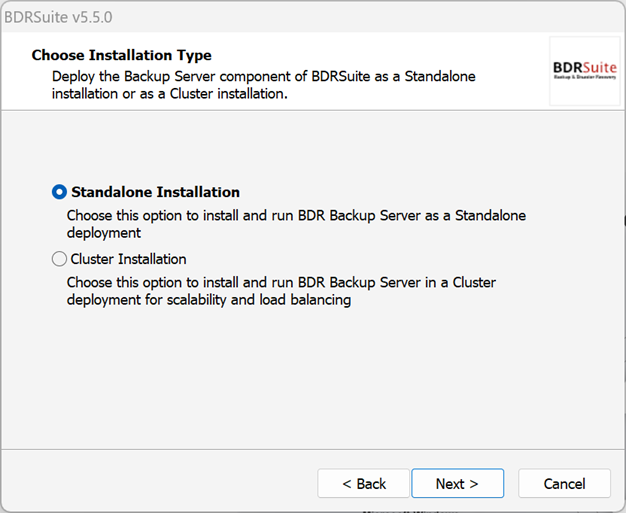
Once you run the installer, accept the terms and conditions, and choose the Standalone installation.
Proceed with the default settings for all other sections, and continue clicking the “Next” button until you reach the Web UI section.
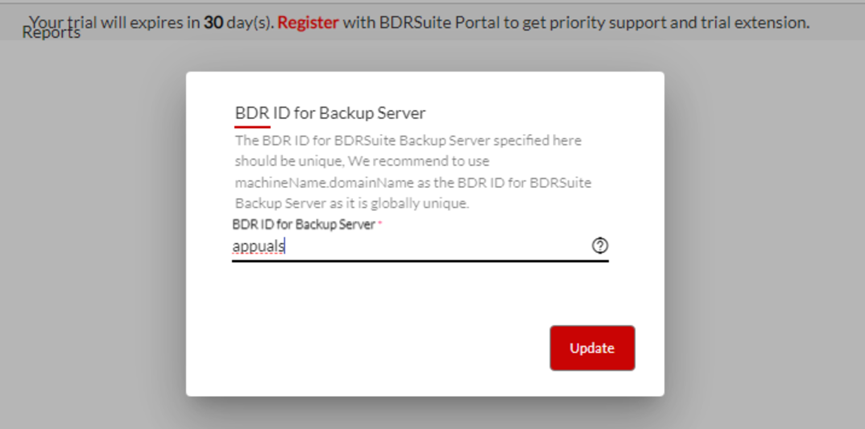
After completing the previous step, you must provide your BDRSuite ID. In my examples, it is “appuals”; however, you should select your own unique identifier.
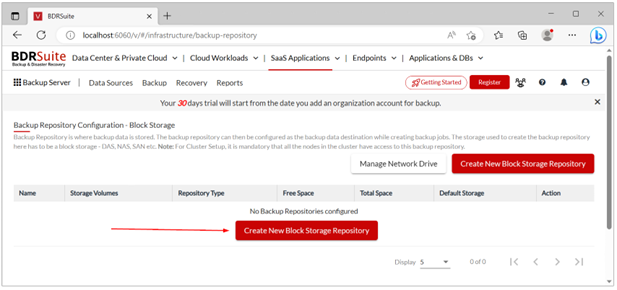
Step 2: Create a New Windows Block Storage Repository.
In the second step, you will create a backup repository. A backup repository is where backup data is stored. The backup repository can then be configured as the destination for backup data while creating backup jobs.
The storage used to create the backup repository here must be block storage – DAS, NAS, SAN, etc.
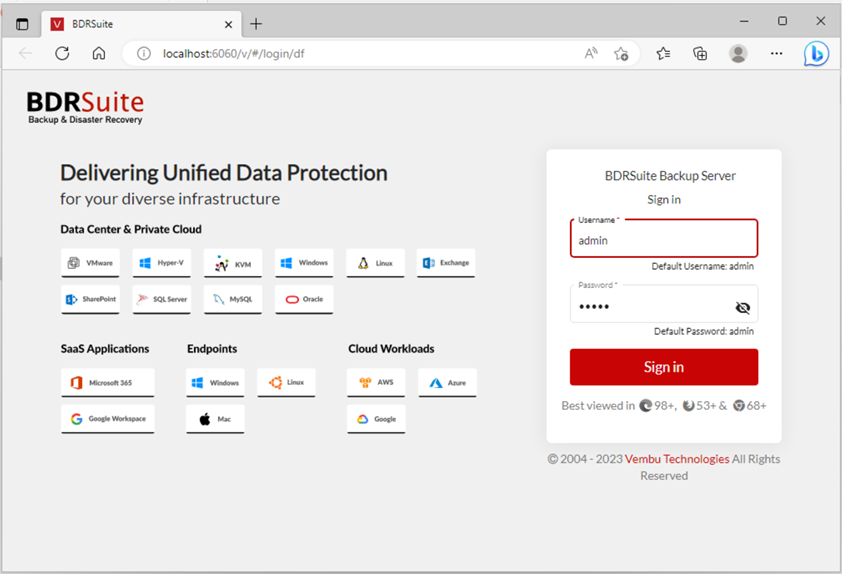
- Log in to your BDRSuite web UI.
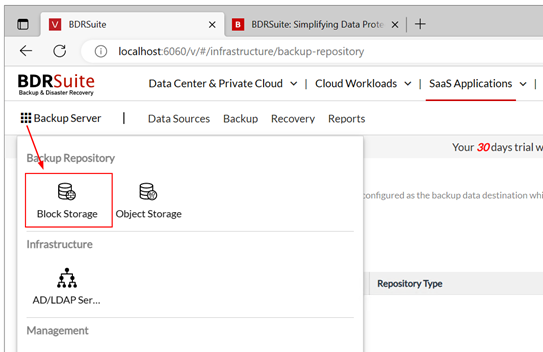
- Click on the Backup Server, and then click on Block Storage.
- Click on Create New Block Storage Repository.
- Add the repository name, choose volumes for the simple repository, and then click “Create.
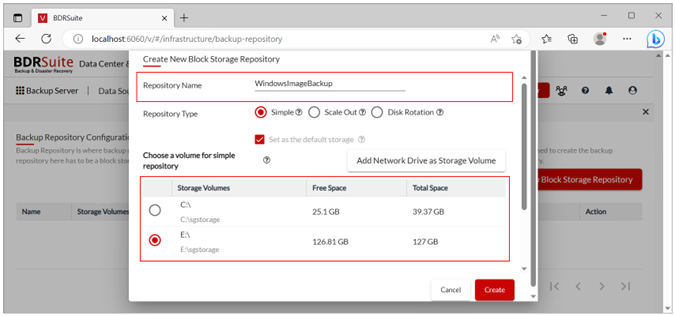
- Click Confirm to confirm the creation of the repository storage. That’s it.
Step 3: Back up your Windows 7/8/10/11 images.
In the third step, you will add the target Windows image, credentials, and proceed with the backup.
- Log in to your BDRSuite web UI.
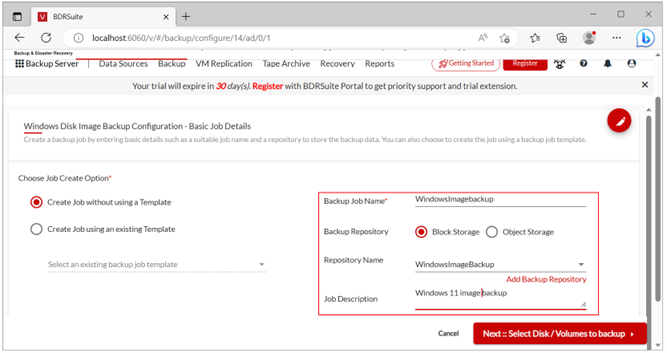
- Click on Backup > Configure Backup > Microsoft Windows > Disk Image.
- Create a backup job by entering basic details such as a suitable job name and a repository to store the backup data. This includes adding a backup job name, backup repository, and job description. Once created, click “Next: Select Disk/Volumes” to back up.
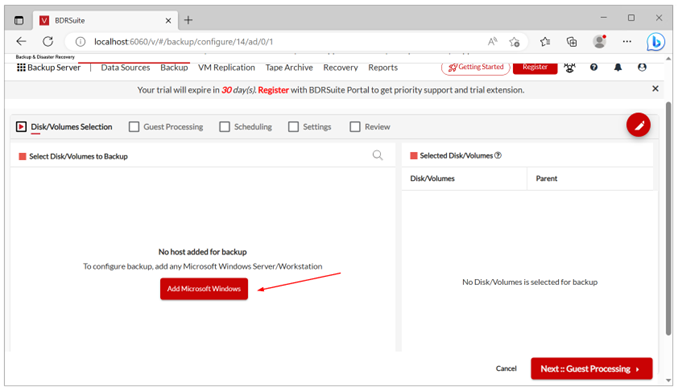
- Click Add Microsoft Windows to add the target host you want to back up.
- Add IP/FQDN and credentials, and then click “Save.” You can set up the credentials by clicking on “Add Credential.

- Click OK, proceed to install the BDRSuite agent on the Windows 11 machine you want to back up.
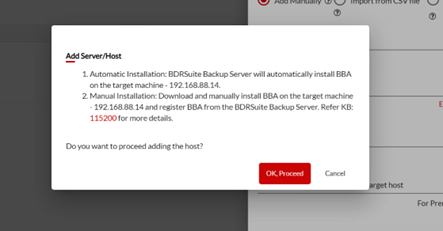
- Wait until the BDRSuite agent is successfully installed.
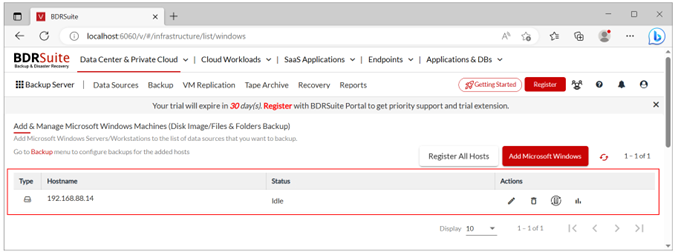
- Now, navigate to the Backup menu and restart the process from Step 2. You will notice that your target Windows machine is added. Expand the disk and select all entities/disks, and then click Next: Guest Processing.
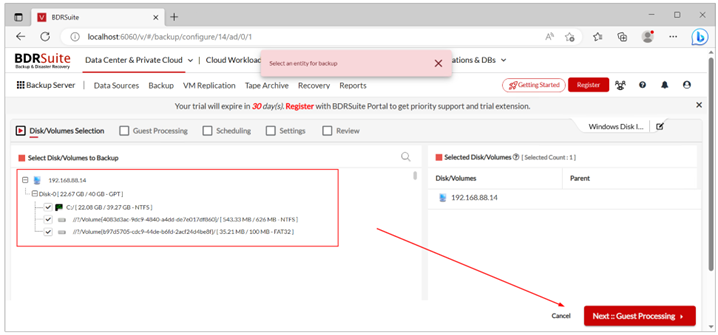
- Click OK to proceed.
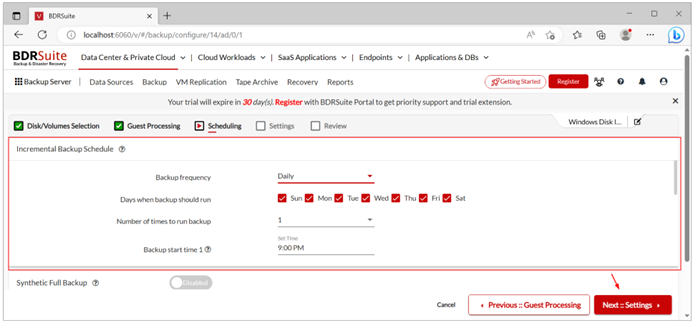
- Select your Windows host to enable guest processing settings and then click Next::Schedule.
- Select when you want to make an image backup, and then click Next:Settings. In my case, the backup happens daily at 9 PM.
- Enable Retention and click Next::Encyrption.
- Enable Encryption and click Next::Review.
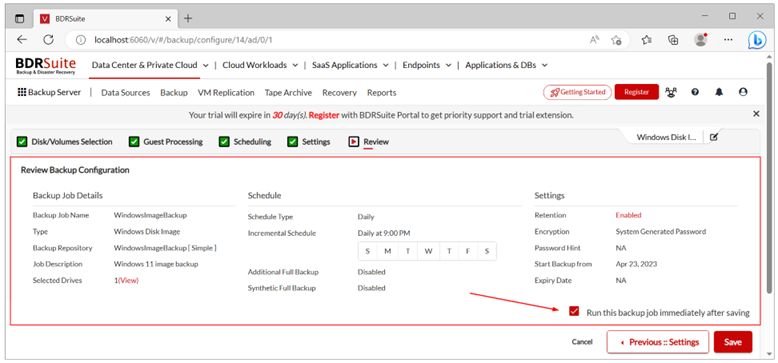
- Review settings, select Run this backup job immediately after saving, and then click Save.
- Click Save to confirm.
- Check the backup status. As you can see, it is „In Progress“.
- Open File Explorer and navigate to the location where you backed up your Windows image.
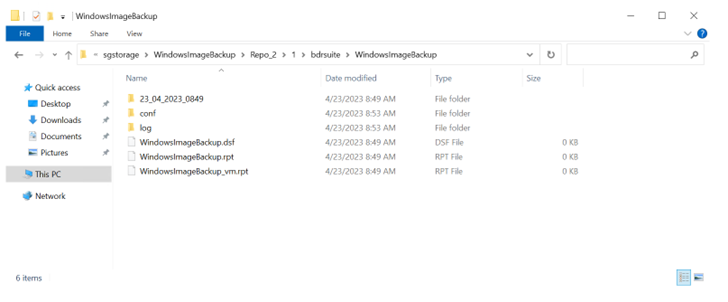
You have successfully backed up a full Windows system image to your safe location. In case of disaster, you can restore it with just a few clicks. In the next article, I will explain how to do it.
Did you find this article informative? If so, please consider sharing it with your friends and colleagues. By sharing this content, you’re helping us spread the word and reach a wider audience. Thank you for your support.