How to Fix CorsairVBusDriver.sys Failure BSOD on Windows 10
The CorsairVBusDriver.sys driver failure may cause the BSOD issue if the driver is outdated or corrupt. Moreover, the conflicting applications (like Valorant) may also trigger the BSOD issue at hand.
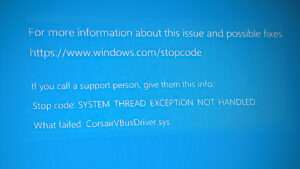
The user encounters the BSOD issue after the installation of a Windows Update. Some of the unlucky users get stuck in a BSOD loop (BSOD > Automatic Startup Repair > Getting into Windows > a few minutes > BSOD), whereas other users occasionally encountered the BSOD. In some cases, the following type of message was displayed:
The first and foremost thing in this issue is to stably boot the system into Windows (as many users may fail to boot the system or face a BSOD crash within minutes of logging into the system), so, the other options could be tried. If you are one of those unlucky ones who could not boot into Windows, then you should try solution 3 and onwards.
Before proceeding with the solutions, check if using Automatic Startup Repair (if you cannot boot into the system) lets you boot into the system (then you may attempt the solutions). Also, check if booting your system with bare minimums lets you access the Windows OS (if so, try the solutions). Once the issue is resolved and your system boots into Windows, make sure to disconnect the Internet to avoid automatic reinstallation of the problematic driver (till the drivers/CUE software is removed).
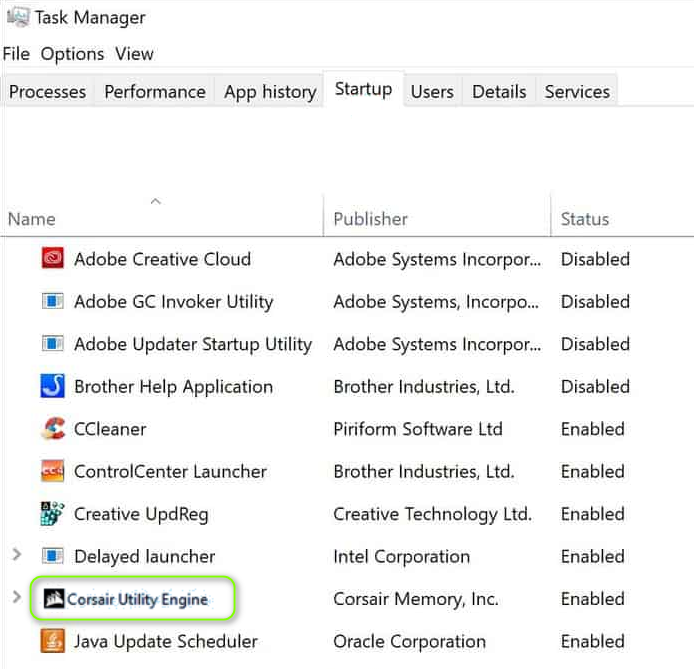
Solution 1: Uninstall the Corsair Utility Engine
The issue is caused by the outdated Corsair driver installed by Corsair’s Utility Engine. In this case, uninstalling the Corsair Utility Engine may solve the problem.
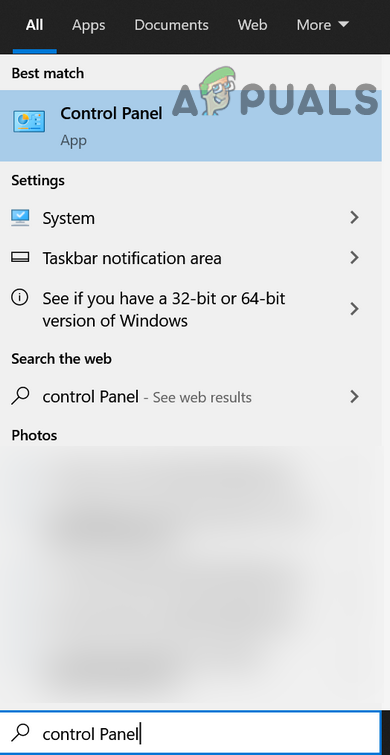
- Press the Windows key and search for: Control Panel. Then open the Control Panel.
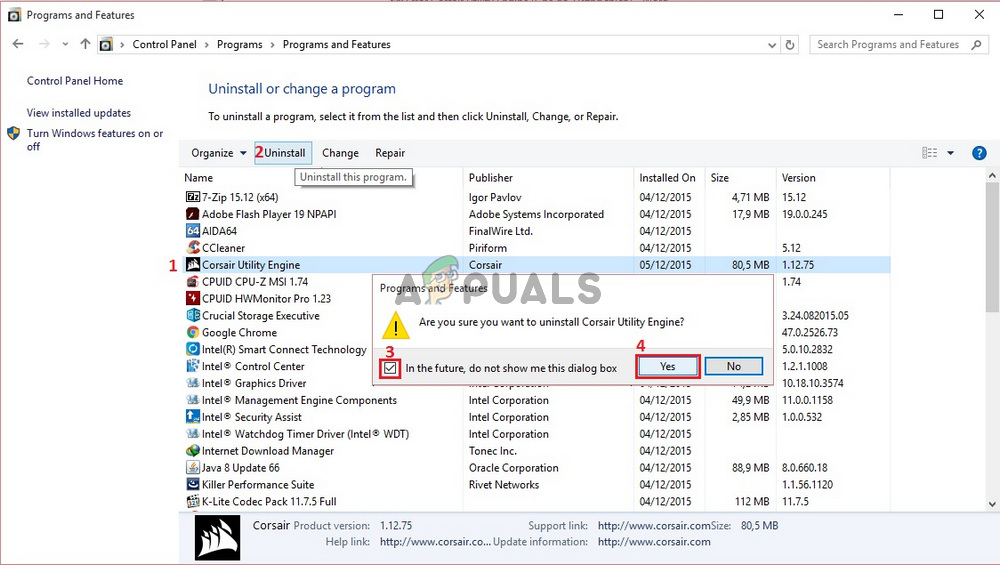
Open Control Panel - Now open Uninstall a Program and select Corsair Utility Engine.
- Then click on Uninstall and follow the prompts to uninstall Corsair Utility Engine.
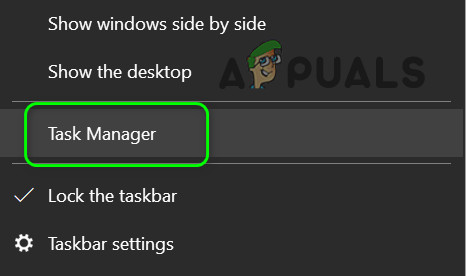
Uninstall Corsair Utility Engine - Now right-click on the Taskbar and in the context menu, choose the Task Manager.
Open the Task Manager of Your System from the Taskbar - Then, in the Startup tab, select Corsair Utility Engine, and near the bottom of the screen, choose Disable.
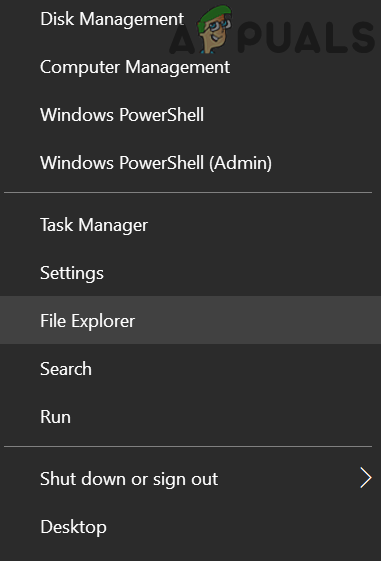
Disable Corsair Utility Engine in the System’s Startup - Now right-click on the Windows button and in the Power User menu, open the File Explorer.
Open the File Explorer - Then navigate to the following path:
\Users\All Users\Microsoft\Windows\Start Menu\Programs\StartUp
- Now delete all the files related to Corsair and reboot your system.
- Then create a backup/restore point of the system and update it to check if the BSOD issue is resolved. If the issue is resolved, then you may install the latest version of the iCUE application (if required).
Solution 2: Remove the Conflicting Applications
The BSOD may have been caused by the applications that hinder the operation of the Corsair driver. In this case, removing the conflicting application may permanently solve the problem. Valorant application (by Riot Games) is reported to cause the issue and you may have to uninstall it to use the Corsair driver.
- Press the Windows key and in the search, type: Control Panel. Then launch the Control Panel.
- Now open Uninstall a Program and select Valorant.
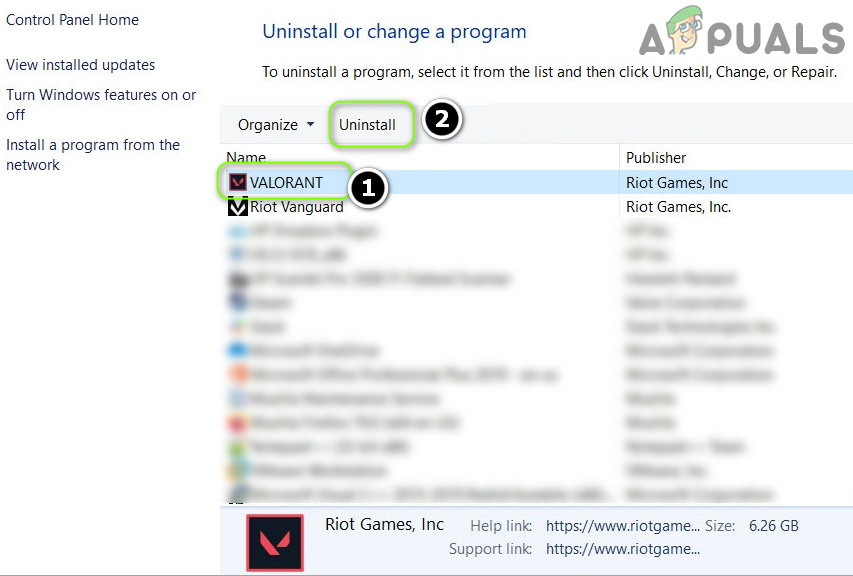
Uninstall Valorant - Then click on Uninstall and follow the prompts to uninstall Valorant.
- Now reboot your PC and check if the BSOD issue is resolved.
Solution 3: Uninstall the Buggy Windows 10 Update
Microsoft has a long history of pushing buggy updates to the Windows users and the issue at hand could also be a result of a buggy update (especially if the BSOD started to occur after a Windows 10 update). In this case, uninstalling the buggy update may solve the problem.
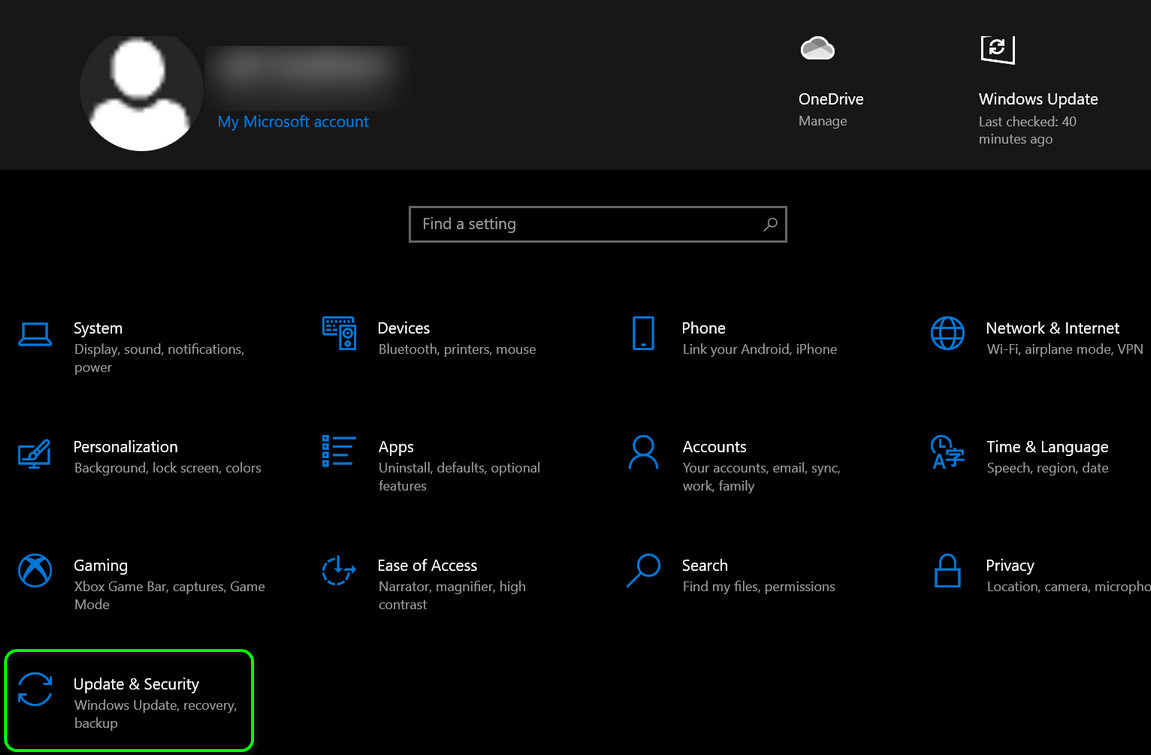
- Press the Windows key and open Settings.
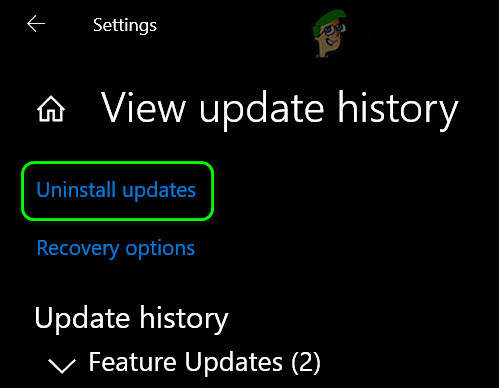
- Now, select Update & Security, and in the update window, open View Update History (in the right pane of the window).
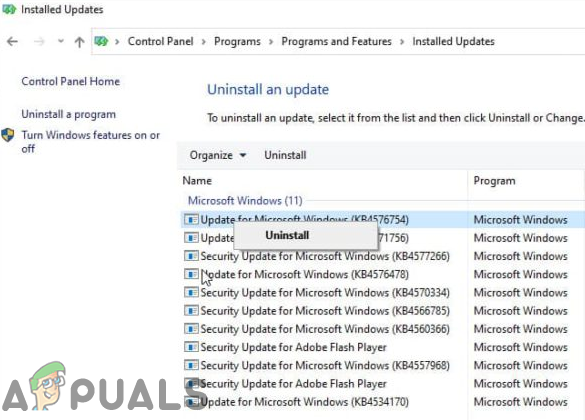
Open Update & Security - Then open Uninstall Updates and select the latest installed update.
Open Uninstall Updates - Now click on Uninstall button and follow the prompts to remove the update to check if the BSOS issue is resolved.
Uninstall Update
If you are continuously encountering the BSOD or cannot log in to the system, then you may have to use the Recovery Environment.
- Power on your system and when the Windows logo appears, press and hold the power button till the system is powered off.
- Repeat the process thrice and at 3rd time, the system may be booted into the Windows Recovery Environment. If that is not working, then you may use Windows bootable media to boot the system and select Repair Your Computer.
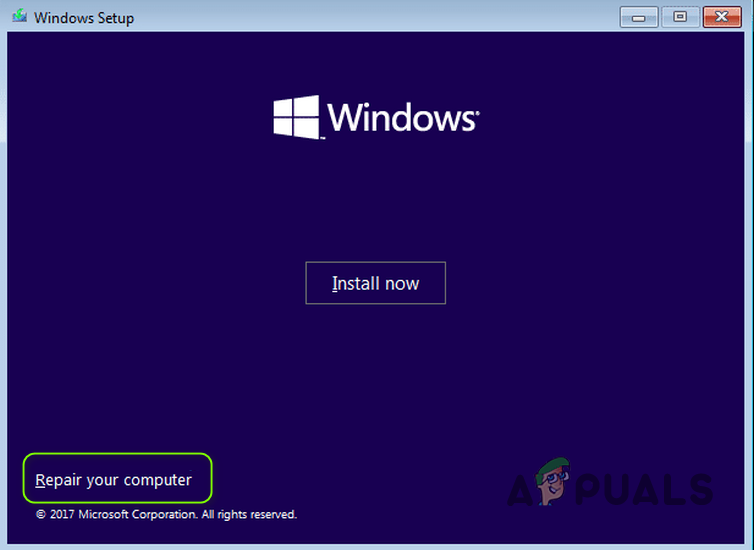
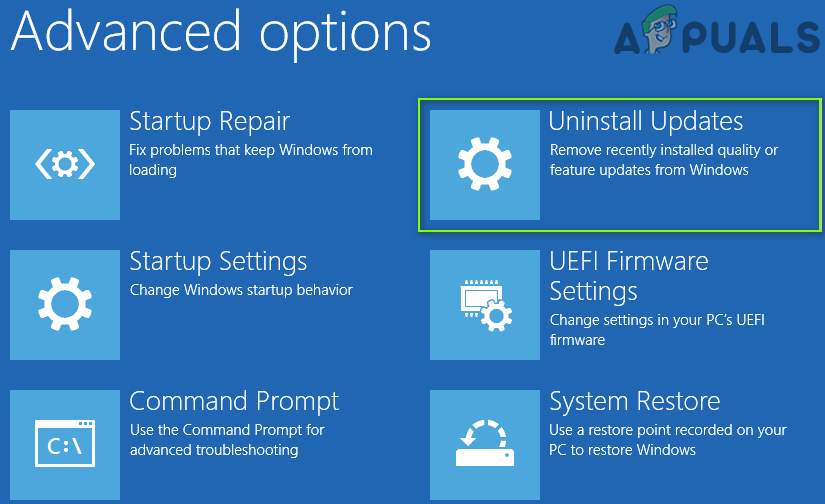
Open Repair Your Computer - Once in the Recovery Environment, choose the Troubleshoot option and open Advanced Options.
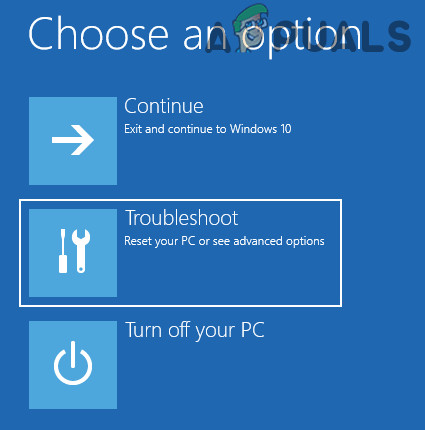
Open Troubleshoot in the Windows Recovery Environment - Now, select Uninstall Updates and choose the update to uninstall (i.e., Uninstall Latest Quality Update or Uninstall Latest Feature Update).
Uninstall Updates in the Windows Recovery Environment - Once the update is uninstalled, check if you can boot into the system.
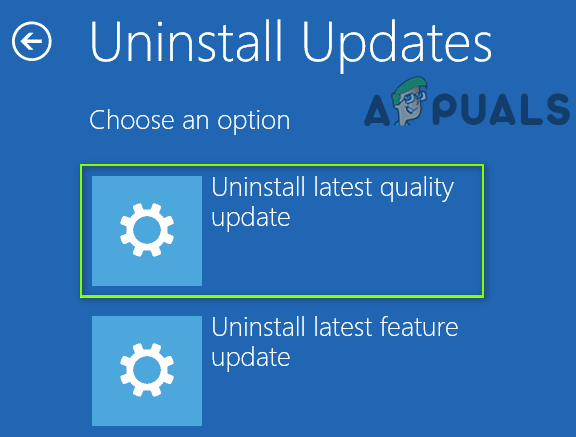
Uninstall Latest Quality Update or Feature Update
After the removal of the buggy update, you may remove the old installation of the Corsair’s Utility Engine (CUE) and update the system (but make sure to create a system restore point). If required, then you may install the latest iCUE application (or disable Windows updates till the issue is resolved).
Solution 4: Perform a System Restore
If the update could not be installed or did not do the trick, then you may restore your system to a point in the time when your system was not facing the BSOD issue. If you are using a 3rd party backup-restore application, then use that.
- Perform a system restore and check if the system can be stably booted.
- If so, remove the Corsair’s Utility Engine (CUE) application and then update the system but make sure to create a system restore point. If required, then install the latest iCUE application.
If you cannot boot the system into Windows, then boot the system into the Windows Recovery Environment (discussed in solution 3).
- In the Recovery Environment, open the Troubleshoot option and select Advanced Options.
- Now open System Restore and follow the prompts to complete the procedure to check if the BSOD issue is resolved.
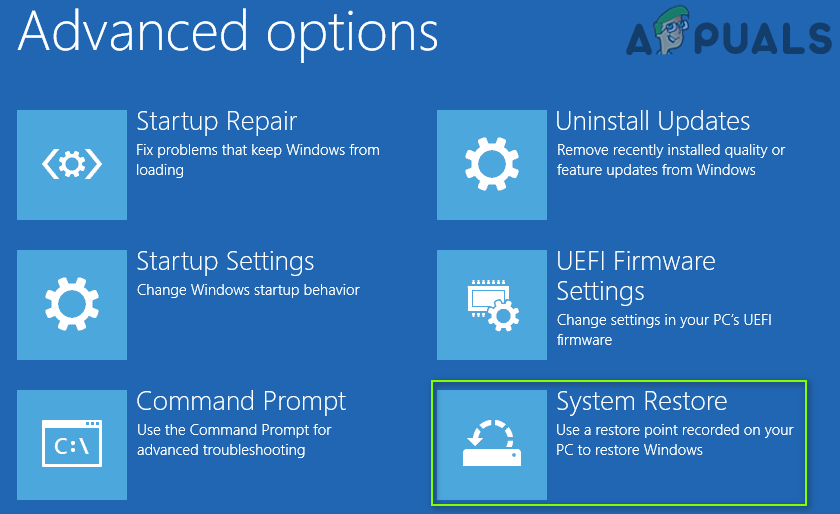
Open the System Restore in the Windows Recovery Environment
Solution 5: Remove the CorsairVBusDriver.sys Driver
As the error indicates the issue is caused by the CorsairVBusDriver.sys Driver, removing the CorsairVBusDriver.sys Driver may solve the problem.
Delete the Drivers from the System’s Directories by Using the File Explorer
- Right-click on the Windows button and in the Power User menu, open the Run box.
- Now navigate to the following path:
\Windows\System32\DriverStore\FileRepository
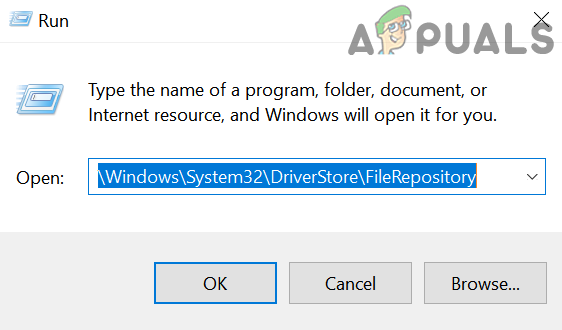
Open the FileRepository - Then delete the files/folders related to Corsair and repeat the same to the following directories (some of these folders may not be available to some users):
C:\Windows\System32\drivers

C:\Windows\SoftwareDistribution\Download\Install
- Now, if you want to play extra safe, then launch the Registry Editor as administrator and delete the following keys (make sure to create the backup of the registry):
HKEY_LOCAL_MACHINE\SYSTEM\ControlSet001\Services\CorsairVHidDriver

HKEY_LOCAL_MACHINE\SYSTEM\ControlSet001\Services\CorsairVBusDriver
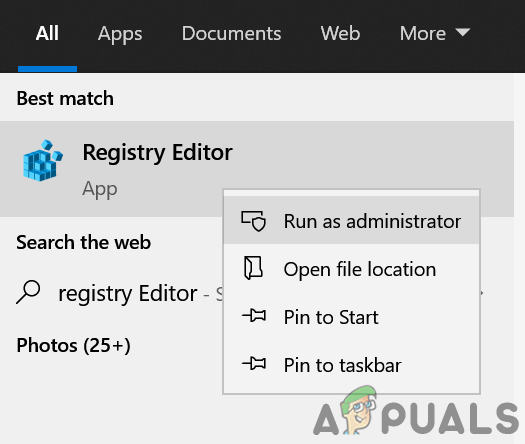
Open Registry Editor as Administrator - Then exit the editor and check if the BSOD issue is resolved.
Use the Command Prompt in the Recovery Environment
If you are stuck in the BSOD loop and cannot boot the system into Windows. Also, no system restore point exists, and the buggy updates cannot be uninstalled, then you may use the Command Prompt in the Advanced Recovery Options to remove the drivers.
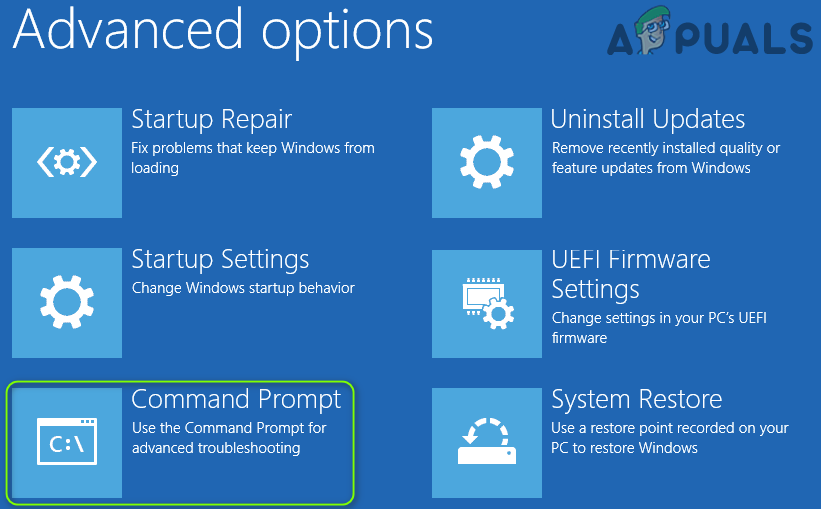
- Boot your system into the Recovery Environment (as discussed in solution 3) and select Troubleshoot.
- Now open Advanced Options and select Command Prompt.
Open Command Prompt in the Advanced Recovery Options - Then you can use the Diskpart command to find the system drive (most probably the one having Boot in the Info column). In the recovery environment, the drive letters may be labeled differently e.g., C: drive in the Windows environment may be labeled as E: in the Recovery Environment. In the Command Prompt, type: Diskpart and then type: list vol.
- Once you have noted the drive letter of your system drive, type: exit (which will take you out of the diskpart command). You can also use the dir command to find out the system drive by looking at the contents of the drives.
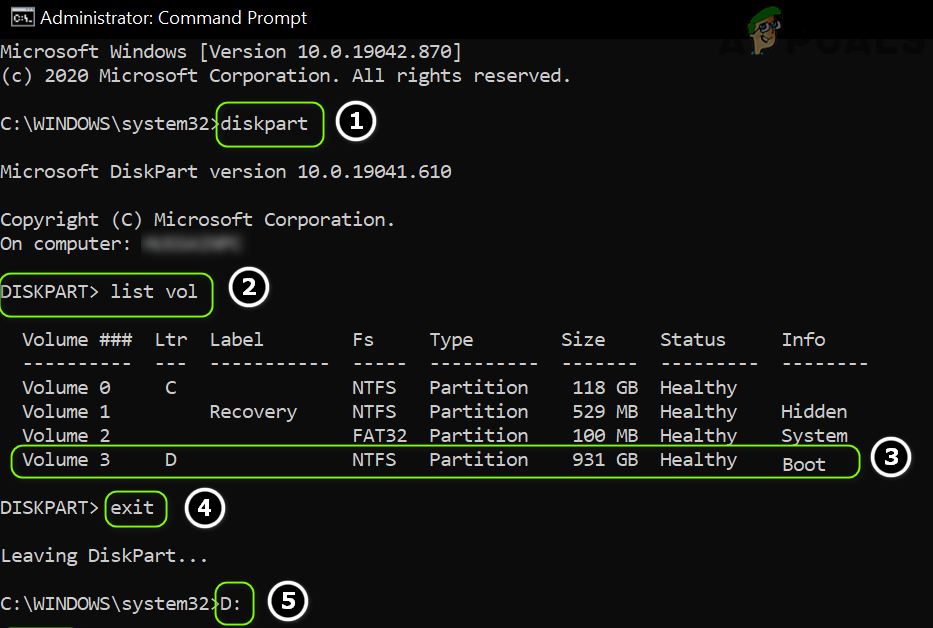
Find the System Drive By Using the Diskpart and Navigting to it - Now, in the Command Prompt window, type the drive letter followed by the colon mark “:”. For example, if your system drive is shown as D, then type “D:” (without inverted commas) and hit the Enter key.
- Once the system drive is found and opened in the Command Prompt window, execute the following commands one by one (which will rename the Corsair driver):
cd \windows\system32\drivers

ren corsairvbusdriver.sys corsairvbusdriver.bak

Rename the corsairvbusdriver.sys Driver - Now restart your computer and check if you can boot into Windows.
- If not, repeat the process (discussed above) to open the Command Prompt in the recovery environment, and in the Command Prompt, open the system drive.
- Now execute the following:
dir corsair* /s /b
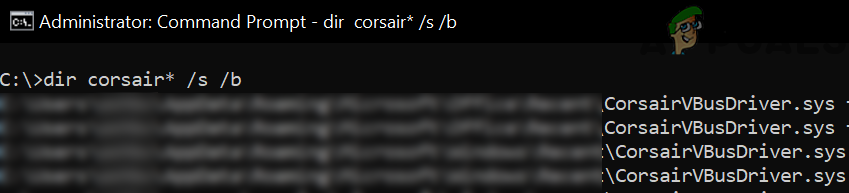
Search for Corsair in the System Drive - This will list down all the files/folders related to Corsair and you should delete the corsair-related files/folders. Usually, the following locations may contain the Corsair files/folders (where C is your system drive in the Recovery Environment).
C:\Windows\System32\DriverStore\FileRepository

C:\Windows\System32\drivers

C:\Windows\SoftwareDistribution\Download\Install
- You can use the “cd Windows\System32\DriverStore\FileRepository” (without quotes) to navigate to the directory and then delete the file by using the following: del “<filename>”. To list down all the contents of the folder, use the dir command.

Delete the Corsair Folder in the File Repository - Now repeat the same to all the directories mentioned in step 10.
- Then, steer to the root directory of the system drive (e.g., type C: and hit the Enter key) and execute the following:
dir *.lnk /s /b
- This will list down all the links pointing to Corsair and you should delete these as well (by following the procedure as discussed above).
- Now reboot your PC and check if you can boot into Windows. If so, then make sure to update the Corsair application (by removing the older version and installing the latest one but make sure to create a system restore point).
Keep in mind you can also use pnputil and DISM commands (not easy for non-tech savvy users) to perform the above steps.
If you are not comfortable with using the Command Prompt, then you can use a Live OS USB (like Ubuntu USB) to boot the system and delete the Corsair-related files through the Ubuntu user interface. Also, you can attach the system drive to another system and delete the Corsair files mentioned above to solve the problem.


