How to Convert GIF to PNG?
GIFs are a series of images combined in a single file that will loop continuously. Most of the time users will want to have a single frame from GIF as a PNG format to use in some other place. Converting GIF to PNG requires a good type of utility that can separate each frame of a GIF. Most basic utilities will just convert the first frame of the GIF to PNG. However, in this article, we will show you methods where you can convert any frame of the GIF to a PNG format.

Convert GIF to PNG through Online Site
These days online sites provide most of the utilities that users used to have by installing applications. Converting Images are much easier by using an online site. It just requires a stable internet to upload and download the converted image back to the system. There are many sites with different converting features, however, we will be using the OnlineConverter site to convert the GIF file to PNG. Follow the below steps to try it out:
- Open your browser and go to OnineConverter site. Click on the Choose File button and open the GIF file that you want to convert.
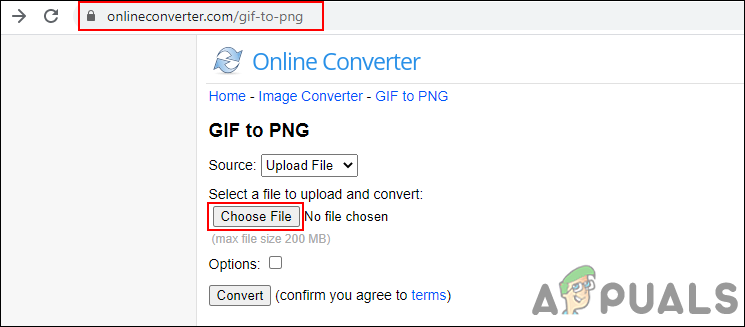
Uploading GIF file to the online site - You can also check the Option for resizing the GIF while converting. If not, just click on the Convert button to upload the GIF file and convert it to PNG.
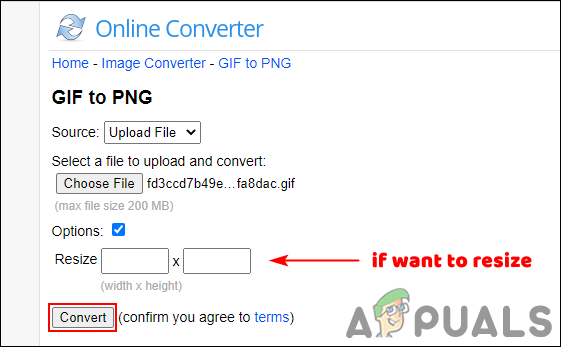
Clicking on the convert button to start progress - Once the file is converted, you will get the Download Now button to download the zip file of all frames (PNG images) of the GIF.
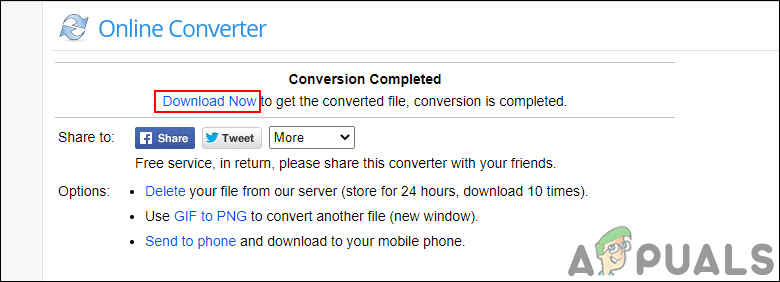
Compression completed - Click on the Download button to download the zip file. Extract the downloaded zip to open the PNG images.

Extracting the zip file to open all the frames
Convert GIF to PNG through Photoshop
Most of the Image Editing applications have features of converting image formats. Photoshop is one of the common and most used applications in most of the computers. Photoshop will open the GIF file into frames and the user can select any of the frames in the layers panel. Users can easily use the Export feature of Photoshop to save the frame of GIF to a PNG. This method takes less than a minute to get the frame of a GIF as a PNG image as shown below:
- Open the Photoshop application by double-clicking the shortcut on the desktop or searching it through the Windows search feature.
- Click on the File menu in the menu bar and choose the Open option. Search for the GIF and open it.
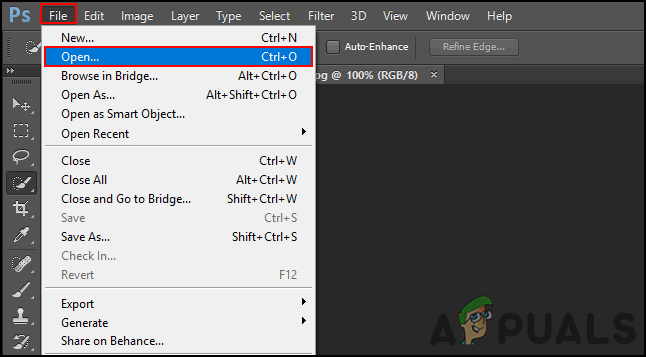
Opening GIF file - You will get all of the frames in the layer panel. Select the frame that you want to save as PNG.

Selecting the frame to save as PNG - Click on the File menu again, choose the Export option, and select Quick Export as PNG option. Provide the location and name to save the frame as PNG.
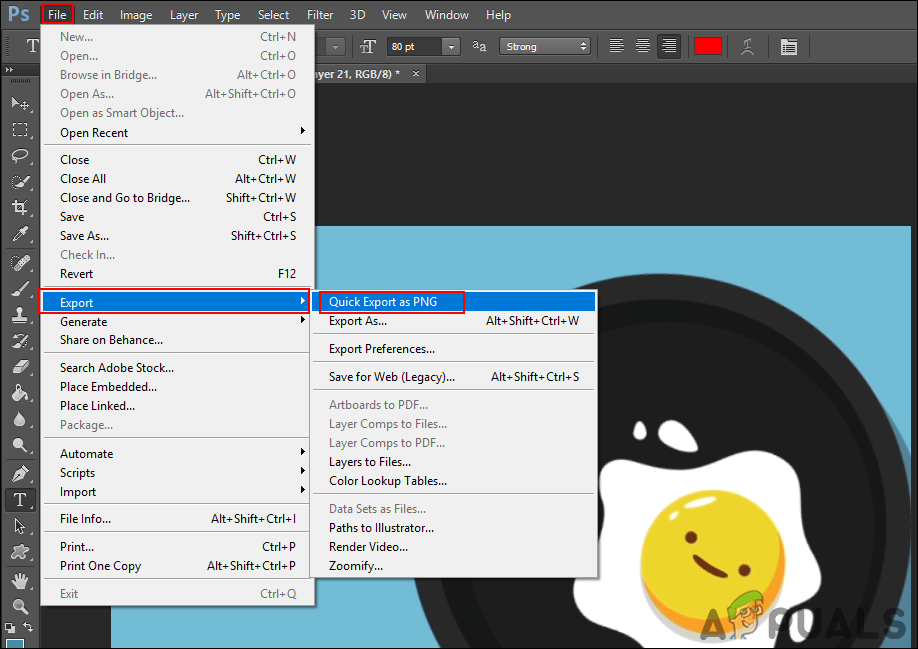
Exporting the frame as PNG - You can also click the File menu and choose Save As option. Here you just need to provide the file format as PNG to save it.
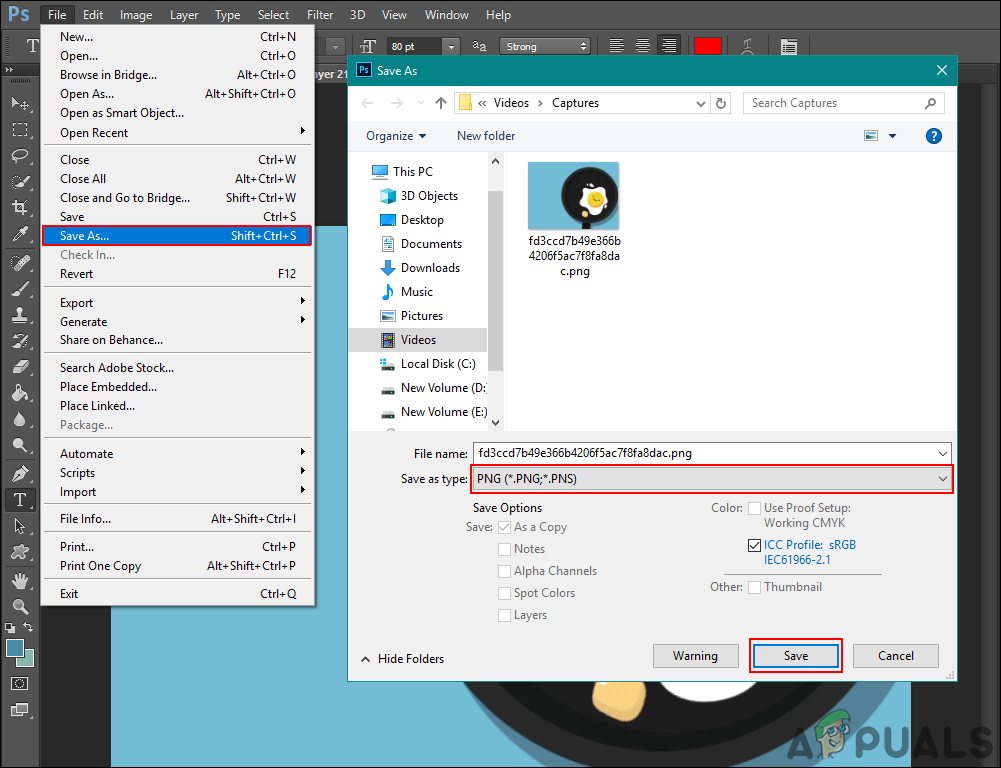
Saving the selected frame as PNG
Convert GIF to PNG in macOS
The Preview application on macOS provides the same feature as Photoshop. It shows all the frames of the GIF file on the left side. However, users cannot directly save those frames as a PNG file. Users need to drag and drop (to desktop) any of the frames that they want to convert to PNG. The drag and drop frame will be in the TIFF format. By using the Export feature of the Preview application, the user can simply export the TIFF file as a PNG image.
- Open the GIF file in the Preview application on your macOS.
- You will get all the frames of the GIF on the left side. Click on the frame that you want as PNG and drag it to the desktop.
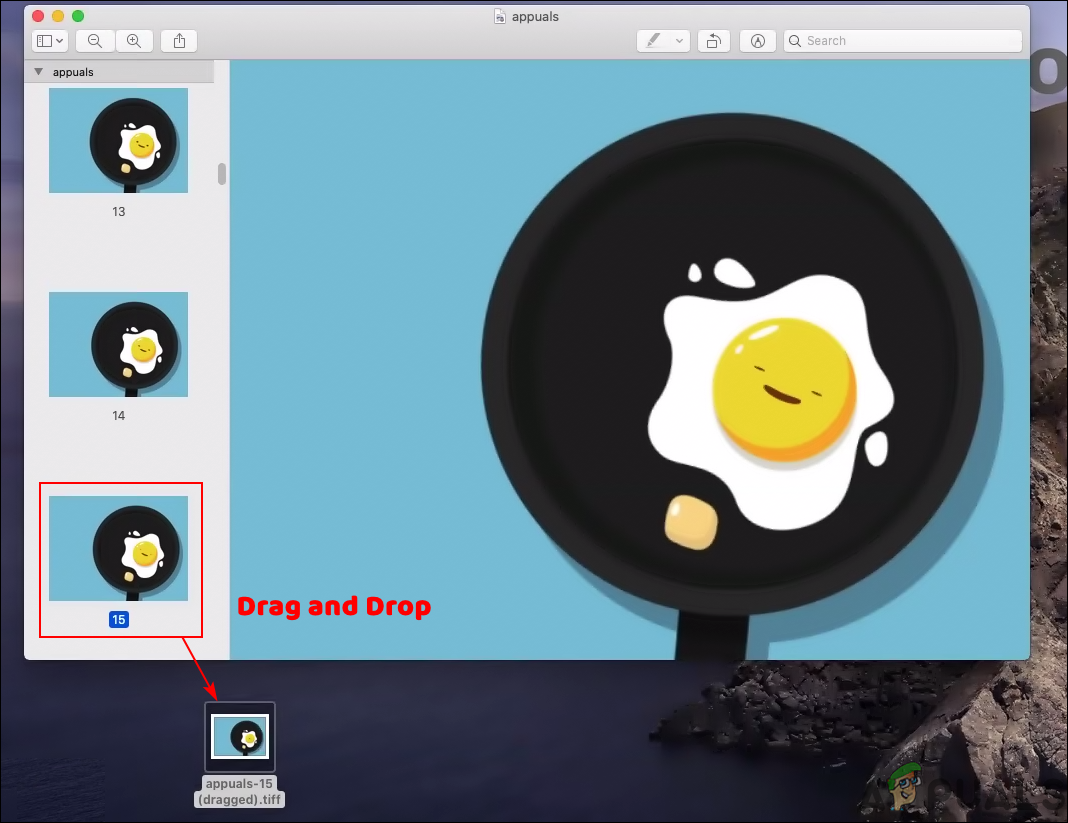
Drag and drop the frame to desktop - You will get the frame as a TIFF file. Open that TIFF file in the Preview application, click on the File menu in the menu bar, and choose the Export option.
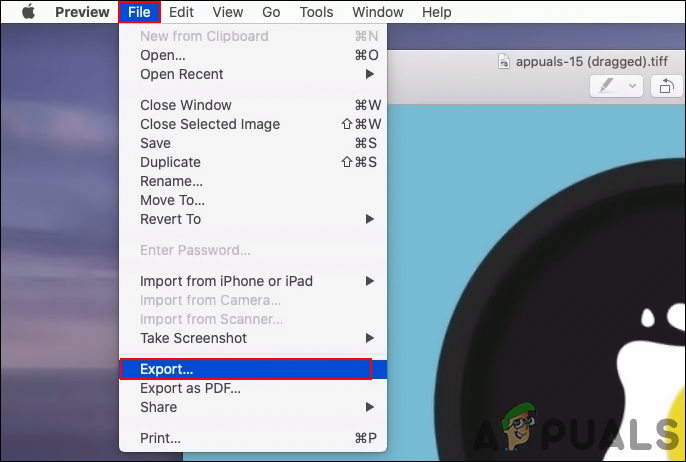
Opening the TIFF file in Preview - Provide the name and change the Format from TIFF to PNG. Click on the Save button to save the file as PNG.
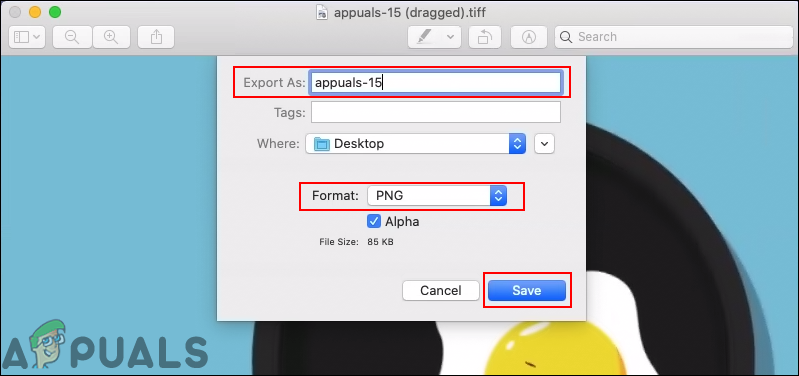
Exporting the TIFF to PNG


