How to Change Between Dark and Light Mode on Windows 11
Windows 11 undoubtedly has a new polished interface and boasts graphical features that make it look fresh and in line with the latest UI trends. And if you’re a fan of Dark Mode, you’ll be pleased to know that it looks even more elegant on Windows 11 with the new rounded corners and blending gradients.
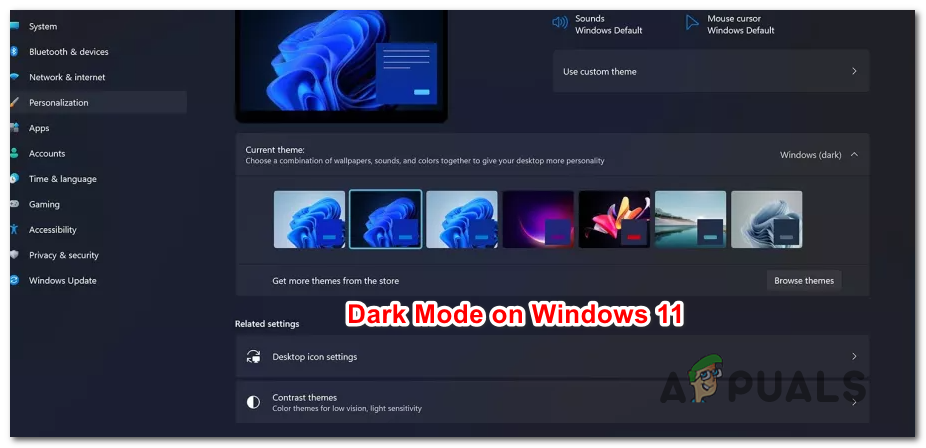
Windows 11 allows you to freely change the theme’s colors from light to dark. Enabling Dark Mode is a great choice if you want to reduce eye strain and it’s also useful for improving the battery life of your device (if you’re using a laptop, ultrabook, etc.).
Personally, I think dark mode ultimately offers better aesthetics and makes Windows 11 look entirely unique when compared with macOS.
But the choice is ultimately up to you – There are five different ways that will allow you to make the switch from Light mode to Dark mode and vice-versa:
- Change between Light and Dark mode via Settings
- Change between Light and Dark mode via the Registry Editor (at an App level)
- Change between Light and Dark mode via the Registry Editor (at a System level)
- Change between Light and Dark mode via PowerShell (at an App level)
- Change between Light and Dark mode via Powershell (at a System level)
Important: Keep in mind that enabling Light mode instead of Dark will gray out and disable the Show accent color on Start and taskbar feature.
Depending on your preferred ways of enforcing changes on Windows 11, follow one of the sub-guides below to freely switch between Dark and Light mode:
Enable Light or Dark Mode from Settings (at App & System Level)
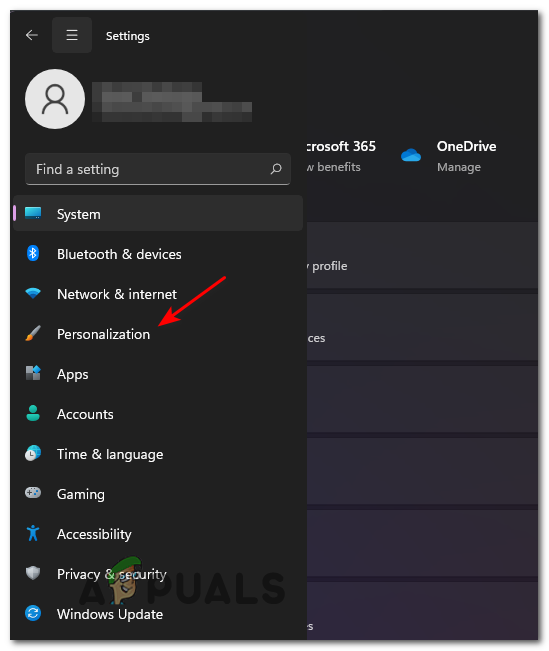
- Press Windows key + I key to open up the Settings menu.
- Once you’re inside the Settings menu, click on the action icon in the top-left corner of the screen, then click on Personalization from the list of available options.
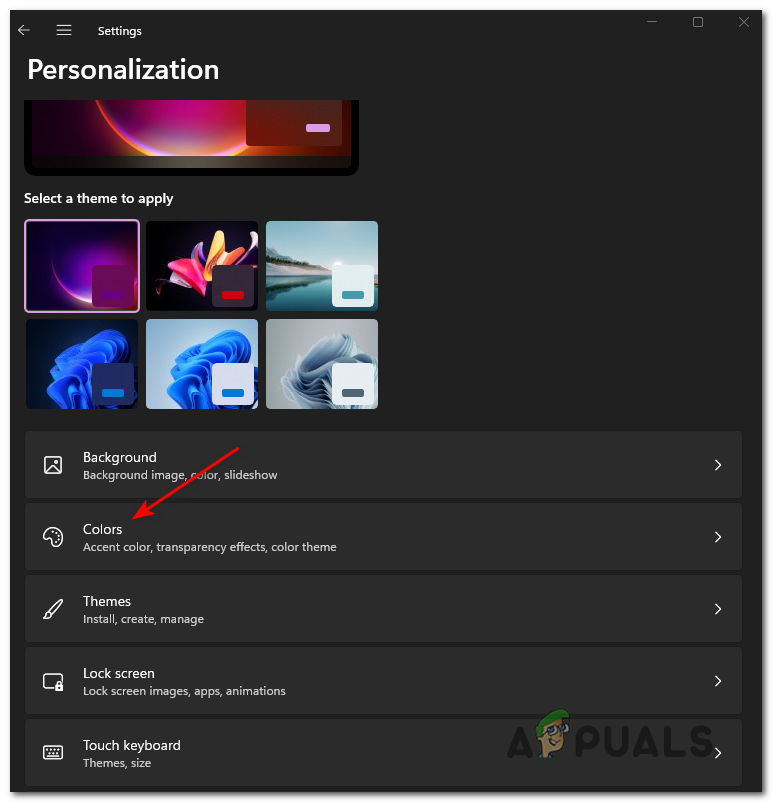
Accessing the Personalization tab - Once you’re inside the Personalization tab, click on Colors to expand the associated drop-down menu.
Accessing the Colors menu - Next, change the drop-down menu associated with Choose your mode to either Dark or Light (depending on which model you want to enable.
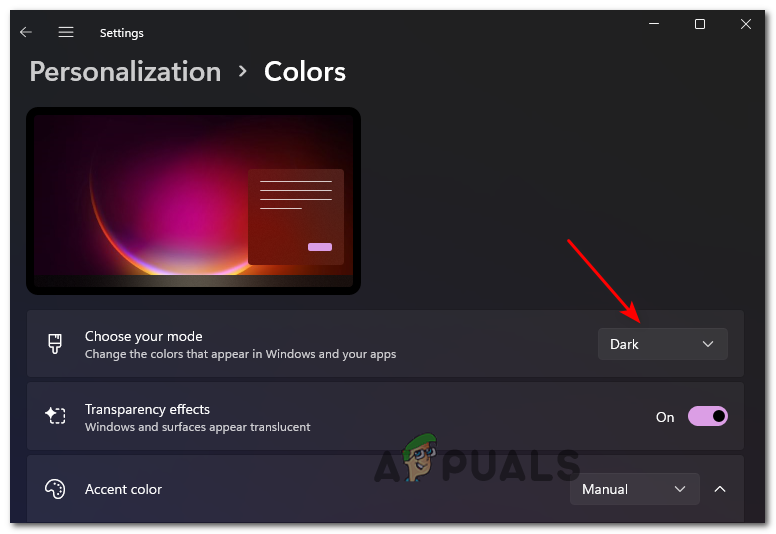
Changing the active color mode on Windows 11 Note: If you select Light or Dark, the setting will apply for both Windows mode and App mode. If you select Custom, you have the option to assign different values for Windows Mode and App Mode.
- The changes will be enforced instantly, so there’s no need to restart your computer for them to take effect.
Enable Light or Dark Mode from Registry Editor (at am App Level)
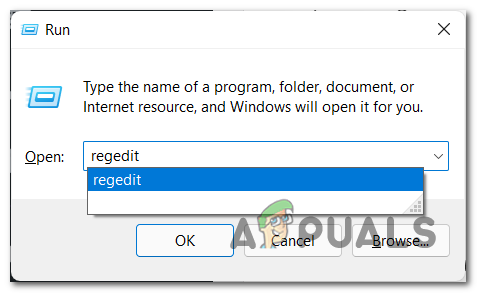
- Press Windows key + R to open up a Run dialog box. Next, type ‘regedit’ inside the text box and press Ctrl + Enter + Shift to open up a Registry Editor prompt with admin access. When you’re prompted by the User Account Control, click Yes to grant admin access.
Opening the Registry Editor - Once you’re inside the Registry Editor, use the menu on the left to navigate to the following location:
HKEY_CURRENT_USER\SOFTWARE\Microsoft\Windows\CurrentVersion\Themes\Personalize
Note: You can also get to this location instantly by pasting the location directly into the navigation bar and pressing Enter.
- Once you arrive at the correct location, select the Personalize key, then move over to the right-hand section of the window and double-click on AppsUseLightTheme.

Accessing the AppsUseLightTheme - Next, from the AppsUseLightTheme key, set the Base to Hexadecimal and the Value data to one of the following depending on the theme you want to enable:
1 = Light Theme
2 = Dark Theme
Note: Keep in mind that this will only modify the look on the App Mode. If you want to change the color theme at a system level, follow the next guide below.
- Close the elevated Registry Editor window and reboot your computer in order to allow the changes to take effect.
Enable Light or Dark Mode from Registry Editor (at a System Level)
- Open up a Run dialog box by pressing Windows key + R. When you’re inside the new dialog box, type ‘regedit’ and press Ctrl + Shift + Enter to open up the elevated Registry Editor window.
Opening the Registry Editor Note: When you are prompted by the User Account Control, click Yes to grant admin access.
- Once you’re inside the Registry Editor utility, use the menu on the left to navigate to the following location:
HKEY_CURRENT_USER\SOFTWARE\Microsoft\Windows\CurrentVersion\Themes\Personalize
Note: If you’re not a big fan of navigating through each Registry key manually, you can simply pate the full path in the nav bar at the top and hit Enter to arrive there immediately.
- Next, move over to the right-hand side menu and double-click on SystemUsesLightTheme.
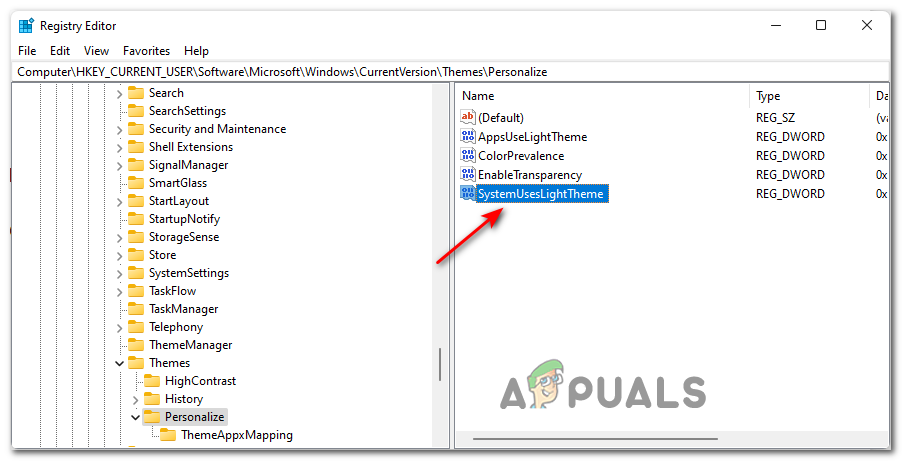
Accessing the SystemUsesLightThem Dword value - From the Edit DWORD (32-bit) Value screen, begin by changing the Base to Hexadecimal, then adjusting the Value data to one of the following depending on what you’re looking to achieve:
0 = Dark theme
1 = Light theme
- Restart your computer in order to allow the changes to take effect. The next time your Windows 11 OS boots up, you should see the theme changes reflecting on your screen.
Enable Light or Dark Mode using Powershell (at an App Level)
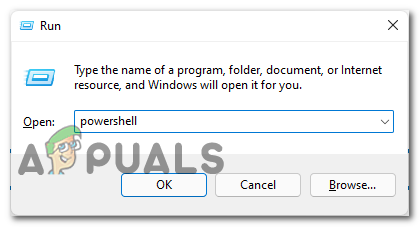
- Open up a Run dialog box by pressing Windows key + R. At the text prompt, type ‘powershell’, then press Ctrl + Shift + Enter to open up a Powershell terminal window with admin access. At the User Account Control (UAC) prompt, hit Yes to grant admin access.

Accessing the PowerShell window - Once you’re inside the Powershell window, type or paste one of the following commands (depending on which color mode you want to enable and press Enter to process the command:
Dark Mode:
Set-ItemProperty -Path HKCU:\SOFTWARE\Microsoft\Windows\CurrentVersion\Themes\Personalize -Name AppsUseLightTheme -Value 0 -Type Dword -Force

Light Mode:
Set-ItemProperty -Path HKCU:\SOFTWARE\Microsoft\Windows\CurrentVersion\Themes\Personalize -Name AppsUseLightTheme -Value 1 -Type Dword -Force
- Restart your computer to force the changes to take effect if the effects are not visible instantly..
Enable Light or Dark Mode using Powershell (at an System Level)
- Start by popping up a RUn box by hitting Windows key + R. Next, type ‘powershell’ in the text box and then press Ctrl + Shift + Enter to open up a Powershell terminal window with administrative privileges. At the User Account Control (UAC) prompt, hit Yes to grant admin access.
Accessing the Powershell window - Once you’re inside the elevated Powershell window, type one of the following commands and hit Enter to enable either Dark Mode on Light mode on Windows 11:
Dark Mode
Set-ItemProperty -Path HKCU:\SOFTWARE\Microsoft\Windows\CurrentVersion\Themes\Personalize -Name SystemUsesLightTheme -Value 0 -Type Dword -Force

Light Mode
Set-ItemProperty -Path HKCU:\SOFTWARE\Microsoft\Windows\CurrentVersion\Themes\Personalize -Name SystemUsesLightTheme -Value 1 -Type Dword -Force
- Once the command has been processed successfully, restart your computer to allow the changes to take effect.


Any idea why this is not working for taskbar and start menu?