Fix: Can’t Switch from Insider Dev Channel to Beta or Preview on Windows 11
If you’re part of Microsoft’s Insider Channel and looking to migrate to a Beta build from a Dev Build, you should know that things are not as easy as one might wish for. Depending on when you initially installed the Dev Preview build, it will either be either very easy or very hard to switch between Insider Channels.
The biggest confusion that users have in regards to making the switch to a Beta Channel or Release Preview Channel from the Dev Channel is the migration conditions that you will not be able to get around.
Can I Make the Switch from Dev Channel to Beta Channel on Windows 11?
The answer depends on how you’ve installed the Dev Channel initially and what build you’re currently using
If you installed an Insider Preview build in the Beta Channel or Release Preview Channel, you’ll have no issues switching between channels – it’s just a matter of accessing the Settings menu and changing the Insider Settings from the Windows Insider Programs menu.
However, if you have installed a build in the Dev Channel that’s not tied to a specific release, you will have no choice but to do a clean install of Windows while resetting your Windows Insider settings to make the switch permanent.
But before you take out your installation media to do a clean install, you should know that there are situations where it might be possible to switch a device from the Dev Channel to Beta Channel or Preview Channel without a clean install.
How to Switch from Dev Channel to Beta or Preview Channel or Windows 11
To figure out what process is needed in order to move away from the Dev Channel on Windows 11, you need to start by taking a look at your current build number and compare it with the current build number in the channel that you wish to migrate to (Preview Channel or Beta Channel)
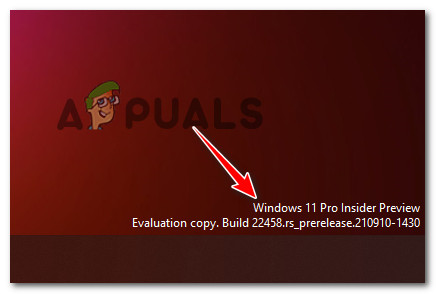
To find your current Dev Channel build, simply check the watermark in the right bottom section of your desktop.
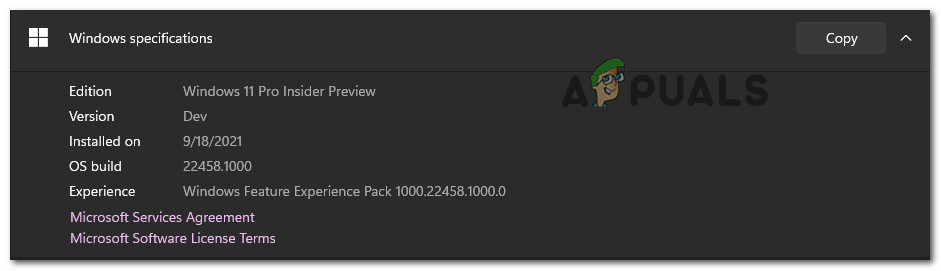
Additionally, you can also check your current build by pressing Windows key + I, then going to System > About and checking the Windows Specifications tab for the OS build.
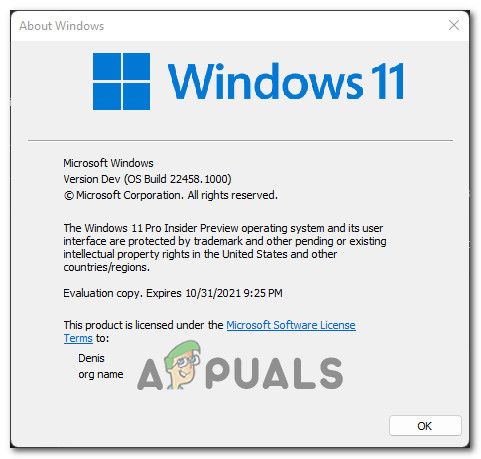
Note: If for some reason, you are unable to access your Settings menu, you can also check your current build by pressing Windows key + R and running ‘winver’. Once you’re inside the About Windows tab, check the current dev channel build under Version Dev.
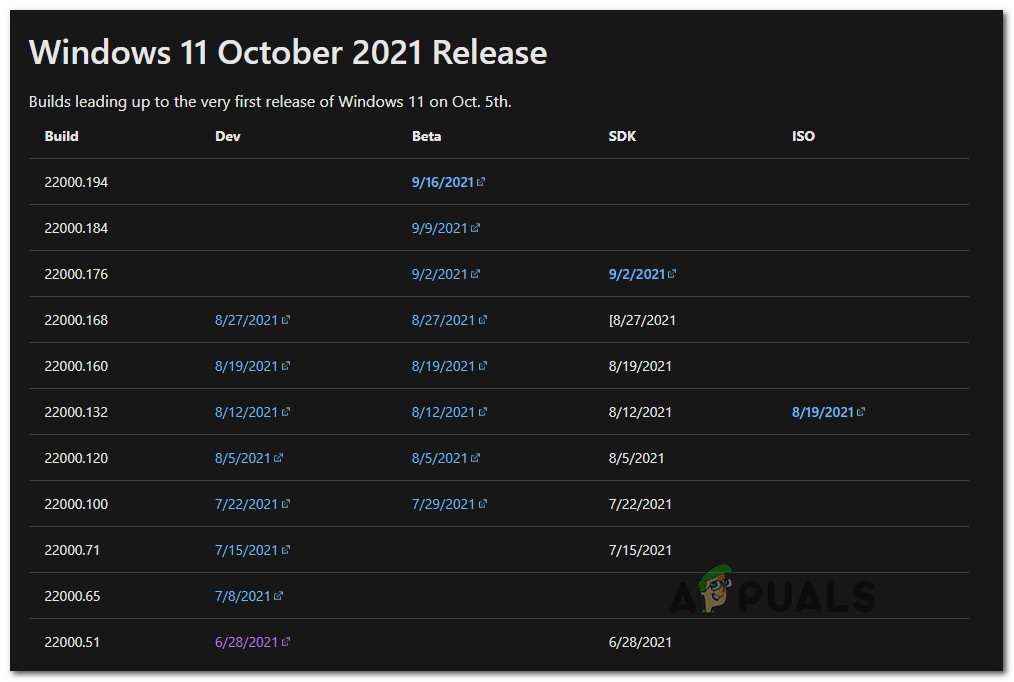
Once you know your current build, it’s time to compare it with the build number of the channel you wish to switch to. To do this, open up your favorite browser and check the latest build available on the Flight Hub page.
So depending on if your build number is equal to or higher than the channel you want to move to, the procedure you need to take is different:
- If your current build number is equal to (or lower) than the build of the channel you want to move to – You can migrate to the Beta or Preview Channel without having to clean install (just by changing the Insider settings)
- If your current build number is higher than the build number of the channel that you want to move to – You will sadly need to do a clean installation of Windows and change the Windows Insider Program behavior after the reinstallation is complete.
But regardless of the scenario, you find yourself in, we’ve covered both methods in a series of step-by-step guides.
Follow one of the guides below (the one that’s applicable) to successfully migrate from the Dev Channel to the Beta Channel or Preview Channel.
Migrate away from Dev Channel on Windows 11 (if your build is equal)
If your current Dev build is equal or lower with the latest build available to the channel you are trying to migrate you, you’re lucky. The instructions of moving away from the Dev Channel will be easy and you won’t be required to do a clean install.
Follow the instructions below to migrate away from the Dev Channel:
- Press Windows key + I to open up the Settings menu of Windows 11.
- Once you’re inside the Settings menu of Windows 11, use the vertical menu on the left to click on Windows Update.
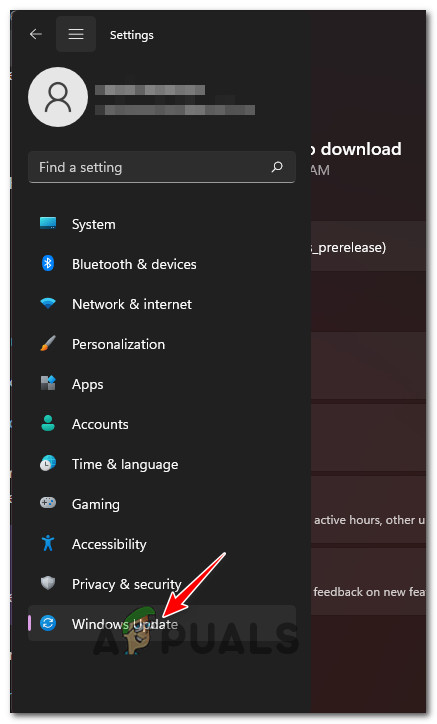
Accessing the Windows Update menu Note: If you can’t see the vertical menu on the left, click on the action button in the top-left corner of the screen.
- Once you’re inside the Windows Update screen, scroll down to the bottom of the screen and click on Windows Insider Program.

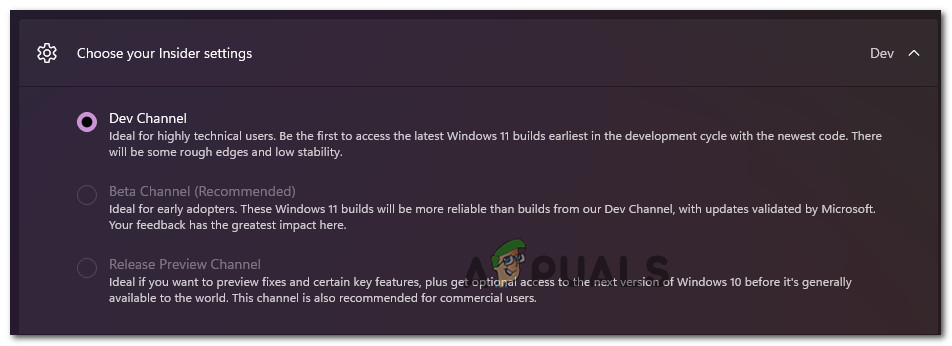
Accessing the Windows Insider Program menu - Once you’re inside the dedicated Windows Insider Program menu, click on Choose your Insider settings.
- Next, select the desired channel that you wish to move to – either the Beta Channel (Recommended) or the Release Preview Channel.
- Go about using your Windows 11 computer normally. The next time you get an update, it will be for the new channel you just selected.
Note: Don’t freak out if no new updates come in immediately. Typically, it takes some time (a few days) until the new channel updates start coming in.
Migrate away from Dev Channel on Windows 11 (if your build is higher)
If you’re on the other side where your Windows 11 build number is higher than the build number of the Insider Channel you are trying to migrate to, you’re unfortunately forced to do a clean install.
There is no way of simply changing the Dev Channel in this particular case since the build you’re using is not tied to a specific release.
The good news is, you can simply do an in-place upgrade in order to keep your Windows Settings, personal files, and apps.
With this in mind, your only option of moving away from the Dev Channel is to do a clean installation of Windows with some special instructions. Here’s what you need to do:
- First things first, visit the Windows Insider ISO page and download the latest ISO of the Windows 11 version you’re trying to install.
- Once you’re inside the Windows Insider ISO page, you will need to sign in with your Microsoft account (if this process doesn’t happen automatically.
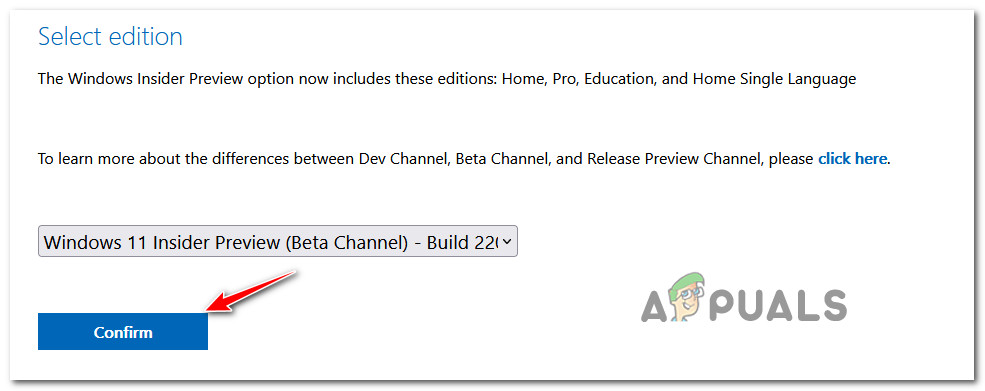
- Next, scroll down to the Select edition category, then use the Select Edition drop-down menu to pick up the Windows channel that you want to fall back to. Once you picked the correct edition, hit Confirm.
Confirming the Windows 11 dev build you want to install - After the request is validated, you’ll be asked to select the language of the product. Do so, then click on the Confirm button once again.
- After the request is validated once again, you will be given a link that’s only valid for 24 hours where you can get the build you’re after. To get it, simply click on 64-bit Download and wait until the download is complete.
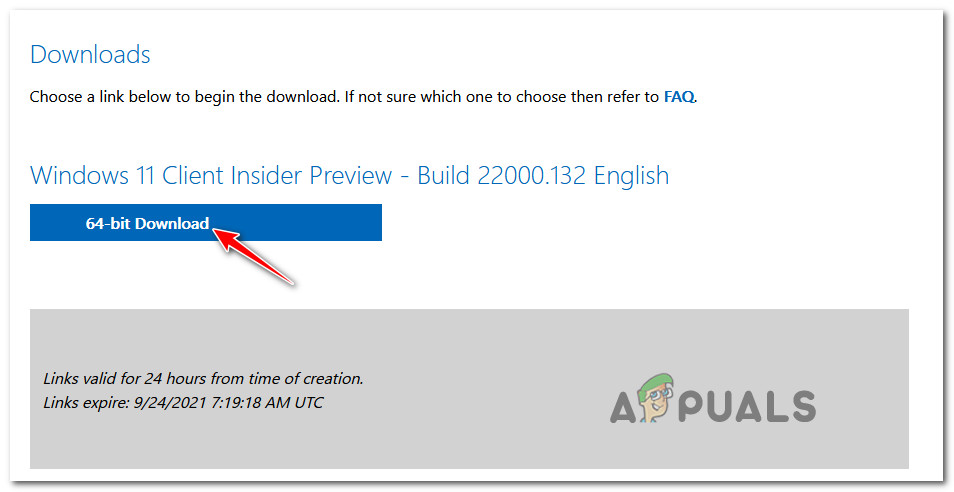
Downloading the in-place upgrade link for Windows 11 Note: You can either save it to a location on your PC or use it to create a bootable Windows 11 USB.
- Wait patiently until the download is complete.
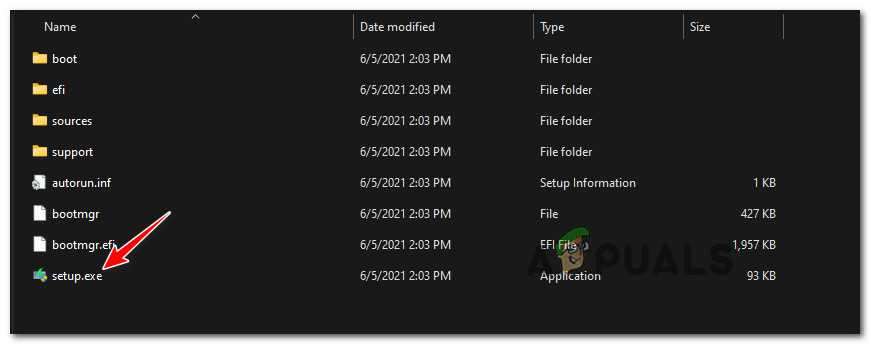
- Once the download is complete, navigate to the location where you downloaded the Windows 11 ISO and double-click on it to mount it.
- Once the ISO is mounted, double-click on the setup.exe file from the root folder.
Opening up the Setup.exe - At the user account control prompt, click Yes at the User Account Prompt to grant administrative privileges.
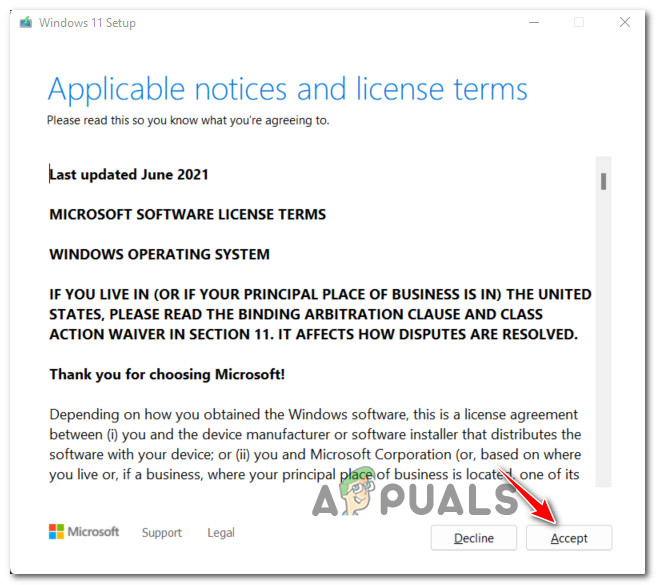
- At the first screen, click Next and wait until the validation is complete. When prompted by the EULA, agree to with by clicking on Accept.
Accepting the Windows 11 EULA - Once you get to the next screen, select the Keep personal files and apps toggle, then click Next one final time.
- Finally, confirm your operation and wait until the in-place upgrade process takes place.
- After the installation is complete, you have successfully migrated away from the Dev build channel.
Note: However, there’s still one more thing you need to do in order to ensure that you won’t migrate back to the Dev Channel. - Once the in-place repair procedure is complete and your Windows 11 computer boots normally, press Windows key + I to open up the Settings screen.
- Inside the Settings menu of Windows 11, use the vertical menu on the left to click on Windows Update.
Accessing the Windows Update menu Note: In case you can’t see the vertical menu on the left, click on the action button in the top-left corner of the screen.
- Once you’re inside the Windows Update screen, scroll down to the bottom of the screen and click on Windows Insider Program.
Accessing the Windows Insider Program menu - Finally, set up your Insider Channel deployment once again, making sure that you have selected the Beta or Preview channel and on the Dev channel.


Doesn’t work! from build 22468.1000
can’t pick keep files.