How to Fix “Cannot Start the PS4 (CE-34335-8)” Error?
The “Cannot Start the PS4 (CE-34335-8)” error shows up with the message “Cannot access system storage,” stopping the console from starting normally and sometimes blocking going into Safe Mode. This code means that the PS4 cannot find or use the built-in hard drive.
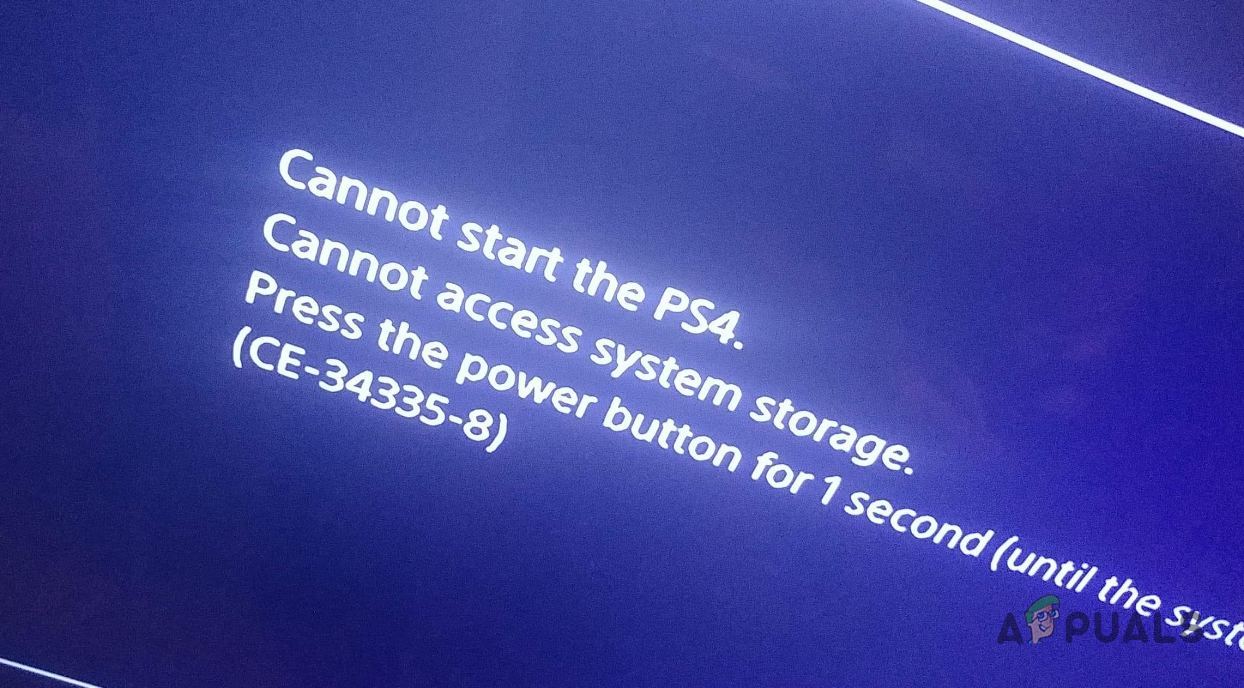
The most common cause is a bad or wrongly connected HDD, with other factors including damaged drive data, loose SATA connections, or a damaged motherboard connection.
1. Reinstall the Hard Disk Drive
When encountering the CE-34335-8 error code, the first step is to reinstall your PS4’s existing hard drive. A slightly misaligned drive can prevent the system from detecting it.
- First, turn off your PS4 and unplug the power cord.
- Afterwards, position the PS4 upside-down and remove the HDD bay cover, starting from the right side. If a sticker covers the HDD cover, you can safely remove it without voiding the warranty.
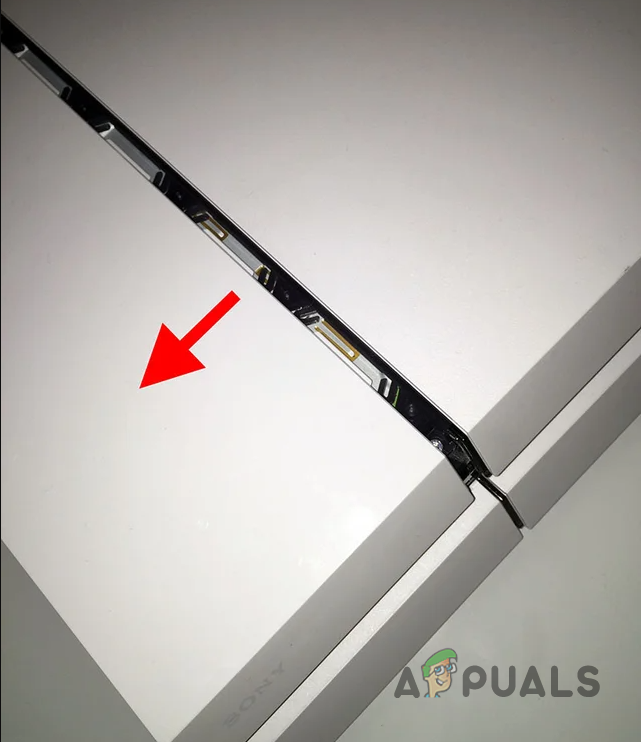
Removing HDD Bay Cover - Then, take a Phillips screwdriver and remove the screw holding the mounting bracket in place.
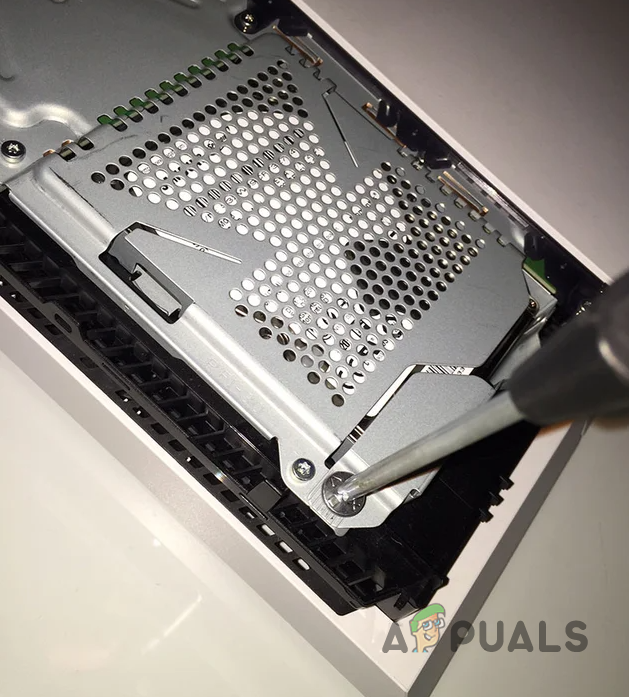
Removing Mounting Bracket Screw - Once unscrewed, pull the mounting bracket straight out.
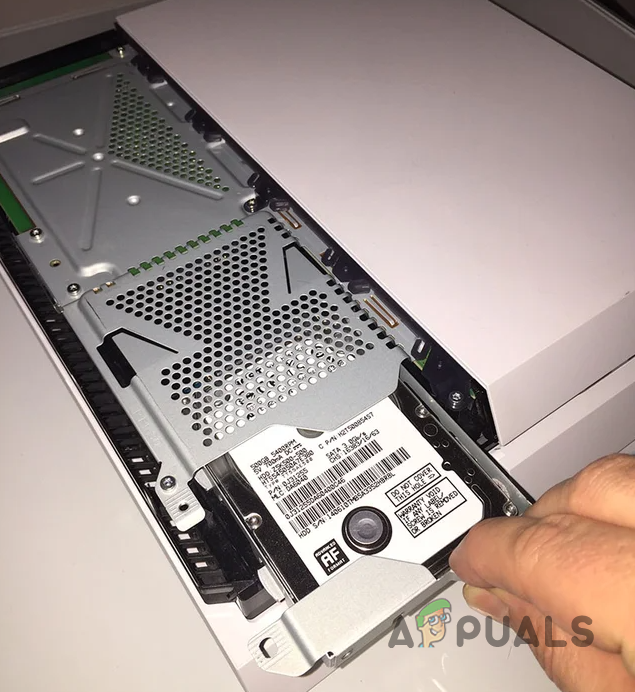
Removing the HDD Mounting Bracket - Now, remove the four screws on the mounting bracket (two on each side).
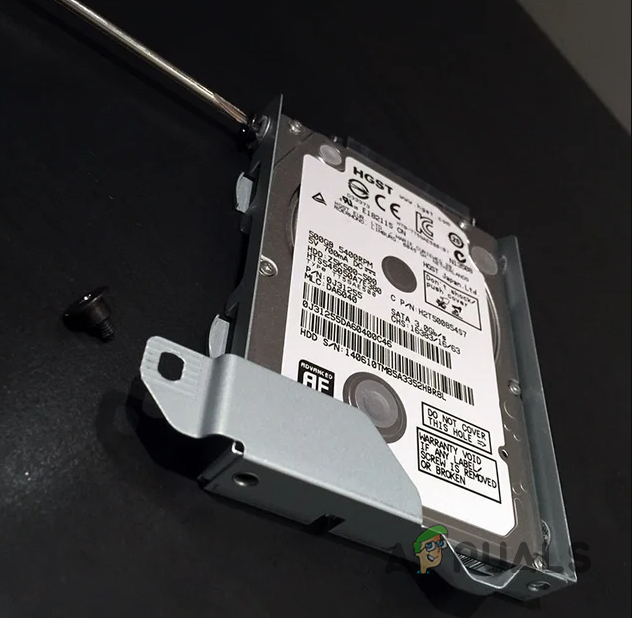
Removing Mounting Bracket Screws - Next, use a soft, dry cloth to gently wipe the hard drive’s metal connectors.
- Then, place the hard drive back in the mounting bracket and screw it in.
- Reinstall your PS4’s mounting bracket.
- Finally, reattach the HDD bay cover and turn on your PS4.
- Check if the problem persists.
2. Replace Hard Drive
If reinstalling the hard drive doesn’t solve the issue, the drive is likely faulty and needs to be replaced.
This process has three parts: downloading the latest PS4 system software to a USB drive, replacing the hard drive, and reinstalling the system software in PS4 Safe Mode. Follow the instructions below.
2.1. Download Latest System Software
- First, connect a USB drive to your computer or laptop.
- Then, open the File Explorer window.

Opening File Explorer - After that, right-click on the USB drive and click Format.
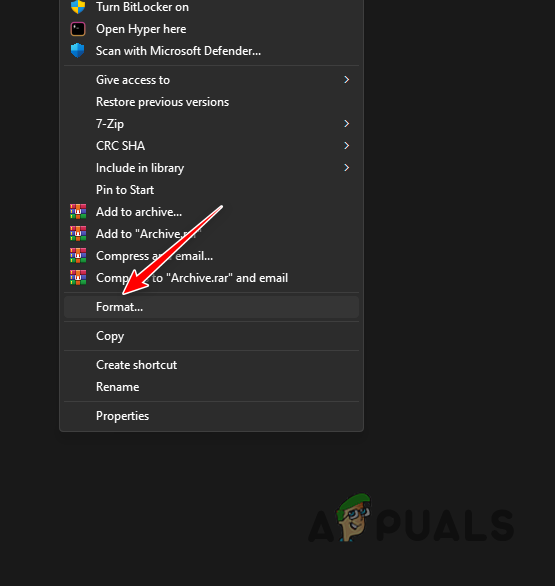
Opening Format Window - On the Format window, select FAT32 from the File System menu (choose exFAT if FAT32 isn’t available).
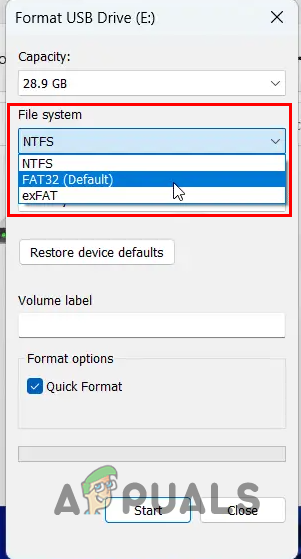
Selecting FAT32 - Then, click Start to format the drive.
- Once you do that, navigate to the USB drive and create a folder called PS4.
- Inside the PS4 folder, create another folder called UPDATE. Keep both folder names in uppercase.
- After that, download the PS4 reinstallation file from the official source here.
- Copy the downloaded file and paste it inside the UPDATE folder. Make sure the file name is PS4UPDATE.PUP.
- That is it. You can now unplug the USB drive from the PC.
2.2. Replace the Hard Drive
- Unplug the PS4 and place it upside-down.
- Remove the HDD bay cover from the right side.

Removing HDD Bay Cover - Then, remove the screw holding the mounting bracket in place.

Removing Mounting Bracket Screw - Once you have removed the screw, pull the mounting bracket straight out.

Removing the HDD Mounting Bracket - Remove the four screws on the mounting bracket. You will find two on each side.

Removing Mounting Bracket Screws - Replace the hard drive with the new one.
- Then, screw in the four screws, but do not overtighten them.
- After that, put the mounting bracket back in and make sure it’s in the correct orientation.
- Reinsert the screw that holds the mounting bracket.
- Finally, reattach the HDD bay cover.
2.3. Install System Software
- Now that you have replaced the hard drive, plug in the PS4.
- After that, plug the USB drive containing the system software into the console.
- Then, press and hold the Power button until you hear the second beep to boot into Safe Mode.
- On the Safe Mode menu, select the Initialize PS4 (Reinstall System Software) option (this erases all data on the drive).
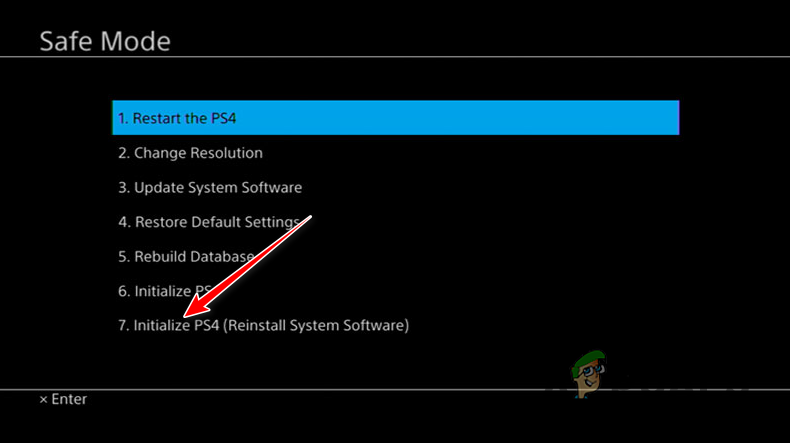
Reinstalling PS4 System Software - Wait for the system software to install. Your PS4 will restart when it’s done.
 Reviewed by


