How to Fix ‘BAD_POOL_CALLER’ BSOD Error in Windows?
When using your computer for gaming or moving files, it sometimes freezes, restarts by itself, or shows a blue screen with the error ‘BAD_POOL_CALLER‘ and stop code 0x000000C2. This happens because a part of the system is making a bad memory request.
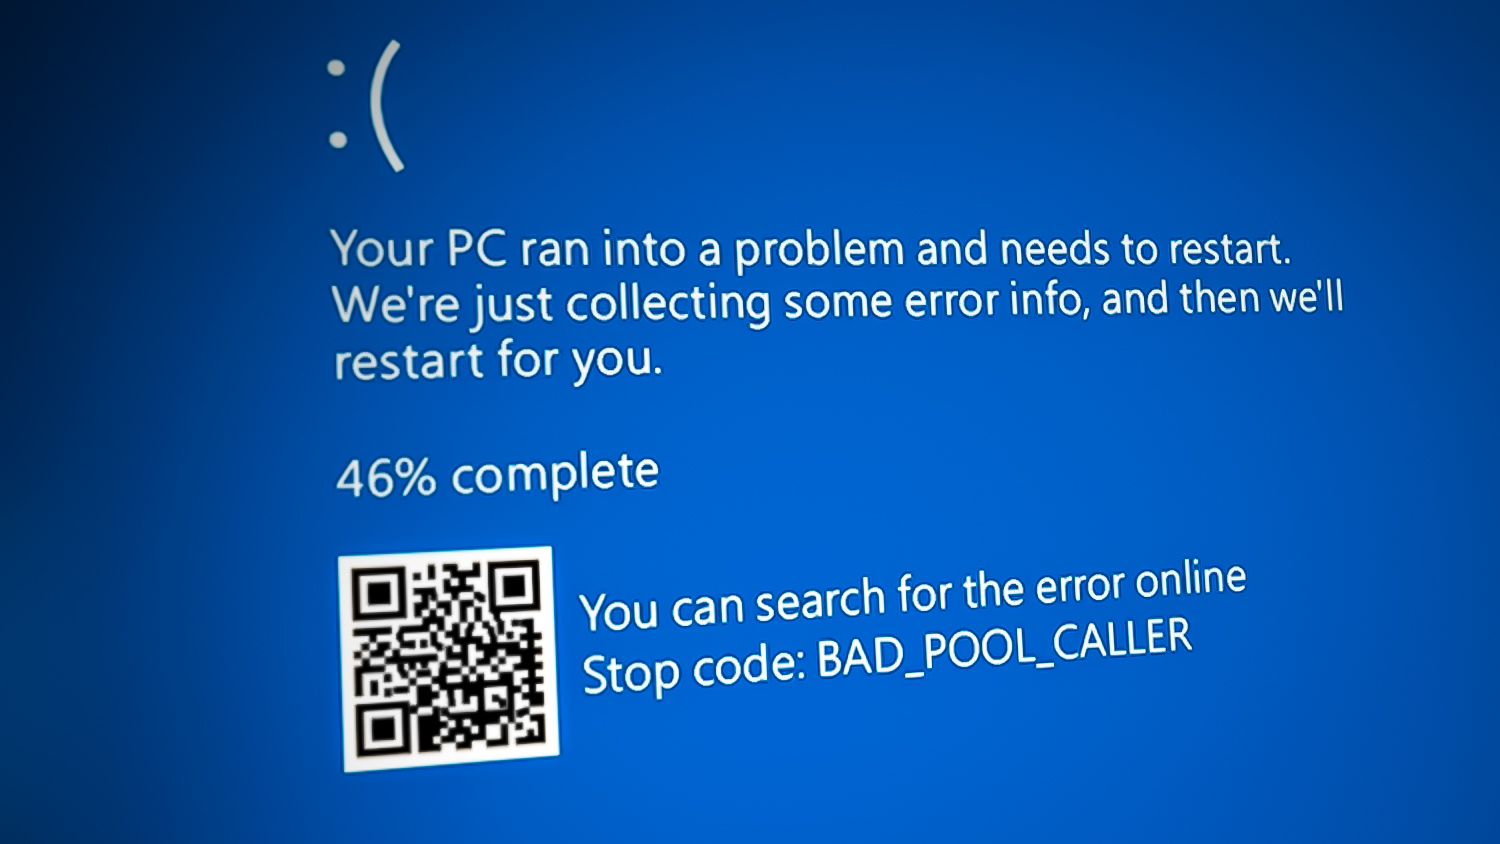
The most common causes are bad or outdated drivers—especially for network, graphics, or antivirus—trying to use memory the wrong way.Other possible reasons are broken RAM, software conflicts, or damaged system files like klwtp.sys.
In this article, we will discuss different ways to solve this error.
Boot Windows in Safe Mode (If Needed)
This method is for users who are stuck in a restart loop or whose Windows isn’t starting properly, even after a forced shutdown. Since you can’t use Windows normally, you’ll need to boot into Safe Mode. Safe Mode starts Windows with only essential drivers, services, and programs.
- Press and hold the power button until your computer turns off completely.
- Turn your computer back on, and as soon as you see the Windows logo, turn it off again.
- Repeat these steps until you see the “Please Wait” or “Preparing Automatic Repair” message.
- Once you’re on the options screen, go to Troubleshoot > Advanced Options > Startup Settings.
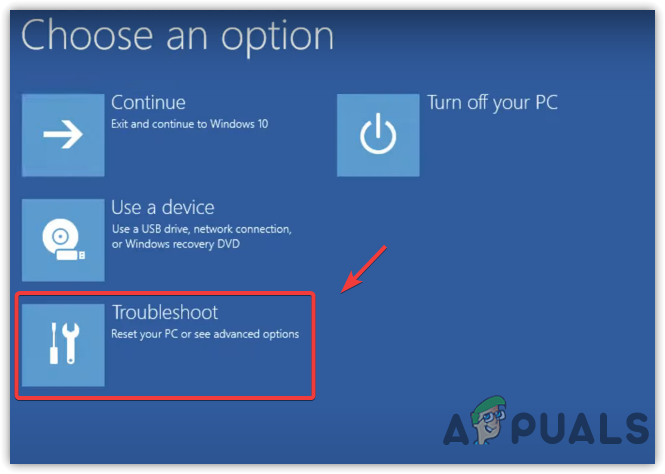
Navigate to Troubleshoot - Click Restart to open Windows in Safe Mode.
- After your system restarts, you’ll see different options. Press 4 on your keyboard to boot into Safe Mode.
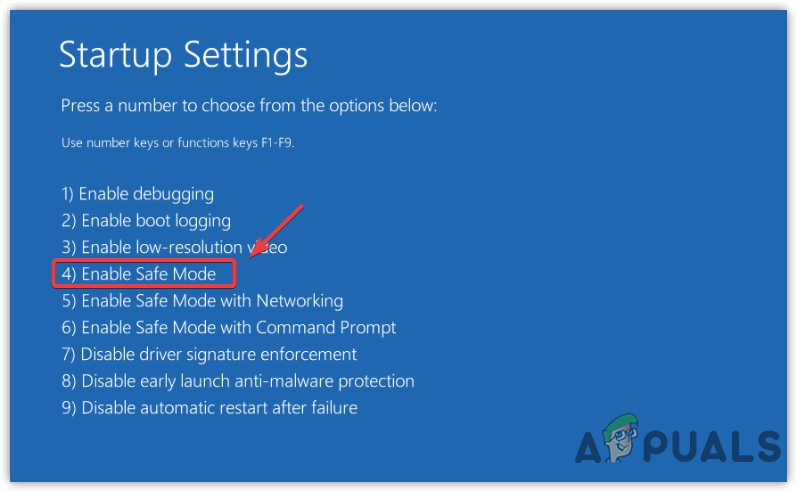
Enabling Safe Mode
If you can’t boot into Safe Mode, or if you still face the BSOD even in Safe Mode, your Windows installation might be corrupted, or there could be a hardware problem. In either case, you will likely need to perform a clean installation of Windows.
1. Clean Installation of Graphics Driver
A corrupted graphics driver is a common cause of the BAD_POOL_CALLER BSOD. Doing a clean installation removes the current driver and reinstalls a fresh copy.
If your computer won’t start normally, first boot into Safe Mode using the steps above. If the error appears randomly, proceed with these steps:
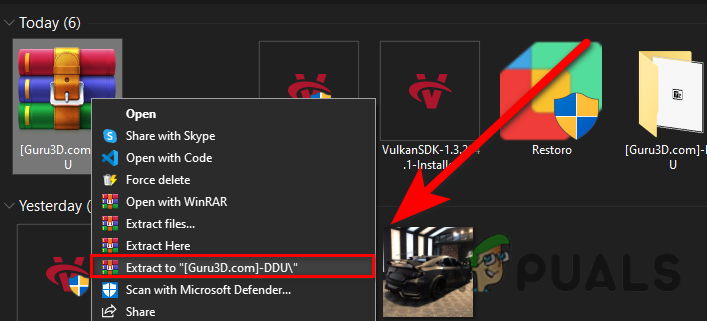
- Download Display Driver Uninstaller (DDU).
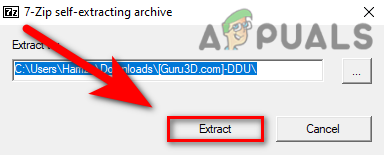
- After downloading, right-click the DDU ZIP folder and select Extract to DDU.
Extracting DDU ZIP Folder - Go into the extracted folder and double-click Display Driver Uninstaller.exe.
- A short pop-up window will appear. Click Extract, then open the DDU folder and launch Display Driver Uninstaller.
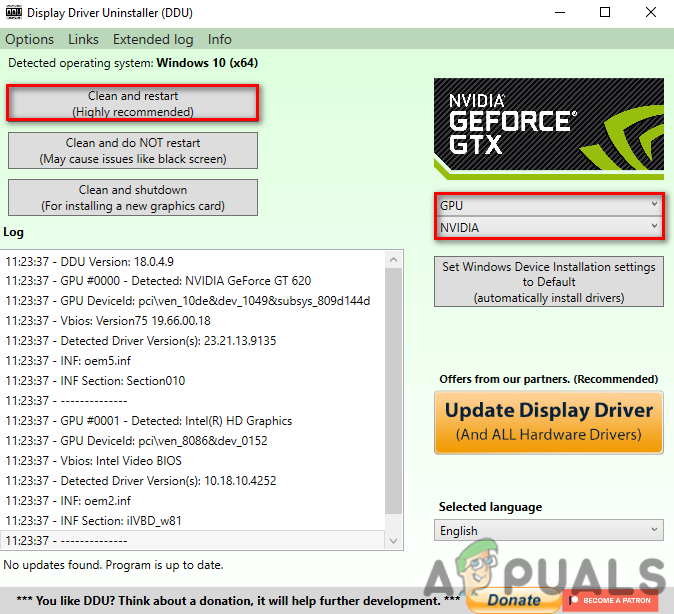
Extracting DDU EXE File - On the right, select GPU as the device type.
- Choose your device from the dropdown list.
- Then click Clean & Restart.
Removing Drivers With Registry Files - If the issue disappears, the driver was likely corrupted. Install a new graphics driver from the manufacturer’s website to resolve the problem.
- Go to your graphics card manufacturer’s official website.
- Search for your specific graphics card model.
- Download the latest driver available.
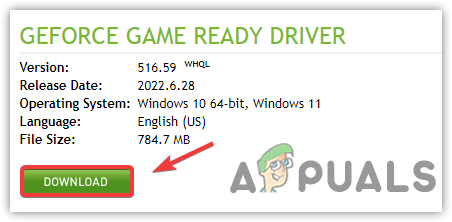
Downloading Graphics Card Driver - Run the downloaded installer and follow the on-screen steps to finish installing the driver.
2. Uninstall Problematic Drivers
The “WhoCrashed” tool can analyze system crash dump files and help identify the driver causing the problem.
- Download and install WhoCrashed.
- Open the WhoCrashed program after installation.
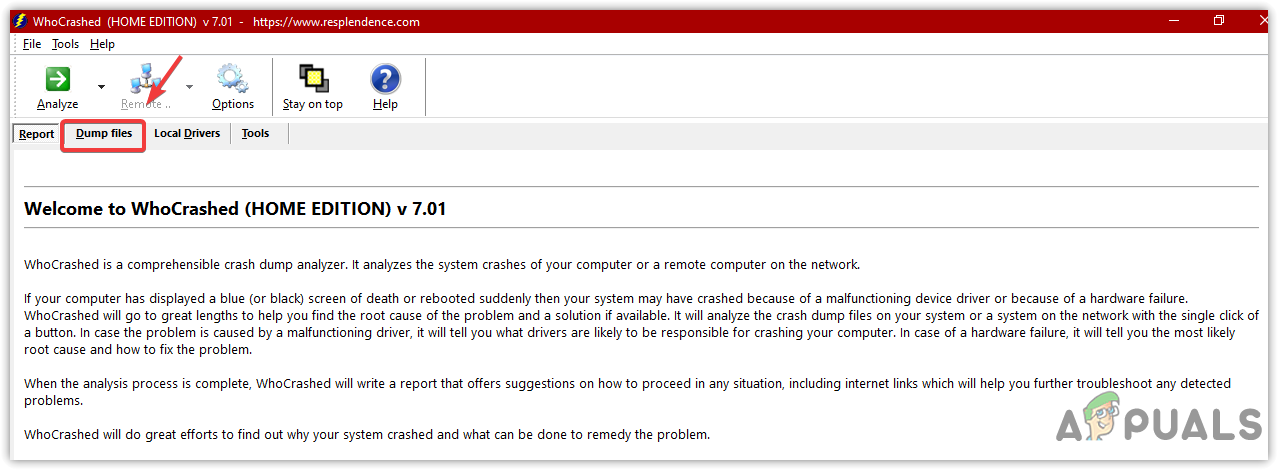
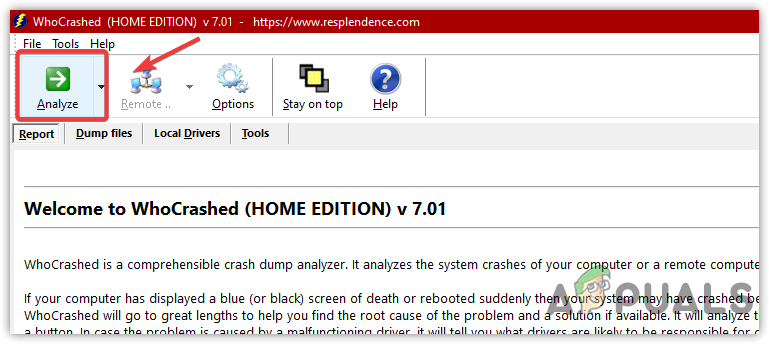
- Go to the Dump Files tab at the top.
Clicking Dump Files - Click Analyze.
Analyzing Dump Files - Wait for the analysis to finish.
- A small window will pop up; just click OK.
- Scroll down to the Crash Dump Analysis section and copy the description from the report—which will typically mention the driver involved.
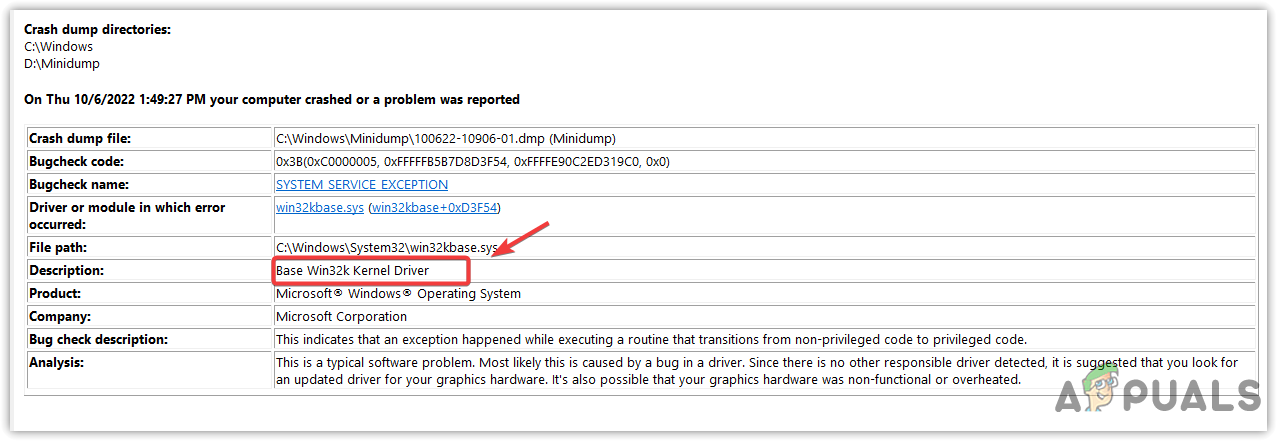
Checking Analysis Report - Search for that driver name on Google to find out what device it belongs to.
- If the driver is related to your graphics card or another device, uninstall it, then reinstall it by downloading the latest version from the official website.
3. Update Component Drivers
Outdated or corrupted drivers for components like sound cards, network adapters, or USB devices can also trigger the BSOD. You can easily check and update these drivers:
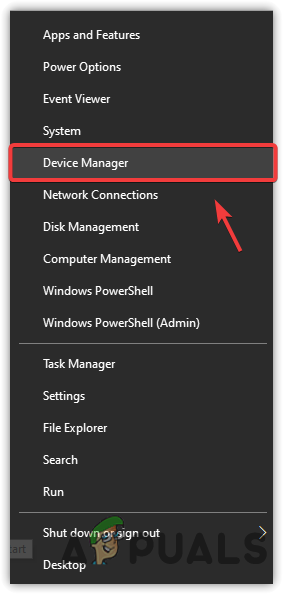
- Once your computer boots into Safe Mode, right-click the Start Menu and choose Device Manager.
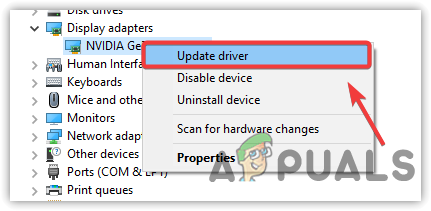
Opening Device Manager From Start Menu - Expand the Display Adapters section, right-click your graphics driver, and select Update Driver.
Updating Driver - Choose Search automatically for drivers. Let Windows search and install the latest driver if it finds one. If you suspect the driver is corrupted, you can also uninstall it and reinstall a fresh one.
- Once done, right-click your network driver (usually found under “Network Adapters”) and select Update Driver.
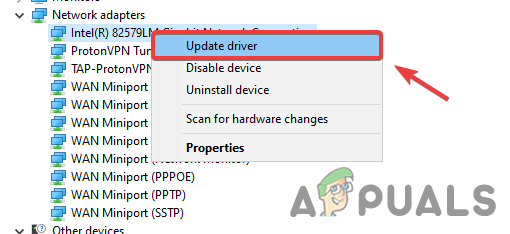
Updating Network Driver - If Windows finds a new driver, update to the latest version. Repeat this process for Human Interface Devices by expanding that section.
- Right-click USB Input Device in the list, and choose Update Driver.
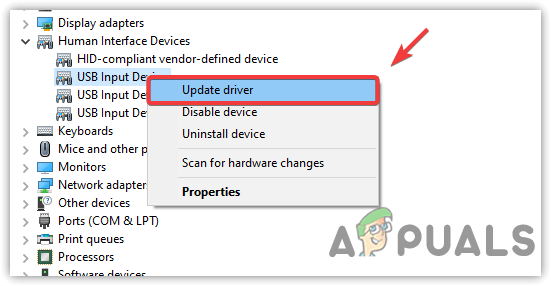
Updating Peripherals Driver - Also, update your audio drivers if listed.
- After updating all relevant drivers, restart your computer and check if the BSOD is resolved.
4. Uninstall Third-Party Antivirus Software
Third-party antivirus programs can sometimes interfere with essential Windows drivers and services, leading to conflicts and causing your system to crash. To rule this out, uninstall any third-party antivirus software:
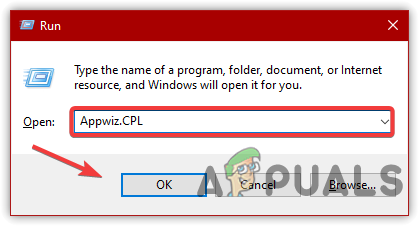
- Press Win + R to open the Run dialog box.
- Type appwiz.cpl and press Enter to open the Programs and Features window.
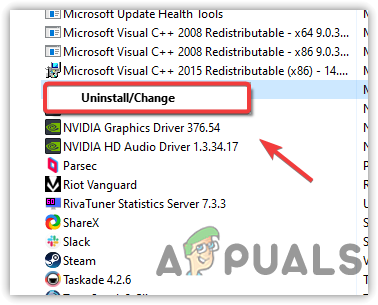
Navigating to Uninstall Programs Window - Find your antivirus application (like Malwarebytes), right-click it, and select Uninstall.
Uninstalling Malwarebytes Program - Restart your computer and see if the BSOD problem goes away.
5. Disable Overclocking
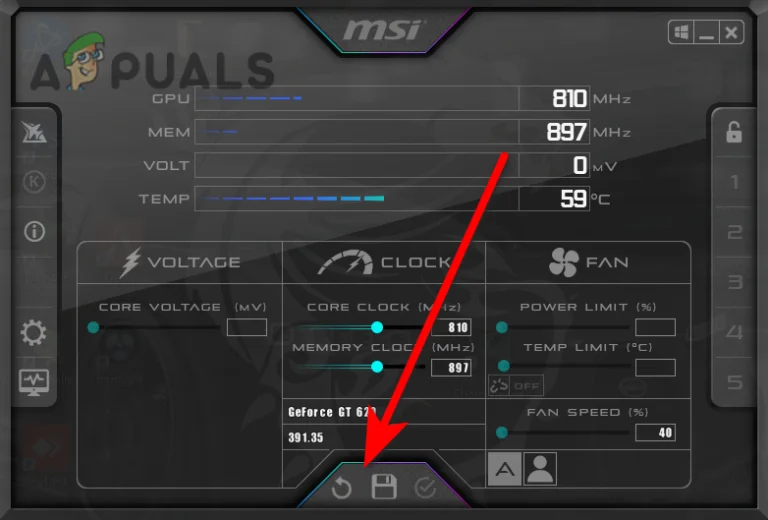
If you use any overclocking software on your system—for your graphics card, CPU, or RAM—overclocking can sometimes push hardware past safe limits, causing instability and BSOD errors. To fix this, either reset your overclock settings or uninstall the overclocking program.
- Open MSI Afterburner and click the Reset button to return all settings to default.
Resetting Overclock Graphics Card Settings - If you want to uninstall the program, press Win + I to open Windows Settings.
- Go to Apps & Features.
- Look for your overclocking software in the list.
- Select the software and click Uninstall.
- Confirm by clicking Uninstall again.
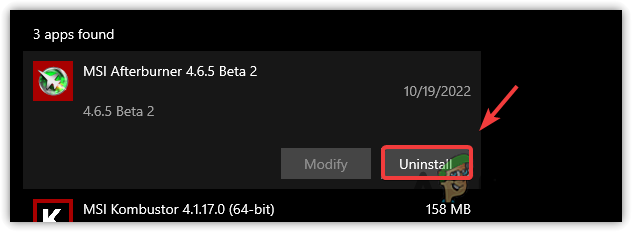
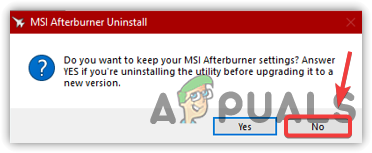
Uninstalling MSI Afterburner - If prompted to keep the overclock settings, click No.
Reverting Overclock Settings - Afterward, restart your computer and check if the issue has been fixed.
6. Use System Restore
If you’re still experiencing problems, restoring your computer to an earlier point when things were working fine can help. System Restore is usually already turned on by default, or some third-party programs create restore points before making changes.
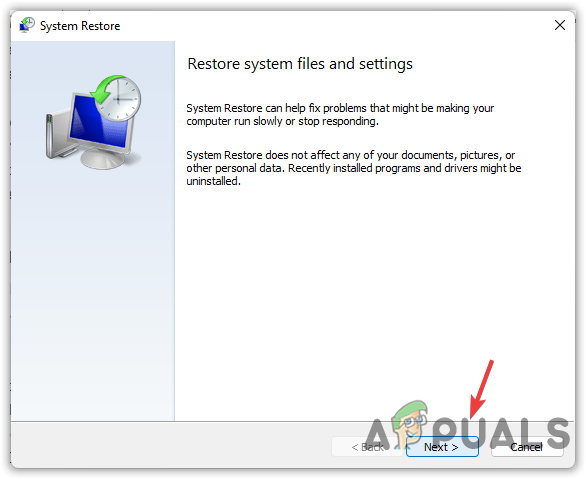
- Click the Start Menu and type rstrui.
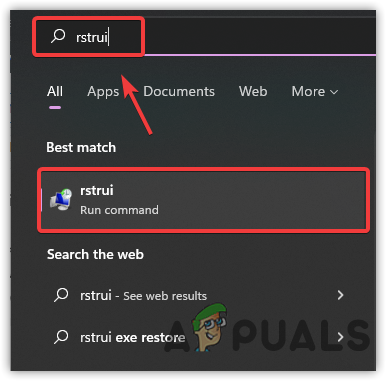
Opening System Restore Settings - Open the System Restore utility and click Next.
- Select a recent restore point and click Next.

Selecting Restore Point - Click Finish to begin the restore process. Your computer will restart and try to fix the problem automatically.
We’ve covered all the main solutions above to help you fix this issue. However, if none of the methods work, there may be a hardware problem with your system. You can confirm this by reinstalling or resetting Windows.


