How to Add or Remove the Manage Item on Context Menu?
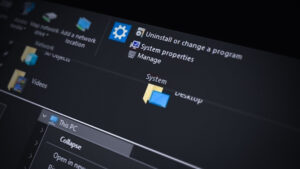
The Manage item in the context menu of File Explorer opens the Computer Management tool window. This shortcut is helpful for quickly accessing Computer Management without having to search for it in the Windows search bar. However, this shortcut isn’t necessary for every user. For example, administrators or parents might want to hide this option from the File Explorer context menu, which will also remove the Manage icon from the File Explorer menu. Keep in mind, this won’t disable Computer Management completely—users can still access it through other means.
In this article, we’ll guide you through the steps to add or remove the Manage item from File Explorer’s context menu.
The Group Policy Editor isn’t available in every version of Windows 10, so we’ve included both Group Policy and Registry methods below. The instructions will mainly focus on removing the Manage item, but we’ll also explain how to add it back at the end of each method.
1. Use the Local Group Policy Editor
The Group Policy Editor is a Windows feature with various advanced settings for your system. The setting we’ll use in this method is under the User Configuration category. The Group Policy Editor is easier and safer to use than the Registry Editor—just navigate to the correct setting and enable or disable it.
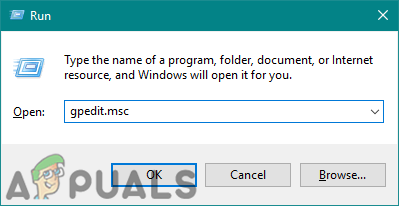
- Press the Windows key and R together to open the Run dialog. Type “gpedit.msc” and press Enter to open the Local Group Policy Editor.
Opening the Group Policy Editor - In the Local Group Policy Editor, go to:
User Configuration\ Administrative Templates\ Windows Components\ File Explorer\
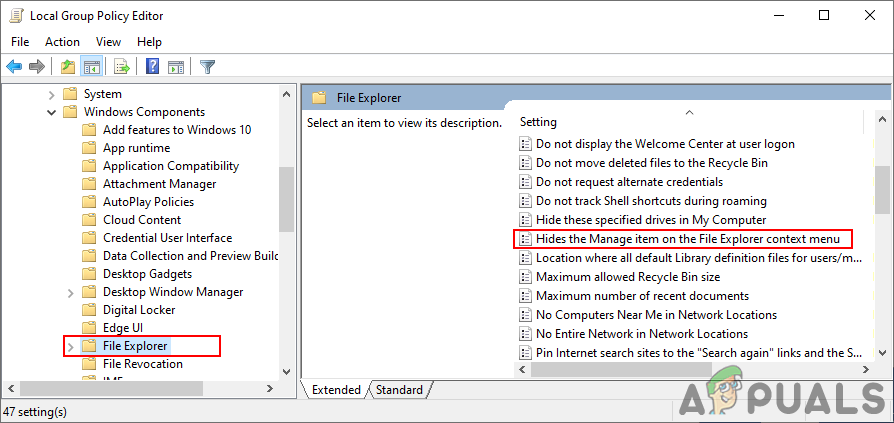
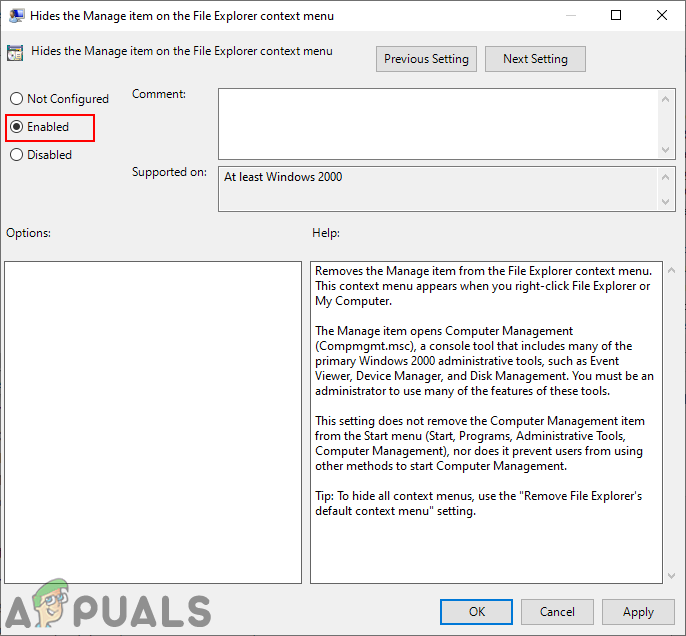
Navigating to the setting - Double-click the setting called “Hide the Manage item on the File Explorer context menu“. In the window that opens, set it to Enabled.
Enabling the setting - Click Apply and OK to save your changes. In most cases, the group policy will apply the new settings automatically. You may need to close and reopen File Explorer to see the changes.
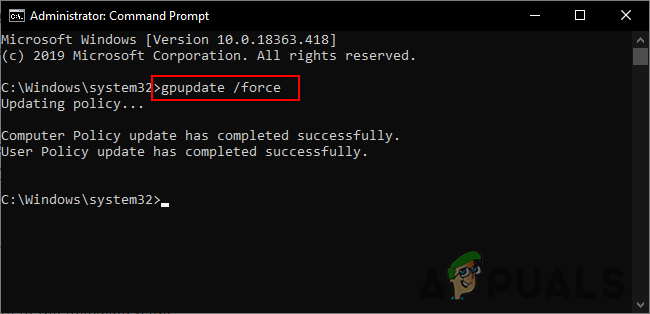
- If you don’t see the change right away, you can force the update. Search for Command Prompt in your Windows search bar, right-click, and select Run as administrator.
- Type the following command in the Command Prompt (Admin) window and press Enter:
gpupdate /force
Force updating the Group Policy - To add the Manage item again at any time, go back to step 3 and set the option to either Not Configured or Disabled.
2. Use the Registry Editor
The Windows Registry is another way to hide the Manage item in the File Explorer context menu. If you’ve already used the Group Policy method above, those changes will show up here. Otherwise, you’ll need to add or edit a Registry value manually. This method works for all Windows versions, including Windows Home.
Note: The instructions include a step to create a Registry backup. This step is optional, but recommended if you want to be able to undo any changes.
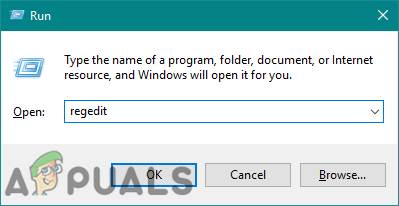
- Press Windows + R to open the Run dialog. Type “regedit” and press Enter to open the Registry Editor. If you receive a User Account Control (UAC) prompt, click Yes.
Opening the Registry Editor - If you want, you can create a Registry backup before making any changes. Go to the File menu at the top, choose Export, then choose a file name and save location. Click Save.
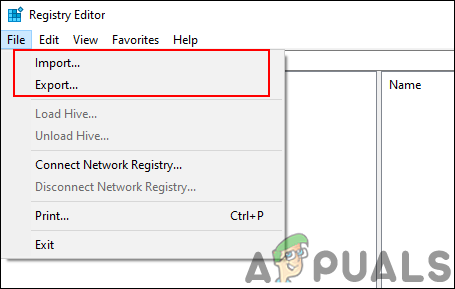
Creating the Registry Backup Note: If you ever want to restore your backup, go to the File menu and pick Import, then select the backup file.
- Now, in the Registry Editor, navigate to this location:
HKEY_CURRENT_USER\Software\Microsoft\Windows\CurrentVersion\Policies\Explorer
Note: If some parts of the path don’t exist, right-click the existing folder, choose New > Key, and create the missing parts.
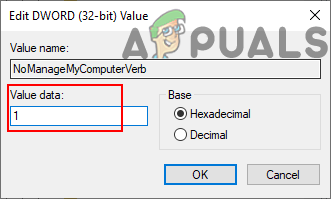
- In the right-side panel, right-click and choose New > DWORD (32-bit) Value. Name it “NoManageMyComputerVerb“.
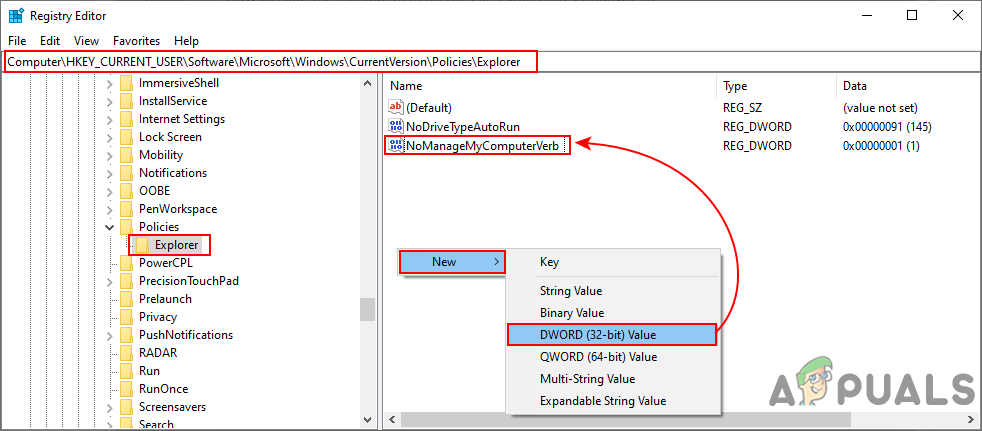
Creating a new value in Registry - Double-click the NoManageMyComputerVerb value you just created, and set its value data to 1.
Changing the value data - When you’re finished, restart your computer to apply the changes.
- If you want to add the Manage item back, change the value data back to 0, or simply delete the NoManageMyComputerVerb entry from the Registry Editor.


