How to Fix Action Center Not Opening in Windows 11?
Clicking the taskbar icons or pressing Win+A sometimes does nothing, making it impossible to open the Action Center in Windows 11 for quick settings or notifications. This problem usually happens when the Action Center stops responding because of system errors or incorrect settings.
The most common reason is that the Action Center has been turned off in Group Policy or in the registry. Other possible reasons include a damaged user profile, problems with the Explorer process, or corrupted system files.
Now that we’ve gone over the possible causes, let’s walk through the different methods you can use to fix the issue.
1. Restart Windows Explorer
The first thing you should try is restarting the Windows Explorer process. Windows Explorer handles your desktop, file management, and the taskbar, so if it isn’t working properly, you may encounter issues like the action center not opening.
- Right-click the Windows icon on your taskbar, then select Task Manager from the menu.
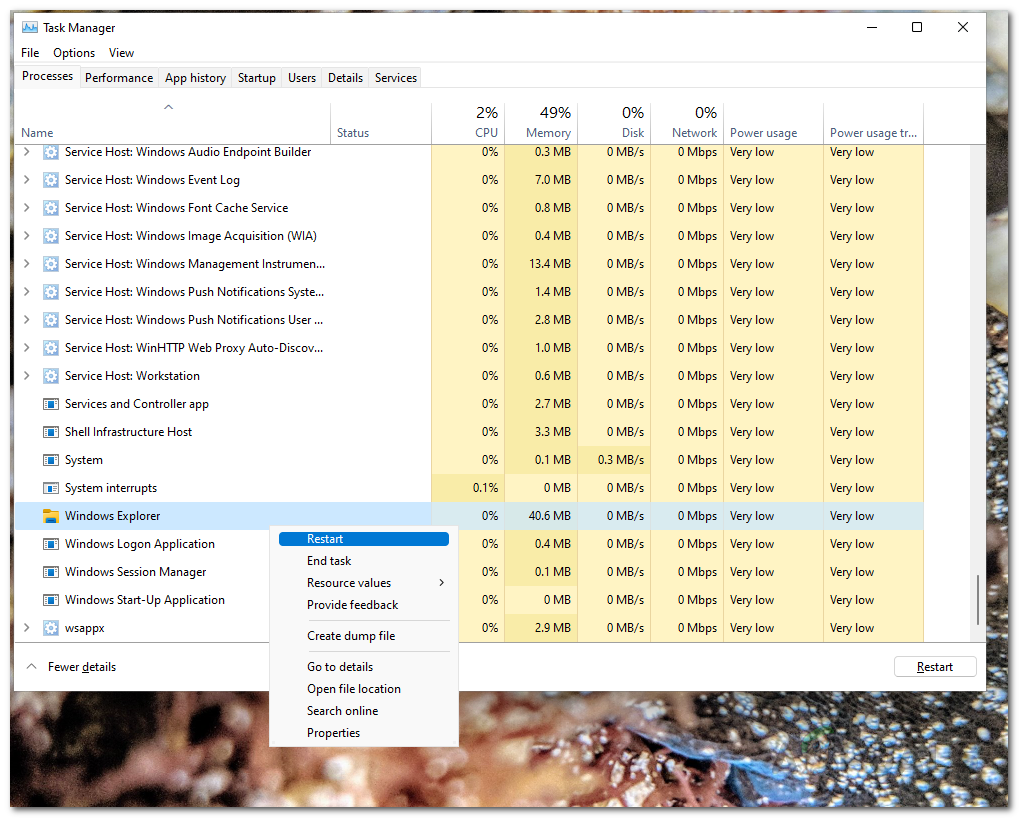
Opening up Task Manager - In Task Manager, find the Windows Explorer process under the Processes tab.

Looking for Windows Explorer Process - Right-click on Windows Explorer and select Restart from the drop-down menu.
Restarting Windows Explorer Process - Wait for Windows Explorer to restart. After it reloads, check if the action center is now working.
2. Enable Action Center via Local Group Policy Editor
In some cases, the action center won’t open because it’s been disabled through system policies. You can re-enable it through the Local Group Policy Editor.
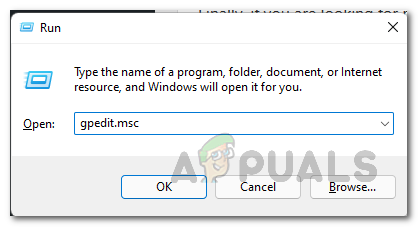
- Open the Run dialog by pressing Windows key + R on your keyboard.
- Type gpedit.msc and hit Enter.
Opening up Local Group Policy Editor - In the Local Group Policy Editor, navigate to:
User Configuration > Administrative Templates > Start Menu and Taskbar
- On the right side, find the policy named Remove Notifications and Action Center.
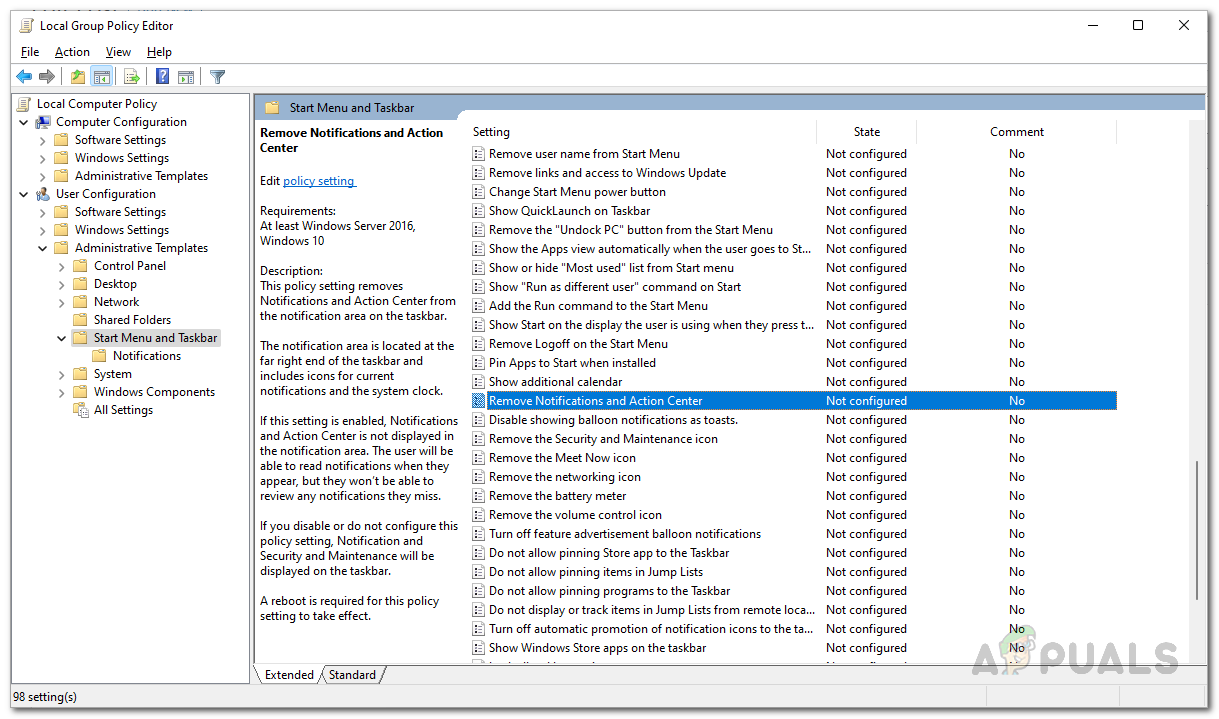
Locating Remove Notifications and Action Center Policy - Double-click this policy to open it.
- Select Disabled and then click Apply.
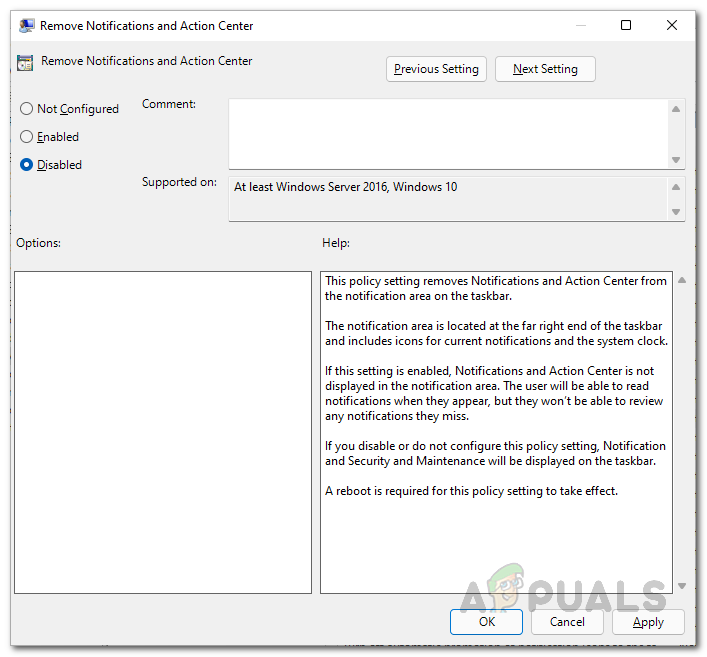
Editing Remove Notifications and Action Center Policy - Restart your computer for the changes to take effect.
- After restarting, check if the problem is solved.
3. Enable Action Center via Windows Registry
You can also enable the action center through the Windows Registry. The registry controls many of the behaviors of your computer, so it’s a good idea to backup your registry before making any changes.
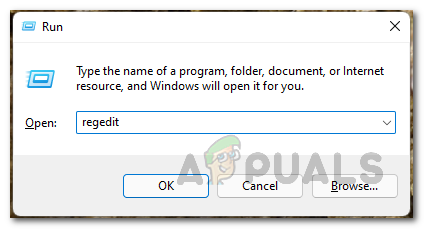
- Open the Run dialog by pressing Windows key + R.
- Type regedit and press Enter.
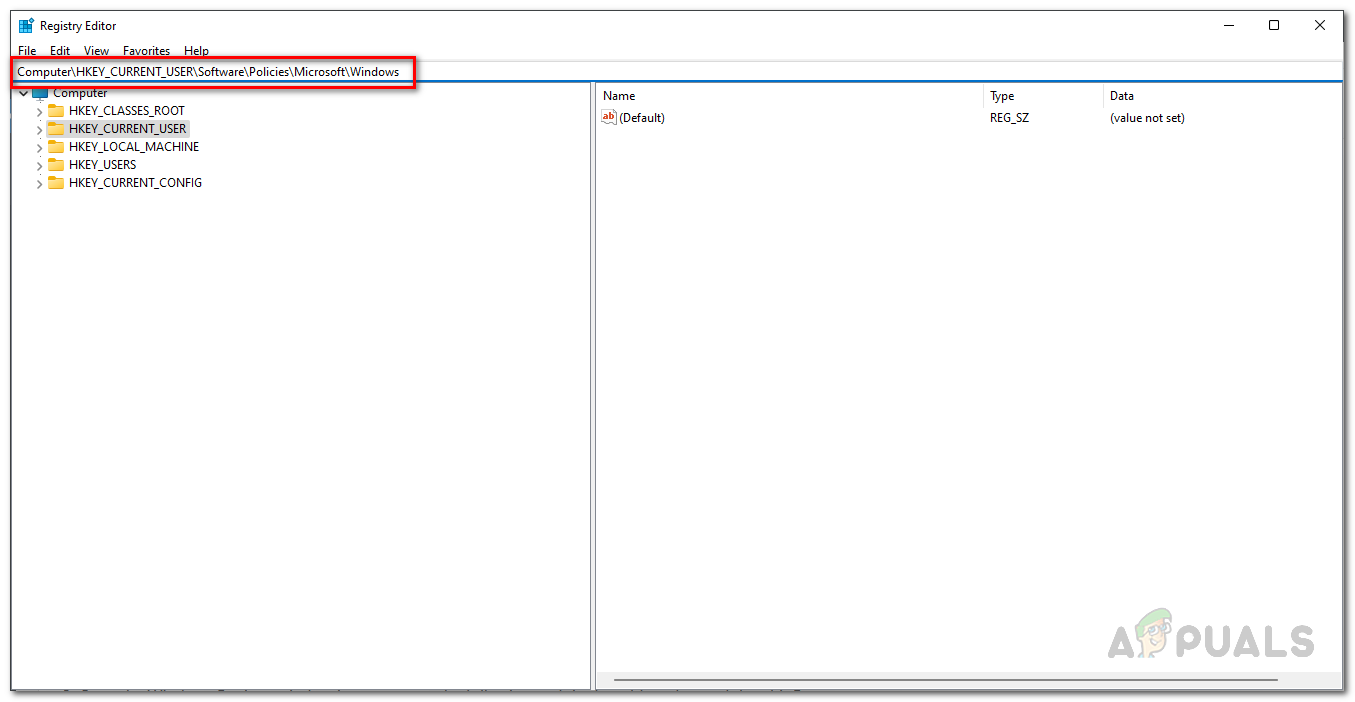
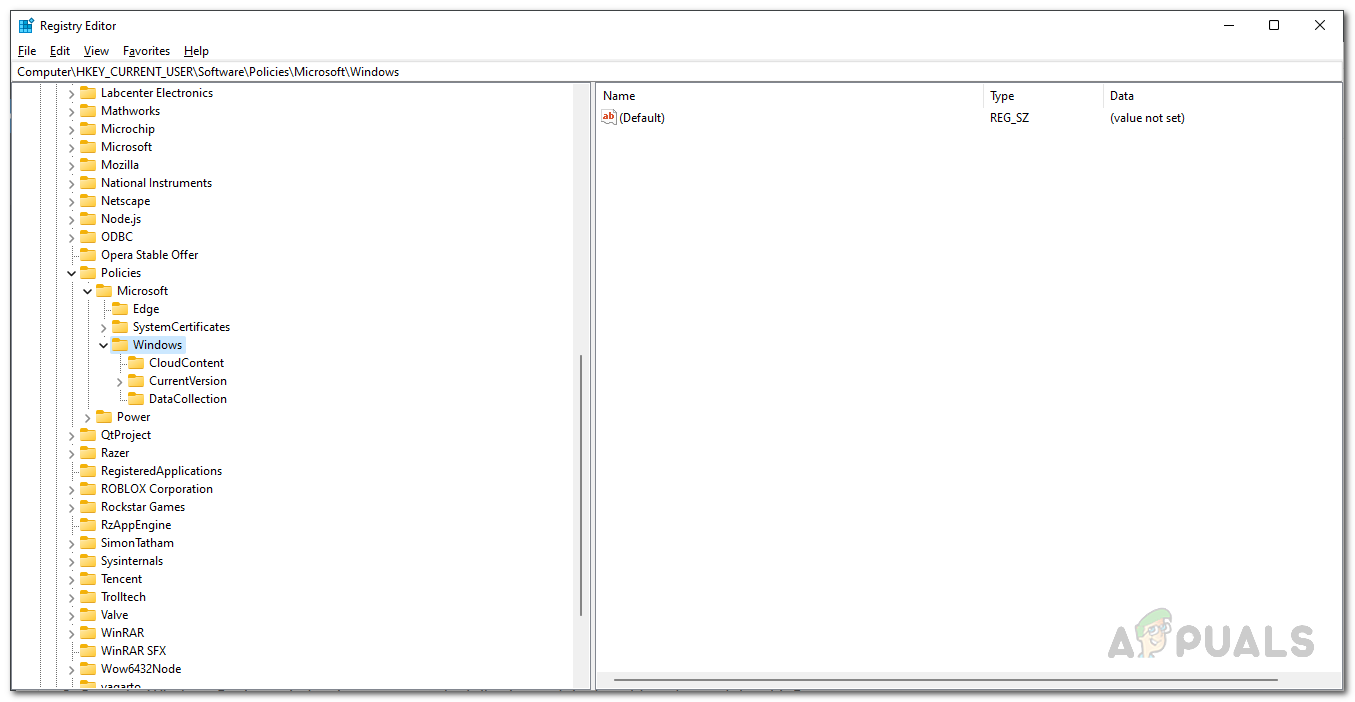
Opening up Windows Registry - In Windows Registry, copy and paste this path into the address bar, then press Enter:
Computer\HKEY_CURRENT_USER\Software\Policies\Microsoft\Windows
Navigating to Appropriate Location - Now, look under the Windows key to see if you have an Explorer key.
Looking for Explorer Key - If there isn’t one, right-click on Windows and choose New > Key.
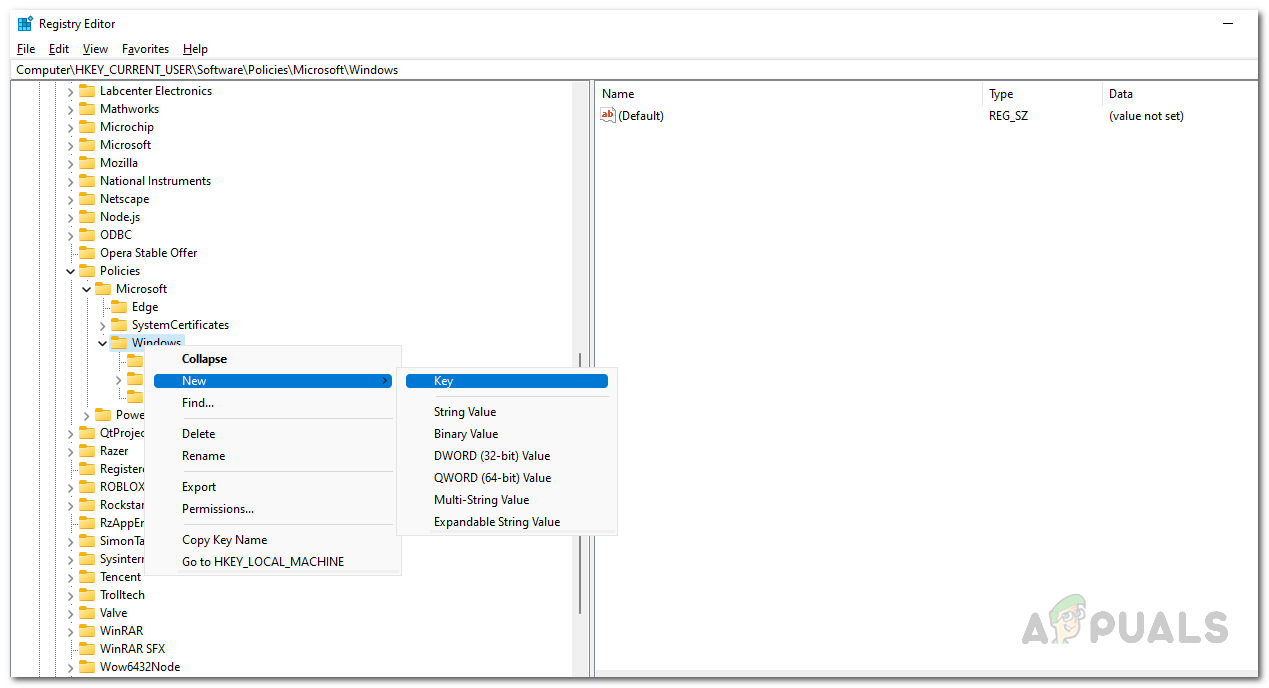
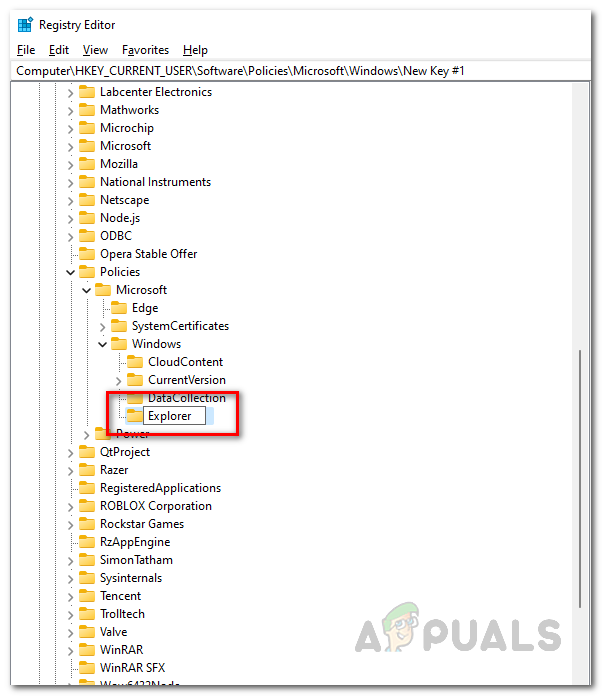
Creating Windows Key - Name the new key Explorer.
Renaming the New Key - Right-click the Explorer key, then select New > DWORD (32-bit) Value.
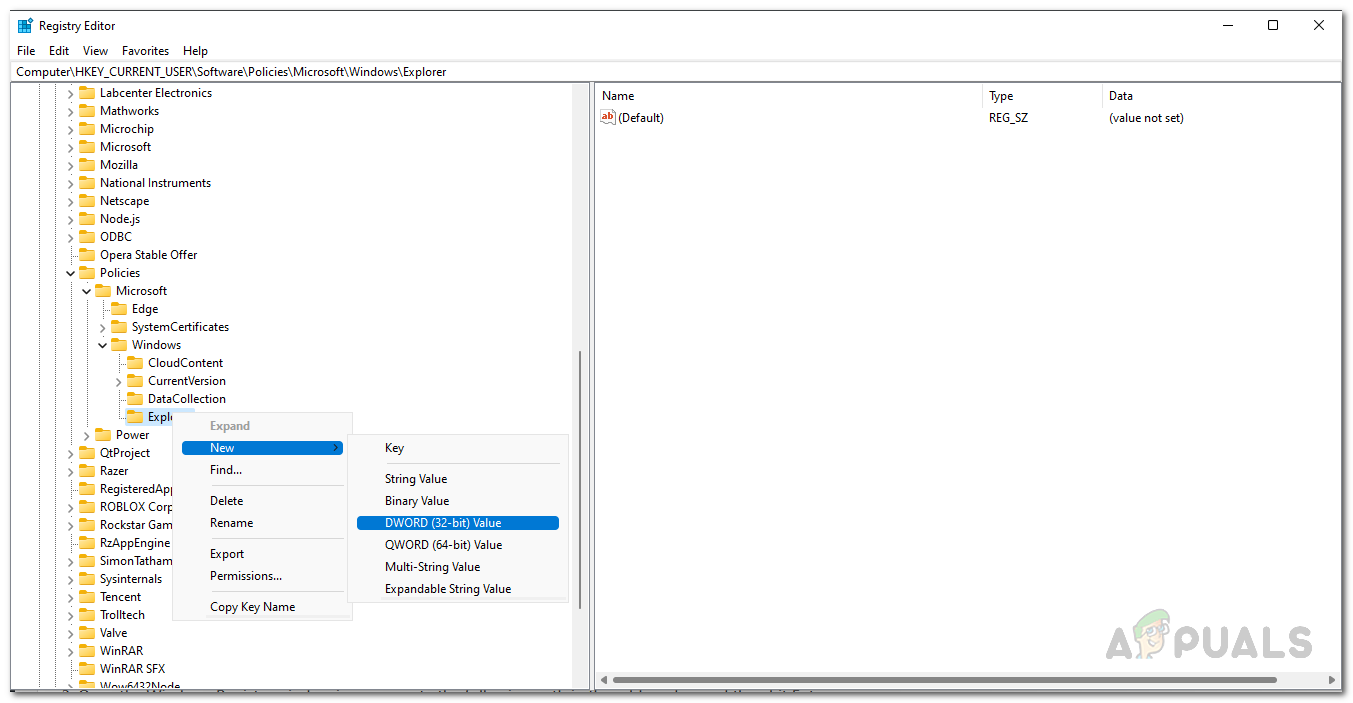
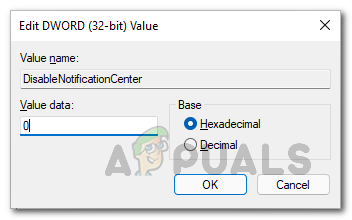
Creating Explorer Key - Name the value DisableNotificationCenter.

Renaming the New Key - Double-click DisableNotificationCenter and set the value to 0. Click OK.
Changing DisableNotificationCenter Value to 0 - Restart your computer for the changes to take effect. After your system boots up again, check if the action center is working now.
4. Repair Windows Apps
As mentioned earlier, corrupted Windows apps can cause the action center to stop working. You can repair Windows apps using PowerShell.
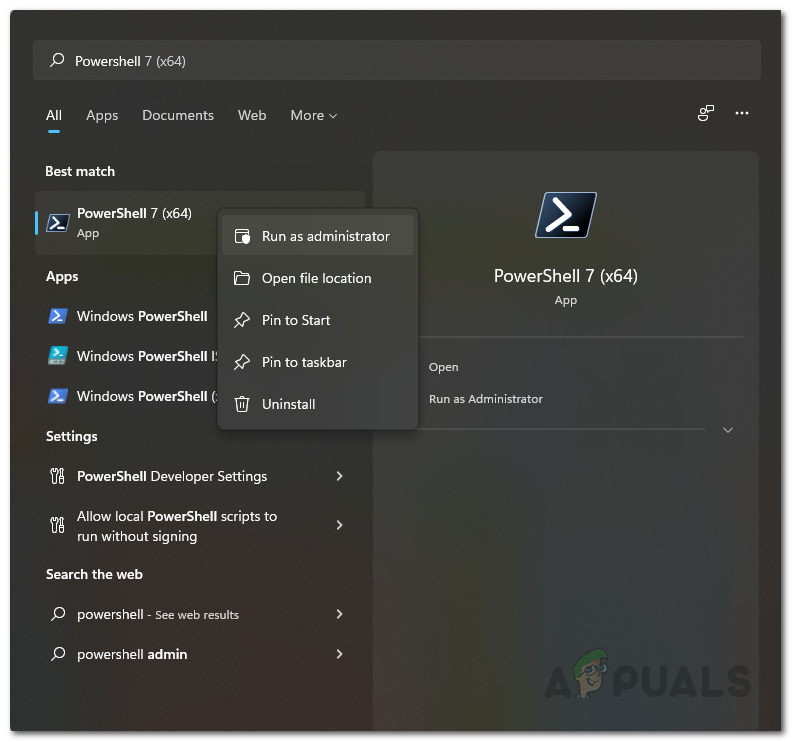
- Open PowerShell with administrator rights. Search for Powershell in the Start Menu, right-click on it, and select Run as administrator. Alternatively, you might see the option on the right panel.
Opening up Powershell - In the PowerShell window, copy and paste the following commands one at a time to repair the apps:
Get-AppxPackage Microsoft.Windows.ShellExperienceHost | foreach {Add-AppxPackage -register "$($_.InstallLocation)\appxmanifest.xml" -DisableDevelopmentMode} Get-AppXPackage | Foreach {Add-AppxPackage -DisableDevelopmentMode -Register "$($_.InstallLocation)\AppXManifest.xml"} - After both commands have run, restart your computer.
- Once your computer boots up, check if the action center has started working.
5. Create a New User Account
If none of the previous solutions worked, your user account itself might be corrupted. In this case, creating a new user account can resolve the issue.
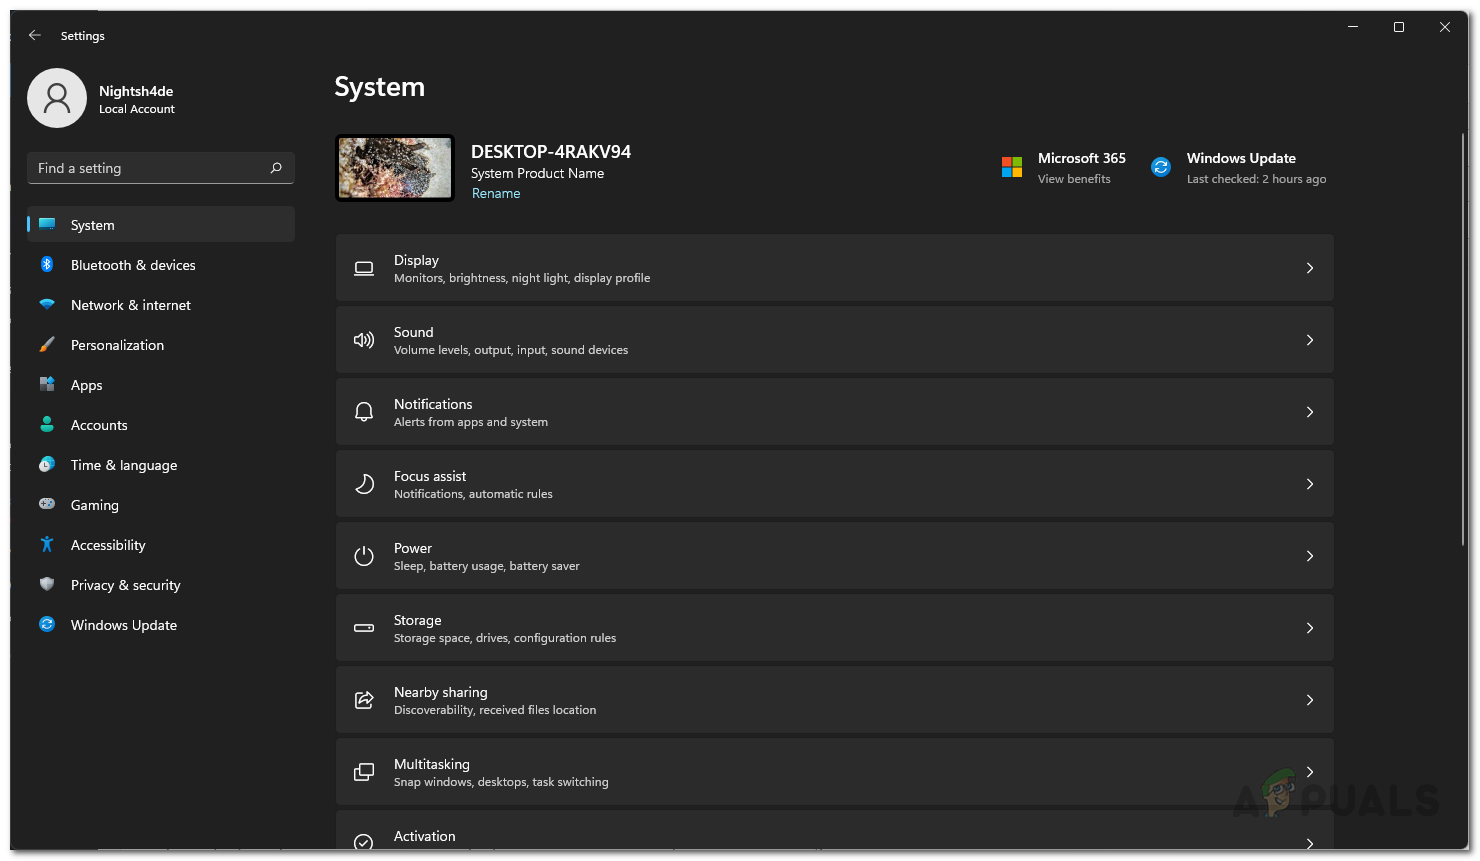
- Open the Windows Settings by pressing Windows key + I on your keyboard.
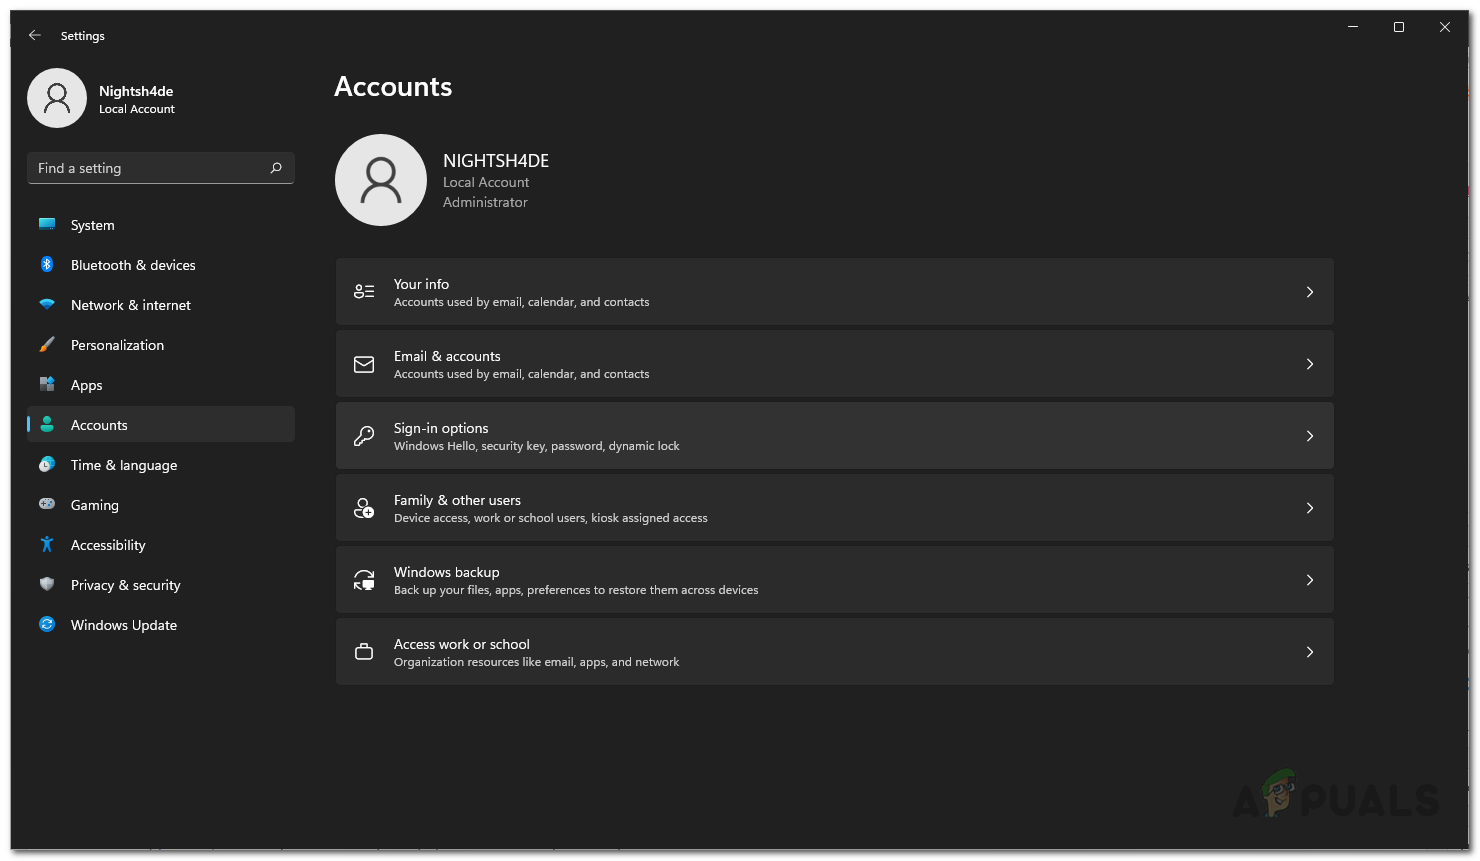
- On the Settings page, select Accounts from the menu on the left.
Windows Settings - Next, click Family & other users under the Accounts section.
Accounts Settings - Under Other users, click the Add account button.

Adding New User Account - A window titled “Microsoft account” will appear. Click I don’t have this person’s sign-in information.
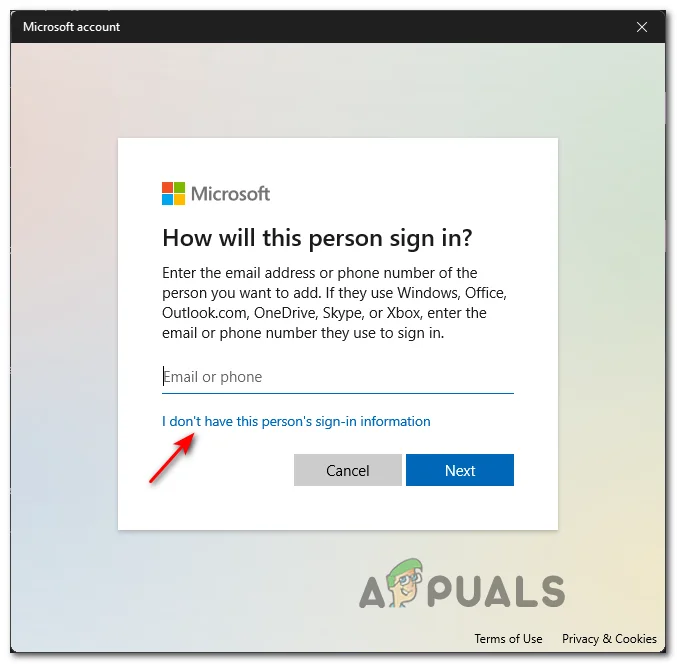
Creating Local Account - On the next page, select Add a user without a Microsoft account.
- On the “Create a user for this PC” screen, enter the username and password for the new account, then click Next.
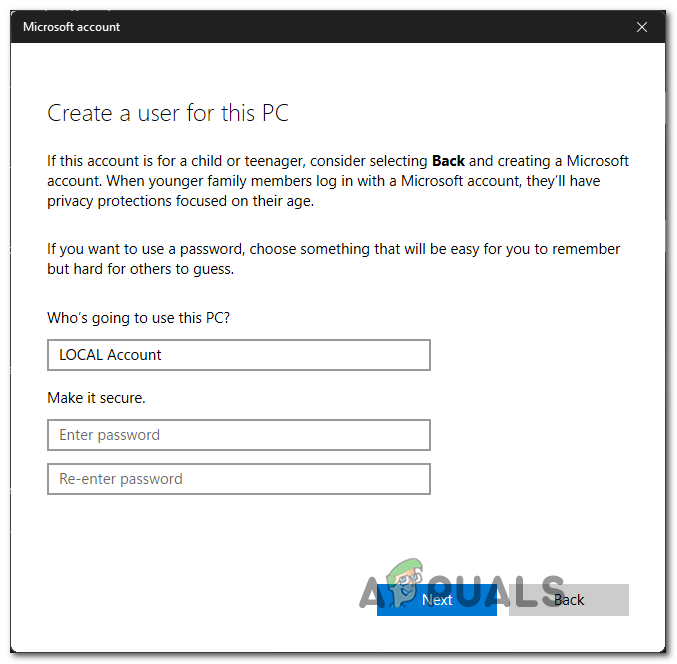
Creating a New User Account - Wait for the account to be created, and then click Next to finish.


You are a God. The regedit method fixed it for me. Apparently the Windows Action Center was set to (1), disabled. I changed it to (0). This fixed it for me. Finally!