How to Fix “Account Connection Failed” in Alan Wake 2
 Reviewed by Huzaifa Haroon
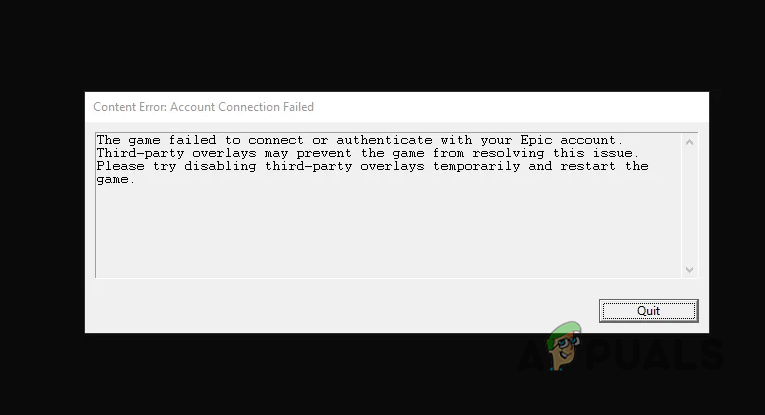
The error message, “Account Connection Failed,” appears when the game cannot connect to your Epic Games account. This may happen if third-party programs interfere with Alan Wake 2 on your computer.
In some instances, you may encounter the “MENU_AUTHENTICATION_FAILED_EPIC” error message. This is essentially the same as the account connection failure issue. The methods outlined below can also be applied to resolve the MENU_AUTHENTICATION_FAILED_EPIC message.
To resolve the issue, ensure the game can connect to your Epic Games account; this will allow uninterrupted gameplay.
In this article, we will guide you through several simple solutions to resolve the ‘account connection failed’ issue.
1. Launch Epic Games as Administrator
You should start off by running the Epic Games Launcher as an admin when stumbling upon the account connection failed error message. This will grant the launcher administrative privileges which the game process will be able to inherit directly from the parent.
Providing the game process with adequate permissions often resolves connectivity issues. It’s easy to do. Please follow the instructions below:
- First, open the Start Menu and search for the Epic Games Launcher.
- Then, click the Run as administrator option on the right.
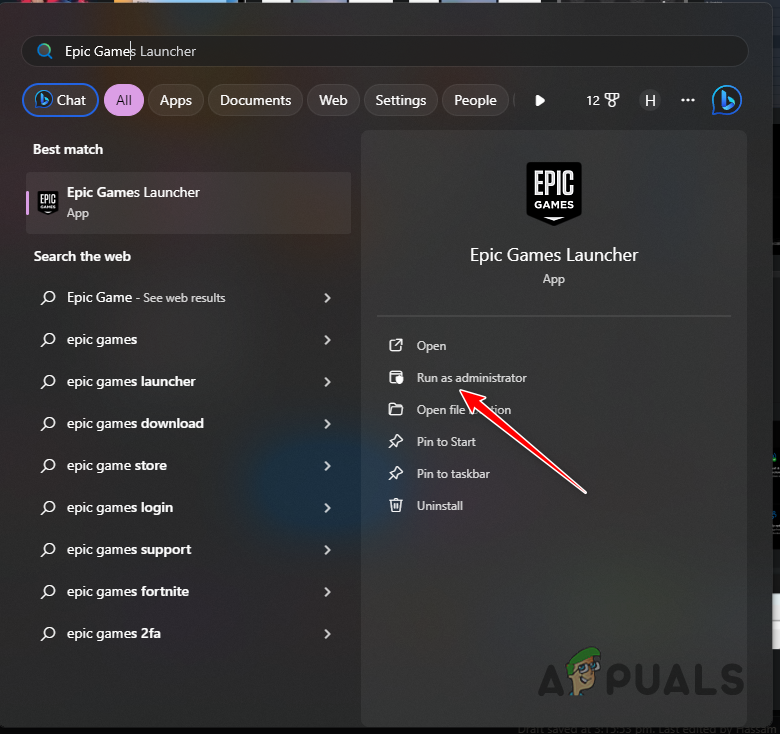
Running Epic Games Launcher as Admin - When prompted with the User Account Control box, click Yes.
- See if that resolves the issue.
2. Remove Third-Party Overlays
Third-party apps on your computer may include an in-game overlay. However, the integration of third-party software with game files can sometimes lead to issues.
In this scenario, you need to disable any third-party overlays on your PC that interfere with Alan Wake 2 game files. This includes apps like Discord, GeForce Experience, MSI Afterburner, or other programs with an overlay.
To disable the overlays for Discord and GeForce Experience, follow the instructions below:
2.1. Discord
- Open the Discord program.
- Then, click on the Settings icon in the bottom left.

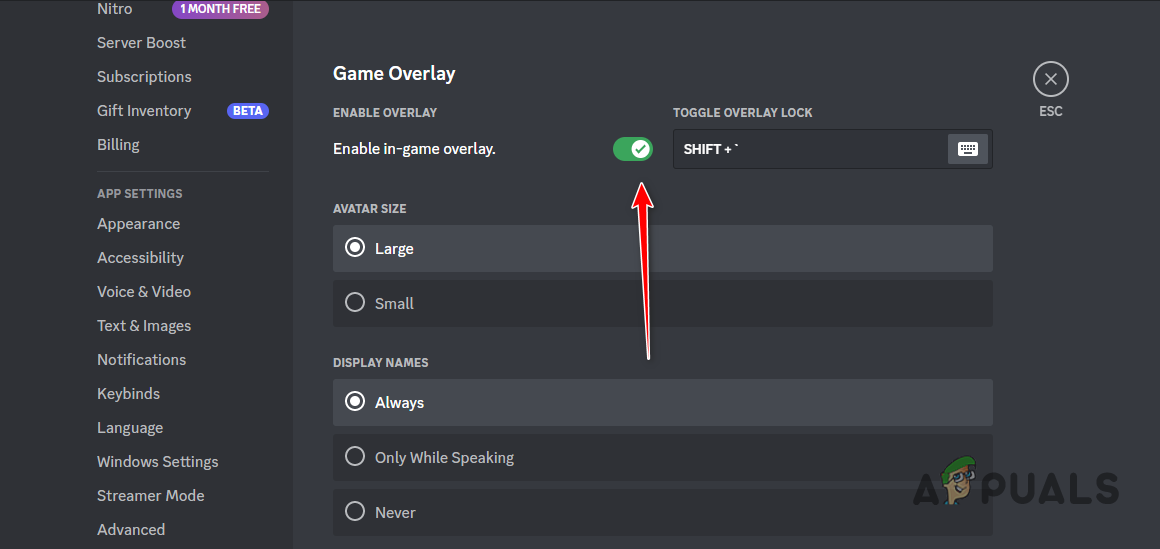
Opening Discord Settings - After that, jump to the Game Overlay tab.
- Use the provided slider to disable the in-game overlay.
Disabling In-game Overlay
2.2. GeForce Experience
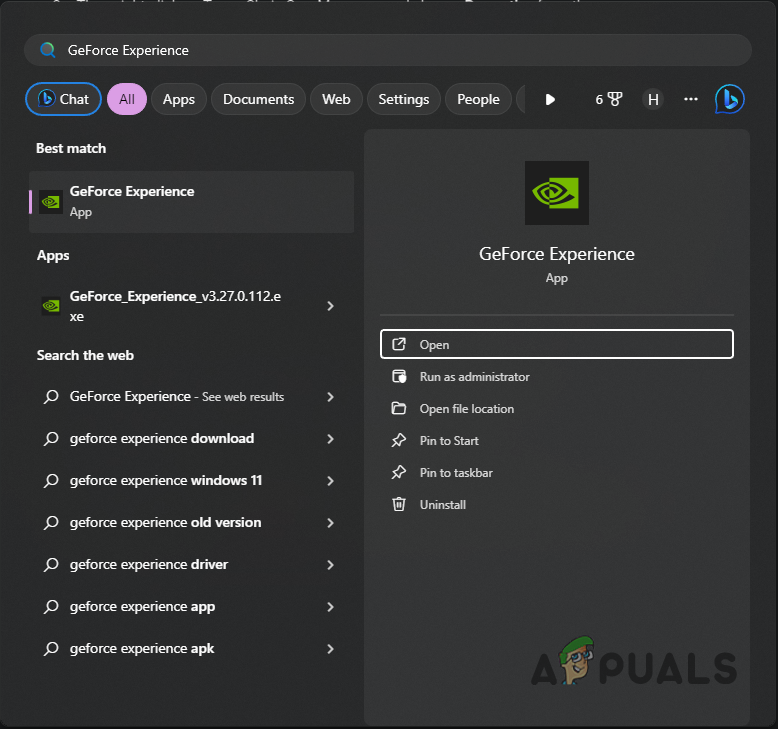
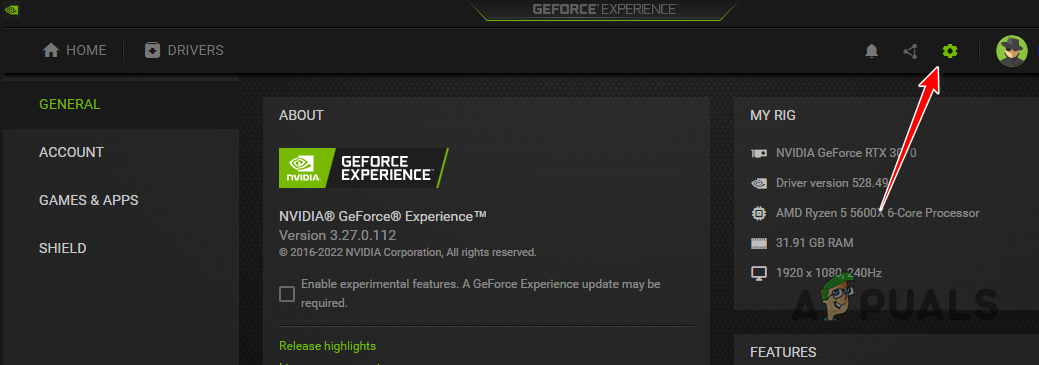
- Open GeForce Experience by searching for it in the Start Menu.
Opening GeForce Experience - Then, click on the Settings icon in the top right.
Opening GeForce Experience Settings - After that, click the Overlay slider to disable it.
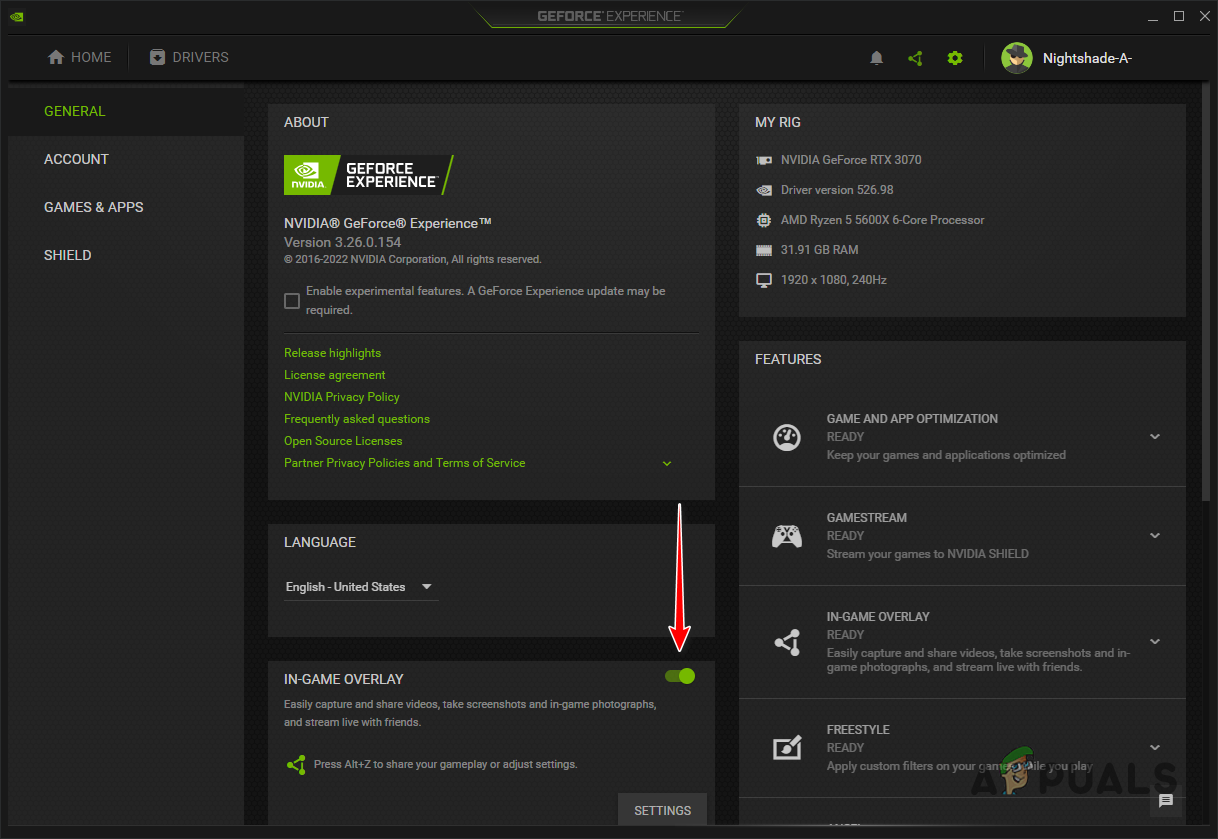
Disabling In-game Overlay
3. Disconnect VPN Connection
Using a VPN on your computer can disrupt the connection with Alan Wake 2 and your Epic Games account. The common connectivity problems with VPN servers arise from the need to tunnel your connection through several servers.
Accordingly, disconnect your VPN connection and check if this resolves the issue. To disconnect a VPN connected to Windows, follow these instructions:
- First, open the Settings app via the Windows key + I shorthand.
- Then, go to the Network and Internet > VPN option.
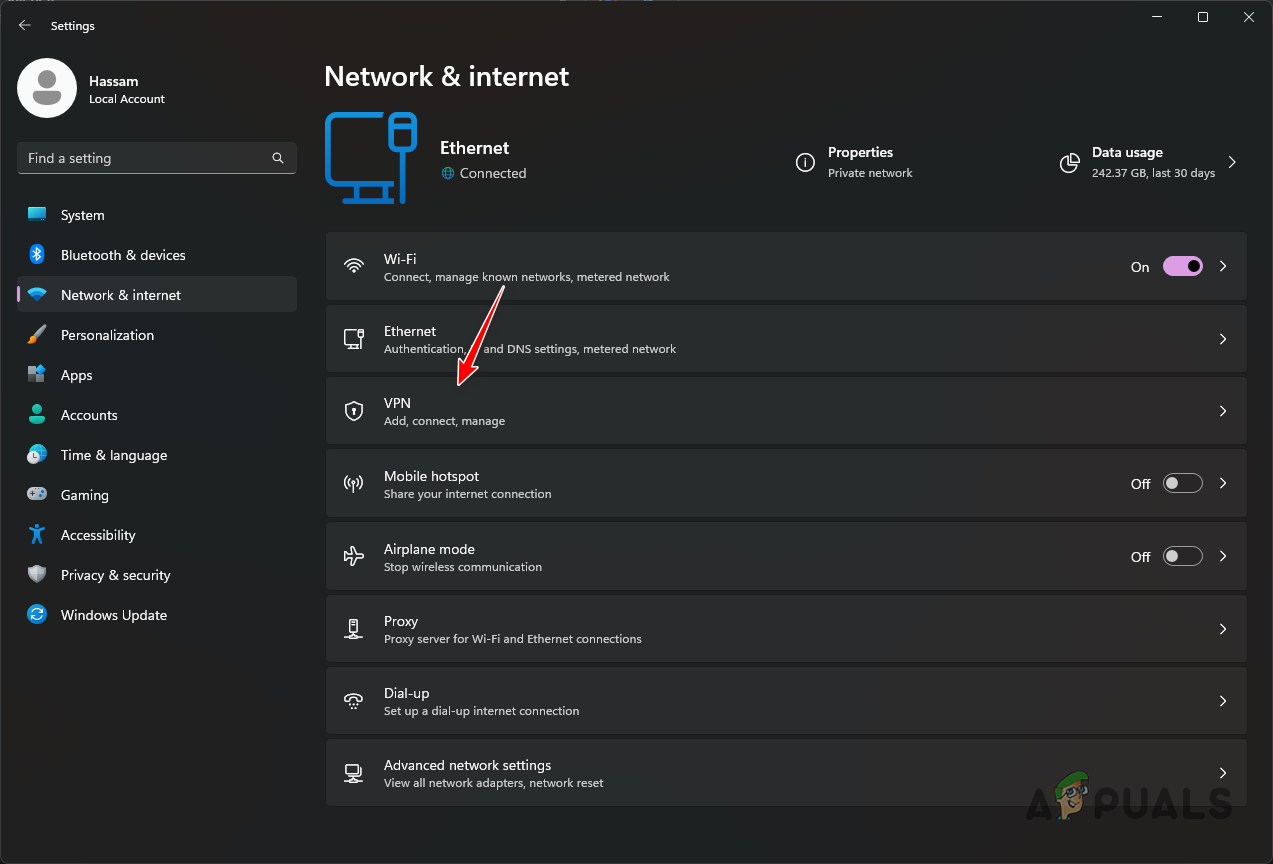
Opening VPN Settings - After that, click the Disconnect option next to your VPN connection.
4. Change DNS Server
Your network’s DNS server can affect your computer’s connectivity. This is because DNS servers convert domain names into corresponding IP addresses, which are then used for server connection.
If the DNS server cannot translate your connection due to an inconsistency, you’ll need to switch to a different DNS server. You can make this change in your Windows Network settings using the instructions below:
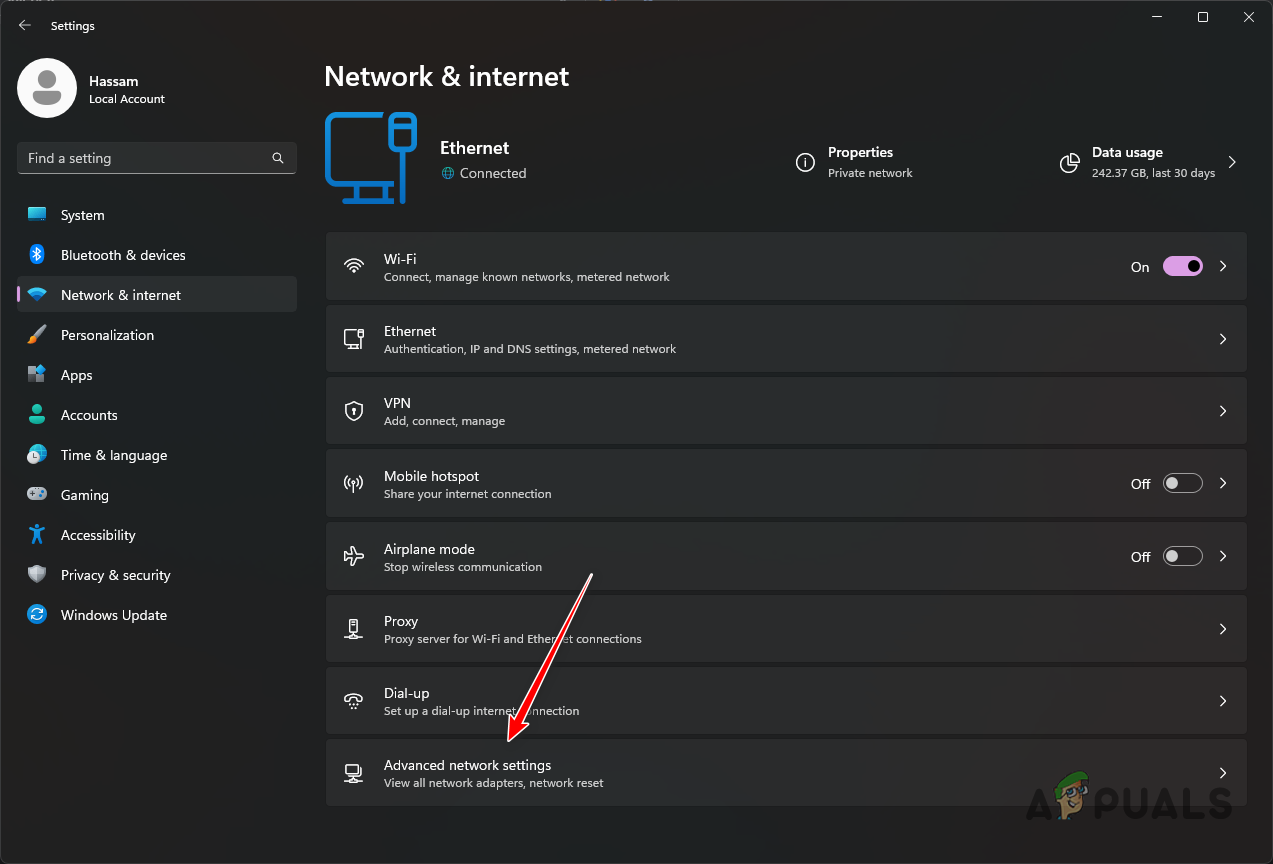
- First, open the Settings app with the Win key + I shortcut.
- After that, navigate to Network and Internet > Advanced network settings.
Opening Advanced Network Settings - Then, click the arrow next to your network adapter to reveal more options.
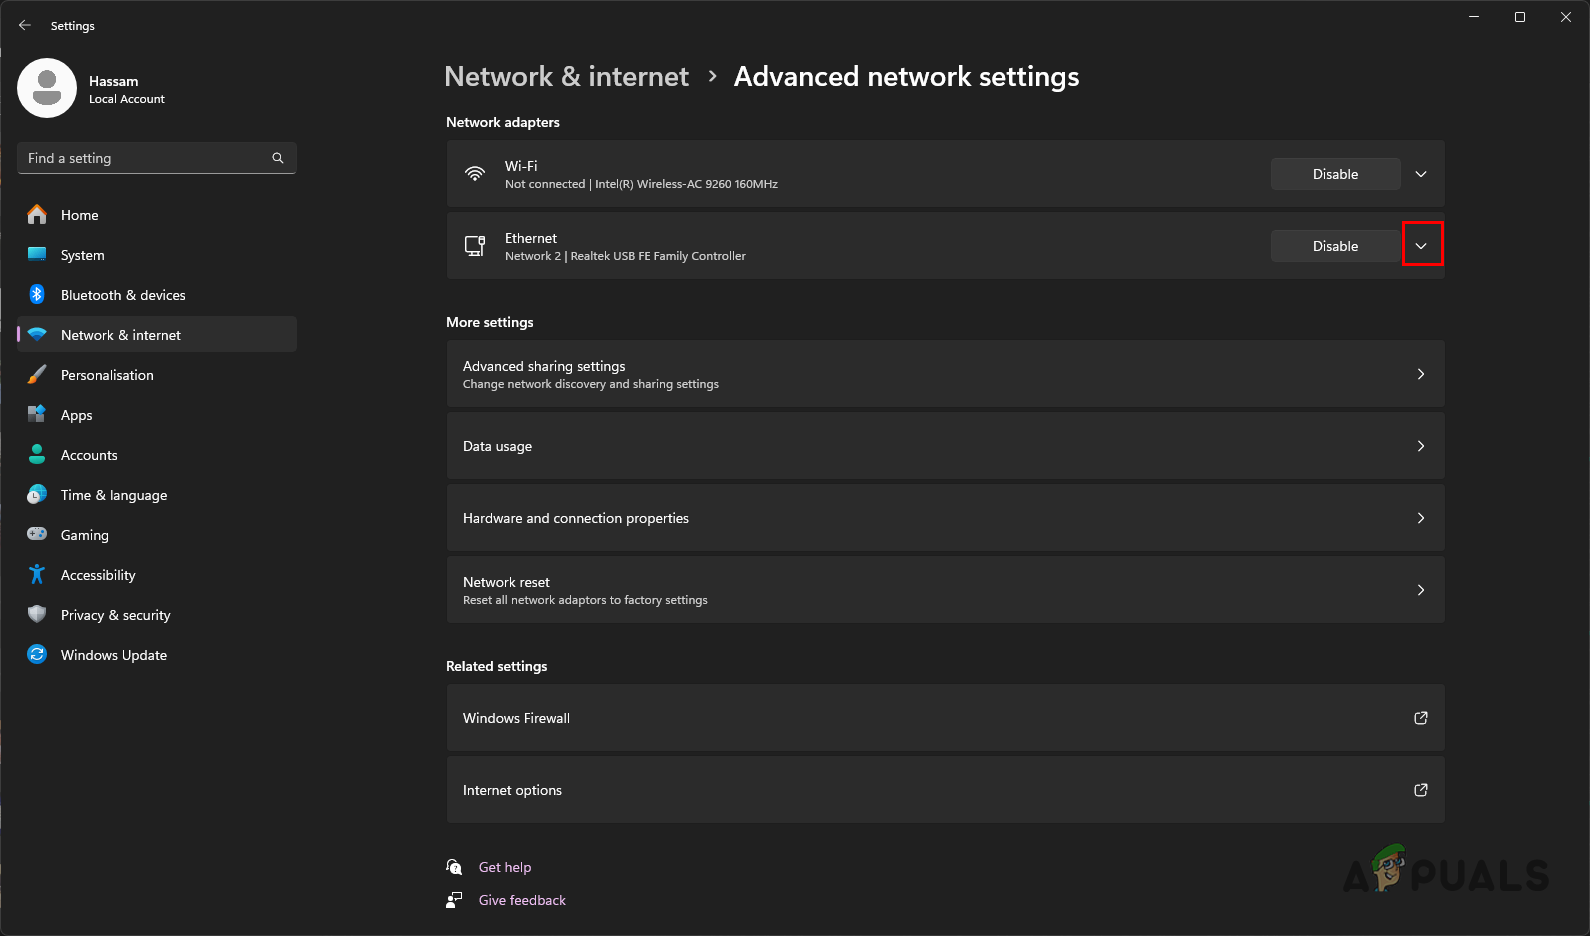
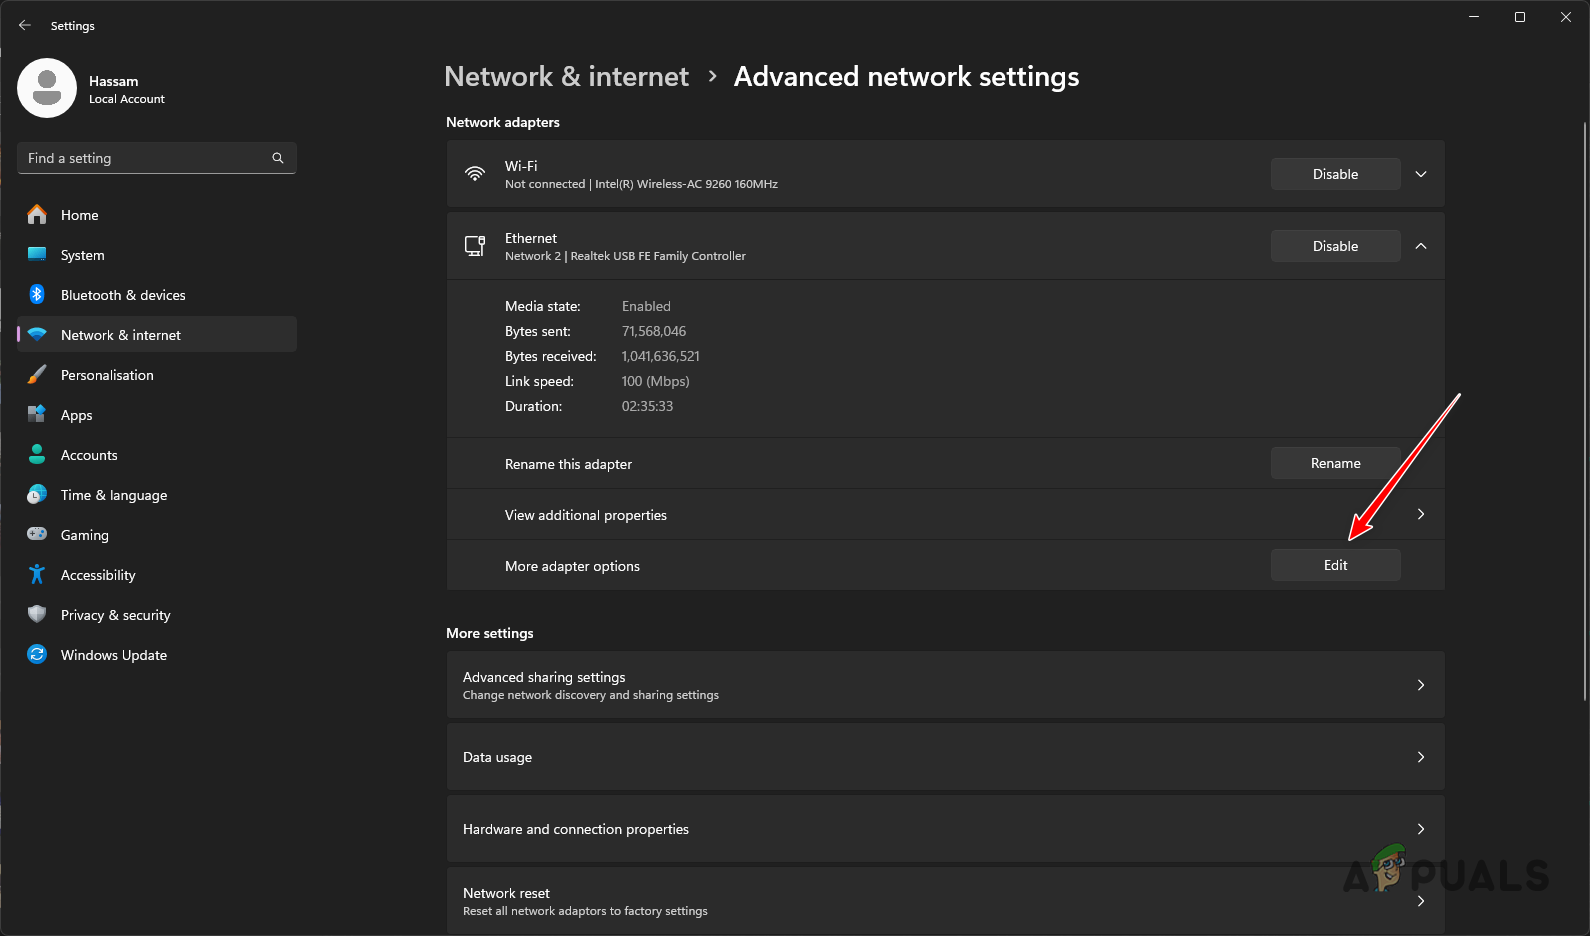
Revealing Network Adapter Options - Click the Edit button next to More adapter options.
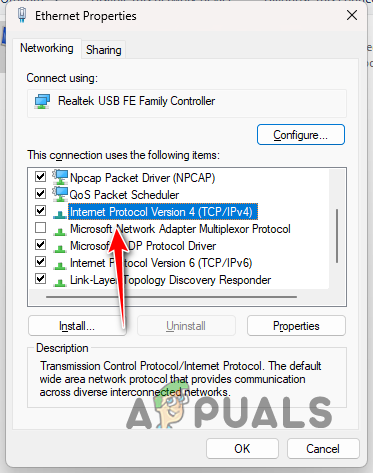
Editing Network Adapter Options - After that, double-click on the Internet Protocol Version 4 (TCP/IPv4) option.
Opening IPv4 Properties - Select the Use the following DNS server addresses option.
- Now, enter Google or Cloudflare’s DNS servers in the fields.
Google: 8.8.8.8 8.8.4.4
Cloudflare: 1.1.1.1 1.0.0.1
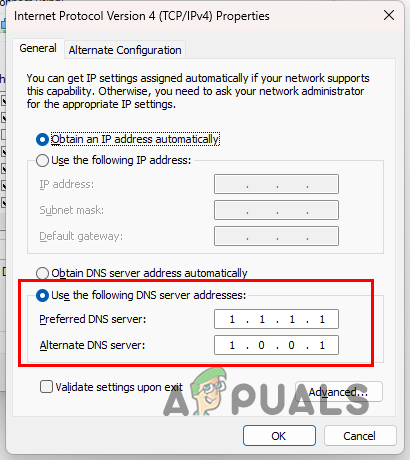
Changing DNS Server - Once you do that, click OK.
- Restart the Epic Games Launcher and open Alan Wake 2.
- See if the problem persists.
5. Reset Network Settings
If changing the DNS server doesn’t resolve the issue, your system’s network configuration may be the cause. In this case, you’ll need to reset the Windows network settings to default.
This will uninstall all network adapters, including third-party and VPN connections, from your system. If using WiFi, you will need to reconnect as the connection will be lost.
To reset your network settings, follow these instructions:
- Use the Windows key + I to open the Settings app.
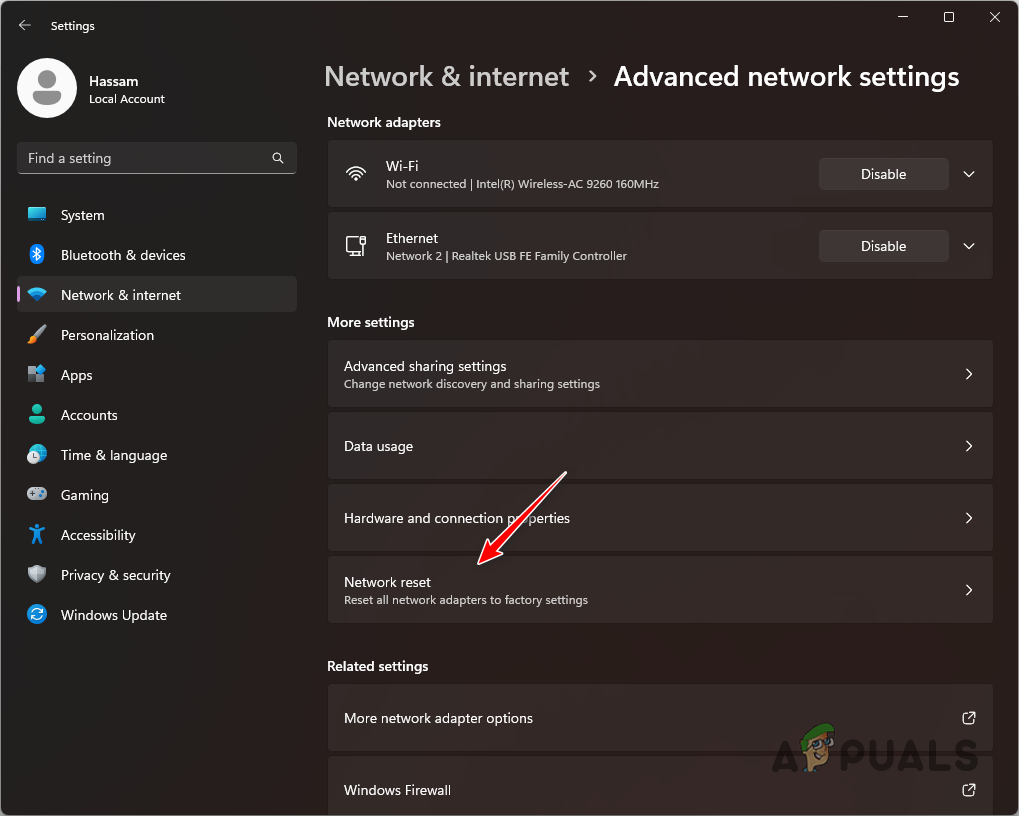
- Then, in the Settings app, go to the Network and Internet > Advanced network settings.
Opening Advanced Network Settings - In the Advanced network settings menu, click on Network Reset.
Navigating to Network Reset - Finally, click the Reset now option to proceed.
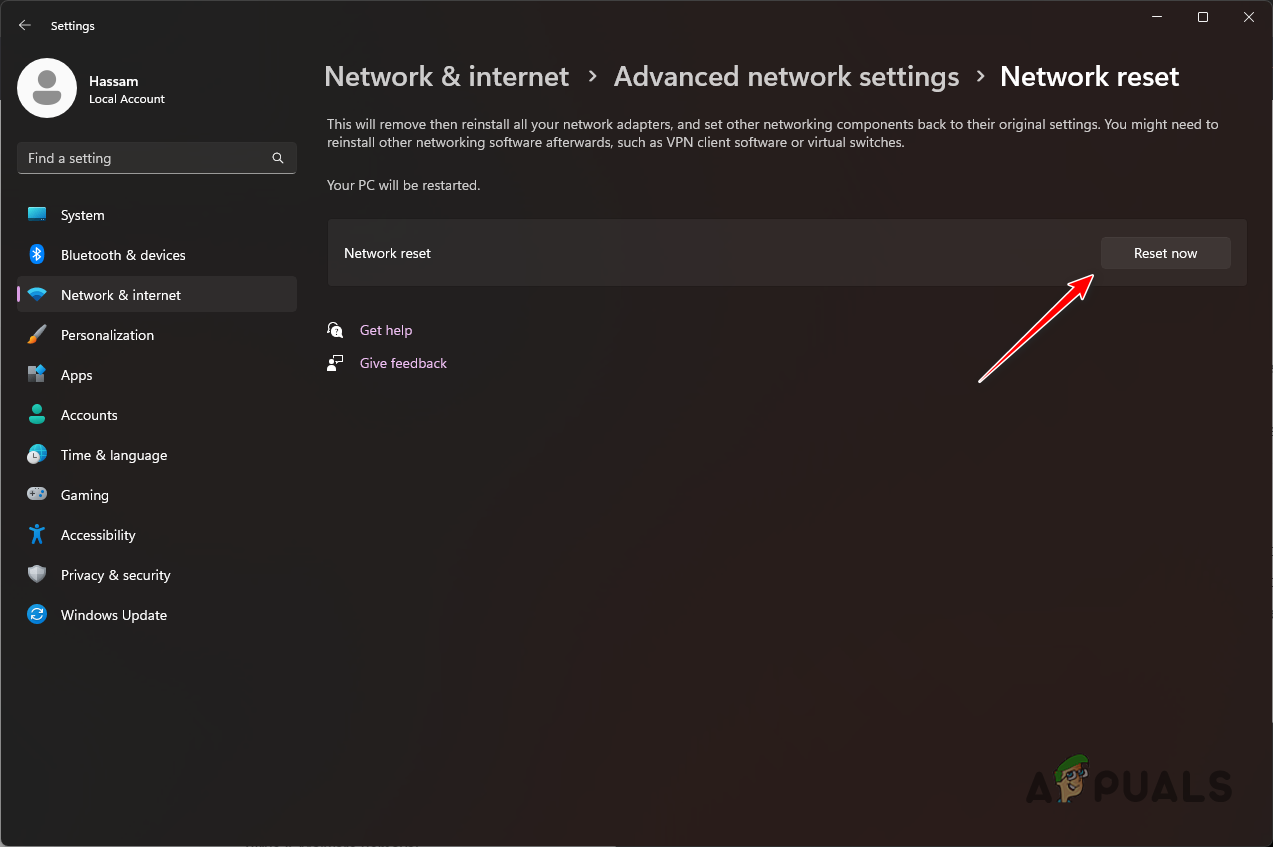
Resetting Windows Network Settings - Once your PC boots up, see if the error message still occurs.
6. Perform a Clean Boot
Another cause of the connection issue with Alan Wake 2 may be background programs and services. These can interfere with the game files and processes, preventing proper operation.
When this occurs, perform a clean boot to start your computer with only the essential Windows services running. Consequently, all other apps and services will be disabled upon startup.
If the connection issue with Alan Wake 2 resolves after a clean boot, identify the problem source by enabling services in the System Configuration tool. Follow these instructions on executing a clean boot:
- First, use the Win key + R to open the Run box.
- Type in msconfig in the Run box and press Enter.

Opening System Config - Now, switch to the Services tab in the System Configuration tool.
- After that, hide Microsoft services with the Hide all Microsoft services option.
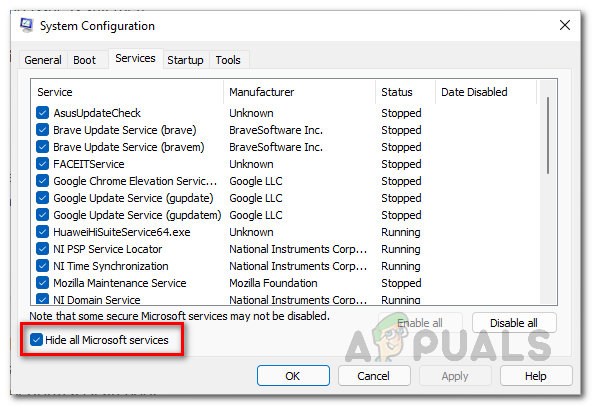
Hiding Windows Services - Then, disable the remaining services by clicking Disable all.
- Click Apply.
- Now, jump to the Startup tab and click the Open Task Manager link.
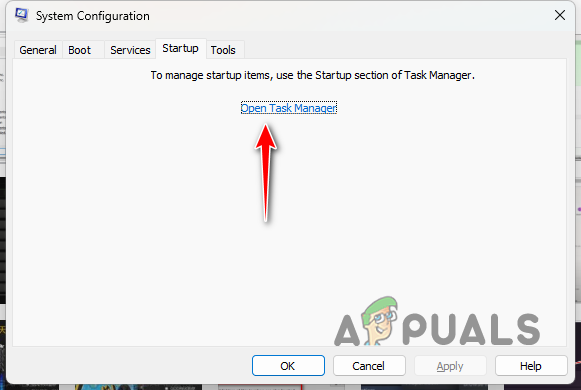
Using the Open Task Manager Link in the Startup Tab - When Task Manager opens, select the third-party apps one at a time and click Disable.
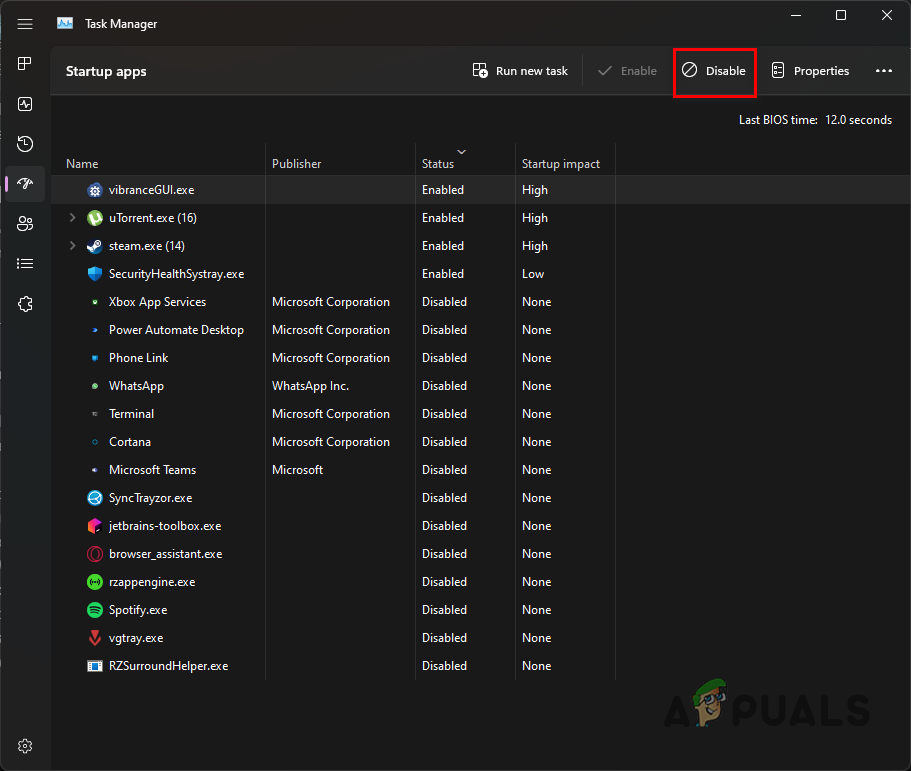
Disabling Startup Apps with Task Manager - Once done, reboot your PC to perform a clean boot.
- See if the error message appears again.
7. Reinstall Alan Wake 2
If the problem persists after the above methods, you will need to reinstall Alan Wake 2 on your system. Also, execute a clean reinstall of the Epic Games Launcher app to remedy any issues causing the problem.
To do this, follow the instructions below:
- First, open the Control Panel by searching for it in the Start Menu.
Opening Control Panel - Then, click on the Uninstall a program option.
Navigating to Uninstall a Program - From the list of apps, locate Epic Games Launcher and double-click on it.
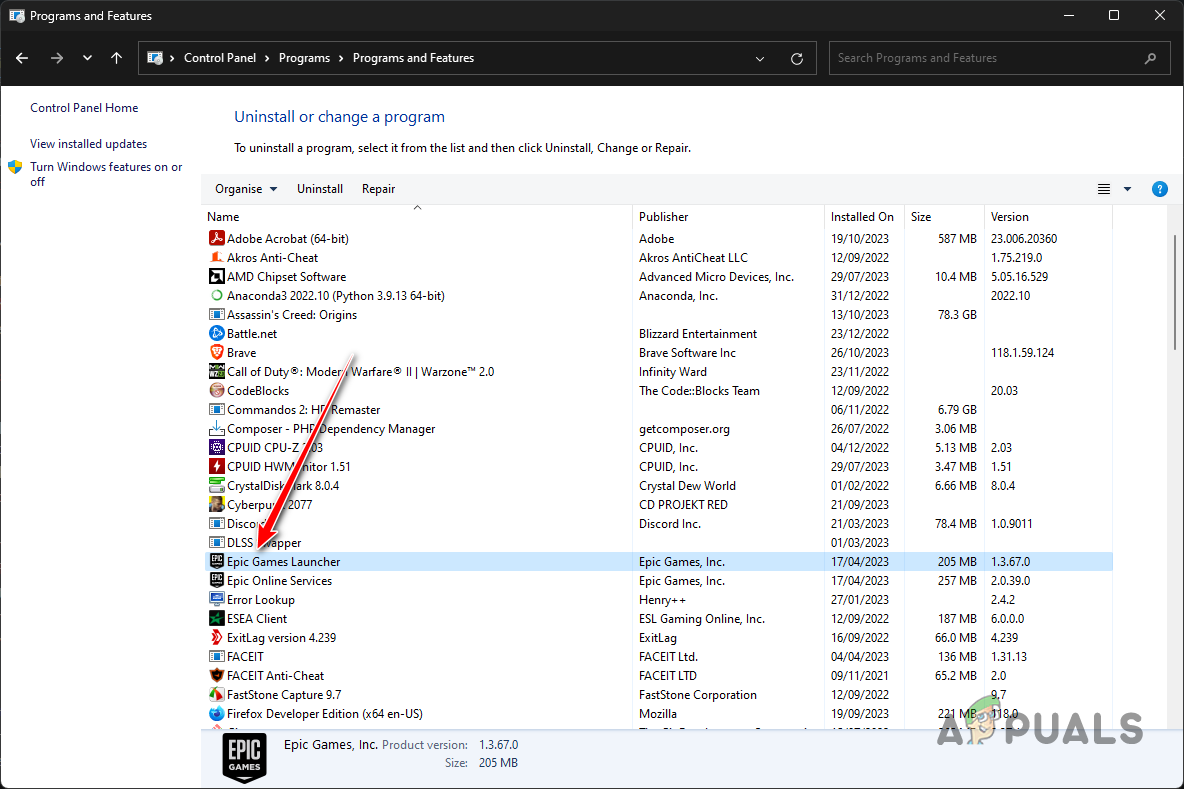
Uninstalling Epic Games - Go through the prompts to complete the uninstallation.
- Do the same for Epic Online Services as well.
- After that, open the Run box by pressing the Windows key + R.
- In the Run box, type %localappdata% and hit Enter.

Opening Local AppData Folder - Inside the folder, look for Epic Games and EpicGamesLauncher folders and delete them.
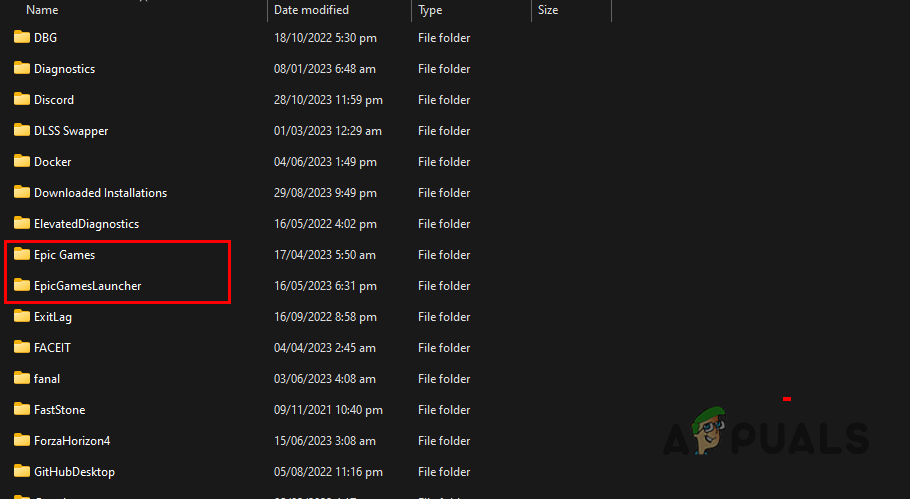
Deleting Epic Games Folders in Local AppData - After that, look for a Remedy folder and delete it too.
- Once you do that, download the installer for Epic Games and install the client.
- Finally, download the game again and the problem should go away.
These methods should help you mitigate the account connection failed issue in Alan Wake 2. In the unfortunate case where the problem persists, contact the Alan Wake 2 support team and ask the support agents for further assistance regarding the error.
Reviewed by Huzaifa Haroon


