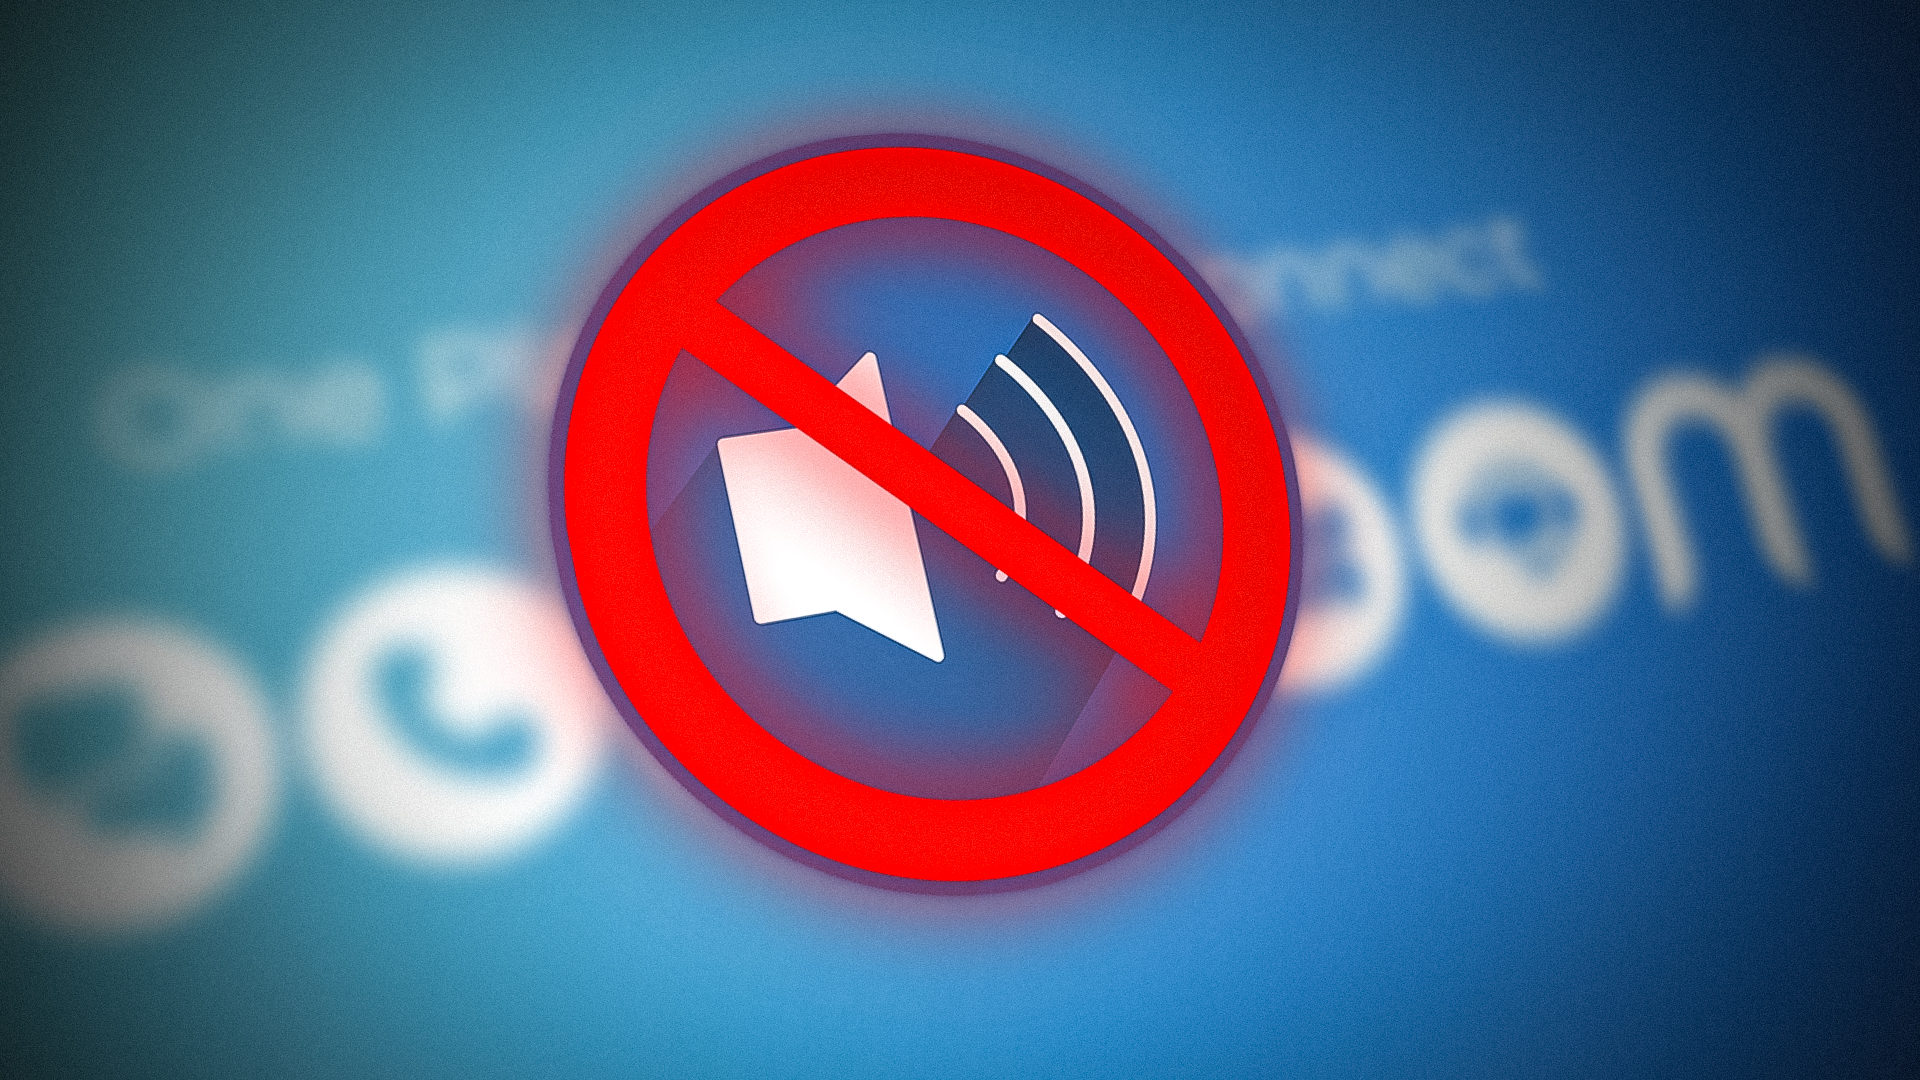
Fix: Zoom Audio Not Working (Windows, Android, iOS)
 Reviewed by Huzaifa Haroon
Zoom audio will not work mainly due to configurational issues or if the communication modules of the OS are no more valid.
Before proceeding, make sure the device’s audio is working fine in other apps. If your device has a magnetic case (like a case for an iPad), check if removing that case solves the problem.
1. Relaunch the Zoom App after Force Closing it
Zoom audio will not work if the app’s audio modules are in an error state and need a fresh start. Here, relaunching the Zoom app after force closing it will solve the problem.
For an iOS device, swipe up the Zoom app from the Recent Apps and restart the device.
- Exit the Zoom app > open the Recent Apps menu > close the Zoom app.

Close Zoom from the Android’s Recent Apps Menu - Navigate to Settings > Apps > Zoom.

Open Zoom in the Android Phone Apps List - Force Stop the Zoom app and launch it. Verify if the Zoom audio is working properly.

Force Stop the Zoom App in the Android Apps Settings
2. Perform a Cold Restart of the Devices
When the audio modules of your device are stuck in a malfunctioning state, the Zoom app won’t be able to utilize them, leading to the audio problem. To fix this, perform a cold restart of the affected device and any connected devices.
- Power off the problematic device (such as a PC), remove its power cable, and disconnect all the attached peripherals (such as a Bluetooth dongle).
- Power off the networking equipment (e.g., a router) and unplug its power cable.

Unplug Your Router from the Power Source - Wait for a minute and power on the networking equipment after connecting back its power cable.
- Power on the problematic device after plugging back its power cable and attaching essential peripherals (e.g., a keyboard or mouse).
- Launch Zoom and check if its audio is working fine.
3. Update the Zoom App and the Device’s OS
A device with an outdated OS will not follow the latest protocol requirements to hand over the audio to 3rd party apps such as Zoom and hence cause issues when using these platforms.
Similarly, an outdated Zoom client will not be compatible with the audio modules of the OS and thus will fail to follow the latest protocol requirements. Additionally, a bug in the Zoom app can also cause audio issues. In either case, updating the app and the device’s OS to the latest version will fix the problem.
Update the Zoom App
To update on Android:
- Launch the Google Play Store and search for Zoom.
- If an app update is shown, tap on Update.

Update the Zoom App on the Google Play Store - Once updated, restart the Android phone and check if Zoom audio is working normally.
Update the Device’s OS
To update an iPhone
- Charge the phone’s battery to full, connect it to a Wi-Fi network, and create a backup of data on it.
- Go to Settings > General > Software Update.

Open General Settings of iPhone - Install the iOS update (if available).

Update Software of iPhone - Restart your iPhone and verify if the Zoom audio is performing properly.
- If that did not work and you are using another audio device (like a headphone or capture device) with the problematic device, check if updating the firmware of that device resolves the issue.
4. Edit the Audio Settings of the Zoom Client
If the audio settings of your Zoom client are not configured correctly, you will have problems hearing. To resolve this issue, adjust the audio settings of the Zoom client.
- Launch the Zoom client and navigate to Settings > Audio.
- Set Speaker to Same as System.
- Set Microphone to the Same as System. See if the audio on Zoom is operating correctly.

Set Speaker and Microphone to the Same As System in the Zoom Audio Settings - If not, try different output devices in the Speaker dropdown in the Audio tab of the Zoom settings and check if anyone of those solves the problem.
- If the issue was resolved when a device was selected in the Zoom Audio settings but as soon as the setting window is closed, the audio stopped. Then you may keep the Zoom setting window opened but minimized while in a Zoom call or meeting till the bug is patched by Zoom.
5. Disconnect and Reconnect the External Audio Device
When using an external audio device, such as speakers, malfunctioning audio modules of that device will prevent audio output from Zoom. In such a case, disconnecting and then reconnecting the external device will resolve the issue.
As an example, let’s walk through the steps for a Windows PC that is connected to a Bluetooth device.
- Right-click Windows and navigate to Settings > Bluetooth & Devices > Devices.

Open Devices in the Windows Settings - Click on the three vertical ellipses for the problematic Bluetooth device and select Remove Device.
- Confirm to remove the device and then re-pair the audio device with the PC.
- Launch the Zoom app and navigate to Settings > Audio.
- Make sure the required device is selected in the dropdowns of Speaker and Mic. See if the problem is solved.
In the case, the issue is occurring with an Android phone and a Bluetooth device, make sure the Bluetooth device has permission to access the Nearby Devices and Locations. Afterward, check if the audio is working in the Zoom app.
6. Change the Default Speaker on a PC (Windows, Mac, Linux)
You will experience the issue at hand when the default speaker on your PC does not match the output configuration set for the Zoom client. Here, changing the default speaker on the PC will resolve the issue. To do so on a Windows PC:
- Right-click on Windows and navigate to Settings > System > Sound.
- Make sure the required speaker device is selected. Same device as in the Zoom settings.

Open Sound in the System Tab of the Windows Settings - Determine if the Zoom audio is functioning normally.

Select the Correct Output Device in the Windows Settings - If not, open Sound in the System tab of the Windows Settings and scroll down to the bottom.
- Click on More Sound Settings and in the Sound Control Panel shown, right-click on the required device.

Open More Sound Settings in the Windows Settings - Select Set as Default Device and click on OK. Verify if the Zoom audio issue is resolved.

Set the Required Audio Device as The Default Device
7. Reinstall the Zoom App
The Zoom app will fail to output any audio if the latest app update could not apply the required patches on the audio modules. This will cause incompatibility within the app components and thus the audio will stop working. In this scenario, reinstalling the Zoom app will solve the problem.
- Right-click Windows and select Apps & Features.
- Locate Zoom and expand its Options.
- Uninstall the app and restart the PC.

Uninstall the Zoom App on a Windows PC - Upon restart, download the official CleanZoom app.
- Launch the downloaded CleanZoom app and wait till it clears out any remnants of the Zoom app on your PC.
- Once done, restart your PC again, and download the latest Zoom installer from the official website.
- Launch the Zoom installer as an administrator and follow the prompts on the screen to complete the installation.
- Once installed, restart your PC, and launch the Zoom client. Verify if the Zoom audio is working normally.
In the case you are reinstalling on a Mac, then after uninstalling the Zoom client, delete any Zoom remnants from the following directories:
~/Library/Caches

~/Library/Logs

~/Library/Cookies

~/Library/Saved Application State
8. Reset All Settings of the Device to the Defaults (Mobile OS Only)
Audio issues on Zoom might occur if customization of device settings is preventing the Zoom audio from working, or if a device setting has become invalid. In this case, resetting all the device settings to defaults will solve the problem.
Before resetting, make sure to note down or back up the info or data that may be required later such as Wi-Fi credentials. To reset all the settings on an iPhone:
- Steer to Settings > General > Reset.

Reset All Settings on Your iPhone - Reset All the Settings of the phone and once done, restart the iPhone.
- Connect the iPhone to a network and launch the Zoom app. Check if the audio problem is solved.
9. Reset the Device to the Factory Defaults
You will experience problems when using Zoom if the audio components of your device’s operating system are no more valid. This might have occurred when an OS update failed to properly patch these components. To fix this, reset the device to its factory settings.
For clarity, we will explain how to perform a factory reset on an iPhone. Before resetting, ensure that the iPhone’s battery is fully charged, and don’t forget to back up the data on your phone.
- Go to iPhone Settings > General> Reset.
- Tap on Erase All Contents and Settings and if required, enter the passcode.

Erase All Content and Settings of the iPhone - Confirm to reset the iPhone and wait till the process finishes.
- Once done, set up the iPhone as a new device (without restoring from the backup), and hopefully, that will clear out the audio issue on Zoom.
If none of the above works for you, contact Zoom support. Till then, you may use Zoom in a browser or use another device (like a phone if the issue is occurring on a PC or vice versa).
10. Windows-Specific Solutions
On a Windows PC, you can try all the solutions discussed in the article, but there are specific Windows settings and configurations that can lead to the Zoom audio issue. Let’s cover the workarounds for them:
Disable Signal Processing of Audio Drivers
- Launch the Zoom app.
- Navigate to Settings > Audio > Advanced.

Open the Zoom Settings - Set Signal Processing by Windows Device Drivers to off (Windows-Raw).

Open Advanced Audio Settings of the Zoom App - Relaunch the Zoom client and check if its audio is functioning properly.

Disable Signal Processing by Windows Audio Device Drivers in the Zoom Settings
Enable Zoom Audio in the PC’s Volume Mixer
- Start a test call on Zoom and right-click on the Volume icon in the system’s tray.
- Select Open Volume Mixer and make sure all the Zoom instances are not muted.

Open Volume Mixer of the Windows PC - Verify if the Zoom audio is functioning properly.

Unmute Zoom in the PC’s Volume Mixer - If not, head to the Apps section in the system’s Volume Mixer and expand Zoom (if not shown, then you may initiate a Zoom call).

Set the Required Input and Output Device for Zoom in the PC’s Volume Mixer Settings - Make sure the correct output device (same as the Zoom client) is selected and determine if the Zoom audio is working as expected.
Unmute the Zoom Audio in the PC’s Game Bar
- Launch the Zoom app and start a Zoom call.
- Press the Windows button and search for Game Bar.

Enable Zoom Audio in the PC’s Game Bar Settings - In the Mix or Voice tab of the Game Bar, locate the Zoom output and make sure it is not muted or too low, and afterward, check if the Zoom audio is working normally.
Update the Audio Drivers to the Latest Version
Manually Update the Audio Driver
- Launch a web browser and head to the OEM website (either PC OEM or sound card OEM).
- Download the latest sound driver as per your PC specifications and once downloaded, launch it as administrator.
- Follow the prompts on your screen to install the driver and once installed, restart your PC.
- Launch the Zoom app and check if its audio is operating normally.
Update Through the Device Manager
- Right-click Windows and select Device Manager.

Open Device Manager Through the Quick Access Menu - Expand the Sound, Video, and Game Controllers tab and right-click on your audio device.

Update the Audio Driver Through the Device Manager - Select Update Driver and click on Search Automatically for Drivers.

Search Automatically for Updated Audio Drivers in the PC’s Device Manager - Wait till the process completes, and once done, restart your PC. Check if Zoom audio is working.
- If that did not work, update the system’s driver through an OEM utility (like Dell Support Assistant) and check if that solves the problem.
Reinstall the Audio Driver
- Launch a web browser and head to the OEM website (like Dell or Realtek).
- Download the latest audio driver as per your PC specs and once downloaded, right-click on Windows.
- Select Device Manager and expand the Sound, Video, and Game Controllers tab.
- Right-click on your audio device and select Uninstall Driver.
- Select the option of ‘Attempt to Remove the Driver of This Device’ and click on Uninstall.

Uninstall the Audio Driver Through the PC’s Device Manager and Remove its Driver - Once uninstalled, right-click Windows and open Apps & Features.

Open Apps & Features - Check if an audio driver utility (such as Realtek Drivers) is installed.
- If so, expand its options and Uninstall the application.
- Once done, restart your PC and let Windows install a generic audio driver if it tries to.
- Launch Zoom and check if its audio is working properly.
Uninstall the Conflicting Apps
Microsoft Teams and Dell Waves MaxxAudio applications are reported to cause Zoom audio problems. If you do not have these apps but any similar ones, uninstall those apps.
If you do not have any such app, you may clean boot your PC to find any such app. To uninstall a conflicting application like Dell Waves MaxxAudio:
- Right-click Windows and open Apps & Features.
- Expand Dell Waves MaxxAudio and Uninstall it.

Uninstall Dell MaxxAudioPro on a Windows PC - Once done, restart your PC and check if the audio on Zoom audio is working properly.
If that resolves the issue but you want to use the Dell Waves MaxxAudio app, then check if disabling Signal Processing in the Voice Settings of the Waves MaxxAudio app clears the issue.
Create Another Admin User Profile
- Right-click Windows and select Computer Management.

Open Computer Management in the Quick Access Menu - Expand the Local Users and Groups tab and right-click on the User folder.
- Select New User and fill out the details as per your requirements.
-

Create a New User in the Users Folder of the Local Users & Groups - Click on Create and once created, double-click on the newly created account.
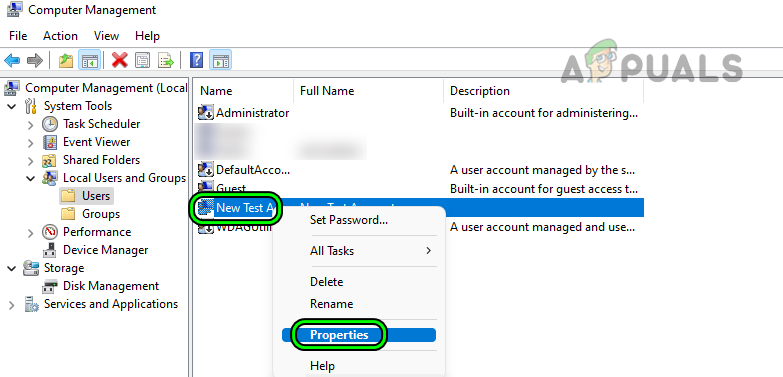 Open Properties of the Newly Created Account on a Windows PC
 - Select Member of and click on Add.
- Open Advanced and click on Find Now.

Open Add in the Member of Tab of the New Account Properties - Double-click on Administrators.

Open Advanced in the Select Groups Dialogue Box - Click on OK in all the opened menus and log out of the current account.

Click on Find Now and Double-Click on Administrators in the Search Results - Log into the newly created administrator account and check if the Zoom audio is working fine. If so, then you may transfer the old account data to the new account or only use Zoom in the new account
Update the PC’s BIOS to the Latest Version
Warning:
Proceed with extreme caution and at your own risk as updating a PC BIOS can be risky at times if the process fails to complete e.g., a power outage when the BIOS was updating can brick your PC.
- Update the PC’s BIOS as per the manufacturer:
- Once updated, check if Zoom’s audio issue is resolved.
That’s it, if none of these solutions fixed the problem then you should contact Zoom’s support and explain the issue to them.
Reviewed by Huzaifa Haroon


