FIX: Your Microsoft Account wasn’t changed to a local account 0x80004005
The 0x80004005 error is usually related to an Access Denied situation. However, if it occurs when you’re trying to switch to a Local Account on your Windows device, it means that the Microsoft account wasn’t synced properly.
When installing Windows 8/8.1/10, you are required to login with a Microsoft account. However, you have the option to skip this, and sign in with a local account, but that isn’t very clear. Having a Microsoft account tied to your PC will give you a lot of advanced functionality, such as syncing settings across devices, integrated cloud storage, downloading apps from the Store etc. However, if you don’t intend to use any of these features and would rather stick to a local account, you can switch to one from the Account settings. However, there is the off chance of getting an 0x80004005 error, which says “We’re sorry, but something went wrong. Your Microsoft account wasn’t changed to a local account”

To solve this, there are two possible solutions, and both work with different users, depending on what the root cause of the problem exactly is.
Method 1: Change “Live Update” & “Windows Live ID Sign In Assistant” to Delayed Start
This configuration of changing services associated with signing in has helped a number of users to resolve this issue.
- Press simultaneously Windows and R on your keyboard to open the Run
- Within the window, type services.msc and either press Enter on your keyboard, or OK in the window, to open the Services window.
- You will be presented with a list of services, and their appropriate activity, whether they start automatically or manually. Search for Windows Live ID Sign-In Assistant and Live Update in the list.
- Check the Status and Startup Type and change it to Delayed Start
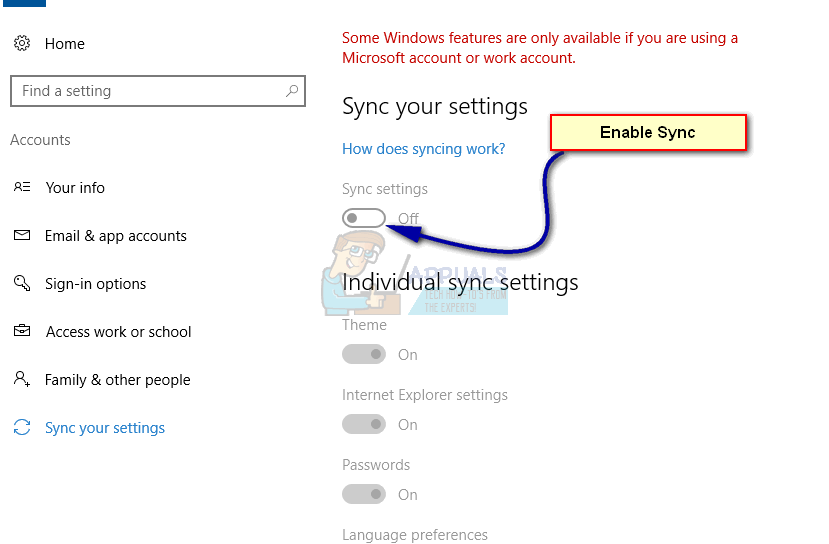
- Click Start -> Type sync and make sure it is enabled for everything.
- Once done, also ensure that the following services are set to Automatic
Remote Procedure Call
Local Session Manager
User Accounts Service
After making the above changes, reboot your computer and sign in, then try switching to the Local Account.
Method 2: Remove your PC from the list of devices online, and try again
Re-connecting your PC with your account can often solve this issue, and you will be able to switch to a local account afterwards.
- Open the Start menu by pressing the Windows key on your keyboard and click the gear icon to open the Settings
- Go to Accounts, and then Sign-in Options. Click on Change Pin.
- Create a new pin, and change the password as well.
- Open your browser of choice, and go to hotmail.com. Sign-in with your Microsoft account and the new password you just changed.
- When you log in, click on your name, and open Account settings.
- On the next screen you’re presented with, scroll down until you find Click on See all.
- Find your device and click Remove PC. Wait for it to sync with your PC, make sure you have a decent internet connection.
- Once this is done, go to your settings and switch to a local account again.
Method 3: Turning off Firewall and other Applications
Another workaround which worked for many people was disabling Firewall applications (including Windows Firewall, Windows Defender, and other Antivirus applications). It seems that because of some bug, these applications conflict and restrain you from switching into the local account.
- Turn off all firewall/antivirus applications. You check our article on how to disable Windows Firewall.
- Once all the applications are closed, try changing into a Local Account without using any password.
- Sign out and finish. Restart your computer to make sure that the changes have been implemented.
Method 4: Deleting Keys using Registry Editor
If all the above methods don’t work, we can try deleting the keys made against your account using the registry editor. Do note that this might work for some while not for others. Make a backup of those registry keys before deleting them so you can always restore something goes wrong.
Note: Registry editor is a powerful tool and making changes using it can sometimes cause additional problems. It is recommended that you always make a backup of keys and don’t mess with other registry keys which you have no idea about. Please follow this solution at your own risk.
- Press Windows + R to launch the Run application. Type “regedit” in the dialogue box and press Enter.
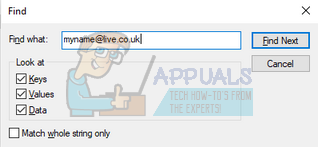
- Once in the registry editor, press Ctrl + F to launch the Find tool. Check all attributes (Keys, Values, Data). Enter your Microsoft Account ID in the dialogue box, for example, myname@live.com or myname@outlook.com
- You will get results like these:
HKEY_USERS\.DEFAULT\Software\Microsoft\IdentityCRL\StoredIdentities
Computer\HKEY_LOCAL_MACHINE\SOFTWARE\Microsoft\IdentityStore\LogonCache\D7F9888F-E3FC-49b0-9……

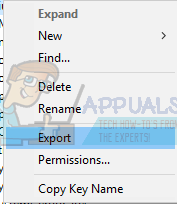
- Since we are about to delete them, we need to make a backup first so you can always restore them back if anything goes wrong. Right-click on the folder entry (at the left side of the screen) and select Export. Choose a convenient location which you can access later on and save it there.
- Now Delete both the registry entries. Restart your computer and try changing to the local account.
Method 5: Making a New Local Account and linking it
If all the above methods don’t work, we can try making a new local account and deleting the old one. Make sure that you have an external hard drive so you can back up all your data and configurations and restore it back when you create the new account.
- Open an administrator account. Type Settings in the start menu dialogue box and click on Accounts.

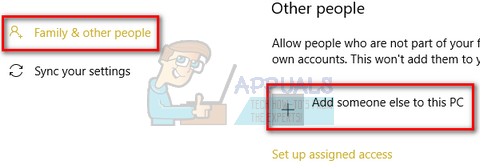
- Now click “Family and other users” options present at the left side of the window.
- Once inside select the menu, select “Add someone else to this PC”.
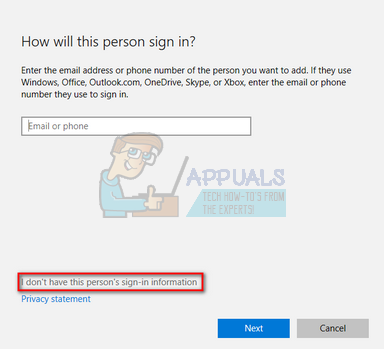
- Now Windows will guide you through its wizard on how to create a new account. When the new window comes forth, click “I don’t have this person’s sign-in information”.
- Now select the option “Add a user without Microsoft”. Windows will now prompt you to make a new Microsoft account and display a window like this.
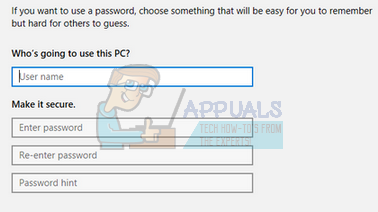
- Enter all the details and chose an easy password which you can remember.
- Now navigate to Settings > Accounts > Your Account.
- At the space beneath your account picture, you will see an option which says “Sign in with local account instead”.
- Enter your current password when the prompt comes and click Next.
- Now enter username and password for your local account and click on “Sign out and finish”.
- Check thoroughly if this new local account is working properly and has all the functionalities which you require.
- Now you can easily switch to a new local account, and move all your personal files to it without any barriers.
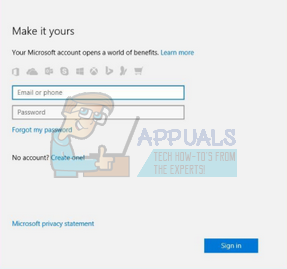
- Now navigate to Settings > Accounts > Your Account and select the option “Sign in with a Microsoft Account instead”.
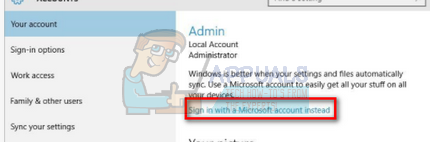
- Enter your username and password and click Sign in.
Now you can safely delete your old account and continue using this one
Note: If you are having a problem making a new local account using Settings, you can also create it using the command prompt. Take a look.
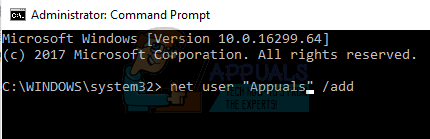
- Press Windows + S, type “command prompt”, right-click on the application and select “Run as administrator”.
- Once in elevated command prompt, execute the following command:
net user “UserName” /add
Here “Username” in the name of the account you are trying to add to the computer.
- Once the account is added to the computer, restart your computer and log in to that local account. Do note that you should make it administrator using the current account before logging into it. Check if all the functions are working properly before transferring your backed up data.
- If all the aspects are working properly, use the new local account to delete your old one. Your password might be required when deleting the old account.
Even though the advantages of having a Microsoft account tied to your PC are numerous, and quite a few users are enjoying them, it is true that many people simply don’t have a need for these functionalities. If you’re one of them, and you’re having the 0x80004005 error when you’re switching to a local account, follow the methods described above and you will have your device back on a local account in no time.
i dont have live update and windows live ID in my services. how do look for it?