Fix: Windows Update Error 0x80070643 on Windows 10 / 11?
Both Windows 10 and Windows 11 users are experiencing an issue where certain pending Windows Updates fail with the same error code (0x80070643). The vast majority of issues are reporting that while several pending updates are not installed with the same error, others install just fine.
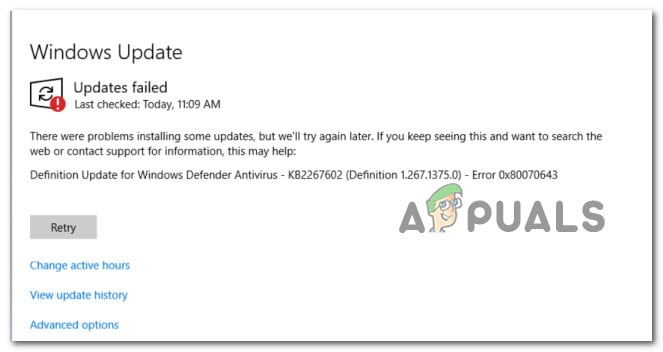
After investigating the underlying cause of this issue, we realized that there are actually multiple causes why you might experience this particular error code. We’ve listed them below so you have an easier time when troubleshooting this problem:
- Common Windows Update inconsistency – If the reason why you are experiencing the 0x80070643 is already covered by a repair strategy included by Microsoft inside the Windows Update Troubleshooter, fixing this problem is as easy as running the utility and applying the recommended fix.
- Corrupted .NET Framework – If you’re only experiencing this error with a specific cumulative update that attempts to install a .NET framework update, chances are that your existing .NET framework installation is corrupted. If this scenario is applicable, you should be able to fix the problem by repairing your current .NET Framework.
- Corrupted Windows Update component (or dependency) – In case you’re experiencing the 0x80070643 with every pending Windows update that you attempt to install, chances are you’re dealing with some kind of corruption affecting the WU component or one of the various associated dependencies. In this case, our recommendation is to reset every WU component and the WU management folders with a series of CMD commands.
- Broken WU Component – There will be scenarios where Windows Update is broken beyond repair and none of the repair strategies featured in this article will allow you to fix it. If you want to avoid reinstalling your operating system, you can apply to install the failing Windows Update manually via the Microsoft Update Catalog.
- Outdated Windows Defender signatures – If you notice that only security updates related to Windows Defender or Windows Firewall are failing with this error code, there’s a big chance you’re dealing with an inconsistency caused by outdated Windows Defender signatures. To resolve this problem, you’ll need to run a series of CMD commands in order to update Windows Defender with the latest virus signatures available.
- System file corruption – Under certain circumstances, an underlying system file corruption issue might be responsible for your PC’s inability to install certain pending updates. If you find yourself in this scenario and none of the other fixes have helped, deploy SFC and DISM scans, perform a Startup Repair or go for a clean install or repair install if everything else fails.
Now that you went over every potential cause of this issue, let’s get to the part where we help you fix it. Below you’ll find a list of methods that other affected users have successfully used to get to the bottom of this error.
1. Run the Windows Update Troubleshooter
If the cause of the 0x80070643 error is already addressed by a Microsoft repair plan provided in the Windows Update Troubleshooter, then resolving the issue is as simple as running the tool and applying the recommended fix.
The Windows Update Troubleshooter, if you’ve never used it before, is designed to automatically discover and fix common problems. If you’re using Windows 11, you’re in luck because the tool is far more extensive than previous versions. If a recognizable case is identified, Microsoft has included dozens of new automated repair options that can be deployed in only a few clicks.
If you haven’t already done so, follow the steps below to run the Windows Update Troubleshooter and have the recommended patch applied automatically:
Note: The instructions below will be applicable to both Windows 10 and Windows 11.
- Press the Windows key + R to enter the Run dialog box and try to fix the Windows Update component.
- In the newly appearing dialog box, put ‘control’ in the text box and click Enter to access the Control Panel interface.
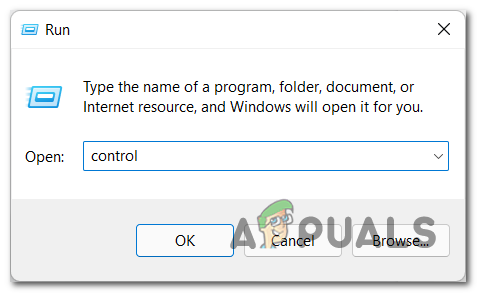
Access the Control Panel menu Note: The User Account Control may prompt you to provide admin access; if so, select Yes.
- Once within the Control Panel window, search for ‘troubleshoot’ using the search function.
- From the list of results, select all of the Troubleshooting categories.
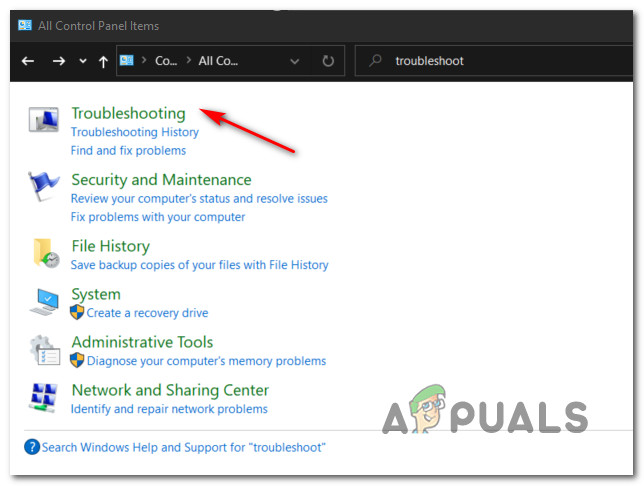
Accessing the Troubleshooting tab - Once you’ve arrived at the Troubleshooting tab, navigate to System and Security and select Fix problems with Windows Updates.
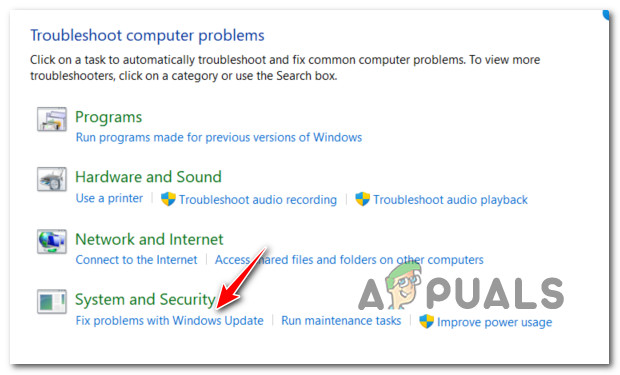
Fixing the problems with Windows Update - When the Windows Update Troubleshooter question appears, click Next and wait for the initial scan to complete.
- When you’ve found a feasible solution, click Apply this Fix to apply it to the current scenario.
Note: You may be required to do a number of manual procedures with some types of recommended solutions.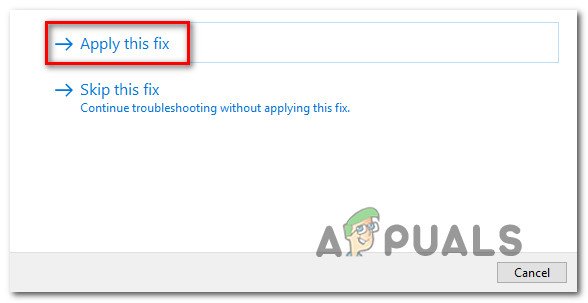
Applying the recommended fix - After successfully applying the repair, restart your computer and try again to install the failed update.
If the Windows Update still fails to install with the same error code of 0x80070643, try the next technique below.
2. Repair the .NET Framework
If you’re only getting this problem when installing a cumulative update that includes a.NET framework update, your existing.NET framework installation is probably corrupted. If this situation applies, you should be able to resolve the issue by updating your.NET Framework.
If this is the case, you should be able to resolve the problem by replacing the corrupted.NET instances with healthy copies. There are several ways to accomplish this, but the most straightforward is to use the.NET Framework Repair Tool.
The majority of people who were affected claimed that the problem was quickly resolved once they used this private Microsoft solution to repair the corrupted.NET dependencies.
Here’s how to use the.NET Framework Repair Tool on any recent version of Windows:
- Go to this link and open your browser. Click the Download button once the page has finished loaded (under Microsoft .NET Framework Repair Tool).
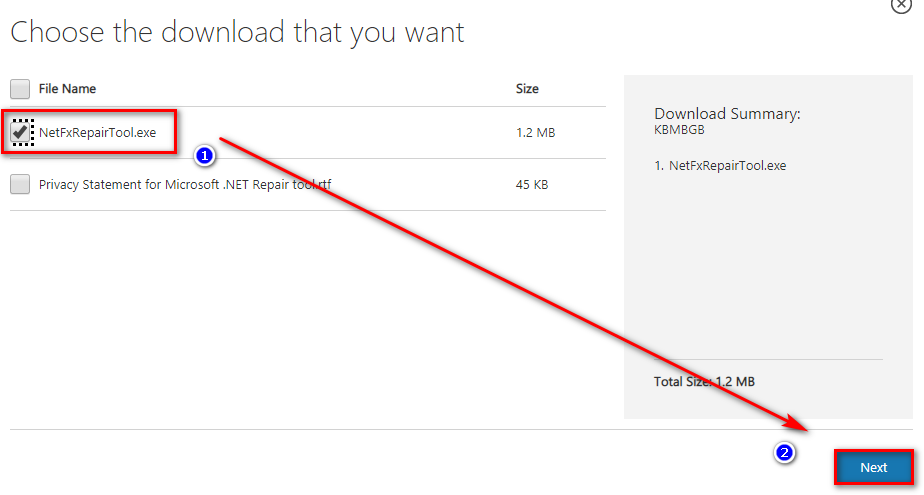
Downloading the net repair tool - When you get to the next screen, tick the box next to NetFxRepairTool.exe to begin the process. After that, press the Next button to move on to the next menu.
- Once the download is complete, double-click on the installation executable and click Yes when prompted by the User Account Control prompt in order to grant admin access.
- Once you’ve opened the Microsoft.NET Framework Repair tool and reached the first window, check the box next to ‘I have read and accepted the license conditions.’ After that, select Next to move on to the next menu.
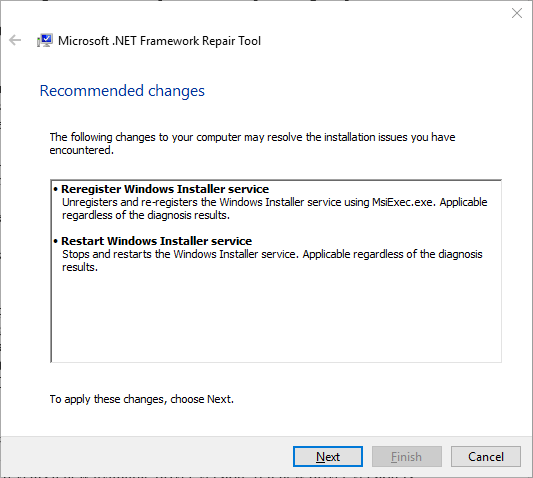
Initiating a repair with the .NET repair tool - By this point, the program has already begun searching the.NET dependencies for problems. Wait patiently for the procedure to finish and don’t disrupt it to prevent generating more problems.
- When the process is finished, click Next again to apply the recommended repair strategies automatically.
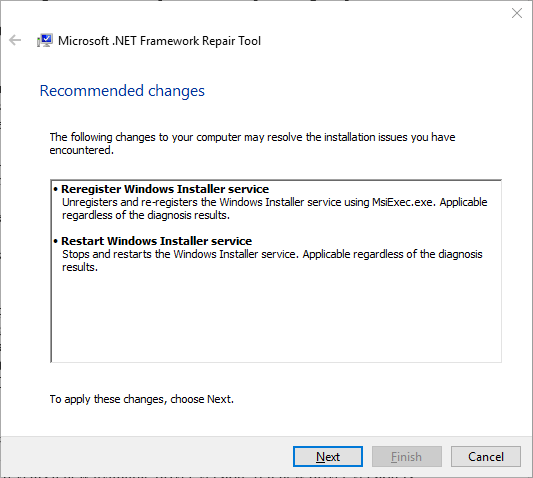
Initiating a repair tool - Whether you’re not prompted to restart your computer automatically, do it manually and check if the problem goes away when the system boots up again.
If the problem is still not fixed and you’re still experiencing the 0x80070643 while installing certain pending updates, move down to the next method below.
3. Reset every Windows Update component
If you’re getting the 0x80070643 error with every pending Windows update you try to install, it’s likely that you’re dealing with corruption in the WU component or one of its linked dependencies. In this instance, we propose using a series of CMD commands to reset every WU component as well as the WU management folders.
One or more WU (Windows Update) components that are currently stuck in a limbo state (neither open nor closed) is by far the most prevalent source of this type of problem. If this scenario applies to you, you can resolve the issue by resetting all WU components engaged in the update process.
If this scenario is applicable, follow the instructions below to reset very Windows Update component:
- Open a Run dialog box by hitting the Windows key + R. Then, in the text box, write “cmd” and hit Ctrl + Shift + Enter to launch an elevated Command Prompt.
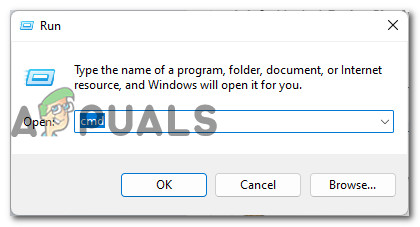
Open a CMD command Note: To grant administrator privileges, click Yes when the UAC (User Account Control) prompt appears.
- Once inside the elevated Command Prompt, type the commands below in order, pressing Enter after each one to stop any WU-related services:
net stop wuauserv
net stop cryptSvc
net stop bits
net stop msiserver
Note: These commands will halt the Windows Update Services, MSI Installer, Cryptographic services, and BITS services, just so you know what you’re actually telling the terminal to do.
- To empty and rename the SoftwareDistribution and Catroot2 folders, use the following commands after stopping all applicable services:
ren C:\Windows\SoftwareDistribution SoftwareDistribution.old
ren C:\Windows\System32\catroot2 Catroot2.old
Note: These directories are responsible for storing the WU component’s updated files. Renaming these directories will compel your operating system to produce new, healthy equivalents that will not be corrupted.
- Now that the directories have been emptied, use the following commands to re-enable the previously disabled services:
net start wuauserv
net start cryptSvc
net start bits
net start msiserver
- Attempt to install the pending update once again and see if the issue is now fixed.
If the problem persists after you’ve successfully refreshed every Windows Update component, move on to the next possible solution below.
4. Download the failing update manually
There can be times when Windows Update is broken beyond repair, and none of the solutions in this article will be able to help you. If you don’t want to reinstall your operating system, you can use the Microsoft Update Catalog to manually install the failing Windows Update.
If the Windows Update component is not functioning properly and the WU Troubleshooter is unable to resolve the issue, you can manually apply the failing update using the Microsoft Update Catalog.
This directory can be used to download the compatible update version that isn’t working on your computer and then manually install it using the.ini file.
It’s vital to note that this solution will not solve the problem’s primary cause (in case the 0x80070643 error appears due to some kind of corruption affecting the Windows Update component). It will, however, allow you to bypass a damaged Windows Update by allowing you to skip the download and instead use MUC’s external mirrors.
Follow the steps below for detailed instructions on how to manually install a pending Windows update:
- Open your favorite browser and go to the Microsoft Update Catalog (MUC) directory’s home page.
- Use the search option in the MUC root directory to hunt for the update that is failing in your circumstance (for example KB5005188).
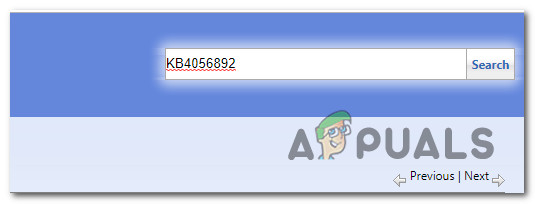
Install the failing updates - Review the results and select the necessary update versions to apply, taking into account your current OS architecture and Windows versions.
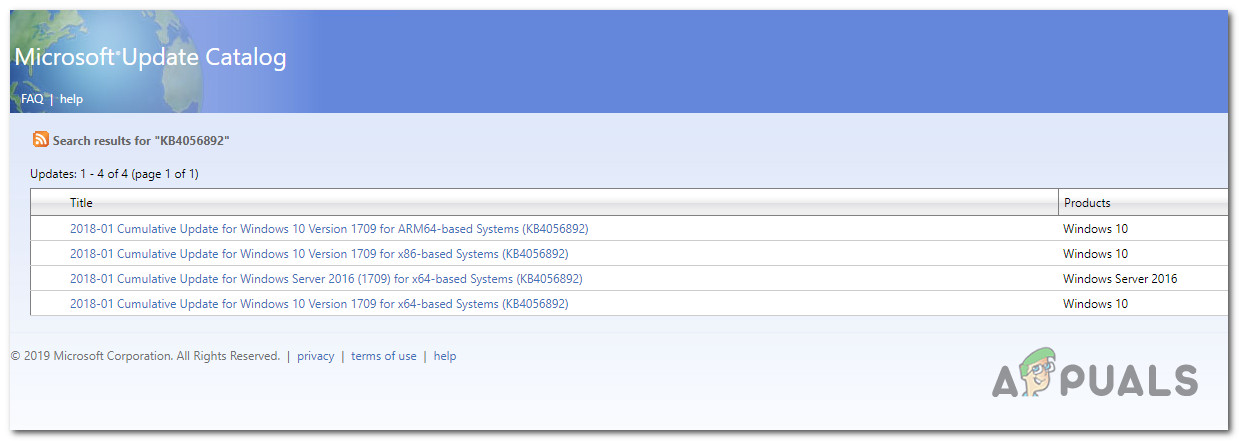
Download and install the correct update - When you’ve determined which update is compatible with your machine, click the Download icon next to it.
- Once the download is complete, open File Explorer and go to the location where the update was saved (most likely in the Download folder).
- Once you’ve found the correct folder, right-click the.ini file and select Install from the context menu.
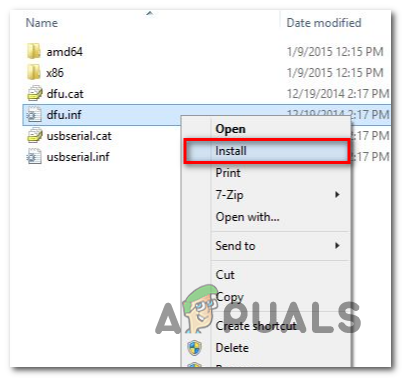
install the update from the ini file - Finish installing the Windows Update that was earlier failing to install by following the remaining instructions on the screen.
- Restart your computer one last time to see if the problem has been resolved.
If the problem persists, and you’re still getting the 0x80070643 error when trying to install the pending update using the Microsoft Update Catalog, try the next approach below.
5. Update Windows Defender Signatures via CMD
There’s a good possibility you’re dealing with an inconsistency caused by outdated Windows Defender signatures if only security updates connected to Windows Defender or Windows Firewall fail with this error code.
To fix this issue, you’ll need to perform a sequence of CMD commands to update Windows Defender with the most up-to-date virus signatures. But in order to be able to do this, we first need to remove the current all the definitions, then force the terminal to re-download them in bulk.
Follow the instructions below for the complete steps of enforcing this method:
- Press Windows key + R to open up a Run dialog box.
- Next, type ‘cmd’ inside the text box and press Ctrl + Shift + Enter to open up an elevated Command Prompt with admin access.

Open up a Command Prompt - At the User Account Control (UAC), click Yes to grant admin access.
- Once you’re inside the elevated Command Prompt, paste the following command and press Enter to get rid of all the current Windows Defender definitions:
“%PROGRAMFILES%\Windows Defender\MPCMDRUN.exe” -RemoveDefinitions -All
- After the first command has been processed successfully, run the following commands in the same order to update the definition library of Windows Defender:
“%PROGRAMFILES%\Windows Defender\MPCMDRUN.exe” -SignatureUpdate
"%ProgramFiles%\Windows Defender\MPCMDRUN.exe" -SignatureUpdate -MMPC
- Restart your PC and attempt to install the update that was previously failing once again.
If the same 0x80070643 is still occurring, move down to the next method below.
6. Deploy SFC and DISM scans
As it turns out, a system file corruption that affects the auto-updating function of Windows installation is one of the most prevalent causes of the 0x80070643 issue while running the Windows Update troubleshooter.
If this situation appears to be relevant, you should begin by scanning using two built-in utilities: System File Checker (SFC) and Deployment Image Servicing and Management (DISM).
While SFC and DISM are comparable in some ways, we recommend running both checks in quick succession to increase your chances of recovering corrupted system files.
Start with a simple SFC scan if this case applies.
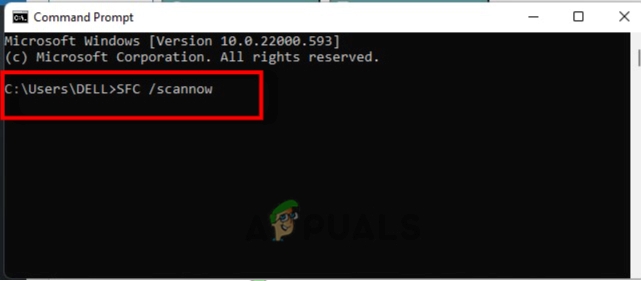
Keep in mind that this tool is completely local and does not require you to be connected to the internet at all times.
Important: It’s critical not to close the CMD window after starting this procedure, even if the utility appears to have frozen. Wait patiently for the process to finish, as interrupting it could result in logical errors on your HDD or SSD.
After the SFC scan has been completed successfully, reboot your computer and check to see if the problem has been resolved after the next computer startup.
If the 0x80070643 Windows Update Troubleshooter problem persists, run a DISM scan and follow the on-screen directions to finish the process.

Note that DISM uses a sub-component of Windows Update to download healthy alternatives to replace broken system files, but SFC does not. As a result, you must ensure that you have a stable Internet connection before beginning this procedure.
Restart your computer after the DISM scan has been completed successfully to see if the 0x80070643 error has been resolved.
If the Windows Update Troubleshooter still isn’t working, scroll down to the next possible solution.
7. Perform a Startup Repair
In rare situations, file corruption in your system files can cause this type of trouble. The first thing you should do in this circumstance is conducted a startup repair to see if the problem has been resolved.
If this is the case, you should be able to fix the issue by performing a startup repair
Note: Startup Repair is a Windows recovery tool that can fix the vast majority of common system problems that prevent your Windows installation from booting up. This program (like every other Windows automated troubleshooter) includes a set of automatic repair options that can be employed if a problem is found.
However, because you’re unlikely to be able to start up normally, you’ll need to use the Recovery Menu to initiate a Startup Repair operation.
If this scenario is applicable, follow the instructions below to deploy a Startup Repair operation:
- Turn on your computer and wait until you get to the login page, which is when the issue appears. Then, while pressing and holding the Shift key, click on the power sign while clicking on Restart.
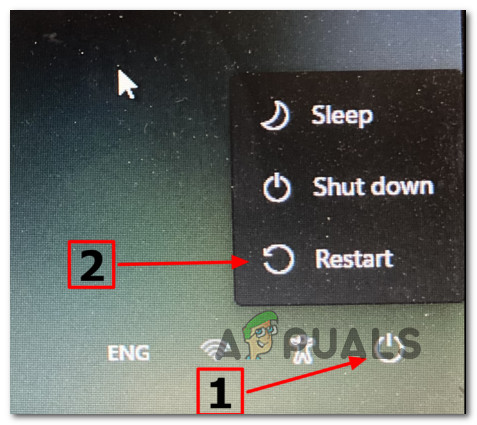
Booting inside the recovery menu Note: Keep in mind that your computer will need to restart in recovery mode for this to work.
- Go to the Recovery Menu and pick Troubleshoot from the context menu that displays when your Windows 11 PC restarts.
- After you’ve entered the Troubleshoot menu, select Startup Repair from the list of options.
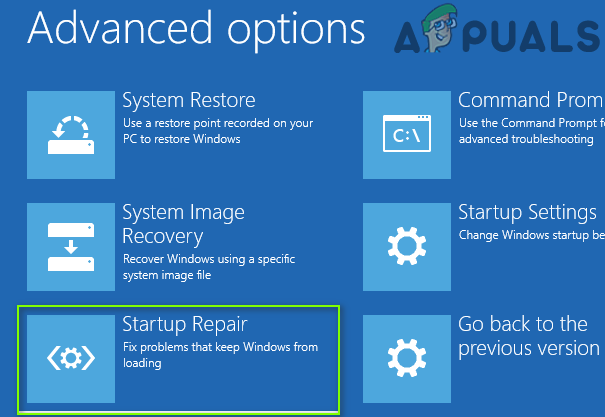
Deploy a startup repair - After you’ve entered the Startup Repair page, follow the on-screen instructions to start and finish a Startup Repair procedure.
- After the procedure is completed, restart your computer to see if the problem has been repaired.
If you’re still getting the “Restoring your prior version of Windows” issue after following the steps above, go to the next solution down below.
8. Perform a clean install or repair install
If none of the options listed above have helped you address the 0x80070643 error when running the Windows Update Troubleshooter, you can assume that your problem is caused by an underlying system corruption problem that isn’t fixable (with DISM and SFC scans).
Several customers who experienced a similar problem claimed that the problem was resolved after they updated all Windows components. An in-place fix (repair install) or a clean install can be used to do this.
A clean install is a more straightforward option, but it has the disadvantage of not allowing you to maintain your personal files (applications, games, personal media, and so on) unless you back them up first.
If you choose a repair install, however, the process is a little more time-consuming, but the key benefit is that you get to preserve all of your personal files, including apps, games, personal media, and even some user preferences.


