Fix: WMI Provider Host (WmiPrvSE.exe) High CPU Usage On Windows 10
WMI Provider Host (WmiPrvSE) is a Windows Host Management Process used by developers for monitoring purposes.
This behavior is usually seen in a production environment. After upgrading from Windows 7 to 10, many users have noticed a spike in CPU usage, which makes the system lag, get hot, and slow down. My personal guess is that the issue is caused by unusual behavior of this service, not following the patterns it is supposed to.
To fix this issue, we will run some basic commands on the command prompt and restart the Windows Management Instrumentation Service.
Restarting the Windows Management Instrumentation Service
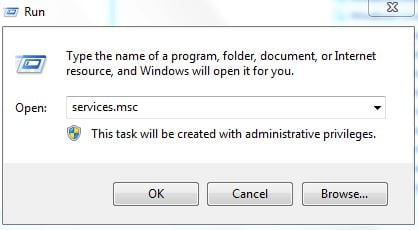
Hold the Windows key on your keyboard and press R. In the Run dialog, type services.msc
From the services console, locate the Windows Management Instrumentation Service. What I usually do is click on any of the services and then press the W key to get to the services that start with the letter W. Then, do a quick scan to locate the one I want.
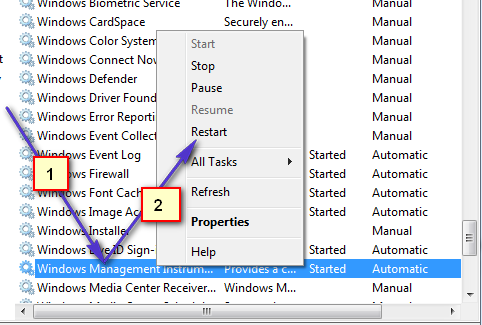
Now choose “Restart” to restart the service. You can also stop the service from here if you want, but it is not recommended. So let it run, and we’ll fix the high CPU usage issue with this process.
Restart Other Associated Services
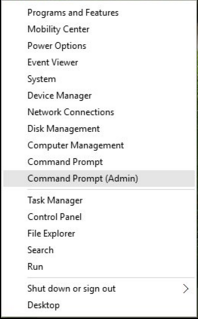
Once this is done, hover your mouse over to the bottom left corner, onto the Start Button, and do a (Right-Click) on it. A contextual menu will open; choose Command Prompt (Admin) from here.
In the command prompt window that opens up, type the following commands one by one; after each command, press the Enter key.
net stop iphlpsvc
net stop wscsvc
net stop Winmgmt
net start Winmgmt
net start wscsvc
net start iphlpsvc
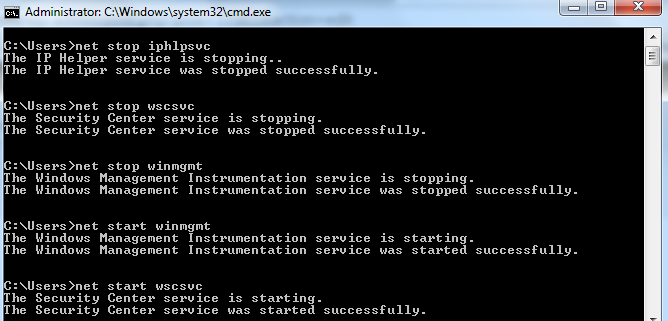
Once done, reboot your PC and check. This should allow the process to drop significantly and the CPU to return to its normal use. If not, proceed to the next method below.
Perform a Clean Boot to Identify a Faulty Application
It is possible that a certain application might be causing the high CPU usage by WMI Provider Host. Therefore, in this step, we will perform a clean boot and isolate the application that is causing the excessive usage. In a clean boot, only the services vital to the boot process are loaded, and extra services and applications are disabled. To perform a clean boot:
- Log in to the computer with an Administrator account.
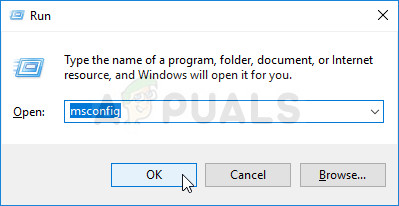
- Press “Windows” + “R” to open up the “RUN” prompt.

Opening Run Prompt - Type in “msconfig” and press “Enter“.
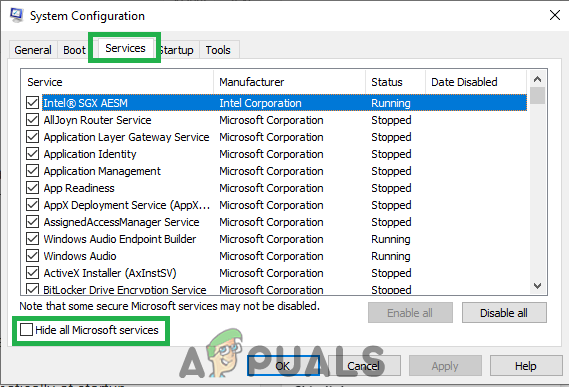
Running MSCONFIG - Click on the “Services” option and uncheck the “Hide all Microsoft Services” button.
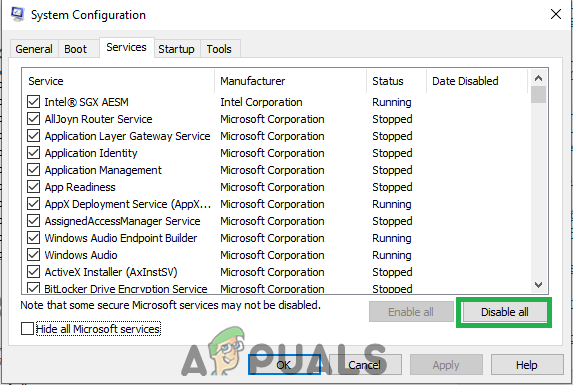
Clicking on the “Services” tab and Unchecking the “Hide all Microsoft Services” option - Click on the “Disable All” option and then on “OK“.
Clicking on the “Disable All” option - Click on the “Startup” tab and click on the “Open Task Manager” option.
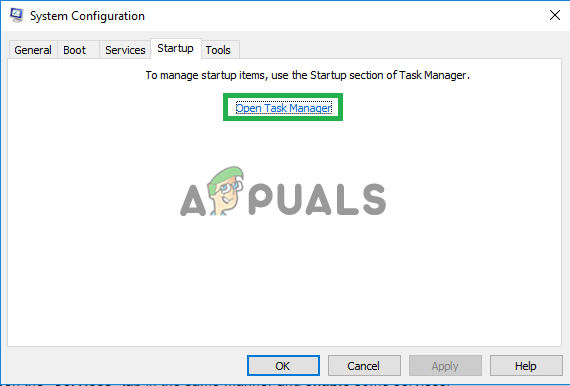
Clicking on the “Open Task Manager” option - Click on the “Startup” button in the task manager.
- Click on any application in the list that has “Enabled” written next to it and select the “Disable” option.
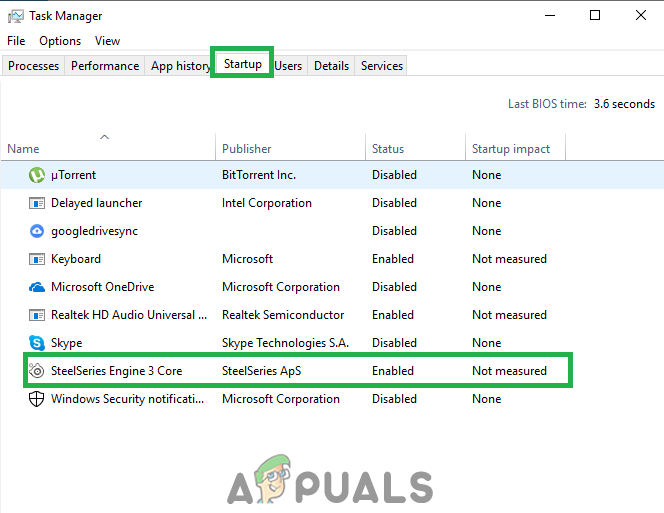
Clicking on the “Startup” tab and selecting an application listed there - Repeat this process for all applications in the list and restart your computer.
- Now your computer has been booted in the “Clean Boot” state.
- Check to see if the issue goes away.
- If the high CPU usage is no longer encountered, it means that a third-party application or service was causing it.
- Start by enabling one service at a time in the same manner and stop when the high CPU usage comes back.
- Reinstall the service/application whose enabling causes the high usage to return, or keep it disabled.
Locate the Process Using Event Viewer and Uninstall It
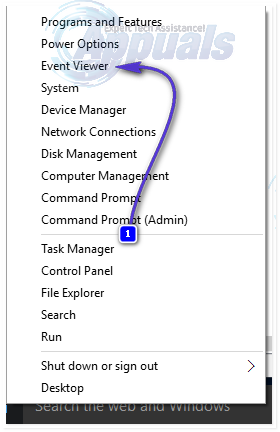
Open the Event Viewer. If you are using Windows 7 or earlier, search for Event Viewer in the Start Menu and open it. If you are using Windows 8/8.1 or 10, simply press the Windows Logo key + X to open the WinX Menu and then click on Event Viewer in the WinX Menu.
Click on View in the toolbar at the top of the Event Viewer window and enable the Show Analytic and Debug Logs option.
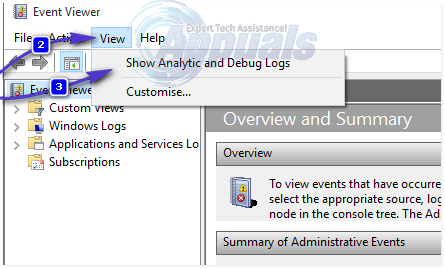
In the left pane of the window, navigate to Applications and Services Logs > Microsoft > Windows > WMI-Activity.
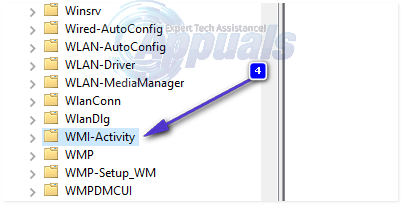
Double-click on WMI-Activity to expand its contents, and click on Operational in the list of its contents to open the WMI Provider Host’s operational logs.
Look for any errors, and when you find one, click on it to display its specifications at the bottom of the window.
Under the General tab of the specifications of the error you clicked on, look for the term ClientProcessId. When you find it, note or remember the number(s) – 1079, for example – that follow it.

Close the Event Viewer and open the Task Manager. Hold the Windows Key and press R. In the Run dialog, type taskmgr and click OK. Navigate to the Services tab and look for the service that has the same Process ID (PID) as the number(s) that followed the ClientProcessID term.
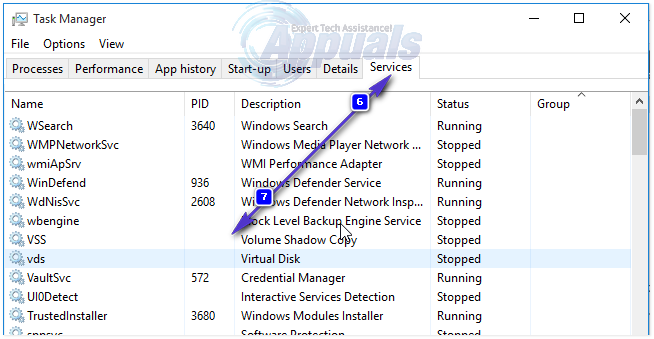
The service that has the corresponding Process ID is the culprit, so once you find it, immediately disable it and then go to Control Panel > Programs & Features and uninstall the program that the culprit service was associated with. Once the program has been uninstalled, WMI Provider Host should go back to using an extremely minimal amount of CPU.
Set the WMI Service to Demand
If your WMI service is constantly using high CPU, it’s possible that some of your programs, such as Discord, are using the process. Follow this step to stop it from happening:
- Search for Command Prompt and click “Run as administrator”.
- Once the Command Prompt is opened, you will have to type the following command:
sc config Wmi start= demand - Now, restart your computer and check to see if the issue persists.
If none of the methods above worked for you, it’s possible that there is a program conflicting with your WMI process. In that case, you will have to clean boot your computer.
